HTI 1437137 User manual

3+
V9_UK MAY 2021
Age:
3Years+
Maximum
user weight:
25kg
1. Not Suitable for children under 36 months.
Choking hazard due to small parts.
2. For family and domestic use only.
3. Warning. Protective equipemnt should be worn.
Not to be used in trac.
4. Adult assembly required.
5. Protective equipment should be worn.
6. This toy has no brake.
7. This toy is unsuitable for children under 3 years due to its maximum speed.
8. Warning: it is dangerous to use the toy in the area other than private grounds.
9. Never leave child unattended. Direct adult supervision is required.
10. Never use on roadway, near cars, on or near steep inclines or steps,
swimming pool or other bodies of water.
11. This toy contains batteries that are non-replaceable.
BATTERY OPERATED
QUAD
INSTRUCTION MANUAL
Read and understand this entire manual before assembly or use
IMPORTANT WARNING!
This instruction manual contain important information which will help you get the best from your product and ensure safe and correct
assembly, use and maintance. Please read the instruction manual fully before use. Failure to do so may result in damage to the vehicle or harm
to the user. Please keep this instruction manual for future reference since it contains important information.
Before rst time use, charge the battery for at least 8-12 hours, no more than 20 hours.
If you need help or have damaged or missing parts, call the Customer Helpline:
www.htigroup.co.uk
+44 (0)1253 775570
Made in China
HTI EU Authorised Representative
The Merrion Buildings - Iconic Oces,
18-20 Merrion Street, Dublin 2, D02 XH98, Ireland
HTI Group, Eastham House,
Copse Road, Fleetwood,
FY7 7NY, UK
1437137, 1437136, 1437252,
1437253, 1437481, 1437190,
1437560, 1437607, 1437225,
1437745, 1437747, 1437746,
1437743, 1437744

P. 1 P. 2
3
6M3.5x12
Screw
Thank you for your purchasing our product. Keep these points in mind as you read this guide:
3+ years
Under 25kg
2.5-3 km/h
PP
FOR THE SAFETY OF YOUR CHILD, PLEASE READ ALL WARNINGS AND
ASSEMBLY/USE INSTRUCTIONS. KEEP THIS GUIDE FOR FUTURE
REFERENCE.
• ADULT ASSEMBLY REQUIRED. The product contains small parts, which are for
adult assembly only. Keep children away when assembling.
DC 6V 3.0AH *1
Below 40°C
Avoid to use under burning
sun
8-12 hours,
maximum 20 hours
F 5A, Self-resetting
Max. 300 times
fully charged
Load Capacity:
Speed:
Material:
Charger:
Battery:
Size Of Product:
Optimum
Temperature:
Charging
Time:
Fuse:
Battery Life:
P. 1
P. 2
P. 3
P. 4
P. 5
P. 6
P. 7
P. 8
ABOUT YOUR NEW QUAD
PARTS LIST
PARTS DIAGRAM
ASSEMBLY STEPS
ASSEMBLY STEPS / HOW TO OPERATE YOUR QUAD
CHARGING YOUR QUAD
TROUBLESHOOTING GUIDE
MAINTAINING YOUR QUAD / DISPOSAL OF BATTERY
Suitable Age:
120-240V 50/60Hz
Output: DC 6V
Current: 500mA
Model No.:
HK050B-060050
Type: Type G
Assembled
on the
Handlebar
Assembled
on the
Handlebar
PARTS LIST
Quad
Body 1
Bumper 1
1
1
1
PART
NO. PART
NAME Qty
(pcs) REMARKSPICTURE PART
NO. PART
NAME Qty
(pcs) REMARKSPICTURE
1
3
5
2
4
1
71
3
8
9
Driving
Wheel
4
10 Wheel
hub
Handlebar
M10
Washer
Gear
box
Wheel
M8 Nut
8
12 M10
Washer
1
11
4
13 1
14 Charger
Split Pin
1
15 1
16 Sticker
Instruction
Manual
Rear
axle
700 x 390 x 430mm
TABLE OF CONTENTS
ABOUT YOUR NEW QUAD
WARNING!
Placed in
the parts
pack
Placed in
the parts
pack

P. 3 P. 4
Tools Required
Screwdriver
(not included)
Pliers
(not included)
Hammer
(not included)
Spanner
(not included)
1
4
2
5
3
6
Quad Body *1 Handlebar*1 Bumper*1
M10 Washer*1 M8 Nut*1 M3.5x12*3
7
10
8
11
9
12
Gear Box *1 Driving Wheel*1 Wheels*3
Wheel hub*4 Rear Axle*1 M10 Washer*8
13 Split Pin*4
PARTS DIAGRAM
M10 Washer
M8 Nut
M8 Nut
Washer
ASSEMBLY STEPS
3. Install the Handlebar
4. Install the Bumper 5. Connect to Battery
1. Install Rear wheels 2. Install the front wheels
A
B
• Ensure the lower part of handlebar locates correctly into the front axle.
• Then push down the Handlebar, and fasten with washer and M8 Nut
(Pic A & B with axle.)
• Unfasten the M8 Nut from Handlebar, connect the
wire connections between the steering wheel and
Quad body.
• Install the Handlebar and steering column, put through
the hole on the top of the ride on body.
• This product requires adult assembly. Please set aside at least 40 minutes for assembly.
• Children can be harmed by small parts, sharp edges and sharp points in the vehicle's unassembled state.
Care should be taken in unpacking and assembly of the Quad. Children should not handle parts, or help in assembly of the vehicle.
• Please identify all parts before assembly and save all packaging material until assembly is complete to ensure that no parts are discarded.
• Assembly tools needed: screwdriver(not included), pliers(not included), hammer(not included), spanner(not included).
• Fix the washer, wheel, washer and split pin onto the axle
in proper order.
• Fix the wheel hub.
• Fix another wheel on the other side.
• Place Quad body upside down for easy assembly.
• Put a washer into the rear axle then push the rear axle from the right to the left
• Put a washer, wheel, washer onto the axle in proper order and x with split pin
• Fix the wheel hub to complete
• Connect the gear box wire at the other side
• Put the gear box, driving wheel, washer in proper order and x with split pin
• Install the Bumper to the corresponding position as shown,
and fasten with screws.
• Unscrew the seat fastener, and open the seat compartment.
Connect the battery with wire as shown. Replace the seat cover
and fasten with the screw.
Handlebar
M3.5x12 Screw
Bumper
Seat Screw Power
connector
Wire
connector
Gear box
Driving wheel Rear axle Wheel Splirt pin
Splirt pin
M10 Washer
M10 Washer
Rim
Wheel hub
Wheel hub
Split pin
Wheel
Front axle
M10 Washer
Wheel hub
9
10
12
13
10
10 13 12 13
8
12
9
7
12
6
4
512 12
2
1
11
3
9
13
12 10

P. 5 P. 6
- For the purpose of recharging the battery, only use the detachable supply unit provided with this toy (Charger model:
HK050B-060050). NEVER substitute the battery or the charger with another brand. Using another battery or charger may
cause a re or explosion.
- Do not use the battery or charger for any other product. Overheating, re or explosion could occur.
- NEVER modify the electric circuit system. Tampering with the electric system may cause a shock, re or explosion or may
permanently damage the system.
- Do not allow direct contact between battery terminals. Fire or explosion
can occur.
- Do not allow any type of liquid on the battery or its components.
- The Power Button must not be pressed when charging.
- This product has CHARGING PROTECTION: When charging,
all the functions will be cut o!
• PREVENT FIRE AND ELECTRIC SHOCK:
Do not charge near heat or ammable materials. Charge the battery in a well-ventilated area ONLY.
- NEVER pick up the battery by the wires or charger. Damage can occur to the battery and may cause a re.
Pick up the battery by the case ONLY.
- This toy contains batteries that are non-replaceable.
- Charge the battery in a dry area indoors ONLY.
• The charger is not a toy.
• The charger is not to be used by persons (including children) with reduced physical, sensory or mental capabilities,
or lack of experience and knowledge, unless they have been given supervision or instruction.
• Wash hands after handling.
• Do not open the battery. Battery contains lead acid and other materials that are toxic and corrosive.
• Do not open the charger. Exposed wiring and circuitry inside case may cause electric shock. Only adults may handle or
charge the battery. NEVER allow child to handle or charge the battery. Battery is heavy and contains lead acid (electrolyte).
• Do not drop the battery. Permanent damage to the battery could occur or cause serious injury.
• Before charging the battery, check for wear or damage to the battery, charger, its supply cord and the connectors.
DO NOT charge the battery if any damage to parts has occurred.
• Do not allow the battery to drain completely. Recharge the battery after each use or once a month if not used regularly.
• Do not charge battery upside down.
• Always secure the battery with the bracket. Battery can fall out and injure a child if the Quad tips over.
• Adult supervision required.
1
32
1. Charge port is located at the right of Quad body.
2. Plug the adaptor of battery charger into the charging port.
3. Plug in the battery charger into socket to start charging.
Power Button
• Press the Power Button and hold to drive forward.
• Release the Power Button to stop. Press again the Power Button to drive forward.
Rules for Safe Riding
HOW TO OPERATE YOUR QUAD
READ THESE RULES ALOUD TO YOUR CHILD AND THEIR PLAYMATES AND MAKE SURE THEY
UNDERSTAND THEM!
• This Quad has no brake. Always wear a helmet, gloves, knee pads and elbow pads when riding.
• Direct adult supervision required.
• Keep children within safe riding areas.
• Never use in roadway, near motor carriages, on lawn space, on or near steep inclines or steps, swimming pools or
other bodies of water.
• Use the Quad only on at surfaces, such as inside your house, garden or playground.
• Never use in the dark. A child could encounter unexpected obstacles and have an accident. Operate the Quad only in
the daytime or a well-lit area.
• It is not recommended to drive the Quad on wet surfaces or on any kind of slopes.
• Do not use this Quad outdoors when it is raining or snowing.
• Make sure you come to a complete stop before changing directions.
• Please follow the correct weight limits allowed to drive this Quad.
• It is prohibited to change the circuit or add other electric parts
• Inspect wires and connections of the Quad periodically.
• In order to avoid accidents, please ensure the Quad is safe before riding.
• Do not let any child touch the wheels or be near them when the Quad is moving.
• The Quad should be used with caution since skills is required to avoid falls or collisions causing injury to the user or third
parties.
MUST CONFIRM BEFORE USING THAT THE FOLLOWING WORK HAS BEEN COMPLETED:
• Important! Before using the Quad for the rst time, the battery needs to be charged for 8 to 12 hours, no more than 20
hours. Only an adult can charge or recharge the battery.
• Finish assembly according to the steps that the manual described.
• Please check and ensure all nuts and screws are fastened tight.
GAP
ASSEMBLY STEPS
QUICK CHECK!
After assembling the wheels (except the driving wheel) onto the axles, please check the gap
between the screw thread (refer to picture). After tightening the nut outside the wheel, please turn
the wheel to check if the wheel can run smoothly. This is very important! If the wheel cannot turn
smoothly, it means the parts on axle are too tight and it will brake the motor very easily. In order to
solve this, please remove one or two washers then check again the turning status of the wheel.
WARNING!
CHARGING YOUR QUAD
ONLY AN ADULT CAN CHARGE AND RECHARGE THE BATTERY!
WARNING!

P. 7 P. 8
TROUBLESHOOTING GUIDE
•PROBLEM: THE QUAD DOES NOT RUN.
PROBLEM CAUSE: The battery may be low on power.
After each use, or once a month minimum, charge the battery for 8-12 hours. Do not leave the battery on charge for more
than 20 hours.
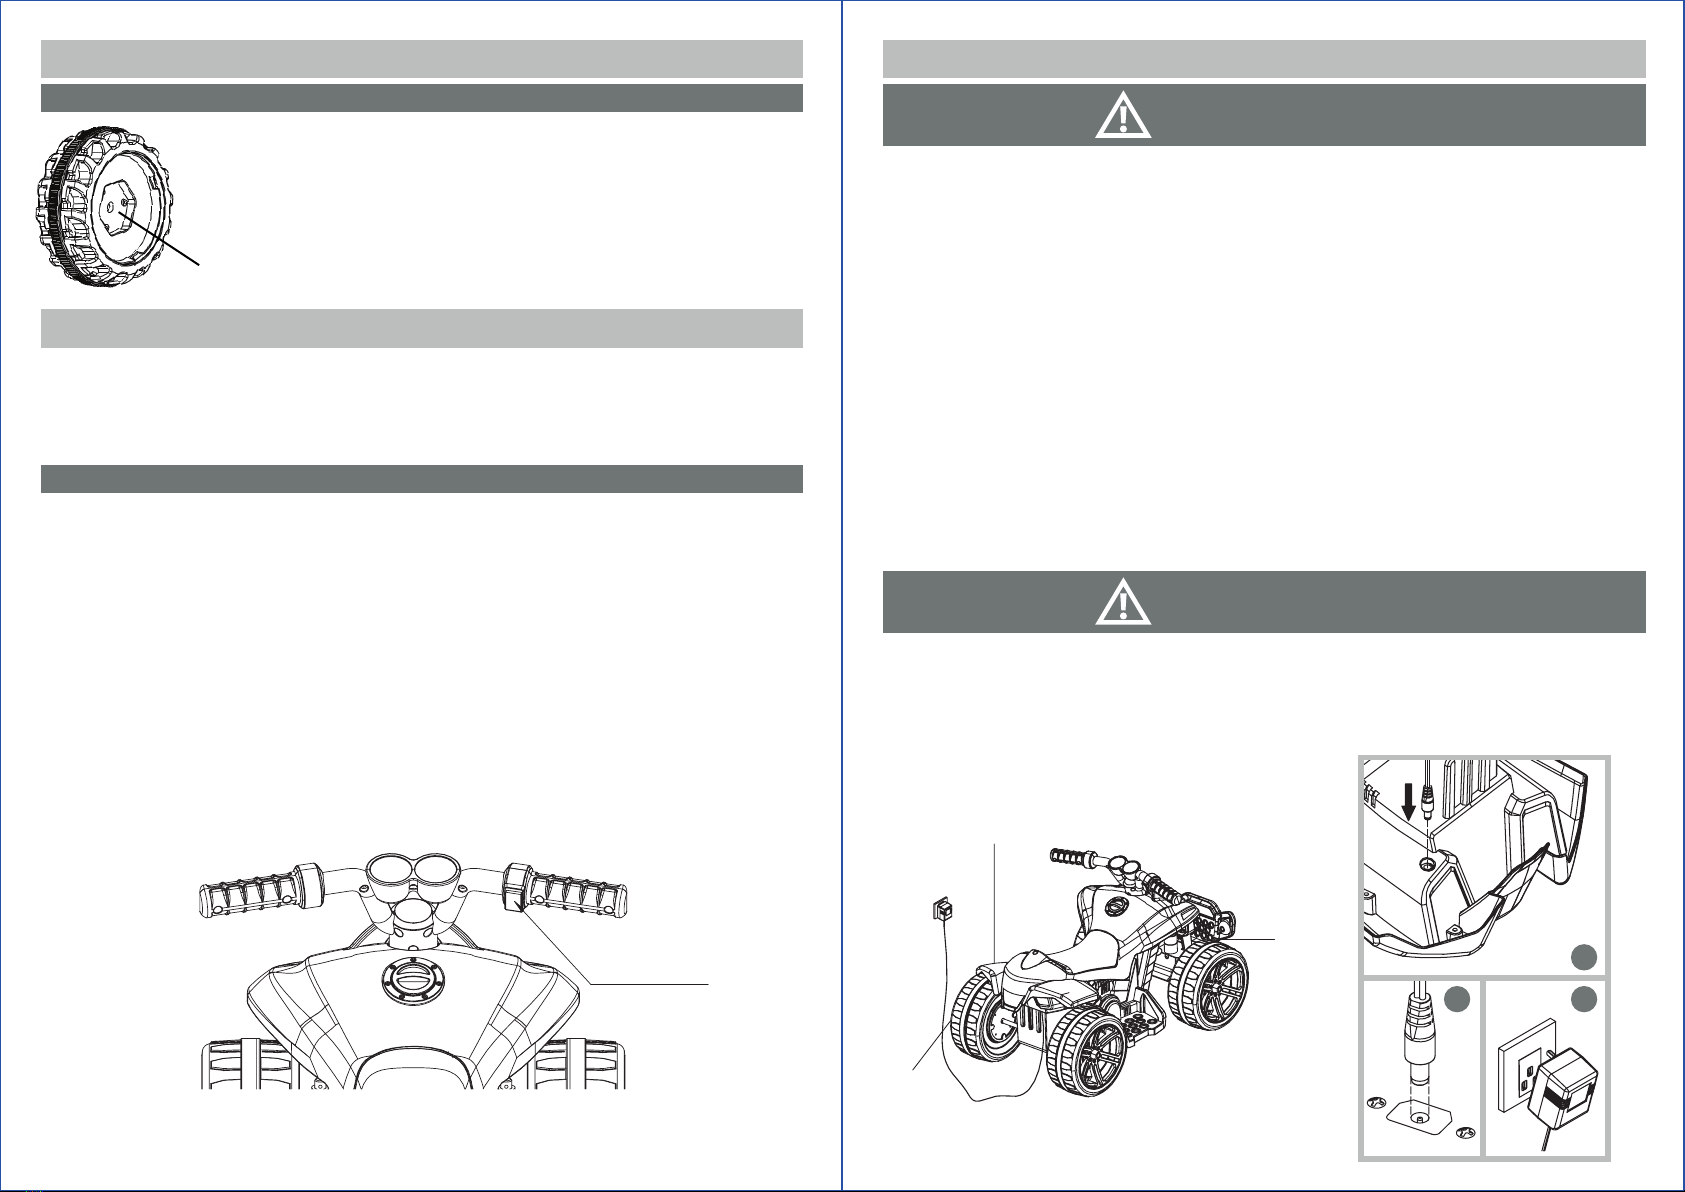
POSSIBLE CAUSE: Thermal fuse has tripped.
The Quad is equipped with a self-resetting fuse. When the Quad is overloaded or operated incorrectly; the self-resetting
fuse will be cut o for 60 seconds before becoming operational again.The self-resetting fuse is under the seat (Refer to the
picture.)
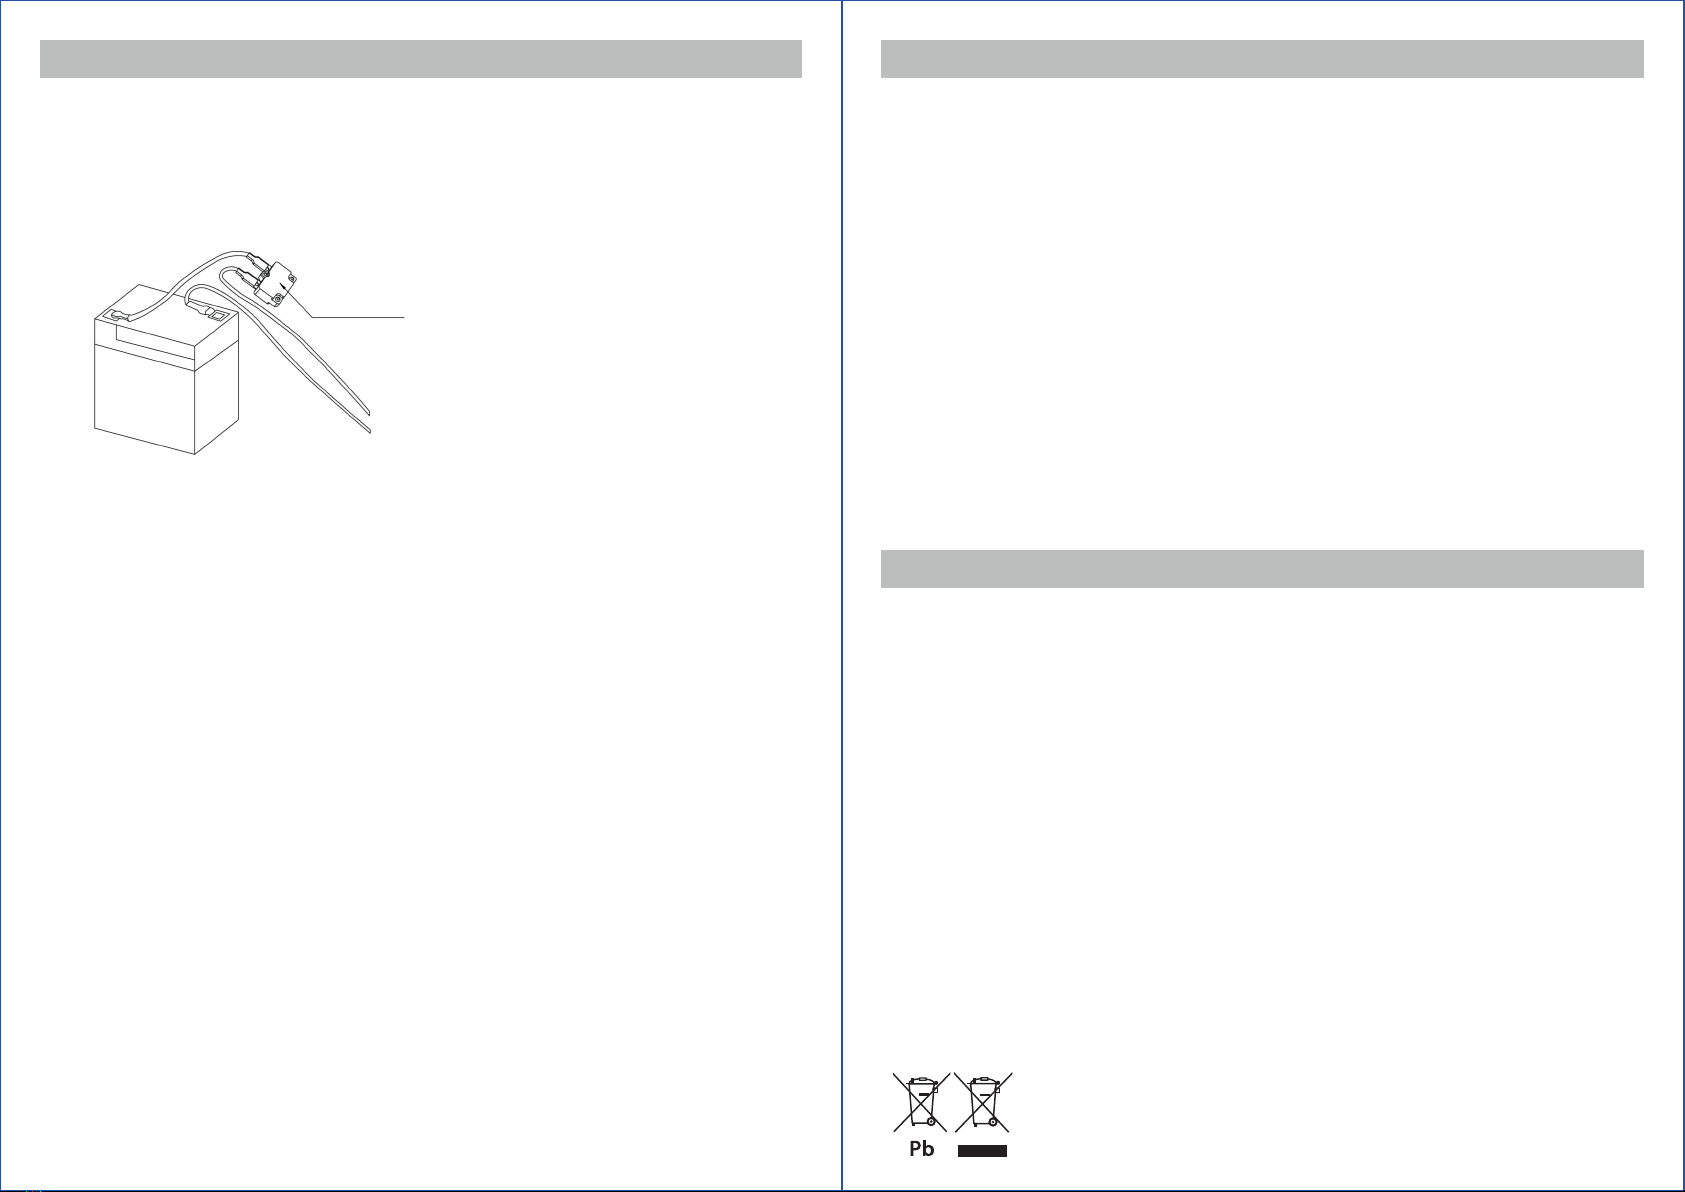
POSSIBLE CAUSE: Battery connector or wires are loose.
Make sure the battery connectors are rmly plugged into each other.
POSSIBLE CAUSE: Battery is dead.
Have you properly maintained the battery according to the directions? Is the battery old? Your battery may need to be
replaced.
POSSIBLE CAUSE: Electric system is damaged.
Water may have corroded the system, or loose dirt, gravel or sand might have jammed the switch.
POSSIBLE CAUSE: Motor is damaged.
The motor needs professional repair.
•PROBLEM: THE BATTERY WILL NOT RECHARGE.
POSSIBLE CAUSE: Battery connector or adapter connector is loose.
Make sure the battery connector and adapter connector are rmly plugged together.
POSSIBLE CAUSE: Charger is not plugged in.
Make sure the charger is plugged into the wall outlet and the power ow to the outlet is on.
POSSIBLE CAUSE: Charger is not working.
Is the charger warm while charging? If not, the charger may not work properly and may need to be replaced.
•PROBLEM: THE QUAD DOES NOT RUN VERY LONG.
POSSIBLE CAUSE: Battery may be undercharged.
You may not be charging the battery long enough. After each use, or once a month minimum, charge the battery for
8 to 12 hours. Do not leave the battery on charge for more than 20 hours.
POSSIBLE CAUSE: Battery is old.
The battery will eventually lose the ability to hold a charge. Depending on the amount of use, and varying conditions
the battery should operate for one to three years. Replace the battery with a new one.
• PROBLEM: BATTERY BUZZES OR GURGLES WHEN CHARGING.
This is normal and not a cause for concern. It may also be silent when charging, which is also normal.
• PROBLEM: CHARGER FEELS WARM WHEN RECHARGING BATTERY.
This is normal and not a cause for concern.
Fuse: 5A
Battery
To avoid the fuse cut off the power,
follow these guidelines:
DO NOT overload the Quad,
Maximum weight allowed: 25 kg
DO NOT tow anything behind the Quad.
DO NOT drive up steep slopes.
DO NOT drive into xed objects, which may cause the
wheels to spin, causing the motor to overheat.
DO NOT drive in very hot weather, components may
overheat.
DO NOT tamper with the electric system, doing so may
create a short circuit, causing the fuse to trip.
MAINTAINING THE QUAD
• It is the parents' responsibility to check main parts of the Quad before using, must regularly examine for damage, such as
the battery, charger, cable or cord, plug, screws or enclosure and other parts and that in the event of such damage, the
Quad must not be used until that damage had been properly repaired.
• Make sure the plastic parts of the Quad are not cracked or broken.
• Occasionally use a lightweight oil to lubricate moving parts such as wheels.
• Park the Quad indoors or cover it to protect it from wet weather.
• Keep the Quad away from sources of heat, such as stoves and heaters. Plastic parts may melt.
• Recharge the battery after each use. Only an adult can handle the battery. Recharge the battery at least once a month
when the Quad is not being used.
• Do not wash the Quad with a hose. Do not wash the Quad with soap and water. Do not drive the Quad in rain or snowy
weather. Water will damage the motor, electric system and battery.
• Prior to swipe clean the Quad, disconnect the battery charger from the toy. Clean the Quad with a soft, dry cloth. To restore
shine to plastic parts, use a non-wax furniture polish. Do not use car wax. Do not use abrasive cleaners.
• Do not drive the Quad in loose dirt, sand or ne gravel which could damage moving parts, motors or the electric system.
• When not using, all the electrical source should be o. Turn o the power switch and disconnect the battery connection.
DISPOSAL OF BATTERY
●Your sealed lead-acid battery must be recycled or disposed of in an environmentally sound manner.
●Do not dispose of your lead-acid battery in a re. The battery may explode or leak.
●Do not dispose of a lead-acid battery in your regular, household trash. The incineration, land lling or mixing of sealed
lead-acid batteries with household trash is prohibited by law.
●Return an exhausted battery to your local approved lead-acid battery recycle, such as a local seller of automotive
batteries.
●Contact your local waste management ocials for other information regarding the environmentally sound recycling and
disposal of lead-acid batteries.
●The battery must be charged only by adult .Please charge the product before using!
●The toy should not be connected to excessive powers (more than the quantity specied herein), and it should not be
operated during charging process.
●Any rechargeable battery must only be charged under adult's supervision.
●Battery charger should regularly check the wires, plugs, casing and other parts for damage and if found should stop using
and restored.
●All batteries should be inserted with the correct polarity (+ and -).
●The battery charger used with the toy are to be regularly examined for damage to the cord, plug, enclosure and other
parts, in the event of such damage, they must not be used until that damage had been repaired.

P. 9 P. 10
This manual suits for next models
13
Table of contents