Ibasan KETTY W-5000 Digital User manual

K
KE
ET
TT
TY
Y
W
W-
-5
50
00
00
0
D
Di
ig
gi
it
ta
al
l
Instruction Manual

1

This Instruction manual has been written bearing in mind all the information
needed for the correct and safe Start-up and use of the machine, including
its maintenance.
Please, read this manual carefully and keep it throughout the useful life of
the machine so that it is always easily available for any doubts or questions
that may arise.
In you have any problems understanding any aspect of this manual or the
machine, we recommend that you contact our technical department.
The firm, IBASAN,S.A. deny responsibility for any damage or injury caused
to the machine itself, people, animals or objects, derived from an improper
use of the machine or a lack of experience in the use of the same, as well as
any failure to observe and apply the safety measures stipulated in this
Instruction manual.
2

Instructions for transport and maintance.
The machine shall be transported in accordance with the safety instructions
indicated, together with standard belts or chains placed in a way that they
cannot slip or cause accidents.
NOBODY
shall place themselves in the
danger area (within a radius of 1 m
from
the machine or underneath the same)
during unloading.
Instructions for the reception of the machine
When the machine is received, bear in mind the following considerations:
•Check that the machine has suffered no damage during transport and/or
that no pieces are missing. Claims will only be accepted immediately after
delivery and only when confirmed by the carrier or transport agency.
•Check that the machine has all the safety protections in place. If not,
contact with IBASAN,S.A. immediately and do not use the machine under
these conditions.
•The placing of the machine shall be in mainly fixed installations and in
buildings designed for its use.
GENERAL INFORMATION
3

1.
IBASAN, S.A.
guarantee that all new products that they produce, are free
from material or manufacturing defects that are checked and recognised
by the company is technical services for a period of 1 year, counting from
the date indicated on this certificate.
2. The guarantee does not cover articles such as electrical elements,
transformers, etc or others manufactured by others manufactured by other
companies, which shall only enjoy the guarantee that these give.
3. The responsibility of the manufacturer is limited to the replacement or
repair of those parts recognised as defective, not including personal injury
or damages that such a breakdown may cause.
4. The duration of the guarantee shall be for 1 year, from the delivery date of
the machine, the transport and labour costs being assumed by the
purchaser, but not the spares that shall be paid for and supplied by
IBASAN, S.A. after prior recognition of the supposedly defective pieces.
GUARANTEE CONDITIONS
4

The guarantee shall be null and void in the following cases:
•When malfunction owing to human error or negligence by the machine’s
user is demonstrated.
•When the limits on conditions of use indicated in this manual are
exceeded.
•When a lack of minimum maintenance is demonstrated.
•When repairs are carried out without using original IBASAN, S.A. spare
parts nor when any maintenance operation or repairs is carried out by a
technical service not authorized by our company.
•When a different degreaser provided by IBASAN, S.A. is using , since
according with their composition can damage the components of the
machine.
•When any of the sections of this instruction manual are ignored or are not
followed.
ANNULMENT OF GUARANTEES
5

RISK ANALYSIS
-Connect to an automatic switch
-For use by trained personnel
-Do not manipulate with the water and air connected
-Must not be used by children or persons foreign to the company
-Use only for wheel washing
-Do not open the cover of the machine during the cycle
-Do not let the wheel fall into the washing machine
-In case of breakdown, do not disconnect the safety systems
IBASAN, S.A.
is not responsible for damage or injury to people or objects as a
result of incorrect use of the machine.
IMPORTANT
DO NOT USE THE MACHINE
WITHOUT HAVING READ THE
INSTRUCTIONS AND
RECOMMENDATIONS FROM
THE MANUFACTURER
6

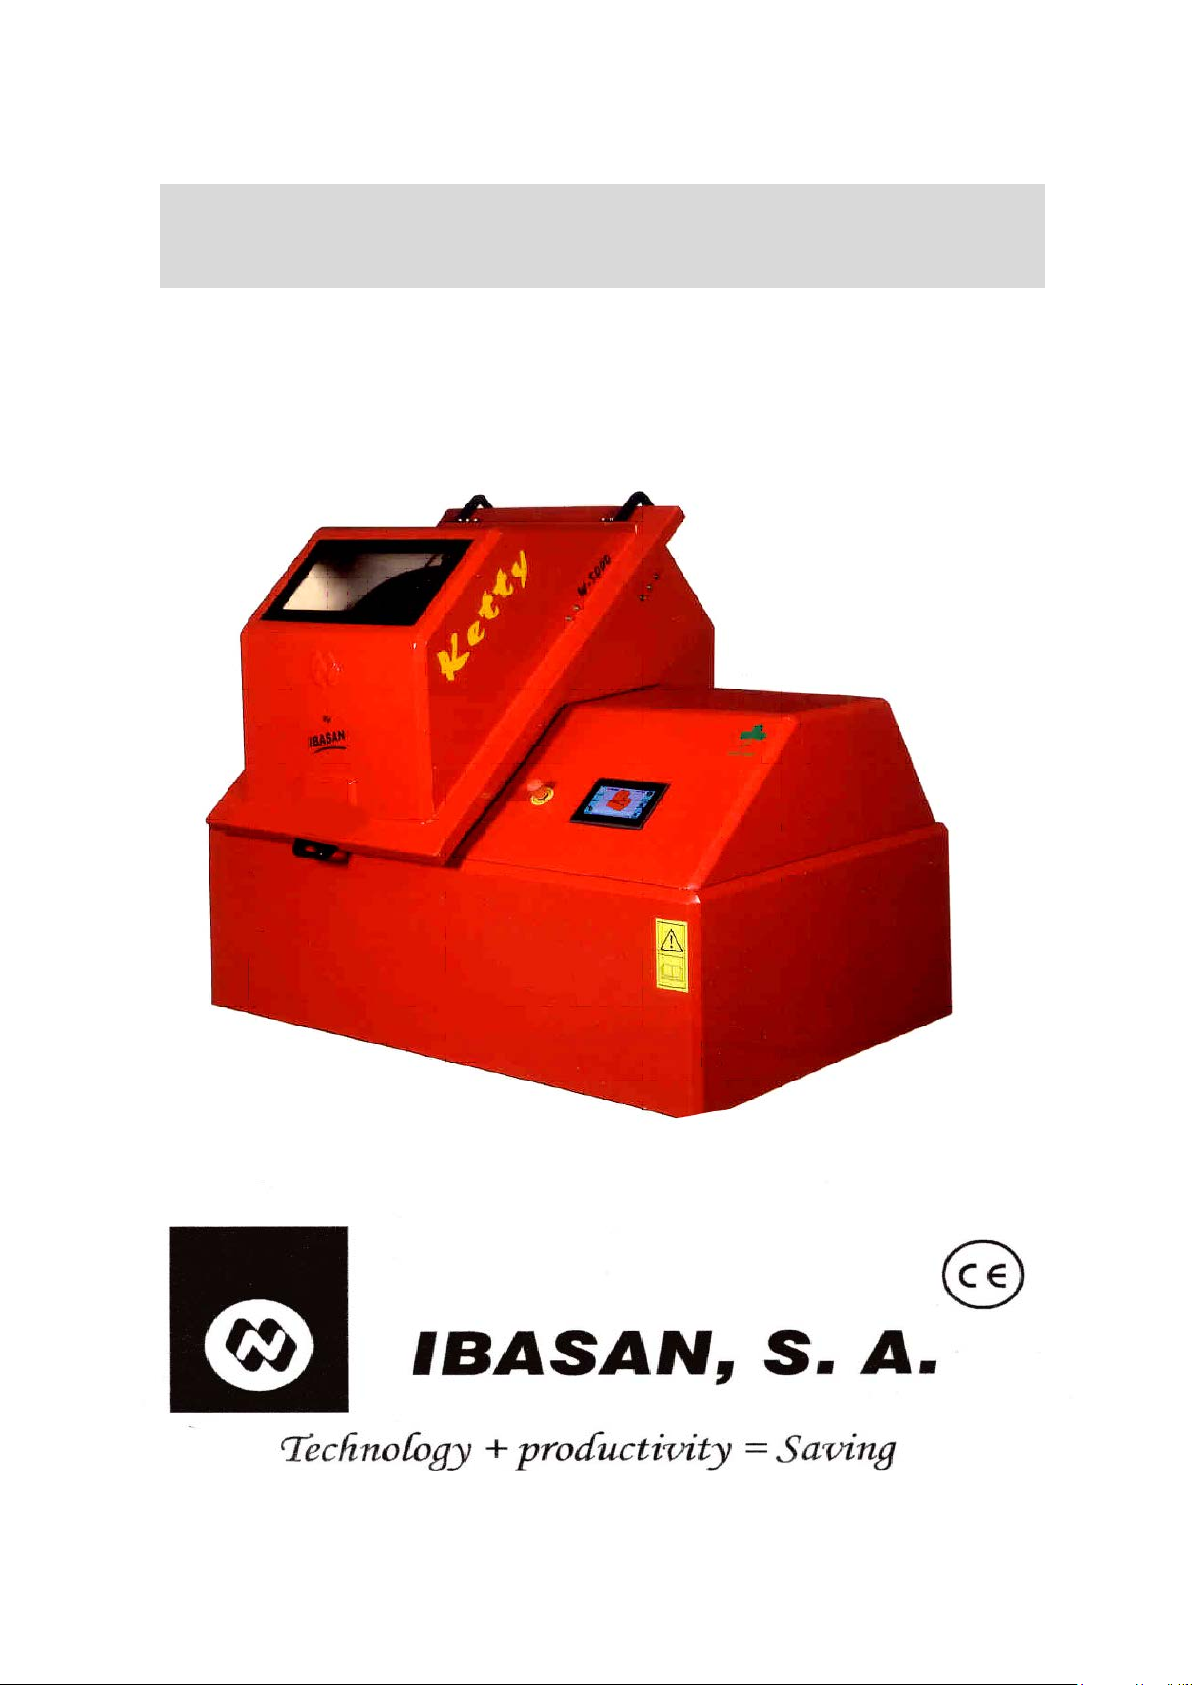
Elimination of waste material
Packing of the new washing machine
-Eliminate the packaging materials of the new washing machine correctly. Remember that the packaging
material I not a toy for children!
-All the materials used in the packaging is recyclable and non-contaminating.
-The cardboard of the packaging is made with 80% - 100% used paper. The wooden parts have not been
treated chemically. The plastics are polyethylene (PE), the tapes are polypropylene (PP).
-All these materials are pure recyclable hydrocarbon combined.
-The preparation and recovery of the above-mentioned material represents a saving of raw materials and a
reduction in the volume of rubbish.
Old washing machine
Put your old washing machine out of use:
-Extract the mains plug, cut the cable and remove it together with the plug.
-The old washing machine possesses valuable material that can be recovered. Be aware about what this
means for the Environment and ensure that the remains of the washing machine are eliminated or recycled in
a non-contaminating way.
-Ask for information from the local authorities to find out how best to eliminate the remains of the old machine.
Safety advice and warnings
ATTENTION. Simple safety precautions must be taken when using electrical machinery to reduce the risk of
electrical shocks and physical injury.
Before using the machine:
-Read the contents of the manual carefully, as this contain important information about the installation, use
and safety of the washing machine.
-Keep the manual and, if need be, hand them to any later owner of the machine.
-Install the washing machine following the instructions in the installation manual.
-Dismount the transport safety catches and keep them in a safe place.
-Never connect a machine that is visibly damaged. In case of doubt, consult your supplier or contact of our
technical help centres.
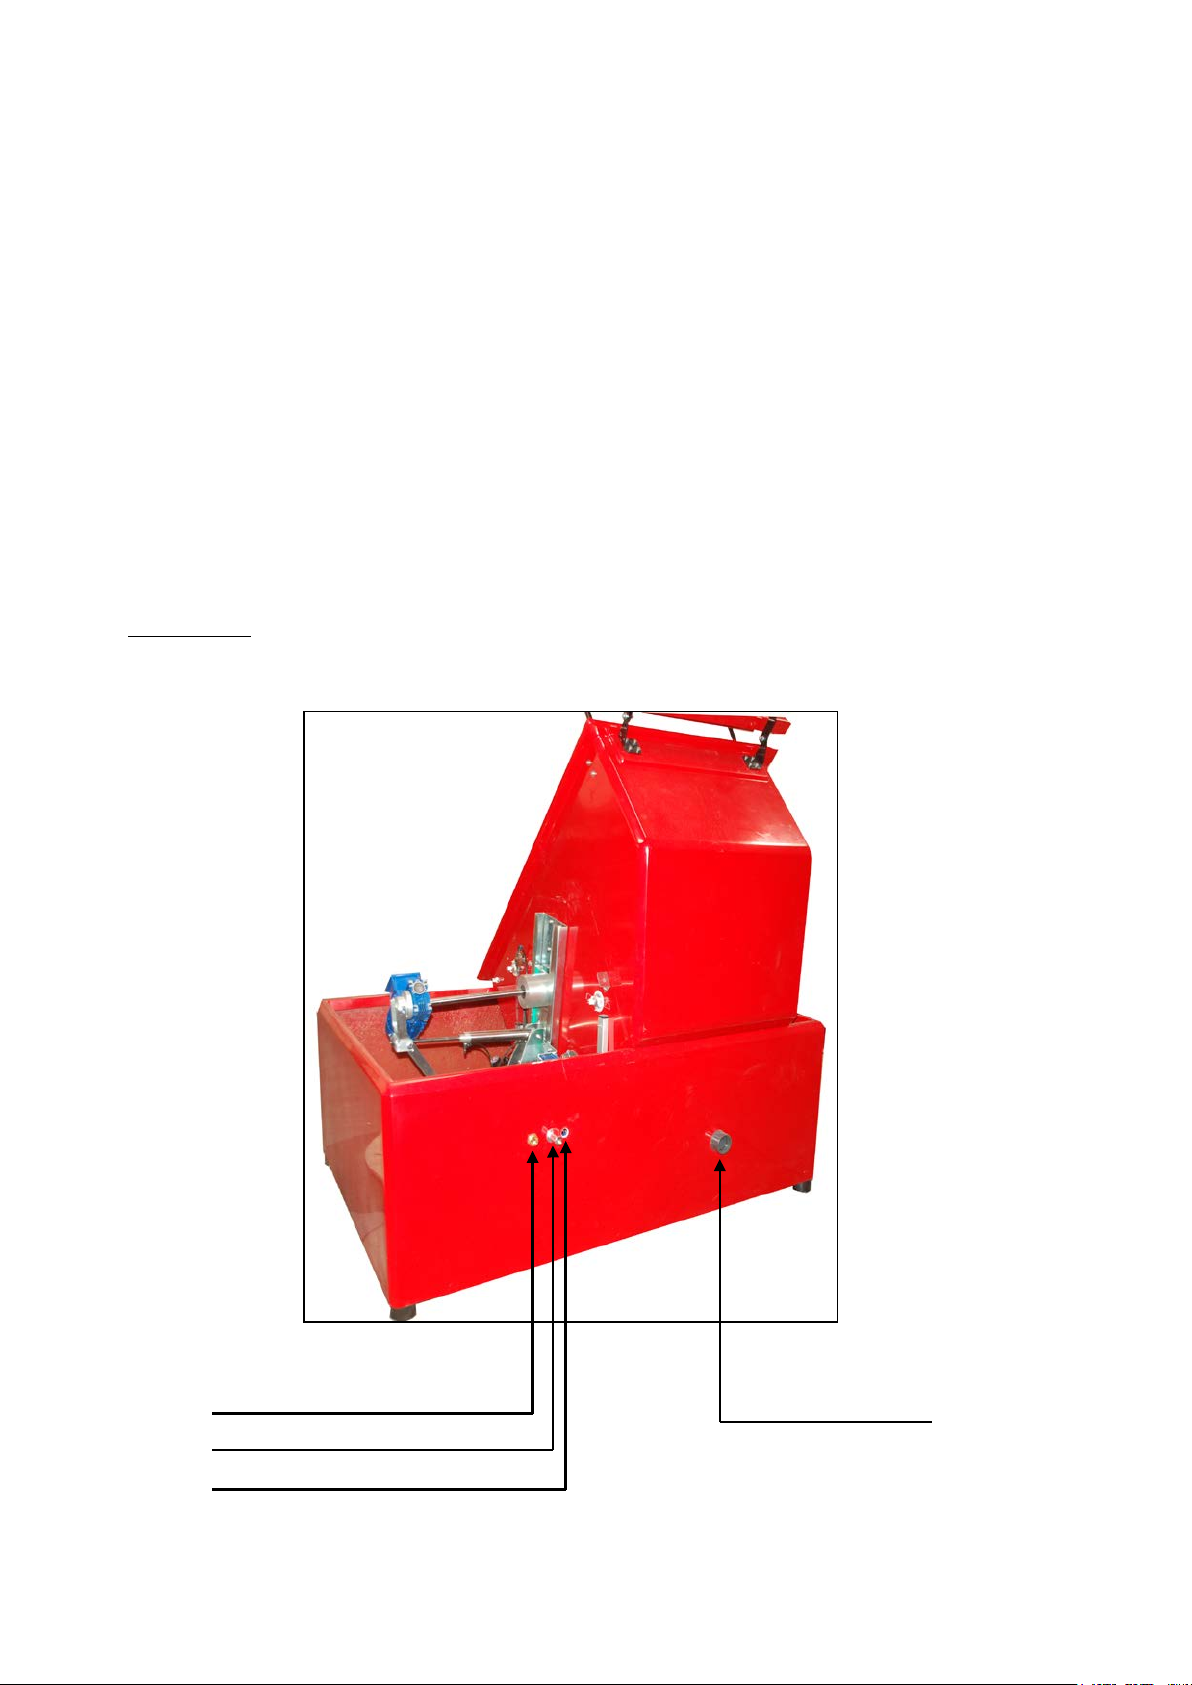
To transport the washing machine:
-Fit the transport safety catches.
-¡Be careful when transporting the washing machine, risk of injury!
-¡Do not lift the machine by the pieces that protrude!
Always connect it to a differential switch and automatic switch.
Keep your workstation tidy.
Untidiness in the workstation increases the danger of accidents.
Ensure that the workstation is well it.
Do not use electrical machinery in a damp or wet environment. Do not use
electrical machinery near inflammable liquids or gases.
7

Keep children away from
the washing machine and do not allow them to play with it.
Keep pets and other animals away from the machine
.
Wear the appropriate work clothes.
Do not wear loose clothing or jewellery. They could be caught by moving
parts. You are recommended to use rubber gloves and anti-slip soled shoes.
If you have long hair, keep it in a hair net.
Check whether your machine is damaged.
Before using the machine again, carefully check that all of the safety
devices or the slightly damaged pieces are working perfectly.
All safety devices and worn pieces should be repaired or changed appropriately.
Do not disconnect any couplings
while
the machine is under hydraulic or pneumatic pressure.
Do not manipulate the hydraulic or pneumatic safety valves.
Do not disconnect the safety switches
. Never replace the fuses with others of a higher calibre
Do not exceed the pressure or temperatures recommended
in the instruction manual.
Have your machine repaired by a specialist.
This machine is of built in accordance with the current safety
regulations. All repairs should be done by a specialist and only with original spares, if not, you may run serious
risks for the safety of the user.
During washing
: This washing machine can only be used for washing wheels with water.
Do not open the loading lid when the machine is washing.
After the programme has finished:
Remove the wheel and close the lid of the washing machine when the
programme has finished.
To protect the washing machine. Do not climb onto the machine. Do not lean on the lid or loading hatch.
8

Connections
1.
Electrical system
The machine is prepared for a 3-phase 380 V connection. In the case that a connection to a
3-phase 220 V current is required, it will be necessary to change the input connections to the
transformer (TR) and also that of the two motors (MI and M2).
2.
Pneumatic system
Connect directly to a pneumatic installation that supplies air at a minimum pressure of 6 Kg/cm2.
The maximum pressure should not exceed 10 Kg/cm2.
For correct working of the machine, the input pipe should have a diameter of 10 mm.
3.
Hydraulic system.
Connect directly to the water pipe bearing in mind that a minimum pressure of 2 Kg/cm2.
4.
Drainage system.
Connect to the general drains with a flexible pipe.
IMPORTANT:
The connection to the electrical circuit should be by means of a 40A/300mA differential switch.
WATER INLET
AIR CONNECTION
ELECTRICAL CONNECTION
DRAIN CONNECTION
Figura A
9

Instructions for the filling of degreaser tank
•The degreaser is supplied with cans of 30 Liters, the tank capacity is 19´5 Liters.
•On the page 16, Figure 92, there is the detergent inlet bung.
•You must take some precautions when you fill the tank: You must avoid any contact
with skin, it can be produce burns, IN CASE of contact, wash with plenty of water,
avoid inhalations, in case of contact with eye, wash with water and go to doctor.
Using degreaser
•The degreaser is used in the rims that have some products adhered themselves, such
oils, fats, linings or other elements and impurities.
•This degreaser has been developed mainly for cleaning aluminium alloy rims.
•The machine is ready to be able to vary the amount of degreaser, and the time of rest.
•The machine is delivered with the normal times of washing, drying, degreaser and rest,
the user can change them depending on the working area (mountain, city etc).
•The degreaser is ready to use directly.
Storing degreaser
Salve the degreaser in a cool and dry place.
10

Your new automatic washing machine
You have acquired a product with proven efficiency, equipped with the most modern functions and services
required by the current development. The full programme with functional modules, parameters and data
permanent.
The new machine has a touch screen of TFT LCD 7” of 800x480, which is the following step in technology and
we are convinced to be able to satisfy this crescent demand with our solutions.
This screen, incorporates all the innovation with touch panel 4 wire resistive. Using the touch screen as input
device, you can control the mouse slide or keyboard “on screen” that comes with your operating system.
The new multifunction touch screen guarantees an IP65 protection, is backlit, allowing easy reading, even under
poor Light conditions.
With the new screen, you will have access to the washing and drying times and will be able to control and show
these times. You can also show the working hours and the number of washes that have been done, and other
services which we will describe later.
Your new machine also incorporates a PLC with a field bus modules for input and output devices, operating
devices and also a connection COM (RS485) for the communication of touch screen. All datas and programmes
are stored in flash EPROM and RAM memory.
Start up
1. Place the Wheel in the washing chamber, bearing in mind that the outer face must be placed to the left
(See Figure B)
(The machine will not start if the lid is open or if the emergency stop button is unplugged)
2. Before to close the lid, check if the moveable brush (right) is in the correct height for the tyre model
which has been introduced, if it’s not so, the brush height will be modify with the button ( ) of the
screen, to place it correctly.
3. Close the lid, press the start button ( without detergent or with detergent) of the screen and wait
until the washing operation has finished (approximately a minute), In case of emergency, interrupt the
washing cycle with the emergency stop button.
Figure B
11

Adjustment elements
The machine is delivered with all the timings and pressure regulators adjusted for optimum working under
normal conditions of use.
In special case, there are three elements whose adjustment can be modified:
A.- Length of detergent cycle, rest, wash and drying. This can be modified with touch screen keyboard.
B.- Water pressure. This can be modified with the regulator installed in the puma motor. A pressure gauge
indicates the value of this pressure.
C.- The brush speed. This can be modified with the flow regulator “06” of the pneumatic circuit (See pneumatic
speed).
This regulator only affects the pressure in the pneumatic cylinder for the brush movement.
Touch screen user manual.
Regulating of detergent, washing and drying
1.
SWITH THE MACHINE ON
You should see the initial screen display (see figure C). If it does not appear,
check that the washing lid is closed or the emergency stop is unplugged.
2.
ADJUSTING TIMINGS
2.1. Press the button ( ) to show the timings screen.
On this screen, you can change the time of detergent , rest, washing and
Drying (See you Figure D)
2.2. On the timings screen, push on the numerical value ( ), if you want
to change the time, to show the (
Numeric Keypad
), select the desired seconds
and push
Enter
Key.
Once the timers introduced, push the return button ( ) to return on the
Main screen.
3.
SCREEN CONFIGURATIONS
3.1. Press the button ( ( ) to show the counters buttons, schedule change,
Language on the screen and to personalize the name (See Figure E).
4.
COUNTER SHOWINGS
4.1. Press the button ( ) to show the service hours and the number of
Washes, totals or partials that the machine has made. If you want to
Delete the partials counters, push the button ( Reset), the total
Counters can’t be deleted (See you Figure F).
Press the return button ( )) to go back to the configuration screen.
(Central Key only to technical service)
Figure C
Figure E
Figure D
Figure F
12

5.
TO SET THE TIMETABLE OF THE SCREEN
5.1. Press the button ( ( ) to show the presen hour and minutes screen
(See figure G).
5.2. On the hour screen, press on the numerical value of the left
( ) to show the
Numeric Keypad
, select the present hour and
press the Key (
Enter
).
5.3. On the hour screen, press on the numerical value of the right
( ) to show the
Numeric Keypad
, select the present minutes and
Press the Key (
Enter
).
Once the hour and minutes are introduced. Press the return button ( ) to
go back to configuration screen.
6.
TO CHANGE THE LANGUAGE IN THE SCREEN
6.1. Press the button ( ) to show the languages screen y select the
Desired language (See figure H).
Once the language is selected, press the return button ( ) to go back
To configuration screen.
7.
INSERT WORKSHOP NAME
7.1. Press the button ( ) to show the screen of workshop name (See figure I).
7.2. Press on the white space to show the (Alphabetic Keypad),
Select the desired name (Maximum 15 characters) and push the key
(
Enter
).
Other keys of Alphabetic Keypad:
Key (
Caps
): to select capitals, small letters and numbers or symbols.
Key (
Clear
): to delete all the display content.
Key (
Esc
): to exit from alphabetic Keypad without make changes.
Key (
BS
): to delete character by character.
Key (
Enter
): to save all the content and exit.
Once the name is selected, press the return button ( ) to go back
To configuration screen.
8.
OTHER MESSAGES ON THE SCREEN
8.1. If the graphic is showing , emergency stop unplugged in the display ( )
the machine and touch screen are blocked (See figure J).
8.2. If the graphic is showing, open lid in the display ( ) the machine
will stop to wash till the lid is closed (See figure K).
8.3. If the graphic is showing, detergent level in the display ( ) the
Machine will cancel the dosage of detergent (See figure L).
(In this case the machine can wash only with water)
Figure G
Figure H
Figure I
Figure J
Figure K
Figure L
13

Led de .alimentacion
CPU
9.
POSSIBLE IRREGULARITIES
9.1. A graphic in the display is showed with the message “
PLC no response [Close]
” ,and the red led
Of communication is off
-Check the communication wire of the screen to PLC.
-Check that the PLC has electrical feed.
9.2. The screen doesn’t save the times of the programmed timings
-Change the memory battery of PLC
9.3. The screen and PLC Works perfectly, but the machine doesn’t wash.
-Check the input voltage, the principal fuses or the handling fuses.
9.4. We have the detergent tank full, but the screen shows is empty.
-Check wires and connectors.
-Check that the electronic buoy works correctly, is cleaned from chips and any object don’t
disturb.
9.5. We have the lid closed, and the screen shows is opened.
-Check wires and connectors
-Check that the electronic sensor works correctly, is cleaned from chips and any object don’t
disturb.
-Check that the sensors are aligned and they are in a correct distance.
9.6. We have the machine connected, and in the touch screen the upper leds work correctly, but the
Screen is dark and without graphics.
-This is normal, touch the screen and it will work. If during six minutes, the machine doesn’t
work, it will activate the saver screen to save electrical energy.
COMMUNICATION
LED
WITH PLC
POWER LED
CPU
POWER LED
SCREEN
BRUSH POSITION
BUUTOON
WASH BUTTON
WITHOUT
DETERGENT
WASH BUTTON WITH
DETERGENT
CURRENT HOUR
ACCESS TIMERS
BUTTON
STOP BUTTON
FOR WASH
CONFIGURATIONS
MACHINE BUTTON
PROGRAM VERSION
TOUCH SCREEN
MACHINE
MODEL
14

Maintenance-Care-Cleaning
Clearing the washing machine
¡Do not use solvents! These products damage the pieces of the machine, form vapours harmful to health and
provoke explosions!
¡Do not clean the machine with a jet of water!
Clean the outside of the machine and the control panel with soapy water or a normal clearing product that does
not contain solvents nor scratches the surface.
Clean the tank
The rust marks caused by metallic objects should be cleaned with a
chlorine-free
cleaning product.
¡ Do not use a steel brush!
Water inlet pipe
To avoid flooding it is essential to check the state of the water inlet pipe at least every 5 years.
Clean the water feed filters
The water feed filters should be cleaned periodically or when with the tap open, the flow into the machine is
insufficient
The filters are in the screw panel at the back of the washing machine.
Cleaning
1. Close the water tap
2. Switch the machine on. Press start to wash and switch it off alter 5 seconds by pressing the “Emergency
Stop” button (this way the water pressure in the feed pipe is eliminated).
3. Unscrew the tube from the tap and clean the filter with tap water.
4. Screw the tube back onto the tap.
5. Unscrew the tube in the back of the machine
6. Extract the filter with pliers, clean it and return it to its position.
7. Screw the tube back onto the machine.
8. Open the water tap and check that there are no leaks.
Lubrication:
Lubricate every 20 working hours.
Periodically lubricate the bearings and all the moving components (see figure D y E)
Lubricating the pump motor
Change the oil after the first 50 working hours.
The following changes are every 500 working hours. The oil used should be S.A.E 20/30.
The capacity is 0.33 l.
Figure D Lubrication pieces
Lubrication pieces Figure E
15

16

17

18

19
Table of contents