Indiana Line MIO Kit User manual

MIO
K I T
2
3
Before setting up the unit, please read
carefully this manual, follow the instructions
step by step and observe all warnings: it’s
necessary for your safety and to obtain the
best performances.
Ensure that the power supply voltage is the
right one: 220 Volt - 50 Hertz.
Place the speakers on a solid surface, in a
well ventilated location and away from
heat generating items, in a dust and moisture
protected place.
Do not cover the powered subwoofer: the
back panel is hot !
To avoid the risk of electric shock, do not
open the cabinet before disconnecting the
cable from the socket.
IMPORTANTE
IMPORTANT
1 subwoofer amplificato
1 coppia di mini diffusori (satelliti)
1 cavo di alimentazione
1 coppia di cavi per altoparlanti
1 cavo di segnale (mini jack 3.5 mm)
4 piedini adesivi
•
•
•
•
•
•
1 powered subwoofer
1 pair of mini speakers (satellites)
1 power supply cable
1 pair of speaker cables
1 signal cable (mini jack 3.5 mm)
4 adhesive pads
•
•
•
•
•
•
CONTENUTO DEL CARTONE
CARTON CONTENTS
Prima di installare l’apparecchio, leggete
attentamente questo manuale, seguite passo
passo le istruzioni ed osservate tutte le
avvertenze: ènecessario perlavostrasicurezza
e per ottenere le migliori prestazioni.
Verificate che la tensione di alimentazione
sia corretta: 220 Volt - 50 Hertz.
Collocate i diffusori su una superficie solida,
in posizione ben aerata e lontano da oggetti
che generano calore, in un luogo protetto da
polvere ed umidità.
Non coprite il subwoofer amplificato: il pannello
posteriore è caldo !
Per evitare il rischio di scosse elettriche,
non aprite il cabinet prima di aver scollegato
il cavo dalla presa di corrente.
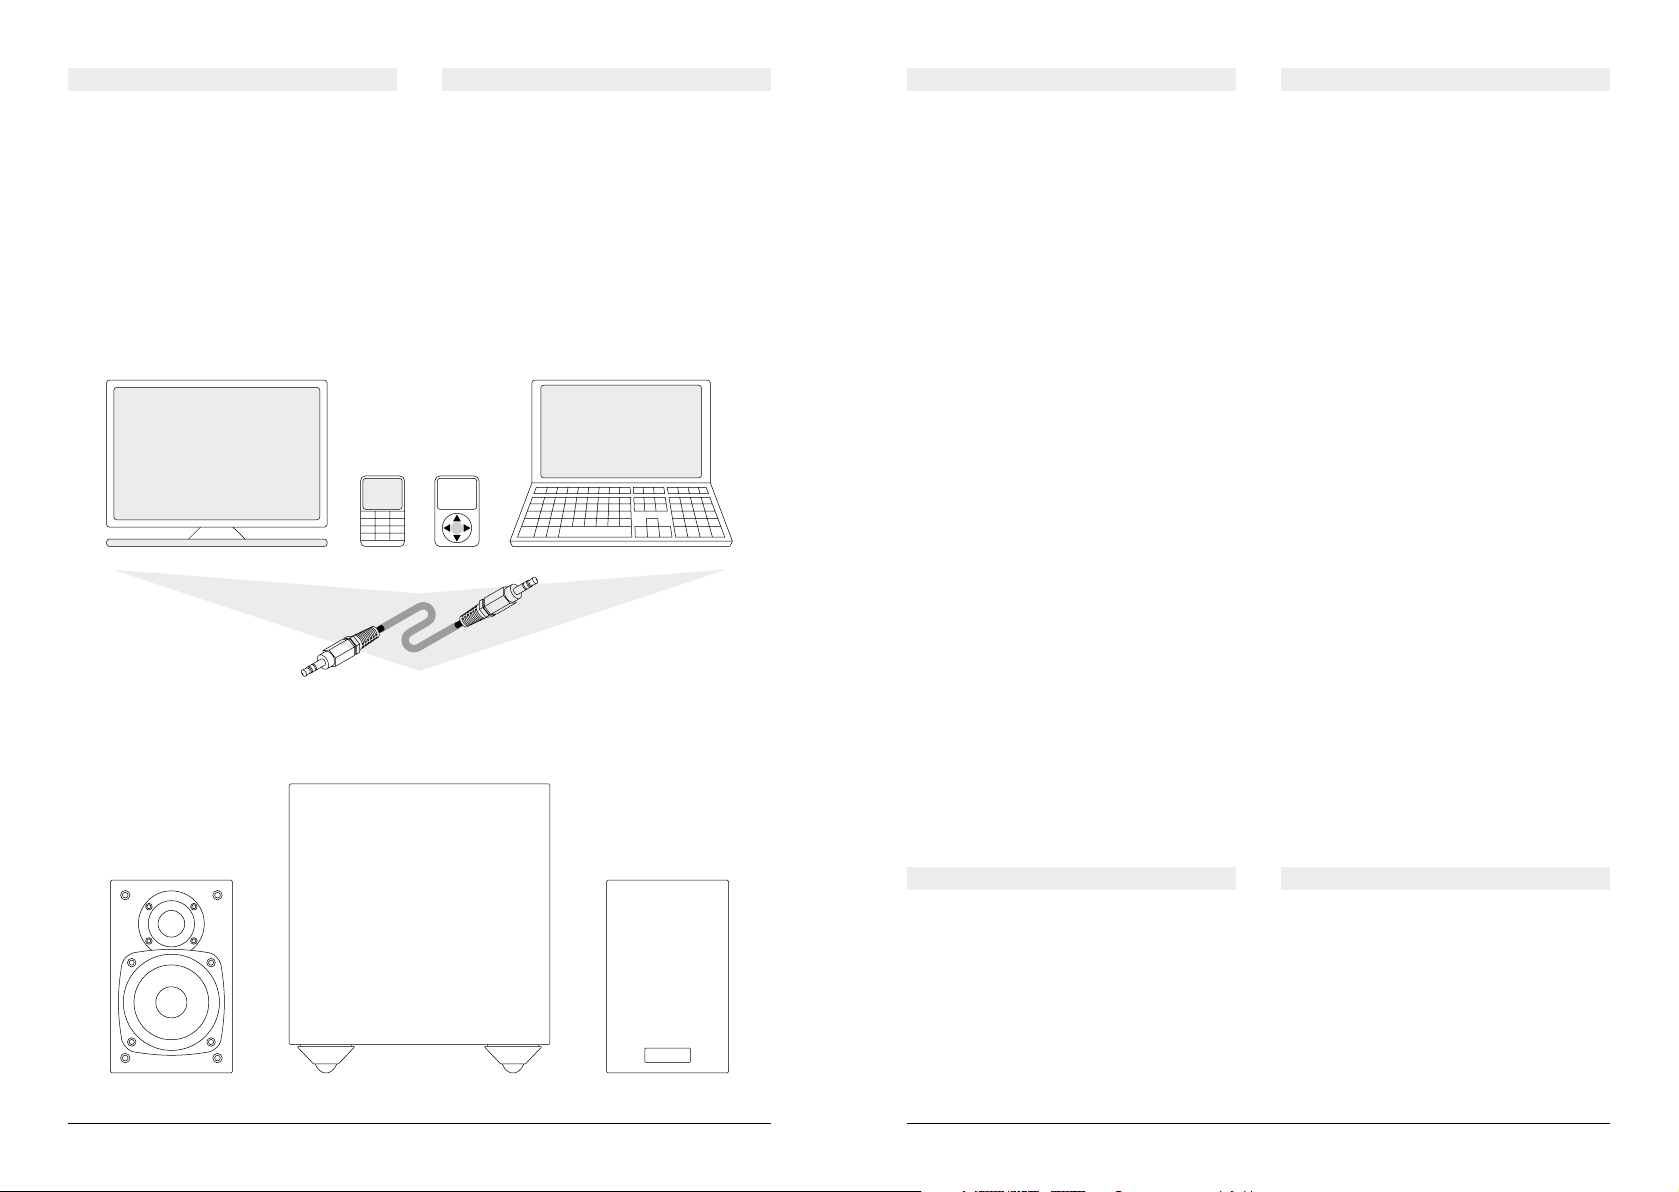
MIO Kit - Sistema amplificato 2.1
Mio Kit consente di amplificare e di migliorare
la qualità del suono di ogni apparecchio dotato
di uscita audio analogica, trasformandolo in un
sistema hi-fi compatto e con buone prestazioni.
Mio Kit allows to amplify and improve the
sound quality of each device equipped with
analog audio output, turning it into a good
performances compact hi-fi system.
MIO Kit - 2.1 powered system

4
5
4 5
INSTALLAZIONE - USO
INSTALLATION - USE
Placing the subwoofer and the speakers,
keep in mind that the acoustical character-
istics of the room play an important role in
sound reproduction:
a room with not much furniture and/or with
large windows increases the high frequencies;
a room with a lot of furniture and/or carpets
and/or curtains decreases the high frequencies;
placing the subwoofer close to a wall or a
corner the low frequencies are increased.
When the speaker is placed on a shelf, ap-
ply the supplied adhesive pads on the bot-
tom of the box.
When the speaker is hung on a wall, apply
an adhesive pad on the back of the box.
Make all connections before plugging the
power cord in the socket. Do not turn on
the subwoofer until the whole system is not
fully installed properly.
If necessary, replace the fuse (inside) with
one of equal value, otherwise warranty will
avoid and you could damage your equipment.
•
•
•
•
•
Connect the speakers to the outputs on the
back of the subwoofer, using a good quality
speaker cable.
Keep the polarities: in the event of wrong
phase (opposite polarity) the performances of
the audio system can be reduced.
Usually the positive is marked with the red
color and/or the “+” sign, the negative with the
black and/or the “-” sign.
Ensure that no stray strands of wire are
shorting speaker outputs together. Check
that the loudspeaker terminals are tight.
Connect the source using a signal cable (mini
jack 3.5 mm).
Connect the supply to the socket by using the
supplied power cord.
Setting the switch to ON, the system switch-
on automatically as soon as a signal is present
(green LED) and returns to standby (red LED)
after about fifteen minutes of no signal.
INSTALLAZIONE - USO
Nel posizionare il subwoofer ed i diffusori,
tenete presente che le caratteristiche acusti-
che della stanza giocano un ruolo importante
nella riproduzione del suono:
un ambiente con pochi mobili e/o grandi su-
perfici vetrate incrementa le alte frequenze;
un ambiente con molti mobili e/o tappeti
e/o tendaggi assorbe le alte frequenze;
posizionando il subwoofer vicino ad una pare-
te o un angolo si rinforzano le basse frequenze.
Quando il diffusore è appoggiato su un ripia-
no, applicate sul fondo del box i piedini adesivi
forniti in dotazione.
Quando il diffusore è appeso ad una parete,
applicate sul retro del box un piedino adesivo.
Effettuate tutti i collegamenti prima di inserire
il cavo di alimentazione. Non accendete il sub-
woofer amplificato finché tutto il sistema non è
completamente installato in maniera corretta.
Se necessario, sostituite il fusibile (interno) con
unodieguale valore, altrimentilagaranziaviene
meno e si potrebbe danneggiare l’apparecchio.
•
•
•
•
•
Collegate i diffusori alle uscite poste sul retro
del subwoofer, utilizzando un buon cavo per
altoparlanti.
Rispettate le polarità: eventuali errori di fase
(inversione di polarità) possono ridurre le
prestazioni del sistema audio.
Abitualmente il colore rosso e/o il segno “+”
indicano il positivo, il colore nero e/o il segno
“-” indicano il negativo.
Verificatechenessunfilo mettaincortocircuito
le uscite degli altoparlanti. Controllate che i
morsetti dei diffusori siano ben serrati.
Collegate la sorgente utilizzando un cavo di
segnale (mini jack 3.5 mm).
Collegate l’alimentazione alla presa utilizzando
il cavo in dotazione.
Posizionando l’interruttore su ON, il sistema en-
tra in funzione automaticamente in presenza di
segnale (LED verde) e ritorna in stand-by (LED
rosso) dopo circa quindici minuti di assenza del
segnale stesso.
INSTALLATION - USE

6 7
ON / OFF
Main switch.
LED
The LED shows the amplifier status:
green = on work
red = stand-by
SUB
Turn the knob to adjust the level of low
frequencies (subwoofer volume).
MASTER
Turn the knob to adjust the volume of the
whole system (satellites + subwoofer).
INPUT
Use this input to connect the source, using
the mini jack cable.
RIGHT SPEAKER
Connect the right speaker to this terminal,
using the speaker cable and keeping the
polarities.
LEFT SPEAKER
Connect the left speaker to this terminal,
using the speaker cable and keeping the
polarities.
POWER SUPPLY
Connect the power supply the power outlet
using the supplied cable.
•
•
CONTROLLI & CONNESSIONI
CONTROLS & LINKS
ON / OFF
Interruttore.
LED
Il LED indica lo stato dell’amplificatore:
verde = in funzione
rosso = stand-by
SUB
Ruotate la manopola per regolare il livello
delle basse frequenze (volume subwoofer).
MASTER
Ruotate la manopola per regolare il volume di
tutto il sistema (satelliti + subwoofer).
INPUT
Utilizzate questo ingresso per collegare la
sorgente, utilizzando il cavo mini jack.
RIGHT SPEAKER
Collegate il diffusore destro a questo morsetto,
utilizzando il cavo per altoparlanti e rispettan-
do le polarità.
LEFT SPEAKER
Collegate il diffusore sinistro a questo mor-
setto, utilizzando il cavo per altoparlanti e
rispettando le polarità.
POWER SUPPLY
Collegate l’alimentazione alla presa di corrente,
utilizzando il cavo in dotazione.
•
•

8
9
Conservate questo manuale: potrà servire
in futuro. Il mancato rispetto dei requisiti del
presente manuale invalida la garanzia.
Vi consigliamo di conservare l’imballo originale
per un utilizzo futuro: i danni di trasporto a cau-
sa di imballaggio non corretto non sono coperti
da garanzia, anche in caso di assistenza.
I diffusori sono provvisti di griglia frontale
per proteggere gli altoparlanti. E’ possibile
l’uso senza la griglia, ma raccomandiamo que-
sta protezione per evitare danni accidentali ai
componenti. Non toccate gli altoparlanti per-
ché si possono danneggiare.
Disinserite il cavo di alimentazione dalla
presa prima di pulire i diffusori, utilizzando
un panno asciutto e morbido. Non utilizzate
detergenti liquidi o spray. La tela di protezione
può essere pulita con una normale spazzola da
abiti, dopo averla rimossa dal cabinet.
Disinserite il cavo di alimentazione dalla
presa se l’apparecchio non sarà utilizzato per
un lungo periodo e durante i temporali.
The sound of all speakers improves with
the time: the better performances can be
matched just after several hours of listening.
RODAGGIO
RUNNING-IN
Il suono di tutti i diffusori migliora con il tempo:
le prestazioni ottimali si ottengono solo dopo
alcune decine di ore di ascolto.
SUGGERIMENTI
Keep this manual for future reference.
Failure to comply with the requirements of
this manual will void the warranty.
We suggest you to retain the original packing
for future use: the freight damages due to in-
correct packaging shall not be covered by the
warranty, in the event of servicing too.
The loudspeakers are equipped with a front
grille to protect drivers. It is possible to use
them without this grille, but we recommend
this protection to prevent accidental damage
to the drivers. Do not touch the loudspeakers
as damage may easily result.
Unplug the power cord from the outlet
before cleaning the speakers, simply by using
a soft, dry cloth. Do not use liquid or aerosol
cleaners. The protection grille fabric may be
cleaned with a normal clothes brush, while
the grille is detached from the cabinet.
Unplug the power cord from the outlet
when the unit will not be used for a long
time and during lighting storms.
SUGGESTIONS
Specifiche /
Data
Sistema
System
Risposta in frequenza
Frequency response
40
÷
22000 hertz
Ingressi
Inputs
stereo 3.5 mm (mini jack)
Alimentazione
Power supply
220 VAC / 50 Hertz
120 W max consumption
< 0.5 W standby consumption
T 1.0 AL internal fuse
Subwoofer
Subwoofer
Amplificatore
Amplifier
50 watt rms
80 watt max
Altoparlante
Loudspeaker
178 mm
Crossover
Crossover
180 hertz
Dimensioni
Dimensions
230 x 255 x 230 mm
(+ 20 mm terminals)
Peso
Weight
5,9 Kg
Satellite
Satellite
Amplificatore
Amplifier
18 + 18 watt rms
30 + 30 watt max
Altoparlanti
Units
82 mm woofer
21 mm dome tweeter
Crossover
Crossover
3400 hertz
Dimensioni
Dimensions
95 x 150 x 95 mm
Peso
Weight
1,1 Kg (pair)

Ci riserviamo il diritto di modificazioni senza preavviso. Decliniamo ogni responsabilità per eventuali errori o imprecisioni.
We reserve the right to change the specifications without notice. We decline each liability for any mistake or inaccuracy.
Indiana Line is a brand of Coral Electronic - 10098 Rivoli - Torino - Italy - www.indianaline.it
Table of contents
Other Indiana Line Amplifier manuals

Popular Amplifier manuals by other brands

Wilcoxon Research
Wilcoxon Research PA8HF operating guide

Marantz
Marantz SR8015 quick start guide

Orion
Orion XTR1500.1D owner's manual

Extron electronics
Extron electronics VersaTools MDA 3V Dual Specification sheet

Denon
Denon Professional DN-A200 operating instructions

Onkyo
Onkyo A-RV401 instruction manual


