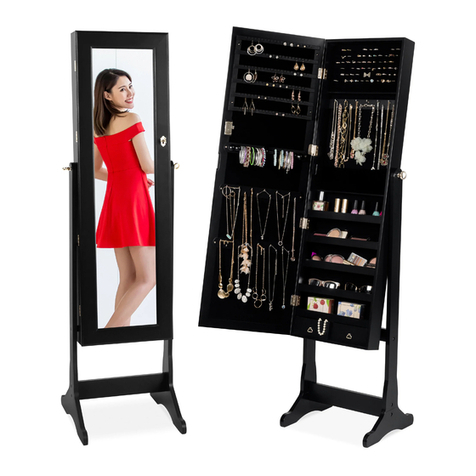
Innoci-USA 63434040 User manual

LED LIGHTED MIRROR W/BUILT-
IN MAGNIFIER AND CLOCK
Model: 63434040, 63434835, 63435636, 63436028
USER GUIDE

IMPORTANT SAFETY INFORMATION
WARNING
This product must be installed in accordance with the installation instruction by
qualified technician. Failure to follow instruction could result in death or serious
bodily injury.
Please read through this installation instruction so you will know how to install
and operate your model properly. Keep this document in a safe place for future
reference after use.
CAUTION
This product must be serviced by qualified personnel. ALWAYS unplug the power
cord or turn off the circuit breaker before service.
PACKAGE CONTENTS
(Model 63434040 x2)
(Model 63434835 x2)
(Model 63435636 x2)
(Model 63436028 x2)
(x1)
Mirror
Mounting Bracket Screw Drywall Anchor
(Model 63434040 x4)
(Model 63434835 x4)
(Model 63435636 x4)
(Model 63436028 x4)
(Model 63434040 x4)
(Model 63434835 x4)
(Model 63435636 x4)
(Model 63436028 x4)
2Customer Service: (866) 479-8076 or customerser[email protected]

INSTALLATION
For drywall installation,
mark the hole locations and
drill Φ6mm holes for the
drywall anchors.
Insert provided drywall
anchors.
Install the mounting bracket.
Connect to 110V power
supply
Hang the mirror to the wall and
make sure the bracket in the
back of the mirror lineup with
the mounting bracket properly.
Press the mirror down
slightly and make sure the
brackets fit properly.
3
•Using the wall studs to hang the mirror is highly recommended.
•This mirror is NOT designed to work with wall switch. The built in digital clock
will need to be reset if the power to the mirror is cut off.
•IR sensor requires a minimum clearance of 5 1/4”.

BASIC OPERATION
1. Rocker switch
a. Turn switch to <–> position;
lights can be controlled by the
IR sensor.
b. Turn switch to < o > position to
turn off the lights.
c. Turn switch to <=> position to
turn off the lights.
2. Dimmable IR sensor
a. Turn the Rocker switch to <–> position to activate the IR sensor.
b. Move your hand across the IR sensor to turn the lights on or off.
c. The distance between your hand and the sensor should be approx. 1”.
d. To adjust the brightness of the lights, keep your hand in front of the
sensor until the desirable brightness has reached and move your hand
away from the sensor.
e. If the lights flicker, the level of brightness might be too low; try to adjust
the brightness to a higher level.
3. Setting the clock
a. To change the hour, press
the button on the left.
b. To change the minute press
the button on the right.
a.
b.
5

CARE AND MAINTENANCE
6
Clean the mirror with a soft, damp cloth and dry thoroughly with a soft towel. Do NOT allow
the edges of the mirror to get or remain wet over a period of time. Please do NOT use glass
cleaner that contains ammonia or vinegar. Never spray any cleaner directly onto a mirror.
Instead apply the cleaner to a soft cloth and then wipe the mirror. Make sure no
commercial cleaner comes in contact with the edge or backing.
DEFECTIVE GOODS CONSUMER WARRANTY
Innoci-USA inspects all of its products prior to shipment. We offer a 5-year Limited
warranty on our electric mirror products. Defective products should be returned to place of
purchase for replacement. However, if this is not possible, we accept returns on defective
product with our written authorization. Returns will be handled by product replacement.
Defects or damage caused to product by the consumer are not accepted.
SHORTAGE OR DAMAGED PRODUCTS
All shipments are carefully inspected and counted before leaving our distribution centers.
Please inspect carefully on receipt of merchandise, noting any discrepancy or damage on
the carrier’s freight bill at that time, and file a claim with the carrier within 10 days from
receipt of order. Then contact our office. Deductions from invoices for shortages or
damage claims will not be allowed.
RETURN NEW GOODS
All claims for returns or adjustments must have prior approval
and return authorization (RA) number. Only original, sealed
product in salable condition are eligible for return. Credit for authorized returns will be
issued at the net price paid for the product and subject to a 15% restocking/handling fee.
Merchandise is to be returned via prepaid freight. All unauthorized returns will be refused
or subject to a 25% restocking/handling fee.
How to request an “RA” number: Fill out the “RA” form and email it to Customer Service
cust[email protected]. “RA” form can be obtained by emailing Customer
Service or from our website www.innoci-usa.com. We will send you a Return Authorization
Number (RA) by return by email. Please take necessary precautions when returning
merchandise to prevent additional damage. Insurance is the responsibility of the shipper.
WARRANTY

© innoci usa, Inc. All rights reserved.
innoci usa, Inc.
14100 Alondra Blvd.,
Santa Fe Springs, CA 90670
www.innoci-usa.com
V6.1
This manual suits for next models
3
Table of contents


