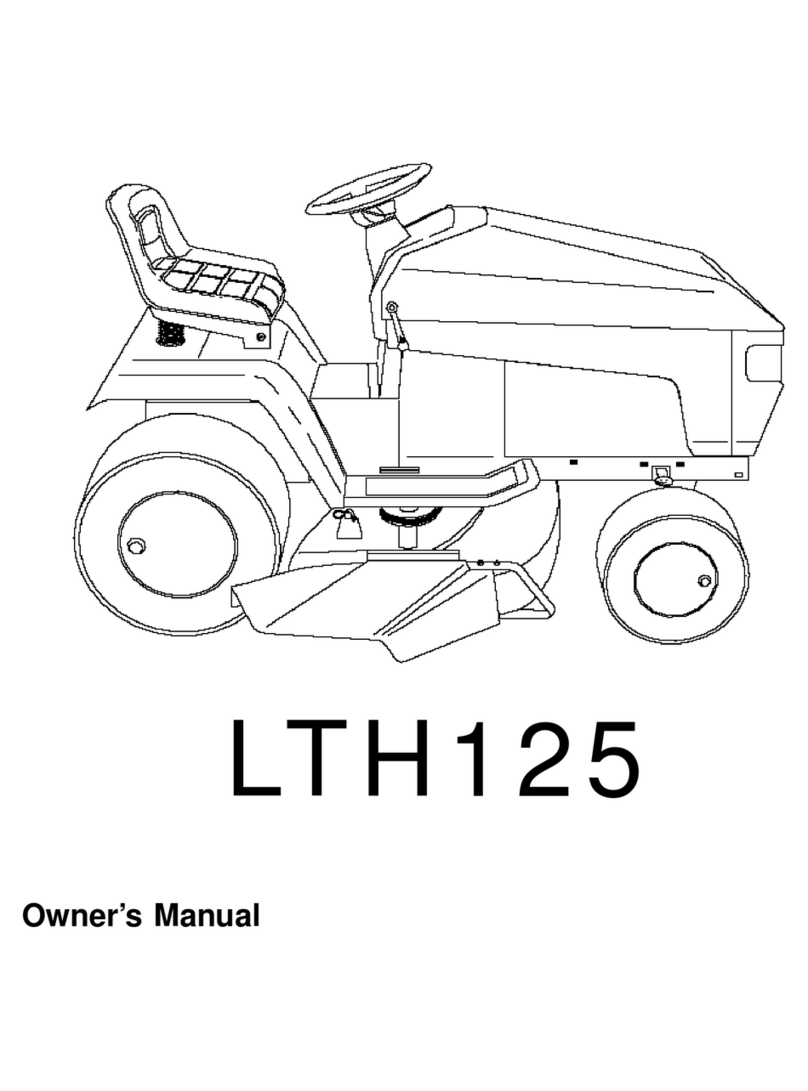
International Harvester Company 72 User manual


INTRODUCTION
Illust. 1
International Cub Cadet 124Tractor.
(Ilust. 1A
International Cub Cadet 105 Tractor.
1

INTRODUCTION
Illust.2
Internatianal Cub Cadet 104 Tractor.
Illust. 2A
Internatianal Cub Cadet 72 Tractar.
2


OPERATING THE ENGINE
STARTINGTHEENGINE
Be sure the fuel shut-off valve is open.
control button all the way in. Do not use the
choke to enrich the fuel mixture, except when
necessary to start the engine.
Manual Starting '(Tractors without electric storting):
Raise the tractor hood. The retractable starter
is mounted on a support plate at the front of the
engin~ at the right side of the tr actor.
2. Pull the choke control button all the way
out (see Illust.4or5}. More or less choking may be
necessary due to variations in temperature,
grade of fuel, etc. Little or none will be
needed when the engine is warm. Put the gearshift lever in the neutral posi-
tion and lock the brake. Turn the key ignition
switch clockwise.
Give a quick steady pull on the retractable
starter handle to start the engine. Do not jerk,
or pull it out to its very end in a rough manner.
A steady pull will accomplish just as much.
Always pull the handle so the cord is in a
straight line through the guide. Maintain your
hold on the handle and allow the cord to returl}
slowly. Releasing the handle when the cable is
extended will shorten the life of the starter.
3. Place the throttle lever halfway between
"SLOW" and "FAST". SeeIllust. 4 or5.
4. Electric Starting: The engine cannot be
started unless the brake pedal is pressed all
the way down to activate the safety starting
switch.
International Cub Cadet72, 104,and 1'24Tractors:
Check to see that the gearshift lever is in the
neutral position. SeeIllust. 4.
International Cub Cadet 105and 125Tractors:
Check to see that the speed control lever is in
th "N" otOSe pOSI Ions. eeIllust. 6. 5. After the engine starts, slowly release
the clutch pedal and gradually push the choke
control button all the way in. Do not use the
choke to enrich the fuel mixture, except when
necessary to start the engine.
STOPPINGTHE ENGINE
All Models: Turn the ignition key clockwise
to the "START" position and release it as soon
as the engine starts; however do not operate the
motor-generator for more than 30 seconds at
anyone time. If the engine does not start within
this time, turn the key "OFF" and wait a few
minutes, then try again. Move the throttle lever to the "SLOW" po-
sition and allow the engine to idle for a short
time before stopping. Then turn the key to the
"OFF" position.
5. After the engine starts, slowly release
the brake pedal and gradually push the choke
FUEL SHUT.OFFVALVE
FUEL SYSTEM Be sure the shut-off valve on the fuel
strainer under the gasoline tank is open.
Screw out the needle stem (Shut-off valve) un-
til the seat on the stem is tight against the
stop, to prevent leakage or seepage when the
valve is in its full-open position.
Fill the fuel tank with clean, fresh, regular
grade gasoline, preferably at the end of each
day's use. This will force out any moisture-
laden air and prevent condensation in the fuel
tank. Do not mix oil with the gasoline.
CLEANINGTHE FUEL STRAINERANDSEDIMENTBOWL
The fuel tank filler cap has an ai.r vent.
Keep the vent open at all times to assure
proper flow of the fuel. After every 25 hours of operation, clean
the fuel strainer as follows:
Caution! Never remove the fuel tank cap
or fill the fuel tank when the engine is running,
is hot, or when near an open flame. Do not
smoke when working around inflammable fuel,
as the air around the tractor is mixed with a
highly explosive vapor. When pouring fuel,
keep the container or hose nozzle in contact
with the metal of the fuel tank to avoid the
possibility of an electric spark igniting the
gas. Do not spill gasoline on a hot engine.
1. Close the shut-off valve. SeeIllusts. 9 and9A.
Loosen the knurled nut under the sediment
bowl and remove the bowl and screen.
2. Clean the sediment bowl and screen.
3. When reassembling, be sure the gasket
between the bowl and the main body is in good
condition and does not leak. Use a new gasket
if necessary.
8

FUELSYSTEM
Illust.9
Carburetor and fuel strainer.
(International Cub Cadet 72 Tractor)
(1Iust.9A
Carburetar and fuel strainer.
(International Cub Cadet 104, 105, 124 and 125 Tractars)
CARBURETORADJUSTMENTS For a final check of the high speed adjust-
ment, operate the engine under load and make
any corrections necessary for smooth opera-
tion.
Adjusting the Idle Adjustment Screw
The carburetor is adjusted at the factory
and under normal operating conditions it will
not require readjusting. If this adjustment has
been disturbed for any reason, proceed asfollows:
Adjusting the High-Speed Adjustment Screw After the high speed adjustment screw is
adjusted, it may be necessary to readjust the
idle. adjustment screw (1IIusts.9 and9A), as each
affects the other..
Turn the high speed adjustment screw (1IIusts.
9 and9A) counter-clockwise approximately two
turns from the closed position and start the en-gine. Close the idle adjustment screw to its seat
by turning it clockwise; then open it one turn.
Start the engine and operate it at fast idling
speed (without any load) until thoroughly warm.
After the engine has reached normal oper~
ating temperature, accelerate the engine and
check its response. While the engine is running at fast idle
speed, it is advisable to screw in the throttle
stop screw (1IIusts.9 and9A) a few turns to keep
the engine from stopping when the throttle
lever is moved to the fully retarded "SLOW"
position. The engine will then be idling at a
fairly high speed and the throttle stop screw
can be backed out a little at a time until the
desired idle speed is obtained.
Place the engine under load and turn the
high speed adjustment screw (1III/sts.9 and9A) to
the leanest mixture that will allow satisfactory
acceleration and steady governor operation.
If the engine misses and backfires under
load, the high speed mixture is too lean. The
high speed adjustment screw must be turned
counter-clockwise l/4 turn at a time until the
condition is corrected. If the engine mis'ses or rolls while backing
out the throttle stop screw, the idle adjustment
screw may be adjusted in or out until the en-
gine operates smoothly. Speed up the engine
for a few seconds; then recheck the idle ad-
justment. A slight adjustment in or out will
give the smoothest idle.
If the engine shows a sooty exhaust and is
sluggish under load, the high speed mixture is
too rich. The high speed adjustment screw
must be turned clockwise 1/4 turn at a time
until the condition is corrected. 9

PREPARING THE TRACTOR FOR EACH DAY'S WORK Retighten the cap screws after the seat is
adjusted.
Fill the fuel tank at the end of each day's
run. Seepage8. The International Cub Cadet 104, lOS, 124
and 125 Tractors features a seat which can be
tilted forward over the steering wheel, for con-
venience in adjusting the seat and to keep out
rain and snow. SeeIllust. 10.
Check the crankcase oil level and add new
oil if ne ce ssary. Seepage29.
Clean the air cleaner element if necessary.
See page 17.
Inspect the tires for general condition. See
pages23 and24-
ADJUSTINGTHE SEAT
Illust. lOA
Adjusting the seat.
(Internatianal Cub Cadet 72 Tractar.)
CLUTCHANDBRAKEPEDAL
Illust. 10
Adjusting the seat.
(Internatianal Cub Cadet 104, 105, 124 and 125 Tractars)
Before starting the tractor, adjust the seat
to the most comfortable driving position by
loosening the four cap screws in the seat sup-
port (lllust. 10) or seat spring clamping plate
(lllust. lOA)and sliding the seat assembly forward
or rearward to the position which is most
comfortable for the operator. IIIust. lOB
Brake pedal lack in the engaged position.
10

DRIVING THE TRACTOR
(I nternational Cub Cadet 12, 104 and 124 Tractors)
CLUTCH AND BRAKE PEDAL. Continued Note: Do not rest your foot on the pedal
while driving the tractor, as this will result
in excessive clutch lining wear.
The combination clutch and brake pedal is
used to disengage the engine from the trans-
mission when shifting gears and to actuate the
brake to stop the tractor. The pedal must be
pressed all the way down to activate the safety
starting switch when starting the engine.
Always be sure the rear wheels are free
to turn. Under any adverse conditions, do not
attempt to free the tractor by speeding up the
engine and suddenly engaging the clutch. Try
backing out instead of going forward.
To disengage the clutch, press the pedal
approximately half way down. To stop the trac-
tor press the pedal all the way down. STOPPINGTHE TRACTOR
Disengage the clutch by pressing the pedal
all the way down. Move the gearshift lever to
the neutral position.
LOCKINGTHE BRAKE
CREEPERSHIFTLEVER
Always lock the brake when the tractor is
parked on a grade. To lock the brake, press
down on the brake pedal; then place the brake
pedal lock in the engaged position. To disen-
gage the lock, press down on the brake pedal
lift the lock up and place it in the disengaged
position behind the brake pedal as shown in
Illust. 7.
The creeper drive provides a slower speed
in each respective gear, by a four-to-one re-
duction in speed from direct drive. When the
creeper shift lever is all the way forward, it
is in direct drive, or all the way rearward, it
is in creeper drive. See1(lust.4. Note: Do not
use a mid-point position on the creeper drive
as neutral. Neutral position must be selected
only with the standard transmission gearshift
lever.
GEARSHIFTLEVER OPERATINGTHECREEPERDRIVE
To operate the tractor in creeper drive,
move the creeper shift lever (1IIust.4) all the
way rearward. Then select the speed desired
and proceed as instructed under !'Starting the
Tractor".
This lever is used to select various gear
ratios provided in the transmission. There
are three forward speeds and one reverse
speed. SeeIllust. 4. Refer to "SPECIFICA TlaNS"
on page35.
The following table shows the speeds avail-
able in each of the three forward gears and thereverse
gear.
STARTINGTHE TRACTOR
SPEEDTABLE
1. Advance the throttle lever slightly. See
Illust. 4. Miles Per Hour
2. Disengage the clutch by pressing the
clutch pedal all the way down. and move the
gearshift lever to the desired speed. Creeper
Drive
Direct
Drive
Gear
.6
2.3
First
3. Start the tractor in motion by slowly
releasing the clutch pedal and moving the
throttle lever to the pos ition where the engine
operates best for the load to be handled. 1.0
Sec~nd 3.9
Third 6.8 1.7
Note: Do not shift gears while the engine
clutch is engaged or while the tractor is in
motion. 2.5 .6
Reverse

DRIVING THE TRACTOR
(International Cub Cadet 105 and 125 Tractors)
BRAKEPEDAL
the tractor is used to hold the rotary tiller
back rather than to pull the unit, as in plow-
ing or mowing.
The brake pedal must be pressed all the
way down to activate the safety starting switch.
When the brake pedal is in the depressed posi-
tion it automatically moves the speed control
lever to the "Nil position. 4. Move the speed control lever back to a
position to maintain proper mulching of the
soil.
The tractor can be stopped either by
pressing the pedal all the way down, or placing
the speed control lever in the I'NII position. 5. With a hydrostatic drive, it may be nec-
essary to vary the speed control lever as
the soil conditions vary. With a gear drive
tractor, under similar conditions, it may be
necessary to de clutch or to use the brake.
LOCKINGTHE BRAKE
Always lock the brake when dismounting
from the tractor. To lock the brake, press
down on the brake pedal; .then place the brake
pedal lock in the engaged position. S..lllust. 10B.
To disengage the lock, press down on the brake
pedal, lift the lock up and place it in the dis-
engaged position behind the brake pedal as
shown in Illust. 7.
6. If desired depth cannot be obtained in the
first pass. additional passes will be neces-
sary. Do not use tine extensions when attempt-
ing deep penetration or when tilling heavy soil.
SPEEDCONTROLLEVER
This lever is used to select any speeds
from a standstill IINII position to eight miles
per hour in the forward direction and to four
miles per hour in the reverse direction.
STARTINGTHETRACTOR
1. Advance the throttle lever slightly. See
1!lust.6.
2. Dep~ess the brake pedal by pressing the
pedal all the way down, and move the towing
lever (I'luit. 6) in drive (horizontal) position,
then move the throttle lever to the position
where the engine operates best for the load to
be handled.
Moving the speed control lever forward
provides increased forward speeds. and mov -
ing the lever rearward provides the reversed
speeds.
Note: Do not rest your foot on the brake
pedal while driving the tractor as this would
cause the speed control lever to return to the
!'N'I position.
Note: On tractors with a rotary tiller the
following instructions are required.
1. Engage the Power Take- Off clutch.
2. Lower the rotary tiller to the desired cut-
ting depth.
3. Start the tractor in motion by moving
the speed control lever forward or rearward
as described above.
RELEASELEVER
To push or move tractor for a short distance
or when working on the engine, the release le-
ver (1IIust.6) must be locked in the release
(down) position and the speed control lever must
be in the "N" position. Caution: Do Not Tow.
STOPPINGTHE TRACTOR
Move the speed control lever to the I'NI'
position or use the brake. Before dismounting
always depress the brake pedal.
3. Move the speed control lever to start for-
ward motion. Note:In rotary tilling application,
three-point hitch is raised and lowered with
the lift handle. The lift handle can be set to
hold the equipment at various positions by use
of the six notches in the lift handle quadrant.
The lower mounting bracket has three holes
which are used for additional adjustment.
Trailing-type equipment must be hitched to
the tractor only at the hitch hole in the draw-
bar. SeeIllusts. 13and13A.
When the tractor has a three-point hitch
(1IIusts. 13 and 13A) equipment adaptable to the 12


OPERATINGTHE FRONTPOWERTAKE-OFFCLUTCH
1. Move the throttle lever back to medium
or low idle speed.
The clutch is factory adjusted and should
not require further adjustment under normal
operating conditions. However, if clutch
slippage should occur. It is recommended
that you see your International Harvester
dealer for satisfactory servicing of the clutch,
as special equipment and instructions are
required.
2. Move the front power take-off clutch
lever (forward) to the engaged position.
(rearward) to the disengaged position. See
'"usts.4orS.
After considerable clutch use, it may be
necessary to readjust the button clearance as
described below to assure proper clutch dis-
engagement.
Hote: It is recommended that the clutch
lever be placed in the forward or engaged
position when the tractor is being used with-
out front power take -off equipment.
ADJUSTINGTHE CLUTCH
With the clutch fully engaged (clutch lever
in the forward position) place a piece of thin
cardboard (match book cover) approximately
1/64 inch thick between the engaging lever
wear button I'A'I and the pressure spring
thrust button "B'I (1IIust.15), loosen the jam nut
on the clutch lever turnbuckle, and adjust the
turnbuckle until a light drag is felt on the
cardboard when it is removed from between
the buttons. Be sure all slack, except the
1/64 inch adjustment, is out of the linkage.
Then, tighten the jam nut securely against theturnbuckle.
It~STALLINGANDREMOVINGDRIVEBELT
To install or remove the drive belt, loosenthe
clutch lever bolt enough so the lever can
be moved forward to provide sufficient belt
clearance between the engaging lever wear
button IIAII and the pressure spring thrust
button IIBII. SeeIllust. 15.
After installing a new belt, move the clutch
lever back onto the clutch lever latch and
tighten the bolt. Seettlust. 15.
Illust. 15
View with grille removed to show engoging
lever wear button and pressure spring
thrust button.
15

UNIT
Note: A slightly sluggish action of the con-
trollever returning to neutral may exist during
the break-in period. A few hours of running
will eliminate this. No adjustments are neces-sary.
To raise or lower front or rear mounted
equipment and to operate in "rigid ,. position,
the end clevis locking clip must be in the locked
position as shown in Illust. 16.
To operate equipment such as a mower in
"float" position, raise the end clevis locking
clip to the unlocked position.
Illust. 16
Hydraulic unit assembled on the tractor.
The hydraulic unit system is designed to
provide hydraulic power with fingertip control
for raising and lowering front or rear mounted
equipment.
FILLING THEHYDRAULICSYSTEM
Use IH Hy-Tranle> Fluid or a good quality
SAE -I OW engine oil.
This unit is a completely self-contained hy-
draulic gear pump with delivery of approxi-
mately 2-l/2-gallons per minute at pressures
up to 400 PSI, directional control valve, and
oil reservoir; with a companion hydraulic cyl-
inder and hoses connecting the power unit to
the cylinder. The unit has a built in safety
valve to eliminate overloading of the hydraulic
system and tractor attachments.
Remove the oil filler plug from the hydraulic
pump and fill to the level of the filler plug open-
ing then replace the plug. Fluid capacity is
approximately 3 pints.
Start the engine. adjust the throttle to fast
idle and test the hydraulic system. Check for
oil leaks at hose connections.
OPERATINGINSTRUCTIONS
To familiarize yourself with the operation
of the hydraulic unit. start the tractor engine
and adjust the throttle to fast idle. After the unit has been checked for opera-
tion, stop the engine, remove the oil filler plug
and add more fluid if necessary to bring it up to
the filler plug opening. Then replace the plug.
To raise the front or rear mounted equip-
ment move the control lever rearward until the
desired height is reached, then release the
lever and it will return to the center or neutral
position. The equipment will "hold" in what-
ever position you desire depending upon when
you release the control lever. To lower the
equipment move the control lever forward. The
lever will again return to the neutral position
when you release it.
Note: Never run the hydraulic unit without
hydraulic fluid. WARRANTY WILL BE VOID
IF RUN WITHOUT FLUID.
16

~
ENGINECOOLING
This tractor has an air cooled engine. Air
must be able to circulate freely around the
engine, through the screen and shroud, and
over the fins of the cylinder head and cylinderblock.
Keep these areas free of accumulated
dirt and trash or the engine will overheat and
result in damaged moving parts.
DRY-TYPEAIR CLEANER
Incoming air for combustion is filtered by
a dry-type air cleaner having a filter element
inside of the cover.
Remove and clean or replace the element
with a new one when loss of power is
noticeable.
Illust. 17
Removing the air cleaner filter element.
Replacing the Element
Replace the element with a new one if dirt
does not drop off easily, or if it is bent,
crushed or damaged. When replacing the ele-
ment be sure the back plate is securely tight-
ened to the carburetor. Replace the backplate
Cleaning the Element if bent or cracked, then be sure the element
fits snugly around the inside edge of the air
To clean the element, remove the wing nut cleaner base. The gasket sur~ace s of the ele-
and air cleaner cover (1IIust. 17)then remove the ment must be flat against the back plate and
element and tap it lightly on a flat surface to cover to seal effectively. The copper washer
cause the loose dirt to falloff. Handle the must be in place between the cover and the
paper element with care to avoid perforations. wing nut to seal and prevent unfiltered air from
Do not use compressed air to remove the dirt entering through the hole in the cover. Then
as this can rupture the element. Do not wash replace the cover and tighten the wing nut
or use a solvent. finger tight.
ELECTRICAL SYSTEM
The twelve-volt electrical system on a the tractor, the key must be turned to the
tractor with electric starting consists princi- "OFF" position to prevent battery discharge.
pally of a motor-generator, voltage regulator,
and a twelve-volt battery. SAFETY STARTING SWITCH
Use the illustrations onpage20 and wiring The safety starting switch activated by the
diagrams on page21, as a guide for identifying clutch or brake pedal serve~ to prevent start-
the va~ious electrical units a?d for tracing the ing the engine accide~tally.
electrIcal cables and connectIons. Be sure all
connections are clean and securely fastened.
IGNITIONSWITCH CHARGEINDICATOR
This instrument (1!lust. 5) indicates whether
the motor-generator is charging or the battery
is discharging. If it shows discharge contin-
uously, investigate the cause to avoid com-
pletely discharging the battery and possible
damage to the motor -generator. Refer to poge 22
for additional information on electrical equip-
ment.
Turn the key clockwise to turn on the
ignition. With electric starting, a further turn~actuates
the motor-generator. The key cannot,be
removed when in the lION" position.
Note: When the t:ngine is not operating or
the engine has stalled and the operator leaves 17

ELECTRICALSYSTEM
IGNITIONTIMING
LIGHTINGSWITCHBUTTON
Pull the button (1IIust.20A) out to turn on the
lights and push it in to turn off the lights.
CIGARETTELIGHTER
Push the lighter to make electrical contact.
When it pops back it is ready for use.
SPARKPLUG
Hote: Remove all dirt from the base of the
spark plug before removing the spark plug.
Remove the spark ~lug after every 100
hours of operation for cleaning and checking
the gap. SeeIJlust.18. When making this adjust-
ment, always bend the outer electrode. Never
bend the center electrode. as it may damage
the insulator. If the gap between the electrodes
is too great, the engine will misfire and be
hard to start.
Always use a spark plug wrench when re-
moving or reinstalling the plug.
Be sure the gasket is in good condition,
and screw the plug in tightly. Do not tighten
more than enough to compress the gasket to
seal the plug and assure a good heat transfer
between the plug and the cylinder head. Tighten
the plug 1/2 to 3/4 turns past finger tight.
Illust.18A
Adjusting the breaker points.
Set gap at .O20.inch.
Cleaning the Spark Plug
Sandblasting is the recommended method of
cleaning the spark plug. Never scrape or clean
the insulator with anything which wiU scratch
the porcelain. Scratched porcelain allows
carbon and dirt to accumulate much faster.
Remove the breaker point cover after every
100 hours of operation for cleaning the points
and resetting the gap (1IIust. 18A). Replace badly
pitted or burned points.
For more precise timing, a timing light I
should be used. The engine has a timing sight
hole which is located in the right side of the
engine bearing plate on the International Cub
Cadet 72 Tractor or in the right side of the
blower housing in the International Cub Cadet
104, lOS, 124 and 125 Tractors. See"lust. 18B.
With the engine running at 1/3 throttle, or
more, adjust the breaker points until the "SP"
mark on the flywheel is centered in the sight
hole. Nate: The "SP" mark will appear 20 de-
grees before top dead center. The other mark
is the top center mark and is stamped with
"DC " below the mark.
Illust. 18
Checking the spark plug gap.
Set gap at .O25-inch.
Illust. 18B
Location of timing sight hole.
(Motor-generator has been removed to better
illustrate the location).
Replace a defective plug with a new plug.
See your International Harvester dealer for a
correct replacement plug.
18
This manual suits for next models
4
Table of contents
Other International Harvester Company Lawn Mower manuals

International Harvester Company
International Harvester Company 75 User manual

International Harvester Company
International Harvester Company 105 User manual

International Harvester Company
International Harvester Company Cub Lo-Boy C-60 User manual

International Harvester Company
International Harvester Company CUB User manual

International Harvester Company
International Harvester Company C-2 User manual

International Harvester Company
International Harvester Company International Cadet 60 User manual
