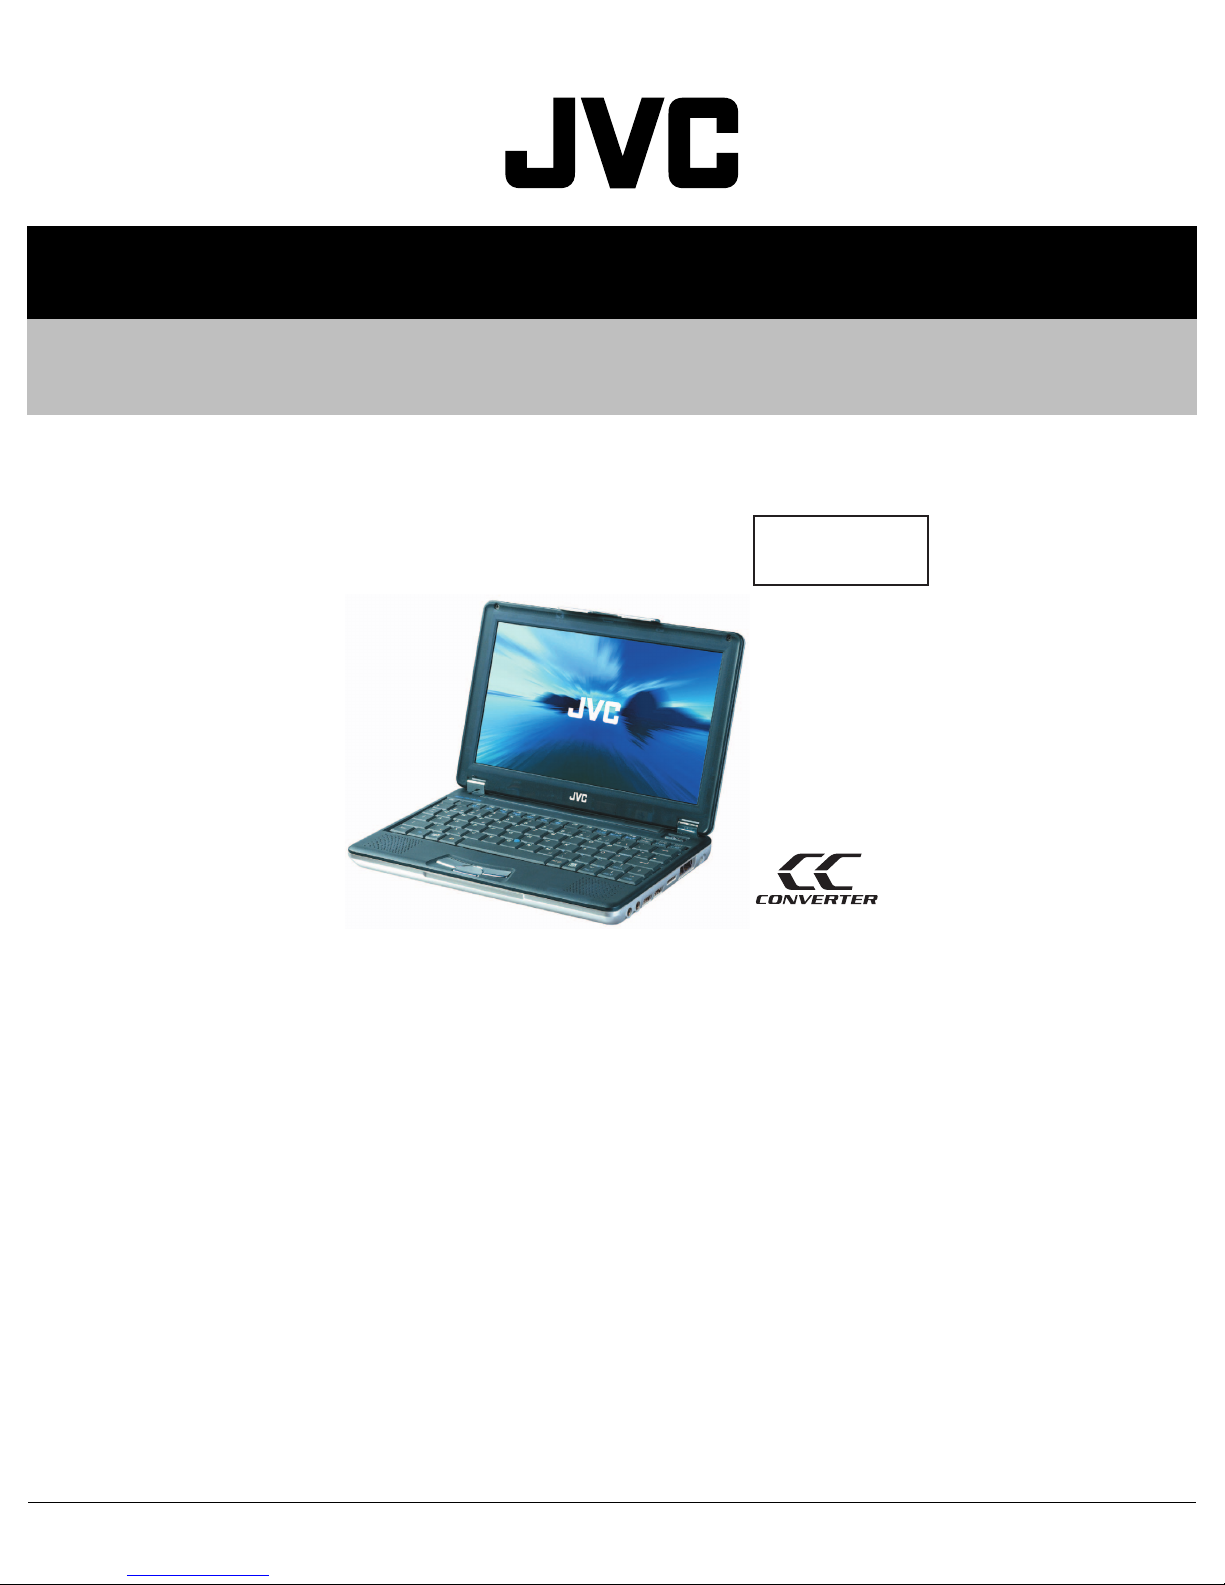
JVC MP-XP741DE User manual

SERVICE MANUAL
COPYRIGHT © 2005 Victor Company of Japan, Limited No.XE007
2005/2
Mobile mini note PC
XE00720052
MP-XP741DE
TABLE OF CONTENTS
1 PRECAUTION. . . . . . . . . . . . . . . . . . . . . . . . . . . . . . . . . . . . . . . . . . . . . . . . . . . . . . . . . . . . . . . . . . . . . . . . . 1-2
2 SPECIFIC SERVICE INSTRUCTIONS . . . . . . . . . . . . . . . . . . . . . . . . . . . . . . . . . . . . . . . . . . . . . . . . . . . . . . 1-2
3 DISASSEMBLY . . . . . . . . . . . . . . . . . . . . . . . . . . . . . . . . . . . . . . . . . . . . . . . . . . . . . . . . . . . . . . . . . . . . . . . 1-3
4 ADJUSTMENT . . . . . . . . . . . . . . . . . . . . . . . . . . . . . . . . . . . . . . . . . . . . . . . . . . . . . . . . . . . . . . . . . . . . . . . . 1-8
5 TROUBLESHOOTING . . . . . . . . . . . . . . . . . . . . . . . . . . . . . . . . . . . . . . . . . . . . . . . . . . . . . . . . . . . . . . . . . . 1-9
Area Suffix
DE ----------- Germany

1-2 (No.XE007)
SECTION 1
PRECAUTION
This service manual does not describe PRECAUTION.
SECTION 2
SPECIFIC SERVICE INSTRUCTIONS
2.1 Another sales option list
2.2 Supplies it as a spare parts (Increase module)
Product category Model name
Lithium-Ion BATTERY BN-LS12E
Lithium-Ion BATTERY BN-LL22E
EXTERNAL DISPLAY CABLE MP-VGX2E
CARRYING BAG MP-BGX3E
CD-ROM DRIVE MP-CDX1E
CD-RW DVD-ROM DRIVE MP-WDX2E
Product category Model name
256M Type Increase memory AP256MJVC
512M Type Increase memory AP512MJVC

(No.XE007)1-3
SECTION 3
DISASSEMBLY
3.1 Disassembly procedure
3.1.1 Removing the internal battery
(See Figure 1)
Prior to performing the following procedure, remove the external
battery.
(1) Remove one screw Aon the bottom of the main body.
Screw A : 13-MAKXC100W(M2 x 10L(K)W-NI)
(2) Pull out the internal battery in the rear direction.
Fig.1
3.1.2 Removing the keyboard assembly
(See Figure 2 to Figure 4)
(1) Push the three latches (a) in the upper part of the keyboard
with a single-slotted screwdriver or a flat screwdriver, and
lift the keyboard.
Fig.2
Fig.3
(2) Disconnect the wires from connectors CON3 and CON4 on
the main board respectively.
Fig.4
A
Internal battery
Latch a Latch a Latch a
Keyboard
In attaching
the keyboard
In removing
the keyboard
In removing
the keyboard
In attaching
the keyboard
22
11
2
2
1
1
CON3
CON4
Key board Main board

1-4 (No.XE007)
3.1.3 Removing the top case and LCD panel assembly
(See Figure 5 to Figure 10)
• Prior to performing the following procedure, remove the key-
board assembly.
(1) Insert a single-slotted screwdriver or a flat screwdriver in a
space bon the underside of the hinge cover. Then, remove
the hinge cover by pulling the screwdriver in the direction
indicated by the arrow.And then, remove one more hinge
cover at the other side of the main body.
Fig.5
(2) Remove the eight screws Battaching the top case.
Screw B : 13-MAKXC60W(M2 x 6L(K)W-NI)
(3) Reverse the main body, and remove the four screws Con
the bottom of the main body.
Screw C : 13-MBSOC120W(M2 x 12L(S)W-NI, NY)
A special screwdriver is used when removing screw C.
(4) Disconnect the connector wire from the connector CON2
on the main board. Similarly, remove the connector wires
from the connectors CON5, CON6, and CN3.
Fig.6
Fig.7
(5) Remove the three screws Nattaching the DIMM cover, and
remove the DIMM cover.
Screw N : 13-MBKXC031W
The connection part of two wires connected to the LAN
board in a main board reverse side is pinched and re-
moved.
• When re-connecting, the wire of a gray is connected to
the ”AUX” terminal on a LAN board, and a black wire con-
nected to the “MAIN” terminal.
Moveover, please connect with a LAN board through a
wire in the hole on a main board.
Fig.8
Space b
Hinge cover
Hinge cover
B
BB
B
BB
CON2
CN3
CON5 CON6
Shield plate Top case
C
N
C
C
C
A special screwdriver
is used when removing
screw C.
Part name : SCREW DRIVER
Part number : 22-240000310
DIMM cover
DIMM cover
Wire connection part
Hole
Main board LAN board

(No.XE007)1-5
(6) Remove one latch con the rear side of the main body, and
release the four joints dwhile moving the top case in the
rear direction.
Fig.9
Fig.10
3.1.4 Removing the main board
(See Figure 11 and Figure 12)
• Prior to performing the following procedure, remove the key-
board assembly, the top case, and the LCD panel assembly.
(1) Remove one screw D(short), one screw E(long), attaching
the main board.
Screw D : 13-MAKXC060W(M2 x 6L(K)W-NI)
Screw E : 13-MAKXC100W(M2 x 10L(K)W-NI)
(2) Lift the main board while pushing the microphone and
headphone jack in the direction indicated by the arrow, and
remove the main board.
Fig.11
CAUTION:
• In attaching the main board, put the lever of the PCMCIA slot
through the bottom case, and then push and attach the mi-
crophone and headphone jack.
• Be careful not to damage the battery detector switch on the
backside of the main board.
Fig.12
Latch c
Joint d
Bottom case
Top case
1
1
2
2
Main board
D
E
Microphone and
headphone jack
2
2
1
Main board
Bottom case
Battery detector
switch

1-6 (No.XE007)
3.1.5 Removing the parts on the main board
(See Figure 13 to 15)
• Prior to performing the following procedure, remove the main
board.
*Removing the fan assembly
(1) Remove the four screws Fattaching the fan assembly.
(2) Disconnect the connector wire from the connector CON14
on the main board.
Screw F : 13-MBKXC031W(M2 x 3L(K,D3.4)W-NI,NY)
*Removing the hard disc drive
(1) Remove one screw Gat the side of the main board where
the hard disc drive is not attached.
(2) Remove the hard disc drive by moving the hard disc drive
in the direction indicated by the arrow.
(3) HDD BRACKET (two places) installed in the side of the
hard disk drive is removed.
Screw G : 13-MAKXF030B(M3 x 3L(K)B-NI)
*Removing the modem pack
(1) Remove one screw Hattaching the modem pack.
Screw H : 13-041203210(M2 x 3L(K)B-NI)
(2) Pull out the socket wire connected to the modem pack.
(3) Lift the modem pack, and remove it.
Fig.13
Fig.14
*Removing the LAN board assembly
(1) Since a LAN board will be lifted upwards if the esection of
LAN board both ends is extended outside, it draws out as
it is.
(2) When attaching, it is a procedure contrary to the time of re-
moving, a LAN board is aslant inserted to a socket, and a
LAN board is pushed until it is fixed.
Fig.15
Hard disc drive Fan assembly
CON14
F
Modem pack
H
G
Socket
e
e
LAN Board

(No.XE007)1-7
3.1.6 Removing the top case and the LCD panel assembly
(See Figure 16)
• Prior to the following procedure, remove the top case and the
LCD panel assembly from the bottom case.
(1) Remove the two screws Iattaching the hinge.
Screw I : 13-041206211(M2 x 6L(K)B-NI NY)
(2) Remove the tapes fixing the two wires of the LCD panel as-
sembly if necessary.
Fig.16
3.1.7 Removing the LCD panel assembly
(See Figure 17 and Figure 18)
• Prior to the following procedure, remove the LCD panel as-
sembly.
(1) Remove the two rubber pads (fixed to the panel with adhe-
sive tapes) by using a sharp tool.
(2) Remove the two screws Jattaching the LCD panel frame.
Screw J : 13-MBKXD040W(M2.5 x 4L(K)W-NI,NY)
(3) Lift and the centers of the four sides of the LCD panel from
inside to an outward direction. (It is soft enough to be lifted.)
Then, latches in the centers of the four sides and also other
latches are removed. To remove all the latches, lift the four
sides from inside to an outward direction.
*Be careful not to damage the LCD or apply any stress to
the LCD.
(4) Remove the two screws Kattaching the LCD.
Screw K : 13-MBKXD040W(M2.5 x 4L(K)W-NI,NY)
(5) Remove one screw Lattaching the inverter board, and dis-
connect the socket wire from the connector CN2 on the in-
verter board.
Screw L : 13-MAK2C023B(M2 x 2.3L(K,Ø4.9)B-NI)
3.1.8 Remove the LAN antenna
(See Figure 18)
• Prior to the following procedure, remove the LCD.
(1) Remove the two screws Mattaching the LAN antenna.
(2) Remove the tapes fixing the wire of LAN antenna if neces-
sary.
Fig.17
Fig.18
I
I
Rubber pad and screw J
LCD
LCD
Latch
Latch Latch
Latch
Inverter board
K
LCD
LCD
K
Q
L
LAN Antenna
M
LAN Antenna
M

1-8 (No.XE007)
SECTION 4
ADJUSTMENT
This service manual does not describe ADJUSTMENT.

(No.XE007)1-9
SECTION 5
TROUBLESHOOTING
5.1 Pre installation procedure
No data such as Windows XP is recorded in a HDD supplied as a service part.
After HDD is replaced, pre installation to record data onto HDD should be carried out.
The following materials are needed:
• DVD-ROM & CD-R/RW DRIVE (model name MP-WDX2E)
• CD for HD Image installation
Procedure
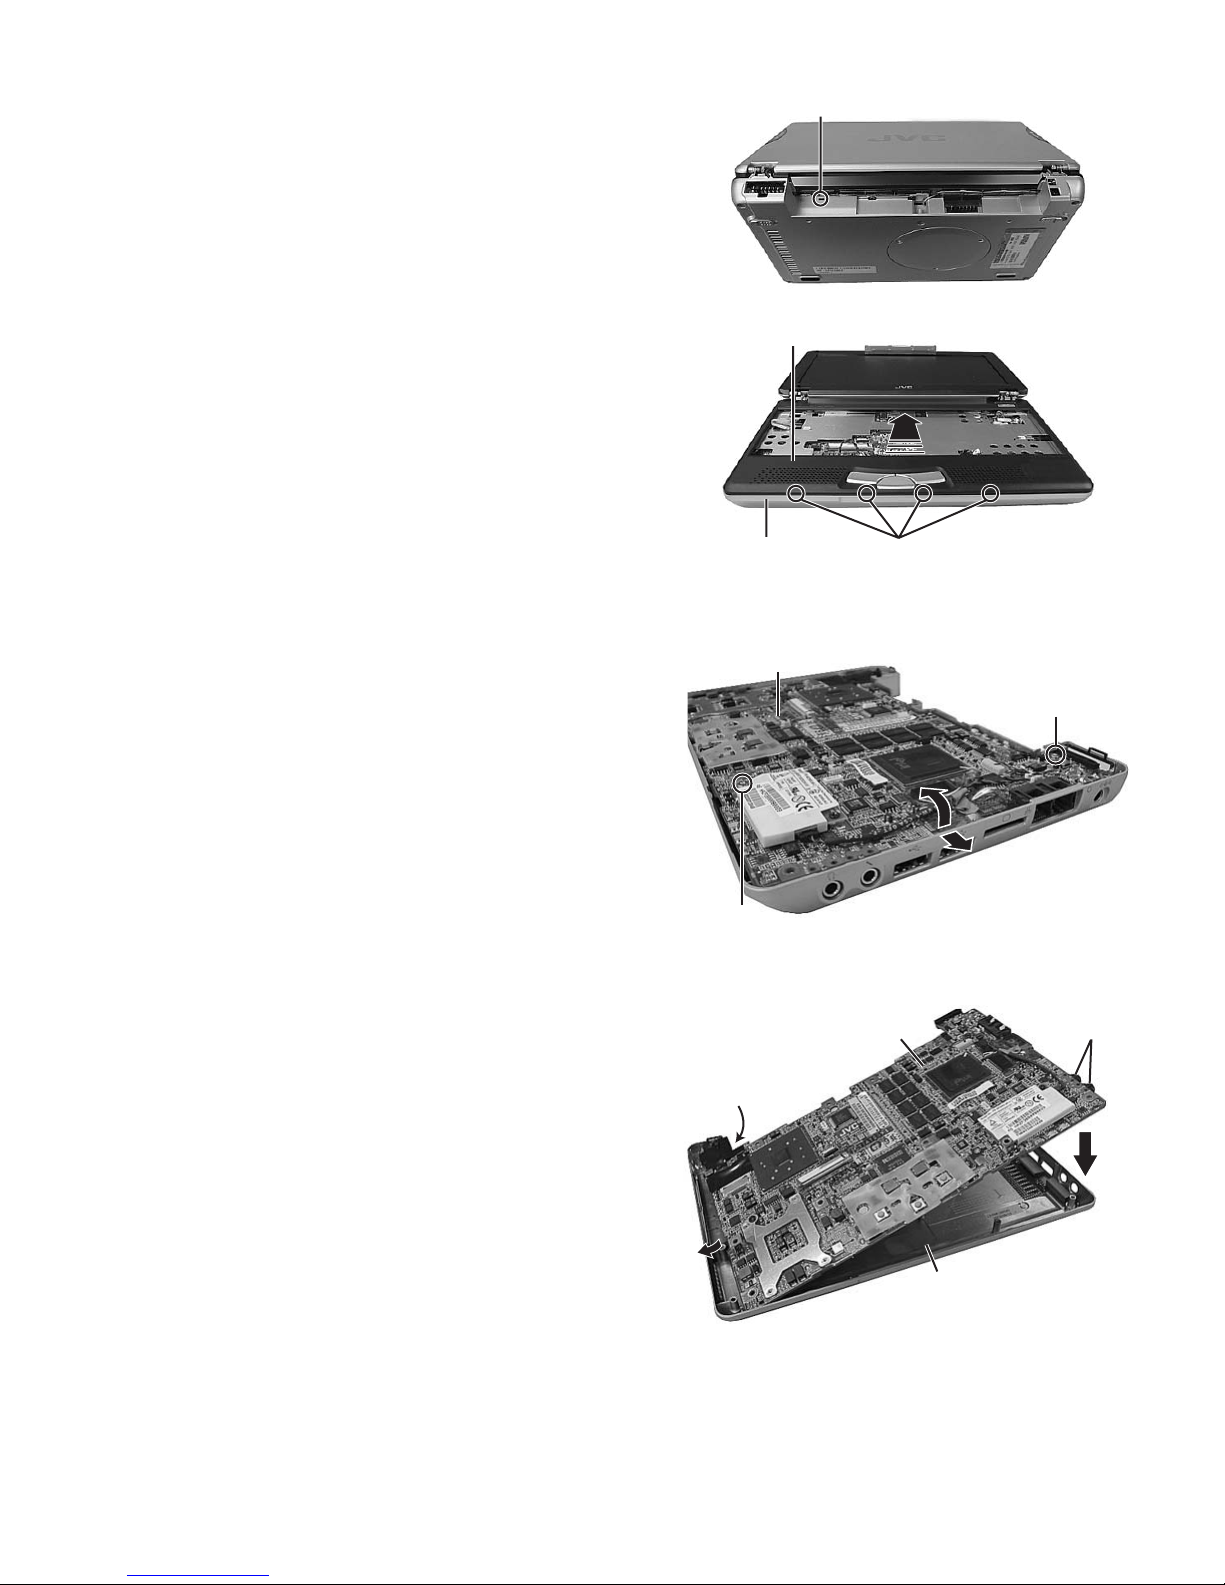
(1) Remove all the appliances connected to the Mobile mini note PC.
(2) Connect the PC to AC adaptor to supply external power source for the PC.
(3) Set the HD Image disc in DVD-ROM & CD-R/RW DRIVE, and connect DVD-ROM & CD-R/RW DRIVE to the PC.
(4) Turn the PC on.
(5) Press "F11" button while "JVC" is displayed on the screen.
Continue pressing the “F11” button until boot menu is displayed.
(6) Select a drive name of DVD-ROM & CD-R/RW DRIVE by using "↑" and "↓" buttons, and press “Enter” button.
(7) When "Press any key to continue..." is displayed, press any key. Then, installation starts.
After installation procedure finishes, the screen shown in Figure 1 is displayed.
When this screen is displayed, press the power button to turn the PC off.
Pre installation is completed in the procedure above.
Fig.1
If error 1701 is displayed
If error 1701 is displayed, delete the data in HDD in the following way, and start the pre installation procedure from the beginning.
The following materials are needed:
• fdisk.exe (bootable disk)
• USB floppy disk drive
(1) Prior to the procedures below, insert an fdisk.exe disc in a floppy disk drive, and connect the floppy disc drive to the PC.
(2) Turn the PC on.
(3) Press "F11" button while "JVC" is displayed on the screen.
Continue pressing "F11" button until a boot menu is displayed.
(4) Select a floppy disc drive by using "↑" and "↓" buttons, and press "Enter" button.
(5) After a while, the screen shown in Figure 2 is displayed. Then, enter "fdisk," and press "Enter" button.
Fig.2
(6) "Do you wish to enable large disk support (Y/N) ......?" is displayed. Then, enter "Y," and press "Enter" button.
Fixed Disk Setup Program is opened.
(7) Delete all the areas in HDD by using Fixed Disk Setup Program.
Follow the procedure indicated on the screen.
(8) Finish Fixed Disk Setup Program by using "Esc" button, and turn the PC off.
(9) Remove the floppy disk drive and start the pre installation procedure from the beginning.
Finish
Q:\>_
Starting Windows 98...
Microsoft(R) Windows 98
(C)Copyright Microsoft Corp 1981-1998.
A:\> fdisk

1-10 (No.XE007)
5.2 BIOS update procedure
After the main board replacement, conform BIOS version to the previous BIOS version. (However, if the client wish an update, comply
with the client's request.) When BIOS update is required as a result of modification, refer to JVC homepage for detail.
Notice for BIOS update
• Make sure to exit all the applications or programs that are running. Resident software such as antivirus software must also be
either finished or canceled.
• Disconnect all the peripheral appliances, modem cables, and LAN cables.
• Do not perform system shutdown, reset operation, or power cut off during the update procedure as it may disable restart function.
• Cancel all the passwords on the BIOS or HDD when starting BIOS, and then perform the update procedure.
• Make sure to connect to AC adapter and fit with a fully loaded battery when updating. (Prepare two ways of power supply in case
of power down, adapter dropout, or battery shortage.)
The following materials are needed
• USB connection floppy disc drive (Provision from JVC)
• A_FLASH2 disc (Provision from JVC)
• BIOS update file (Download from JVC homepage)
Update procedure
1. BIOS update disc creation
(1) Download an update file from JVC homepage.
(2) Save the updated file to the route of A_FLASH2 disc.
2. Start from the USB connected floppy disc drive.
(1) Insert BIOS update disc into the floppy disc drive and connect it to the PC via USB.
(2) Press the button to turn on and to start DOS. [A:\>_] is displayed on the screen.
3. Execution
(1) Input[aflash2]after [A:\>_] then press Enter key.[ACPI BIOS Flash Memory Write V2.05] will start running.
(2) Display on the screen is as shown below, input [2] then press Enter Key.
(3) Display on the screen is as shown below, input the update file name.
(e.g.) 0201j3n.rom
•If you input a wrong file name, [FILE NOT OPEN]will be displayed on the screen. Press any key to start again and input
the correct file name.
(4) Input [Y] answering the question on the screen shown as below. The update will start.
(5) When the update is completed properly, [Successfully! press any key to continue.] is displayed. Press any key to return to
the initial screen.
(6) Press [ESC]key to return to DOS screen. Turn the switch off to finish the procedure.
Choose one of the followings :
1.Save current BIOS to file
2.Updata BIOS to flash Memory
Enter choice [ 2 ]
Please input file name of new BIOS : _
Are your sure to replace BIOS? (Y/N) : [ Y ]

(No.XE007)1-11
5.3 Diagnosis on HDD
By operating this procedure, HDD failure is self diagnosed.
The following materials are needed. (Provision from JVC)
• USB connection floppy disc drive
• Drive Fitness Test disc
Diagnosis procedure
1. Start from USB connected floppy disc drive.
(1) Insert Drive Fitness Test disc into the floppy disc drive and connect the floppy disc drive to the PC via USB.
(2) Press the power button to turn the PC on. The PC DOS 7.0 Startup Menu will start running shortly. Input [2] and press EN-
TER key.
2.Execution
(1) When [License Agreement] is displayed, input [A].
(2) When [Device List] is displayed, select [Primary Master] and input [Y].
(3) The screen returns to [Device List] confirmation display. Input [A].
PC DOS 7.0 Startup Menu
1. SCSI and ATA support
2. ATA support only
Enter a choice : 2
License Agreement
I don't AgreeI Agree
Device List
NoYes
00 ATA Primary Master **************** **.** GB
01 ATAPI Secondary Master ****************
Device List
Advance Test
Help
Rescan BusQuick Test
00 ATA Primary Master ****************
01 ATAPI Secondary Master ****************

1-12 (No.XE007)
(4) When [Advanced Test] is displayed, input [S].
(5) [Test Results] is displayed. If no bad sector is detected on the HDD, [Operation completed successfully] is displayed. As a
result the HDD has been diagnosed as proper.
(6) Input [O], to return to [Device List] display. Press [Alt] key and [X] at the same time, [Confirmation] screen is displayed. Next
input [Y].
(7) When [Exit] screen is displayed, press power button to turn the PC off to finish the procedure.
Advance Test
HelpStart Cancel
Test Results
Ok
Operation completed successfully
Disposition Code = XXXX
Confirmation
Yes No
Do you want to exit this program ?
Exit
Please reboot your system now !

(No.XE007)1-13
5.4 Caution in replacing a bottom case
• Serial label and COA LABEL are not stocked as service parts. Reuse the serial label and COA LABEL. Use glue remover when
removing the serial label and COA LABEL.
Parts No:UN-001
Parts name:SUBSIDIARY MATERIAL
Removing the serial label
(1) Drip a few drops of glue remover onto the spatula .
(2) Immediately remove the serial label slowly and carefully with a spatula.
(3) If any stickiness left on the surface of the label, drip few more drops of glue remover and wipe with some tissue paper.
5.5 Main board replacing procedure
(1) Replace parts from the previous MAIN BOARD.
• Replace [HDD].
• Replace [LAN BOARD ASSY].
• Replace an expansion memory. (If there is any)
(2) Adjust after the main board replacement.
• Conform the BIOS version to the previous MAIN BOARD.
• If the client wish an update, comply with the client's request.
(3) Perform an operation check after the replacement of the main board.
Perform an operation check according to the [ Operation check item list after the repair is completed ].
5.6 Operation check item list after the repair is completed
Item Contents Required equipment
1 IEEE1394 Is connected with IEEE1394 port the Digital video camera and
do recognize it?
Digital video camera made of our company.
2 PC CARD Check whether PC card operates properly when it is connected
to PC card slot for Card Bus.Check whether PC card operates
properly when option CD-ROM drive is inserted in PC card slot.
PC card corresponding to Card Bus on the
market.(Example:100Mbase-T LAN card)CD-
ROM drive of option.
3 USB Is connected with USB the Digital video camera and do recog-
nize it?
Is connected with USB the mouse and do recognize it?
Digital video camera made of our compa-
ny.USB mouse on the market.(Transfer
rate:Low)
4 MIC Is connected with the MIC terminal a MIC on the market, and
can record it?
MIC on the market.
5 HEADPHONE Is connected with the headphone terminal a headphone on the
market, and can hear a sound?
Headphone on the market.
6 LAN Do connect with the network, and do recognize it? Network
7 WIRELESS
LAN
Do connect with the network, and do recognize it?
Does a WIRELESS LAN ON/OFF switch operate?
Network, Access point for wireless LAN
8 MODEM Can the telephone line be connected, and it connect it with the
Internet?
Telephone line.PPP account to connect dial-
up with the Internet.
9 VGA Does it connect with the monitor, and is the image displayed? Monitor for PC
VGA Cable (Provision)
10 DC in Can AC be driven? General power supply
11 BATTERY Is the outer battery recognized? Outer battery
12 LID SWITCH Does the LID switch work?
13 RESET Is RESET effective?
14 KEYBOARD Is the key input effective?
15 STICK Is the STICK effective?
16 THREE BUT-
TON
Does each button operate normally?
17 SPEAKER Is the sound emitted from both channels of the speaker?
18 RUNNING Is not there trouble after it playback by using Windows media
player for continuousness eight hours?

(No.XE007)
AV & MULTIMEDIA COMPANY MOBILE IT CATEGORY 1644, Shimotsuruma, Yamato, Kanagawa 242-8514, Japan
Victor Company of Japan, Limited
VPT
Printed in Japan

(No.XE007)3-1
PARTS LIST
* All printed circuit boards and its assemblies are not available as service parts.
* (x_) in a description column shows the number of the used part.
[MP-XP741DE]
- Contents -
Exploded view of general assembly and parts list
Packing materials and accessories parts list
3-2
3-9
Area Suffix
DE ----------- Germany

3-2(No.XE007)
Exploded view of general assembly and parts list
Final assembly (1/2)
Refer to
MAIN BOARD ASSY
43
37
42
42 42
85
Block No. M1MM
24
26
25
48
77
77
77
77
81
PLEASE be sure to stick
(25)"15-100323910/ INT BATT.LABEL"
and (26)"15-100324111/ WARNING LABEL"
on (24)"INTERNAL BATTERY" in shipment.
47
41
67
36
36
47
47
28
28
47
27
1
47
43
70
12
41
49
49
32
33
33
A
B
11
47
47
47
47
6
83
84
86
87
B
C
A
43
70
D
I
H
73
92
91

(No.XE007)3-3
Final assembly (2/2)
Refer to
INVERTER
BOARD ASSY
15
44
44
44
19
44
19
18
13
17
22
23
20
14
45
C
D
G
G
90
Block No. M1MM
L
L
H
76
75
I
J
J
16

3-4(No.XE007)
Parts List (Final assembly)
Block No. [M][1][M][M]
*1 PLEASE be sure to stick (25)"
15-100323910
/ INT BATT.LABEL" and (26)"
15-100324111
/ WARNING LABEL" on "INTERNAL BATTERY" in shipment.
Symbol No. Part No. Part Name Description Local
1 60-N6TMB1000A02 MAIN BOARD
6 15-135001010 AMI BIOS LABEL
11 IC25N040ATMR04 40GB HDD
12 04-N6K1KGER3 KEYBOARD
13 LTM09C362J LCD
14 60-N6QIN1000 INVERTER BOARD
15 14-100305400 CABLE FOR INVERTER
16 08-20DN8011N COAXIAL CABLE
17 13-N6T2AM010 LCD COVER ASSY
18 13-N6K12P143 LCD BEZEL
19 13-N6K10L220 LCD RUBBER (x2)
20 13-021021000 WASHER
22 13-N6K10L030 INVERTER MYLAR
23 13-N6Q10C031 AL-FOIL
24 70-N6R1B2000 INTERNAL BATTERY *1
25 15-100323910 INT BATT. LABEL
26 15-100324111 WARNING LABEL
27 13-N6T1AP020 TOP CASE ASSY
28 LE40887-001A WET CHECK SHEET (x2)
32 13-N6R1AP050 BOTTOM CASE ASSY
33 13-N6R10L010 FRONT FOOT (x2)
36 13-N6R10P081 HINGE COVER (x2)
37 13-N6R12P030 DIMM COVER
41 13-041206211 SCREW M2*6L(K)B-NI NY(x2)
42 13-MBKXC031W SCREW DIMM COVER(x3)
43 13-MAKXF030B SCREW M3*3L (K) B-NI(x3)
44 13-MBKXD040W SCREW M2.5*4L (K) W-NI NY(x4)
45 13-MAK2C023B SCREW M2*2.3L (K 4.9)B-NI
47 13-MAKXC060W SCREW M2*6L (K) W-NI(x9)
48 13-MAKXC100W SCREW M2*10L (K) W-NI
49 13-MBS0C120W SCREW M2*12L (K)W-NI NY(x2)
67 13-N6K10L260A TRACK POINT CAP
70 13-N6R10M020 HDD BRACKET (x2)
73 WM3B2200BGMW WLAN BOARD ASSY
75 14-152012100 WLAN ANTENNA L
76 14-152012000 WLAN ANTENNA R
77 13-N6L10L020 REAR FOOT (x4)
81 EXTERNAL BATTERY
83 15-100316060 WINDOWS LOGO
84 252352-001 CENTRINO LABEL
85 15-100398310 RATING LABEL
86 LE40888-003A COA LABEL(PRO)
87 13-N6R10L160 THARMAL PAD
90 13-N41106010 CONDUCTIVE TAPE
91 15-100398900 RATING LABEL
92 15-100379910 WARNING LABEL

(No.XE007)3-5
TOP CASE ASSY
LCD COVER ASSY
1
1
1
1
1
1
2
3
2
3
5
4Block No. M2MM
3
2
1
LCD Cover assembly
1
Block No. M3MM

3-6(No.XE007)
Parts List (TOP CASE ASSY)
Block No. [M][2][M][M]
Parts List (LCD COVER ASSY)
Block No. [M][3][M][M]
Symbol No. Part No. Part Name Description Local
1 13-041203210 SCREW M2*3L(K)B-NI(x6)
2 04-170003900 SPEAKER SET (x2)
3 13-N6R10L050 SPEAKER RUBBER (x2)
4 13-N6R10L170 THERMAL PAD
5 13-N6R10L100 THERMAL PAD
Symbol No. Part No. Part Name Description Local
1 13-MBKXD040W SCREW (x4)
2 13-N6R10P031 J2N HINGE L
3 13-N6R10S040 J2N HINGE R
Table of contents
Other JVC Laptop manuals