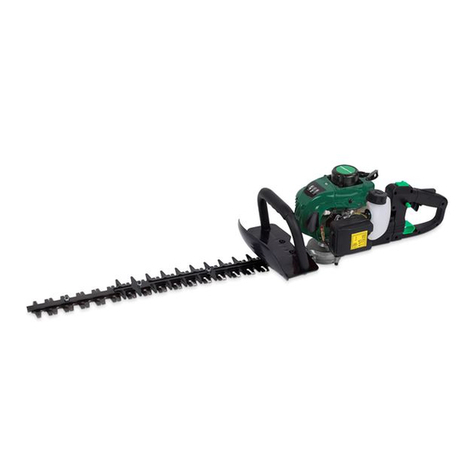
Kellfri 27-HRT160 User manual

Read this manual carefully
before using the product!
Translated from the original
27-HRT160
HEDGE TRIMMER

INTRODUCTION
Thank you for choosing a product from Kellfri AB. By following general safety information,
operating instructions and common sense, you will have many years of enjoyable use of the
product. Kellfris equipment and products are aimed to be use by active farmers with high
demands on functionality.
PRODUCT INFORMATION
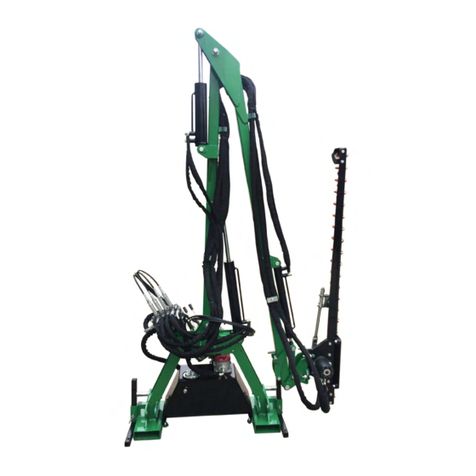
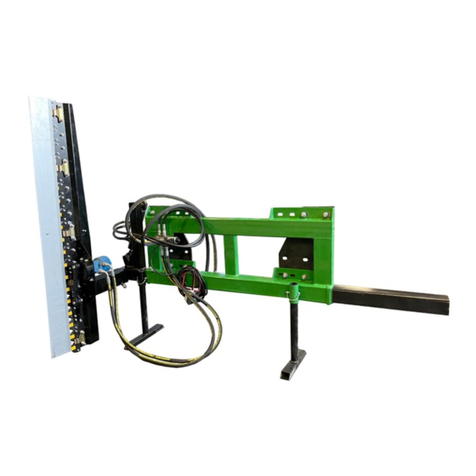
Hedge trimmer with arm for mounting on the tractor’s three-point linkage or for frontloader
with pallet forks
you can use the hedge trimmer for trimming hedges, clearing saplings from roadsides and
removing protruding branches from trees, for example along eld edges where branches can
scratch tractors and equipment.
The hedge trimmer is supplied complete with tank, pump and valve block package, plus lever
kit with Teleex wire for controlling the hedge trimmer from inside the cab.
The ’lever kit’ that you lift into the cab is small and exible, as the valve is on the hedge trim-
mer and is controlled by Teleex wire, which is connected to the valve block package from the
levers. The length of the wire is 3 metres, so that it will work on the frontloader or three-point
linkage.
The hedge trimmer’s hydraulics are operated by a pump positioned on the tractor’s power ta-
ke-o. Working speed of the pump is 540 rpm. This means that there is no need for large ows
from the tractor, the hedge trimmer is suitable for those with a small tractor with a PTO. When
using this hedge trimmer, it is important to remember to adjust the operation to the weight of
the tractor. We recommend the use of a tractor weighing about 1500 kg so that you can operate
the crane in its outermost positions.
The crane and the arm on which the cutting unit sits reach 5.5 metres up into the air and 4.8
metres horizontally outwards from the tractor.
TECHNICAL DATA 27HRT160
Length mm
Width mm
Height mm
Reach height: cm / horizontal: cm
Working width mm
Weight kg
Power requirements 25-40 hk
Recommended driving speed 3-8 km/h
Recommended rpm 540 rpm
Oil volume (tank) 20 L
IMPORTANT! BEFORE USING THE MACHINE
Check and tighten all bolts, nuts and all connections.
Lubricate all lubrication points and check the oil level in the tank as well as if
there is any leakage in the hydraulic system before operation.

SAFETY INFORMATION
Before using the product, please read the safety information and instruction manual and un-
derstand its contents for your own and others’safety. Always keep the safety information and
instruction manual easily accessible to the user of the product. Remember that it may be good
for your own and others’ safety to read the safety information every now and then. If the in-
structions manual is damaged or otherwise unusable, please contact and order a new one
from: Your retailer
The general safety instruction is also available from Kellfris website: www.kellfri.co.uk
Do not use this equipment if you are feeling sick, tired or in inuence of alcohol. Nor if you
are under the inuence of strong medications or drugs, suering from strong depression or
severe mental illness. Always follow the general trac rules and regulations and the rules of
the Animal Welfare Act. Persons under 15 years old and people with mental illness may not
use these product.
WARNING!
The machine’s original design must not under any circumstances be changed without the permission of the manufacturer.
Unauthorized modications and / or accessories can result in life-threatening or fatal injury to the operator or others.
PRODUCT SAFETY INFORMATION
Kellfris pasture topper is designed to operate eciently at 540 rpm. Make sure the PTO is set
to 540 rpm. The machine may only be used to cut hedges, bushes and grass. In addition, the
machine should only be used with a suitable tractor (see product nformation) and operated
by a suitable PTO shaft. All other use is strictly prohibited.
The user of the machine should understand the contents of this manual before use, service
and installation of equipment to the tractor and all other relevant measures. Never wear jewel-
ry, loose clothing, ties, scarves, belts, unbuttoned jackets that can get caught in moving parts.
Always wear approved clothing that complies with the provisions of accident prevention pur-
poses, such as non-slip shoes, hearing protection, goggles and gloves. Wear a jacket with re-
ective stickers on the equipment used near public roads.
Contact your dealer, health authority or the nearest equivalent authority for information
about the current safety regulations and special provisions to guarantee the personal security.
Warning!
Always disengage the PTO shaft, Turn o the tractor engine and apply the parking
brake before adjustment is performed on the machine.
DANGER!
Never put your hands or feet near the machine without stopping the implement
and the tractor engine. The rotors may continue to rotate for up to 1 minute

WARNING!
Never use a tool or product with defective safety equipment.
• Never leave the equipment with the tractor engine running. Turn o the engine and ap-
ply the parking brake when you leave the piece of equipment, even for a short while.
• Never leave the gear retracted. The hydraulics can lose pressure and cause the implement
to fall down.
• Make sure that all guards are tted correctly and cannot come loose.
• The PTO shaft must be protected throughout its length. Make sure to anchor the safety
chain well.
• Only you who is driving the tractor shall be in the vicinity of the machine during work. No
one is allowed to stand underneath a suspended load
• Check before driving that no rocks are sticking up on the eld, or lying objects that can
be thrown out while operating.
Danger!
careful!
NB!
Warning!
This symbol indicates that a serious accident will occur if the instructions in the manual is not followed.
The accident resulting in serious injury, possibly death or serious property damage.
This symbol indicates that an accident will occur if the instructions in the manual is not followed. The
accident resulting in serious injury or property damage.
This symbol indicates that an accident could occur if the directions is not followed. The accident resulting
in personal injury or property damage.
NB! indicates the potential for the breakdown of the regulations is not followed.
Warning symbols identify important safety aspects in this manual to help you and others avoid hazards and ac-
cidents. When using the machine: Take extreme caution!
When using the machine in a company, the employer has the responsibility to ensure the user of the
machine has theoretical and practical knowledge of the machine and the operation is done safely.
Follow the country’s Health and Safety regulation. For more information, contact your Health and
Safety Executive.

PERSONAL PROTECTION
Always wear suitable clothing and footwear. Do not wear loose clothing or jewelry when using
the machine. Remember to put up long hair when operating rotating machines. Wear protec-
tive gloves, to prevent risking burns on contact with hot surfaces such as exhaust system, and
to avoid oil and gasoline on the skin. Hearing protection should be used when the engine is
running.
SURROUNDINGS
Make sure your working area is clear from people, children and objects before installing and
using the machine. Risk of serious injuries can occur during operation.
Take an extra caution when children are in the area where the equipment/ product is being
use or stored. Check the area for low hanging electrical wires. Be careful when working on
slopes and near ditches.
Always work alone with single - purpose equipments/products. Never have junk lying in your
area. Keep working areas clean. Always respect the risk zone.
Danger! Children in the area should be supervised.
INCASE OF EMERGENCIES
In case of an emergency please dial 112.
Keep cell phone or emergency phone available specially when working alone. First aid kit and
re extinguishers must be kept easily accessible during all work, maintenance and service.

WARNING LABELS
Make sure that the warning labels are always visible, clean the warning labels if necessary. Do
not wash with high pressure washer directly on the warning label. If any part of the decal is
worn or label becomes frayed or otherwise unreadable, order new decals.
SYMBOL EXPLANATION
Read the instruction manual! Before starting the operation.
Caution! Before maintenance, service, connection and discon-
nection of the machine, the tractor engine must switched o
and the ignition key removed.
Risk zone 15 m. Warning ejection! Keep distance!
Rotating Blades
- Warning leaking hydraulic uid!!
-Prohibition to be on the machine
- Warning! Risk of crushing behind the tractor when connect-
ing and disconnecting the implement. No person is allowed
nearby when connecting and disconnecting the machine.
CHECK AND TIGHTEN ALL BOLTS AND NUTS!
EFTERDRAG SAMTLIGA BULTAR OCH MUTTRAR!
HUSK EFTERSPÆNDING!!
TARKISTA JA KIRISTÄ KAIKKI RUUVIT JA MUTTERIT!
SPRAWDŹ I DOKRĘĆ WSZYTKIE ŚRUBY I NAKRĘTKI!
- Tighten all bolts, nuts and ttings before use.
- Lubrication
The equipment is CE-marked
- Warning! No one is allowed to stand under suspended load
- Keep away
NEVER allow anyone to be on the machine!
The machine is designed for solitary work

BEFORE USE
Read the safety information and instruction manual carefully. Be sure you understand the
safety measures, instruction manual and warning labels. Use common sense when operating
the machine and use appropriate personal protective equipment.
Always check the performance and the machine combination that are used. It’s highly impor-
tant these matches in a satisfactory manner. This is to ensure the product or the function and
most important yours and others safety. Do visual inspection of equipment or product before
use. Fix or replace damaged or worn parts immediately to reduce the risk of injury. Lubricate
moving parts and check that all screw-nuts and bolts are tightened.
Warning!
For safety, this product should only be used in the manner described in this man-
ual.The user is responsible for the instruction to be read through and followed.
Learn and remember the correct working methods. Beginners should always keep a low speed,
use extreme caution before routine and product knowledge is achieved. The user/customer is
responsible to handle the situation correctly. The product should not be taken into use unless
it can be done in a safe way for the user.
Read the tractor’s manual before connecting machine.
WORKSTATION: The driver must remain in the driver’s seat during the the entire operation.
If the operator need to leave the tractor, the PTO must be disengaged, the tractor engine shut
o and the parking handbrake must be applied.
Warning!
NEVER RUN THE HYDRAULICS WHEN THE TRACTOR IS TURNED OFF
What to consider when operating a machine with the PTO shaft
The transmission gearbox is protected by both the drive shaft and the shear bolt. All protec-
tion should be eective and in good condition. If protections condition is poor or worn, the
protection should be replaced before implement is used.
DANGER!
If the PTO shaft is not properly protected, this can cause death because it can
catch parts of the body or clothing and cause life-threatening injuries.
Make sure the safety chain is properly anchored to the PTO-shaft and that the PTO shaft is pro-
tected over its entire length. Ensure that PTO shaft spins easily inside the protective tube. Hold
the spline groove clean and well lubricated so that the drive shaft can be connected easily.
Read PTO shaft manual adjustment and use of PTO shaft.

RISKRISKS AND HAZARDS OF USE OF MOWING MACHINE
Risk of crushing
Bystanders may be injured when the machine is lowered to the cutting position. The machine
has crushing points around the hinge areas and between the three-point hitch mount and the
main body.
Rotating blades
All persons will be at risk of injury if they stick out their hands or feet under the machine when
it is lifted from the ground and the blades are rotating.
Risk of pinching or risk of trapping body parts
This risk is common in transmission devices such as belt drives, gears and rollers. Ensure that
all guards are tted correctly.
Risk during disengaging of the machine
The heavier the rotating part is, the longer it will continue to rotate after the drive has been
switched o. This feature is called ”free-wheeling” . Rotating blades and other components,
such as drive shafts, etc. will continue to spin after the drive has been disconnected. Damages:
• When the operator releases the equipment, and try to clean or adjust the machine
before the components have stopped rotating.
• When the shear bolt in the protective device in the power take breaks and rotors
still spinning while the PTO has stopped. Operator’s awareness is the key to safety
around rotating parts. Do not raise the machine while the blades are rotating.
Risk of ejecting objects
Machines that mows throws out material while driving. Foreign objects such as rocks, sticks
and other debris can get into the machine and ejected with tremendous speed. Cover the
sides and the front prevents these objects to be thrown out but it does not always guarantee
that the guards catch everything that is thrown out.
Bystanders or animals that stand in the way of the projected object can be seriously damaged.
Never bystanders within the vicinity of the machine. Respect the machine’s danger zone.
Danger zone m!
Noise
Please note that the machine is normally used outdoors and that the position of the operator
is in the driving seat of the tractor. It is advisable to read the regulations specied in the tractor
manual and maintenance instructions.
The sound pressure level exceeds dB during operation. Hearing protection should be used
while driving.
Accidents involving slips and falls
Accidents involving slips and falls often happens as the result of:
• Slippery surface
• Uneven steps and platforms

The potential for slip-and-fall accidents can be signicantly reduced by using good judgment.
All unprotected rotating machinery is a potential for accidents. Damage usually occurs when
loose clothing or long hair caught and wrapped around rotating parts such as transmission
shafts or drive shafts on the machine. Make sure all guards are tted.
Drive safely on public roads
Always follow trac safety on public roads and follow the rules applies for driving tractor with
towed equipment gear on public road.
Make sure reectors, warning and / or warning ag that indicates protruding equipment is
mounted on the machine or tractor. These indicators must be installed properly and must be
visible and easily seen by the driver of the second vehicle.
Spectators must not lean on or climb on the machine during transport or during work.
NEVER allow anyone to ride on the machine!
The maximum transport speed should not exceed 20km /h
OPERATION
Only people who understand the safety information and instructions in this manual may op-
erate the equipment. Be alert and careful when working with the machine and only use the
equipment or product in the manner described in this manual. When working with equipment
that has moving parts, there is always the risk of injury. Be careful when working with equip-
ment equipped with hydraulic hoses ,oil under pressure can penetrate the skin. Seek medical
attention immediately if this occurs. Always work alone with the equipments that are dened
as single purpose equipment. Never overload the implement. Respect the equipment’s dan-
ger zone.

SAFETY PRECAUTIONS DURING OPERATION
• It is forbidden to use the machine as a lifting instrument.
• It should not be used for excavation of any kind or cutting other materials than described
in this manual.
• Before operation, make sure that the PTO shaft is correctly mounted and cannot come
loose during operation.
• When working in the dark, the vehicle used must be equipped with a rotating warning
lamp and the workplace must be well lit.
• Support legs must be use when the machine is parked or not in use.
• Always check that there are no people or animal nearby before operating the machine
• Under no circumstances may anyone be in the vicinity of the machine during operation!
• Adjust the speed of the tractor when cutting dierent materials. Recommended speed
when cutting a hedge is 1.5 - 2km / h.
• Using the machine or a long period of time can lead to accidents due to the operator los-
ing concentration. Take regular breaks to prevent fatigue and thus accidents.
• The machine is wider than the tractor when the arm is folded out, be precocious when
driving on a public road.
• Never let an inexperienced person handle the machine without supervision. Make sure
that the person driving the machine is aware of all safety measures and risks during op-
eration and when connecting and disconnecting the machine
• Do not connect the machine unto the tractor if the tractor is not working properly.
• Only connect the machine to a tractor with approved rollover protection
• The machine should be use during daytime when you have a clear overview of your work
area
• Adapt the driving speed during operation, drive at the speed you feel you have control
over the machine.
• Always stop the machine when passersby is closer than 20m.
• Inspect the work area carefully prior to driving. High grass / weeds can hide or cover junk
or other debris.
• Do not make sharp turns, turn o the knives when turning and the arm is in the highest
position.
• The eld of vision deteriorates when an implement is connected to a tractor. Set all mir-
rors so that you have a good overview of your work area.
• Use ballast if necessary to move the center of gravity in the center.
• WARNING! Make sure there is enough swing space for the machine when the arm is to be
folded out or when turning the arm.
• When the pallet fork brackets are used during operation, ensure that the machine is sta-
ble on the pallet forks and can not come loose while driving. Tighten out the pallet forks
so that it does not tip back and forth or laterally.

USE
Attach the machine to the tractor’s 3-point lift, make sure it is well-attached
Connect the pump to the PTO, make sure it can not loosen and all the hoses are not bent or
caught in any rotating parts of the tractor or machine.
The ’lever kit’ that you lift into the cab is small and exible, as the valve is on the hedge trim-
mer and is controlled by Teleex wire, which is connected to the valve block package from the
levers. The length of the wire is 3 metres, so that it will work on the front loader or three-point
linkage.
When using the hedge trimmer, it is important to adapt the driving speed according to the
weight of the tractor. It is recommended that the machine should be connected to a tractor
weighing approximately 1500 kg in order to be able to operate the crane in its outermost
positions.
The mower can be used in dierent modes:
• Sideways - to cut the side of the hedge
• Lower position for cutting high or dry grass
• The mower can be rotated 180 degrees to cut the other side of the hedge
• Above mode to cut above the hedge.
AFTER USE
Switch o the trimmer, ensure that the knives have stopped before disconnecting the ma-
chine Set the machine to the ground, mount the support legs Make sure there is no pressure
left in the hydraulic system before disconnecting hydraulic hoses. Switch o tractor and pull
the handbrake. Disconnect the machine from the tractor, making sure it can not overturn.
Rinse o with water if necessary, but make sure to lubricate all layers and knives afterwards
LEVER FEATURES
lifting arm
up/down
folding arm
up/down
knife beam
rotation
hydraul motor
on/o

A1 A2 B1 B2 C1 C2
CM MIN. MAX. KGS LRPM °°°CM CM CM KGS
160 25 40 1500 20 540 480 320 370 550 280 100 300
35HTR160 TECHNICAL DATA

TRANSPORT AND STORAGE
Check that the area is free of persons, children and objects prior transportation. Always take
precaution when transporting and moving the machine. Make sure that the implement or
product is well anchored and that existing transport safety lock are tted. Always place the
load as low as possible. Always have the risk zone in mind when transporting and moving the
machine. In case of lifting, nobody is allowed to stand under suspended load. Trailers used for
transport should have functional brakes.
Always store the machine or product in a dry place, preferably under roof when not in use.
Make sure that the implement or product is standing steady and there is no risk for it to tip
over. Never allow children to play where the machine is stored. Keep in mind the risk of tip-
ping! When storing a machine, it should be cleaned and all bearings and knives are lubricated.
MAINTENANCE AND SERVICE
Make sure the implement is stable and there’s no risk of falling over during maintenance and
service. Replace damaged and worn parts immediately to reduce the risk of machine failure
and injuries. Perform maintenance, service and inspections as recommended. Use only spare
parts with equivalent performance to reduce the risk of damage and failure.
Regularly check the condition of the machine. Retighten bolts and other nuts as needed. If
cracks, twisting, bending ore wear are detected, top the operation and rectify the error. Avoid
using the machine at lower temperatures more than -20 ° C and higher temperatures than +
30 ° C. Check that all bolts and nuts are tightened after maintenance and service. Always test
the machine before starting he operation. Take great care when repairing a machine. If the
ladder is to be used for repair or maintenance, ensure that it is stable.
Avoid burns, wait until the machine has cooled enough before repair or maintenance is carried
out, wear protective gloves.
Make sure there is no pressure left in the system before repair or maintenance is performed
on the machine.
OIL
First oil change after hours
There after once a year
OIL FILTER
New machine - Replace after hours
After every hours or every time the oil is changed once a year
LUBRICATION OF JOINTS
Lubricte regularly, at least times a year or every time service / maintenance is performed
For ordering spare parts : Contact Kellfri Service
RECYCLING
Disposal of the product, disassemble and transport to the municipality’s recycling station.
Contact your local authority for further information

Warning! Risk of crushing! Make sure that the machine does not tip over during assembly!
The machine is delivered partly assembled.
Use appropriate lifting instrument when lifting the machine from its packaging box. make
sure that the machine is steady and cannot tip over. Remove all packaging material and tra-
sport locks and prepare all parts for assembly
Packaging measurement: LxWxH
xx mm
ASSEMBLY

Install the cutting head to the lifting arm, then tighten all
bolts. NOTE! The head of the bolts should be mounted on
the side where the cutouts are located (shown with ar-
rows in the picture)
Then connect the hydraulic hoses on the hydraulic motor

Check that all hydraulic couplings and hydraulic hoses are intact, tighten the con-
nections if necessary. Fill the oil tank with hydraulic oil approximately L.
Attach the machine to the tractor’s three point hitch and connect the pump to the
PTO. Turn on the machine and run all cylinders to its end positions. Check the oil
level in the tank and top up if needed.

Cylinder
Cylinder
Cylinder
Hydraulic motor
Pump
Valve package
Cylinder - Beam (R-HRT.)
Cylinder - Folding arm (R-HRT.)
Cylinder - Bom cylinder (R-HRT.)
Hydraulic motor
Hydraulic tubes - J,K,L
LEVER FEATURES
lifting arm
up/down
folding arm
up/down
knife beam
rotation
hydraul motor
on/o
J
KL
HYDRAULIC DIAGRAM

3 2 1
37
40
363738
9
45
67
8
9
4
35
33
31
10
11
12 30
13
28
27
17
16
21
19
18
18
15 25
18
25
18
242322
15
60
29
29
41 42 43 44 45
46 47 48
50
49
51
53
52
54
55
56 57
42
59
H
G
58
14
20
26
34
32
39
CUTTING HEAD

No Description Qty
Bolt Mx
Hydyaulic motor (BMPAD)
Oil pipe connector
Nut M
Square hole washer
Connection plate
Bolt Mx
Hydraulic motor support plate
Bolt Mx
Flywheel
Locking washer
connecting rod shafts
Ring
Protection palte (L)
Bolt Mx
Bolt Mx
Knife guard
Nut M
Reinforcing plate
Protection palte (R)
Bolt Mx
Knife set
Base plate
Press plate
Washer
Knife guard xing plate
Hinge pin
Washer
Connecting rod combination
Nut M
No Description Qty
Bearing
Ring
Bearing seat
Ring
Washer
Nut M
Washer
Hitch frame
Seperator
Bolt Mx
Bolt Mx
Spring washer
Washer
Connecting rod end cover
Bearing
Connecting rod end
Nut M
Spring washer
Connecting rod
Screw Mx
Bolt M x
Hinged joint folded plate
Side plate
compressed spring
Flange
Nut M
Nut M
Wrapped bushesP××
Nut M
Oil hose(Valve to motor)

A
B
C
D
E
F
G
H
L
J
KK
J
L
1 2 3
4 5
7 8 9
6
14
10
15
21
16 17 18
12
13
41
39
1
3
37
36
2121
26
30
29
33 34
40
23
22
17 18
11
28
35
24
24
25
27
26
31 31
38
20
19
BASE FRAME
Table of contents
Other Kellfri Trimmer manuals
