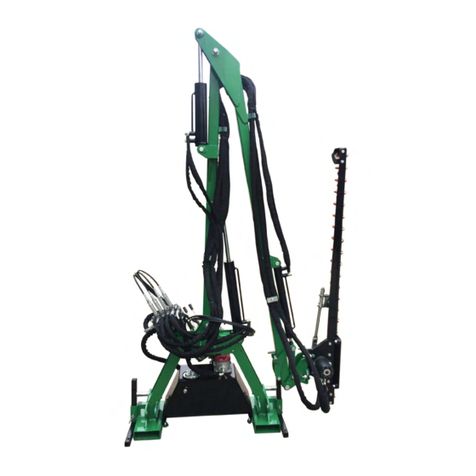
Kellfri 27-HTFL2E User manual

Carefully read the operating instructions before
using the product!
Operating instructions translated from Swedish
27-HTFL2E
27-HTFL2T
HEDGE TRIMMER
EURO/TRIMA

Table of contents
TABLE OF CONTENTS
Introduction 3
Product information 3
Technical data 3
Safety instructions 4
Product safety information 4
Instructions for emergency situations 4
Personal protection 5
Surroundings 5
Before use 5
Use 6
Safety precautions when in use 6
After use 6
Transportation and storage 6
Recycling 6
Warning decals 7
Maintenance and service 7
Parts 8
Assembly 9– 15
Hydraulic diagram 14
Exploded diagrams and materials list 16 – 19
Blade guard 20
Lubrication points 20
Notes 21 – 22
Deviation form 23
Warranty terms and conditions 24
Kellfri designs and supplies ecient, aordable machinery and components for forestry, ag-
riculture, construction and gardening in Sweden, the rest of the Nordic region and Europe.
Please note that the information in this document is general and may not pertain to your par-
ticular machine. We therefore recommend that you always read and follow the safety instruc-
tions and the instructions in the machine's operating manual.
Kellfri is not liable for any errors in this document.

Table of contents
Kellfri AB has a policy of continuous product development and therefore reserves the right to
make modications, e.g. to the design and appearance of the product, without prior notice.
INTRODUCTION
Thank you for choosing a product from Kellfri AB. Compliance with the safety instructions,
operating manual and sound common sense will guarantee many years of enjoyment using
the product. Kellfri’s attachments and products are aimed at self-employed farmers, horse en-
thusiasts and other country-dwellers who have stringent demands on performance.
PRODUCT INFORMATION
Hydraulic hedge and branch trimmer for mounting on frontloaders.
• Working width 140 cm.
• Fitted with horizontally and vertically adjustable cutterbar.
• Bolted separate blades on the cutterbar.
• Electric valve
• Cuts branches up to 35 mm.
Clears an overgrown road quickly where branches block the road and damage lorries and
other vehicles. A cutterbar height of 140 cm in combination with the lifting height of the front-
loader ensures a clean and high corridor for vehicles to pass through.
The hydraulic motor is 125 CC, and can achieve 278 Nm with 75 litres and 240 bar.
It has a speed of 599 rpm.
Superior hedge trimming capacity where tractor access is possible.
Cutterbar with bolted separate blades for quick replacement of damaged blades.
AREA OF USE
For trimming hedges, clearing eld edges and maintaining roads and forestry access roads.
TECHNICAL DATA 27-HTFL2E 27-HTFL2T
Working width 1400 mm 1400 mm
Length 3079 mm 3079 mm
Width 706 mm 706 mm
Height 545 mm 545 mm
Bracket Euro Trima
Oil ow 15 l/min 15 l/min
Weight 119 kg 119 kg
Warning!
Compliance with the safety instructions requires that the product is only used as described
in these instructions. It is the user’s responsibility to read through the instructions and com-
ply with them.
RETIGHTEN ALL BOLTS AFTER 1 HOUR OF OPERATION.

Table of contents
SAFETY INSTRUCTIONS
Before using the equipment or product, and for the safety of yourself and others, you must read the
safety instructions and instruction manual and understand their contents. Always keep the safety
instructions and operating manual handy for users of the equipment or product. For the safety of
both yourself and others, it may be a good idea to read through the safety instructions every now
and then. If the safety instructions or the operating manual are damaged, or become unusable
for any other reason, new copies may be ordered from: Kellfri AB, Munkatorpsgatan 6, SE-532 40
SKARA, Sweden. Tel: +46 511 242 50
The safety instructions can also be downloaded from Kellfri’s website: www.kellfri.co.uk
Do not use the equipment or product if you feel ill, tired or are under the inuence of alcohol. Do not
use the equipment or product if you are taking prescribed medication or drugs, or suering from
severe depression or mental illness.Always comply with general rules of the road and applicable
rules stipulated by animal welfare legislation. People under the age of 15 are not allowed to use the
equipment.
PRODUCT SAFETY INFORMATION
• Keep the work area clear of other people; moving parts increase the risk of accidents. Respect
the equipment’s risk zone! Only the operator may be present in the vicinity of the machine while
it is in operation.
• Children must never be present within the work area, never let children operate the machine.
• The equipment works best and most safely when it is used in the capacity it is intended for. Do
not attempt to alter the machine to increase its capacity.
• Never leave the machine unsupervised when it is running. Switch o the engine and apply the
parking brake when you leave the equipment – even for a short period.
• Never leave the machine in a raised position. There can be a loss of pressure in the hydraulics and
the machine can drop to the ground.
• Make sure that all guards are tted and cannot come loose before use. The machine may only be
used in the way described in this operating manual. Do not attempt to use or cut other materials
such as metal and hard plastic.
• Operate a new machine at low speed for the rst few hours, not at high speed and with a full
load.
• Avoid getting oil on your skin. If this happens, rinse thoroughly with water.
• Only the operator may be present in the vicinity of the machine while in operation.
• Do not use the machine without ensuring that all guards are correctly tted.
• To avoid accidents, inspect the work area and remove any harmful objects such as large stones
and large branches, etc. before starting the work.
• Do not operate the machine if it is vibrating substantially; stop the machine immediately and
check the machine.
• Do not use the machine in inclement weather or in reduced visibility, e.g. in thick fog.
• Exercise caution when working near power lines and telephone lines.
• NEVER try to remove objects that have become trapped in the hedge trimmer while it is running.
Make sure that the equipment has stopped before taking action.
Children must not be left unsupervised in the area.
Warning!
INSTRUCTIONS FOR EMERGENCY SITUATIONS
In case of emergency, call 112.
Always have a mobile phone or emergency phone available when working alone. A rst-aid kit and
re extinguisher must be kept in an easily accessible location when carrying out any work, mainte-
nance or service.

Table of contents
PERSONAL PROTECTION
Always wear suitable clothing and shoes. Do not wear loose clothing or jewellery while work-
ing with the machine or the product. Long hair should be tied up when working with equip-
ment that has moving parts. Use protective gloves to avoid the risk of burns if hot surfaces
such as exhaust pipes are touched, and to avoid oil and petrol getting in contact with the skin.
Ear defenders must be worn whilst the engine is running. Helmet and face shield are recom-
mended when using the machine.
SURROUNDINGS
Check that the work area is free from bystanders, children and objects before hitching or us-
ing the equipment. There is a risk of serious injury. Be extra careful if there are children in the
vicinity of the area where the equipment or product is used or stored. Check that there are no
low-hanging electrical cables within the work area. Exercise caution when working on slopes
and close to ditches.
BEFORE USE
Carefully read the safety instructions and the operating instructions. Make sure that you un-
derstand the safety instructions, operating instructions and warning decals. Use common
sense when using the product and suitable personal protective equipment.
Always check the performance of the machine combination to be used. It is important that
these are compatible and work satisfactorily together. This is to ensure that the equipment or
product works as expected, and to guarantee the safety of yourself and others.
Carry out a visual inspection of the equipment or product before use. Repair or replace dam-
aged or worn parts immediately to reduce the risk of injury. Grease moving parts and check
that all nuts and bolts are tightened. Correct if necessary.
Learn and remember the correct working method. Beginners must work slowly until they have
learned how the machine or product works and can handle the situation.
If users feel that the machine is dangerous to use, it should not be used.
• Make sure that the equipment is connected correctly and cannot come loose.
• Inspect the work area before starting work and remove any objects that can cause an
accident.
• Check that all bolts are tightened before starting the machine.
• Check all hydraulic hoses and couplings for leaks.
Warning!
Never use equipment or products with defective safety components.

Table of contents
USE
Only those who understand the safety instructions and the operating instructions may use the
equipment or product. There is a risk of crushing when working with equipment that has moving
parts. Exercise caution when working with equipment with hydraulic hoses as oil under pressure
can penetrate the skin. Immediately seek medical attention if this should occur. Always work alone
with equipment that is made for working alone. Respect the equipment’s risk zone.
SAFETY PRECAUTIONS WHEN IN USE
• Use of the machine as a lifting tool is forbidden.
• Nor may it be used for digging of any kind or cutting other materials not described in this operat-
ing manual.
• When working in the dark, the vehicle used must be equipped with a rotating warning lamp and
the workplace must be well lit.
• Stabilisers must always be tted to the machine when it is not in use.
• Always check that there is no person or animal in the vicinity before operation.
• Under no circumstances should anyone be near the machine while it is in operation.
• Adjust the tractor’s speed when cutting dierent materials. The recommended speed when cut-
ting hedges is .– km/h.
The trimmer can be used in dierent positions:
• Laterally – to cut the side of the hedge.
• Bottom position for mowing tall or dry grass.
• The trimmer can be turned degrees to cut the other side of the hedge.
• Top position for cutting above the hedge.
AFTER USE
• Switch o the trimmer. Important! Make sure that the blades have stopped before you discon-
nect the machine.
• Place the machine on the ground, t the stabilisers.
• Before you disconnect the hydraulic hoses, make sure there is no pressure left in the system.
• Switch o the tractor and apply the handbrake.
• Disconnect the machine from the tractor, making sure that it cannot tip over.
• Wash, rinse with water and dry if necessary. Lubricate all bearings and blades afterwards.
TRANSPORTATION AND STORAGE
Check that the work area is free from bystanders, children and objects before driving o. Always
observe additional caution during transport and moving. Ensure that the equipment or product is
well anchored and existing transport lashings are tted. Always position the load as low as possible.
Respect the risk zones even during transport and moving. Do not permit anyone to walk under
suspended loads when carrying out lifts. Trailers used for transport should have brakes that work.
Always store the equipment or product on a dry surface, preferably under a roof, when not in use.
Ensure that the equipment or product is stable and cannot tip over. Never permit children to play at
the storage site. Be aware of the tipping risk!
• When the machine is in storage, it should be cleaned and all bearings and blades lubricated.
• The blade guard must always be tted when the machine is not in use.
RECYCLING
When scrapping, the equipment should be dismantled and transported
to a designated recycling station. Contact your local authority for further
information.

Table of contents
MAINTENANCE AND SERVICE
Make sure that the equipment is stable and cannot tip over when carrying out maintenance
and service work. Replace damaged or worn parts immediately to reduce the risk of injuries.
Carry out maintenance, service and checks in line with recommendations. Only use spare
parts with equal performance to reduce the risk of injuries and breakdowns.
• Check that all nuts and bolts are tightened after maintenance and service work. Always
test the machine before starting work.
• Always check the condition of accessories to be connected to the machine.
For spare parts: Contact Kellfri Service.
WARNING DECALS
Make sure warning decals are always visible and clean them when necessary. Do not use a
high-pressure washer directly on the warning decal. If apart with a decal is replaced, or the
decal becomes worn or in any other way unusable, order a new set of decals.
SYMBOL EXPLANATION
Read the operating manual! Before carrying out work.
Ejection warning!
Risk zone 15 m
Respect the equipment’s risk zone!
Warning!
Do not permit anyone to stand under suspended loads.
Warning!
Rotating machine parts.
Warning! Keep o the product!
Warning! Accident risk for children!
Children should be supervised.
The equipment is CE marked.
Product name:
Type:
Weight:
Year of manufacture:
Serial no.: 2006/42/EC

Table of contents
PARTS
Blade arm
Shaft with cylinder bracket
Cylinder
Selector valve
(Electric valve)
Start button
Hydraulic hoses Stabiliser
Nylon roll
Rubber link
Frame for frontloader
Euro Trima
The hedge trimmer is supplied with a Euro
or Trima bracket, depending on what you
have ordered.

Table of contents
2. Fitting blade arm bracket and cylinder bracket.
Loosen the bolt and remove the cylinder bracket from the blade arm bar bracket (see gures
below).
Fit the shaft on the frame, lubricate the slide bearings to facilitate tting the shaft.
Then mount the cylinder bracket on the shaft.
NOTE! Don’t forget to t the wedge*.
bolt
blade arm bracket
cylinder bracket
FITTING
Warning: risk of crushing. Make sure that the machine cannot tip over during assembly.
*Fitting the wedge
1. Fit frame.

Table of contents
3. Fitting the stabilisers.
Note: Left and right.
Lock with pin.
Stabiliser
4. Fit cylinder.
Cylinder

Table of contents
5. Fitting the blade arm.
Fit the trimmer head on the blade
arm bracket.
Tighten bolts.
Euro Trima
The hedge trimmer is supplied with Euro
or Trima bracket, depending on what you
ordered.
6. Fitting the bracket.
The photo shows the trimmer with a Euro bracket tted.

Table of contents
7. Fit the hydraulic couplings.
Unscrew all protective
covers (yellow).
Fit the hydraulic couplings.
Note: Don’t forget
the Tredo tray.
8. Fit the selector valve (electric valve) to the frame.

Table of contents
9. Connect the hydraulic hoses.
11
2
2
3
Connect to the
tractor.
3
Note: 90° angle
Check that all bolts and connections are tightened.
Re-tighten all bolts after 1 hour of operation.

Table of contents
a
a
C
P P
A
A
D B
B
b
CYLINDER
PILOT OPERATED CHECK VALVE
SELECTOR VALVE
HYDRAULIC MOTOR

Table of contents
10. Installing the start button
2.Start by stripping o the outer sheath of the
cable to expose the wires contained in the cable.
Be careful not to strip or cut so deep into the outer
sheath that you damage the wires.
Do not t earth.
1.Dismantle the valve connector.
3.Thread the cable into the connector.
4.Tighten the wire.
5. Screw the casing into place.
6.Fit the valve connector to the selector
valve.
Note: Test run before starting operation.

Table of contents

Table of contents
ITEM NO. SPARE PART NO. DESIGNATION QUANTITY
Frame
RHTFL. Arm
RHTFL. Hydraulic hose – cylinder
Cylinder coupling
Bolt Mx
RHTFL. Cylinder
RHTFL.
(Items , , , , , )
Flat washer
(Connecting rod incl. bearing hydraulic m./blade)
Bolt Mx
Flat washer
Bolt Mx
RHTFL. Cylinder bracket
RHTFL. Wedge xx
RHTFL. Square prole
Bolt Mx
RHTFL.
RHTFL.
(Items , , )
Blade arm
Complete cutterbar
RHTFL. Allen bolt Mx
RHTFL. Tensioner– plastic
Nylock nut M
RHTFL. Blade attachment
M x bolt
Bolt Mx
RHTFL.
RHTFL.
(Items , , )
Blade guard
Complete cutterbar
Mx
Large at washer
Rubber link
RHTFL. Blade guard– metal
Nylock nut M
RHTFL.
(Items , , , , , )
Allen bolt Mx
(Connecting rod incl. bearing hydraulic m./blade)

Table of contents

Table of contents
ITEM NO. SPARE PART NO. DESIGNATION QUANTITY
RHTFL.
(Items , , , , , )
Clamp ring .
(Connecting rod incl. bearing hydraulic m./blade)
RHTFL.
(Items , , , , , )
Bearing
(Connecting rod incl. bearing hydraulic m./blade)
RHTFL.
(Items , , , , , )
Rod for hydraulic motor
(Connecting rod incl. bearing hydraulic m./blade)
RHTFL.
RHTFL.
(Items , , , , , )
Bushing
(Connecting rod incl. bearing hydraulic m./blade)
Wedge xx
RHTFL. Hydraulic wheel
Nylock nut M
RHTFL. Hydraulic motor
Coupling
RHTFL. Stabiliser
RHTFL. Hydraulic hose for motor
Bolt Mx
Flange nut M
RHTFL.
RHTFL.
(Items , , )
Blade
Complete cutterbar
RHTFL. Allen bolt Mx
RHTFL. Allen bolt Mx
RHTFL. Adaptor
Wire to solenoid valve
Power cable
Switchbox
Bolt Mx
Solenoid valve
Hydraulic hose
Quick coupling
RHTFL. Pin
RHTFL. Attachment plate
RHTFL. Lighter plug v
RHTFL. Bracket iron blades, set (mm)
RHTFL. Bolt kit for connecting rod (Items , , , )

Table of contents
Kellfri is not liable for any modications, changes or rebuilds carried out by customers.
Important!
The original design of the machine must not, under any circumstances, be modied without
the approval of the manufacturer. Unauthorised modications and/or accessories may cause
life-threatening injuries or death to users and others.
BLADE GUARD
The blade guard is secured with a chain for transport purposes. Dismantle the chain and then
mount a rubber link on the blade guard. Fit the nylon roller to the blade arm.
Lubricate all grease points
with grease, joint bearings
on the cylinder and cylinder
bracket.
GREASE POINTS
This manual suits for next models
1
Table of contents
Other Kellfri Trimmer manuals
