KIC KTT 15 WH User manual

4
This appliance is not intended for
use by persons (including children)
with reduced physical, sensory or
mental capabilities, or lack of
experience and knowledge, unless
they have been given supervision or
instruction concerning us e of the
appliance by a person responsible
for their safety.
This appliance is for indoor use only.
Children should be supervised to
ensure that they do not play with
the appliance.
When choosing the water inflowing
to wash tub or spin tub, do not
move the water inlet valve during
the process of water inflowing.
The new hose-sets supplied with the
appliance are to be used and that old
hose -sets should not be reused.
If the supply cord is damaged, it
must be replaced by the
manufacturer, its service agent or
similarly qualified persons in order
to avoid a hazard.
The openings must not be
obstructed by a carpet.
If strong vibration occurs in time of
spinning, open the spin cover
immediately.
Make sure that the washing machine
is placed on a flat and stable floor,
and then adjust washing materials,
distribute them evenly.
To do spinning and draining together,
please spin for 1 minute before
draining.
Do not wash or spin waterproof
clothes or clothes that float easily to
avoid abnormal vibration or damage
to the clothes.
Observe the instructions given in
these Instructions for Use and the
Installation Guide when using the
washing machine.
Keep these Instructions for Use and
the Installation Guide; If you pass on
the washing machine to another
person, also give him/her
Instructions for Use and the
Installation Guide.
The washing machine can be
operated by children from the age of
8 years up, as well as by people with
reduced physical, sensory or mental
capabilities or lack of experience and
SAFETY PRECAUTION
Be sure to comply with the following to prevent damage to body and
property of you and others:
The sign stands for “pay attention”, and the picture of specific items
needs attention shows in .
The sign stands for “forbid”, and the picture of specific items
forbidden shows in .
The sign stands for “must do”, and the picture of specific items must
be done shows in .

5
knowledge, provided they are
supervised or instructed regarding
the safe use of the washing machine
and the understand the dangers
resulting from the use.
Do not use extension leads,
extension leads with multiple
sockets, or adapters; they might
cause a fire by overheating. If you
need a longer main cable, contact
our After-Sales Service.
After installation, access to the
mains plug or to disconnection from
mains supply by a double-pole
switch must be ensured at all times,
to make sure the washing machine
can be separates immediately from
the mains supply.
For washing your laundry, only use
detergents, additives or dyes which
are appropriate to be used with
domestic washing machines.
Repairs must only be done by our
After-Sales service. Improper
repairing can lead to unpredictable
dangers for the user and to damages
on the washing machine.
Improper repairing will cause the
loss of the guarantee.
For repairs, only original spare parts
are admitted, to assure proper
functioning of the washing machine.
Forbid dismantling
Do not dismantle the machine by yourself.
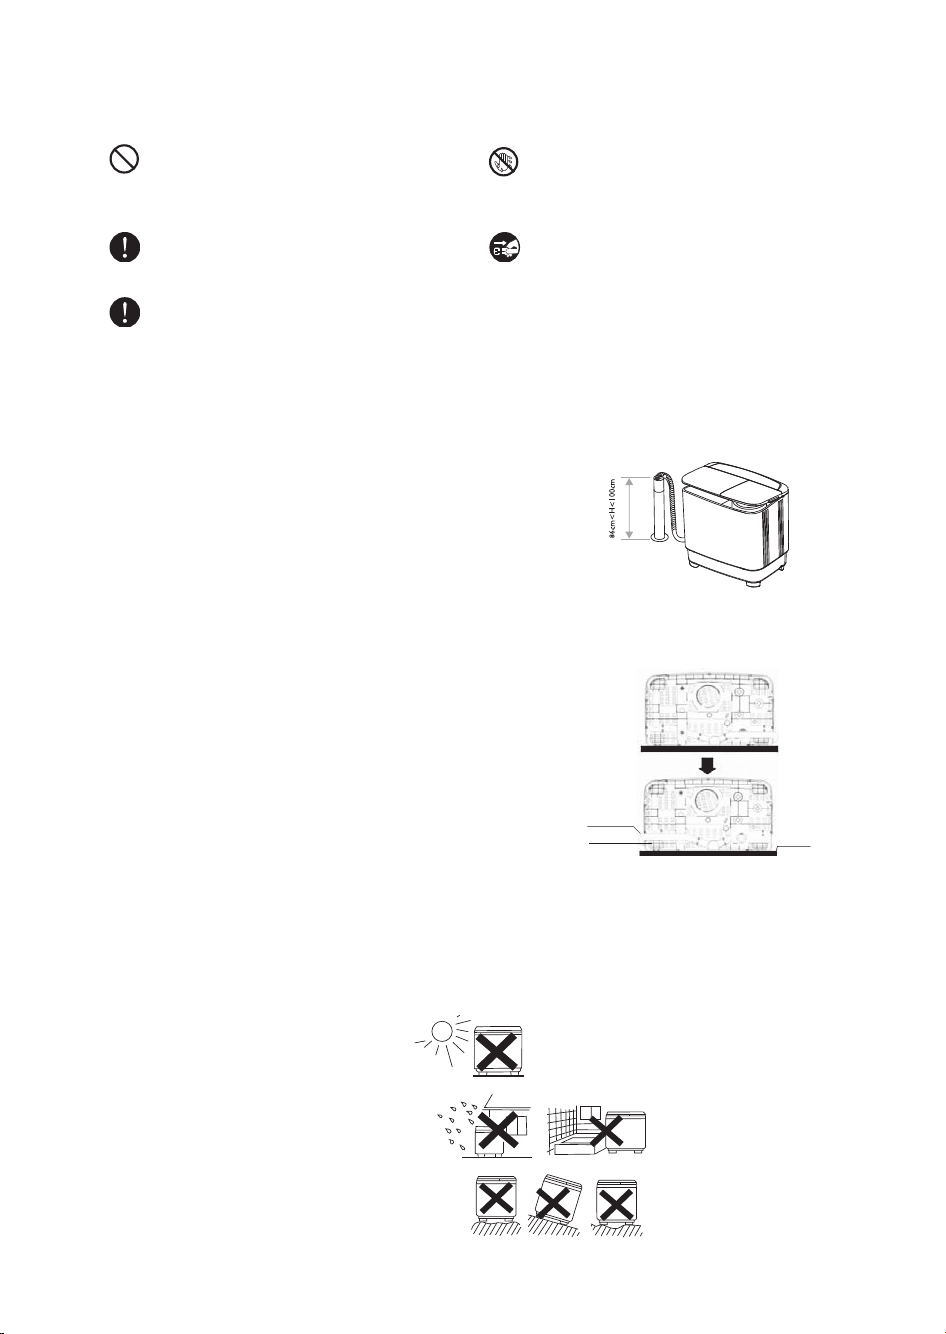
Avoid dampness
Do not install the machine in damp or rainy
environment to avoid electric shock, fire, machine
failure,or deformation.
Forbid
Do not place materials like burning candle,
mosquito incense, cigaret etc. or heating source like
electric stove, calorifier etc. on the machine.
Avoid spraying water
Do not spray water directly to the machine.
Forbid
Do not let baby sit on it or place heavy things on it.
Forbid
Do not wash clothes that are stain ed with
kerosene, petrol, alcohol, and other flammable
substance.
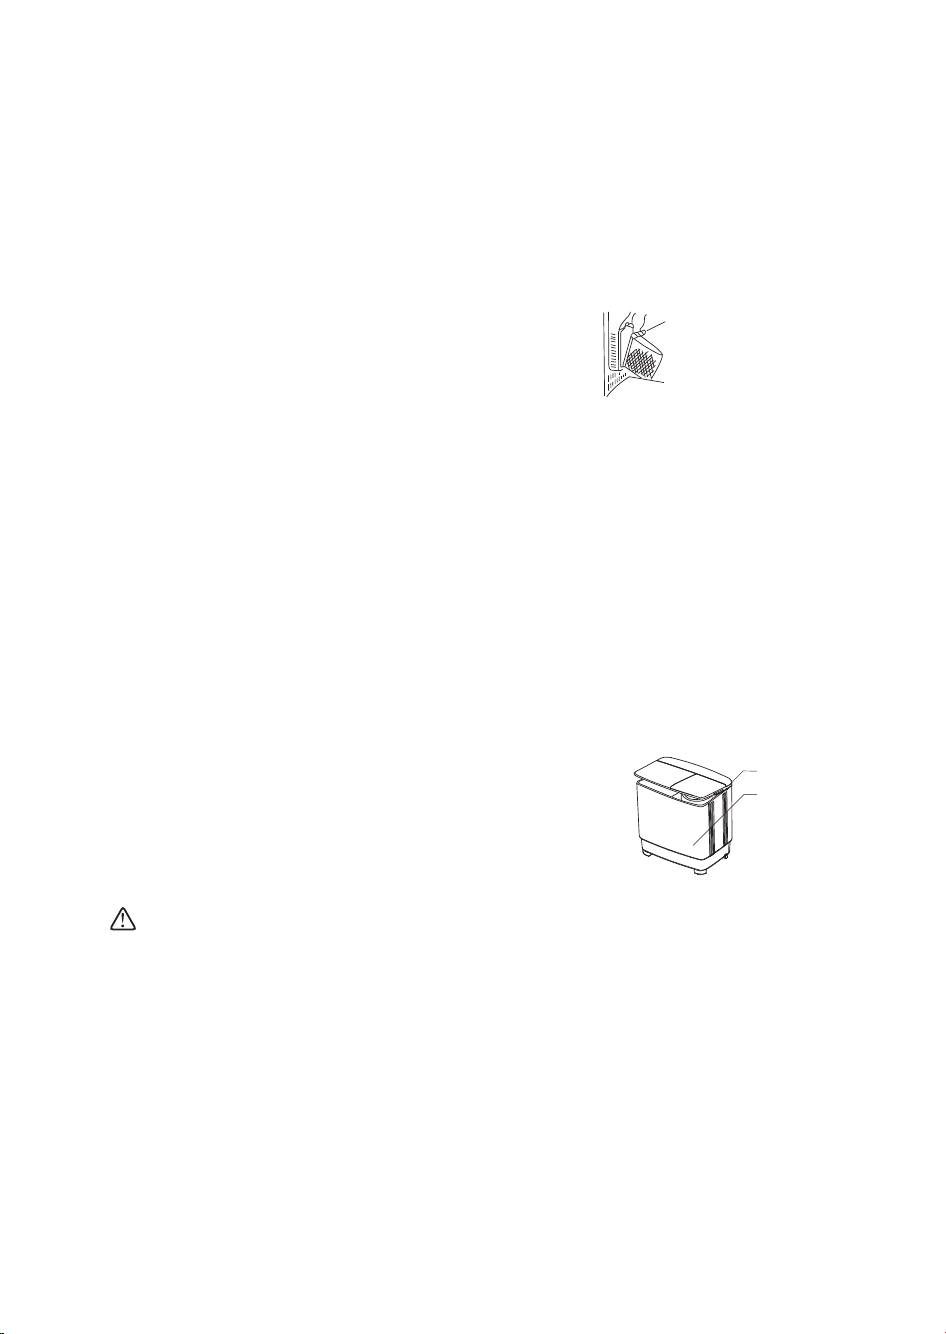
Make sure that the water inlet hose is connected
and the tap is opened before washing.
Forbid
Do not exceed the max. water level to avoid water
overflowing and machine failure.
Grounding
To avoid electric shock resulting from electric
leakage, please connect grounding wire of the plug
properly.
Forbid
Do not let baby climb to the machine or play near
running tub to avoid accident.
Forbid
If use warm water, the water temperature should
not exceed 50 °C.
Wipe off dirty and dust on the plug often to prevent
poor contact with power supply.
Forbid putting into
Do not put hands into the tub before it stopping
running.
Forbid
Do not replace power cord by yourself.
WARNING:

6
Forbid
Do not damaget he power cord and plug to avoid
electric shock, short circuit or fi e.
Insert the plug tightly when use.
Do not pull the cord when unplug the plug.
Forbid wet hands
Do not insert or unplug the plug with wet hands to
avoid electric shock.
Unplug the plug
Unplug the plug from socket after use.
Lay upper drain hose
• Needs a drain hose with minimum diameter 3 cm, and
minimum carry away capacity of 40 liters per minute.
• For upper drain system, the drain hose must be placed at least
86 cm (30 inches) from thebottom of washer, but not higher
than 100 cm.
FOR UPPER DRAIN SYSTEM ONLY
Change the position of the drain hose
The ex-factory installation position of the drain hose is located at
the spin side. According to the installation site, the drain hose can
also be installed at the wash side of the machine. The method is
as follows:
1. Unplug the power cord and empty water in the drain hose
completely.
2. Spread a piece of soft cloth on the floor (e.g. a blanket) and
place the washing machine on it gently.
3. Take the drain hose out from the buckle at the spin side, and
put it into the buckle at the wash side.
4. Hang up the drain hose kit.
FOR LOWER DRAIN SYSTEM ONLY
Installation site
In order to avoid electrical failure, discoloration and deformation, do not install the machine in the following
places:
• Locations exposed to direct sunlight
• Locations exposed to rain or snow
• Locations with uneven or unstable ground
INSTALLATION
Drain hose
Buckle Blanket

7
Preparation Instructions
• Plug in power and connect the water inlet hose.
• Lay down the lower drain hose and connect it to the sewer, or lay the upper drain hose to places as
indicated in page 3.
• Check that there are no objects such as coins, hairpins, mud or sand in the pocket.
• Strings should be knotted in advance to prevent entanglement.
• Clothes can be classified for washing according to the texture, dirty degree and color.
• For small pieces (e.g.,stockings) or fluffy clothes, put them into a nylon net for washing.
Attachment: Reference of laundry quantity corresponding to different capacities
• The figure above is for reference only, specific weights are subject to actual clothes.
Attachment: Laundry volume and detergent dosage reference
• The dosage of washing detergent varies according to dirty degree and texture of laundries.
USAGE METHOD
Laundry
Capacity
Shirt
about 500 g
Uniform
about 650 g
Jeans
about 900 g
Jacket
about 1600 g
2.0 kg Capacity about 4 pcs. about 3 pcs. about 2 pcs. about 1 pcs.
3.0 kg Capacity about 6 pcs. about 4 pcs. about 3 pcs. about 1 pcs.
3.0 kg Capacity about 7 pcs. about 5 pcs. about 4 pcs. about 2 pcs.
4.6 kg Capacity about 9 pcs. about 6 pcs. about 5 pcs. about 2 pcs.
5.0 kg Capacity about 10 pcs. about 7 pcs. about 5 pcs. about 3 pcs.
5.5 kg Capacity about 11 pcs. about 8 pcs. about 6 pcs. about 3 pcs.
6.0 kg Capacity about 12 pcs. about 9 pcs. about 6 pcs. about 3 pcs.
7.0 kg Capacity about 14 pcs. about 10 pcs. about 7 pcs. about 4 pcs.
7.5 kg Capacity about 15 pcs. about 11 pcs. about 8 pcs. about 4 pcs.
8.0 kg Capacity about 16 pcs. about 11 pcs. about 8 pcs. about 4 pcs.
8.5 kg Capacity about 17 pcs. about 12 pcs. about 9 pcs. about 5 pcs.
10.0 kg Capacity about 20 pcs. about 15 pcs. about 10 pcs. about 6 pcs.
12.0 kg Capacity about 24 pcs. about 18 pcs. about 13 pcs. about 7 pcs.
13.0 kg Capacity about 24 pcs. about 18 pcs. about 13 pcs. about 7 pcs.
14.0 kg Capacity about 24 pcs. about 18 pcs. about 13 pcs. about 7 pcs.
Fabric type
Laundry capacity(kg)
Water level Water flow Wash time
(minutes)
Detergent
amount (g)
KTT 15 WH
KTT 15 ME
KTT 18 WH
KTT 16 ME
Synthetics, silk,
Delicate fabrics
0 - 4.5 0 - 4.5 Low Normal 3About 42
4.5 - 8.0 4.5 - 8.0 Mid 3 - 5 About 65
Cotton or linen 0 - 8.0 0 - 8.0 Mid Normal 7About 65
8.0 - 13.1 8.0 - 14.0 High 7 - 10 About 87
Heavy soils 0 - 8.0 0 - 8.0 Mid Heavy 10 About 65
8.0 - 13.1 8.0 - 14.0 High 10 - 35 (soak 20) About 87

8
Name Of Parts
STRUCTURE INSTRUCTION
Control panel
Wash cover
Lint filter
Wash tub
Pulsator
Base
Drain hose
(For upper drain only)
Spin cover
Safety cover
Frame
Cabinet
Power plug
Drain hose
(For lower drain only)
Accessories
Inner spin cover Water inlet hose
Introduction Of Control Panel
KTT 16 WH
KTT 15 WH
KTT 16 ME
KTT 15 ME
The drawing above is for reference only, specific drawing is subject to actual models.
• Water inlet: be used to inject water.
• Wash timer: be used to select required washing time.
• Spin timer: be used to select required spinning time.
• Wash selector: Choose “Normal” or “Heavy” according to laundry fabric.
• Drain selector: For upper drain, Choose “Wash” for washing, choose “Rinse” for rinsing; choose “ Drain”
for draining. For lower drain, Choose “Wash/Rinse” for washing or rinsing;choose “Drain” for draining.

9
Quick Start
Washing Method
1. Insert the water inlet hose into t water he water inlet mouth,
and choose injecting water to the wash tub.
2. Put the laundry into the wash tub, and add detergent into it.
When fill water to half of the desired water level, turn off the
water tap and let laundries soak in the solution for minutes, then
fill water to desired water level.
3. Set wash program “Normal” or “Heavy” as per amount and texture of laundries.
4. Turn the wash timer knob to set wash time.
5. After washing, set the wash drain selector to “Drain” position for draining.
Rinsing Method
A. Spraying rinse (rinse in the spin tub)
1. Put the laundry into the spin tub after washing.
2. Turn on the water tap, choose to fill water into the spin tub for 3-4 minutes, and then turn off the
water tap.
3. The above steps can be repeated.
4. Set the spin timer for 2-5 minutes for rinsing.
Note: 1. If there is red rust in water, do not choose spraying rinse, for the rust is easy to adhere to
laundries.
2. Ensure that do not fill water into spin tub when spinning.
USAGE METHOD
1. Install the washing machine
2. Load the laundry
3. Add detergent and water
into the wash tub
4. Turn the wash timer knob
to set wash time
5. Set the wash drain
selector to “Drain” position
after washing
6. Repeat the steps 3-5
for rinsing
7. Move the laundry into
the spin tub and close the
spin cover
8. Turn the spin timer knob
to set spin time
9. the spin tub
Take out the laundry from
Wash timer
Water level indicator

10
B. Common rinse (rinse in the wash tub)
1. To save time, water and energy, can do pre-spinning before rinsing.
2. Put laundries which have already been dehydrated into the wash tub.
3. After filling water to the desired level, turn off the water tap to save water.
4. Turn the “Wash selector” knob to the "Normal” or “Heavy”.
5. Set the “wash timer” to the desired time (about 3-5 minutes)for rinsing.
6. After rinsing, put the washing materials into the spin tub to spin for 1 to 5 minutes.
7. Drain out the rinsing water in the wash tub.
8. The above steps can be repeated.
Spinning Method
Efficiency Program
(For efficiency program only)
“Heavy” wash, 15 minutes with 40°C. warm water, spin twice, 3 minutes each; Rinse once for 5 minutes
with 20°C. cold water, spin twice, 3 minutes each; Rinse once for 5 minutes with 20°C. cold water, spin
twice, 4 minutes each Water level “H” used for all wash and rinse.
1. Shake out the laundry and put them into
the spin tub.
2. Put the inner spin cover on.
Confirm the inner spin cover is placed horizontally.
Inner
spin cover
Spin tub
IncorrectCorrect
3. Close the safety cover and the spin cover. 4. Refer to the following table to select spinning time.
Spin cover
Safety cover
Washing materials Spin time
Silk About 50
seconds
Light clothes
(fiber/blended)
About 1
minute
Knitwear (fiber) About 1〜2
minutes
Underwear
(cotton)
About 2〜3
minutes
Slipover
(cotton/linen)
About 3〜4
minutes
Toweling coverlet
(cotton)
About 5
minutes

11
Special Features
A. Soak function (For machines having soak function only)
For seriously stained clothes, Soak wash is useful to achieve better wash result.
15-35 minutes of the wash timer is for soak wash: (illustrate as follows)
This machine can wash blended blanket (less than 3 kg) marked with the "hand washing" label.
Washing method is as follows:
1. Dilute detergent with adequate water (below 50°C), then pour the solution into the wash tub.
2. Fold the blanket as shown in the figure, and put it into the wash tub.
B. Buzzer function (For machines having buzzer function only)
Function of the buzzer is to alarm finish of washing,and it is helpful to control wash process.
• Buzzer will alarm the completion of washing.
Total: 35 (mins) about 5 about 5 about 5
about 2 about 1,5 about 1,5 (unit:mins)
Work time
Static time
Fold in half along
the long edge
1/3 fold in the
same direction Roll up the blanket Put into the tub with
blanket edge facing down

12
Attention To Maintenance
Cabinet maintenance
After using the washing machine, wipe the moisture and stain on it with a piece of soft cloth.To avoid
damage to the surface,do not use corrosive or volatile chemicals.
Cleaning the lint filter
•Press the button head, and pull the lint filter out.
•Turn the filter net inside out, and rinse it in water.
•After inserting the claw, press the button to insert it into place.
•A sound of “ba” means proper installation.
Anti-freezing protection
• Cleaning the lint filter
1. Turn off the water tap, remove the water inlet hose and empty water in the water inlet hose
completely.
2. Lay the drain hose and turn the drain selector knob to the "Drain”position to empty the water in
the tub.
• If the water is frozen, please take the following steps:
1. Put the water inlet hose into warm water of about 50°C.
2. Keep about 2 liters of warm water below 50°C in the wash tub for about 10 minutes. and then lay
the drain hose and turn the wash drain selector knob to the "Drain” position to empty the water.
3. Fit the water inlet hose and turn on the water tap to confirm water filling and draining work
properly.
Operation when objects are dropped into the outside of the spin tub
1. Remove all screws on the frame with a screw driver and loosen the
connector of the brake belt.
2. Pull up the frame with both hands and turn it backwards.
3. Take out the clothes dropped into the outside of the spin tub.
4. Fasten the connector of the brake belt, Press the frame to reset and
tighten screws.
After you use the washing machine, never forget to do the following two things:
1. Disconnect the power plug.
2. Remove the water inlet hose.
Notes
The washing machine employs alternative current with rated voltage and frequency. When voltage
fluctuates between -10% and 10% of the rated voltage, the machine can work normally.
Connection mode of the power cord of this machine is Y-shaped connection. Users should not detach or
reconnect the wire by themselves. If this part needs to be repaired, please contact the designated service
center.
MAINTENANCE
Button head
Claw
Frame
Cabinet

13
• Do not connect to the hot water supply.
• After using, be sure to unplug the power plug.
• Spin timer: be used to select required spinning time.
• Be sure to use plug that is properly grounded.
• The maximum gradient of the supporting surface for the washing machine should not exceed 2º.
• Do not tear down electrical wires and components in the machine by yourself.
• There are holes on the base for ventilation. These holes should not be blocked by foreign objects
(carpets, etc.).
• If the power cord is damaged, it must be replaced by a qualified person to avoid a hazard.
If the following symptoms occur, please disconnect the power plug and perform the following checks:
Main Technical Parameters
Symptom Reason
The washing machine does not work.
• Check that the power supply is in good condition.
• Check that the power plug is inserted properly.
• Check that the wash timer knob or the spin timer knob is not in
the "0" position.
The drain hose does not work.
• Check that the drain hose is not laid too high.
• Check that the drain hose is not frozen.
• Check that the drain hose is not blocked by foreign matter
There is abnormal noise during washing. • Check that there are no coins or any other foreign objects
dropped into the wash tub.
There is abnormal noise and violent vibra-
tion during spinning.
• Check that the washing machine is placed on flat, stable floor.
• Check that clothes are evenly distributed in the spin tub.
• Check that there are no washing materials or foaming debris
dropped into the outside of the spin tub.
Wash Spin
Model KTT 15 WH
KTT 15 ME
KTT 16 WH
KTT 16 ME
KTT 15 WH KTT 16 WH
KTT 15 ME KTT 16 ME
Capacity (dry Clothes) 13.1 kg 14.0 kg 7.0 kg
Power Supply 230V/50Hz
Input Power 450W 180W
Maximum Time 15 min. 35 min.
(soak wash) 5 min.
Water volume HI: 87L M: 65L L: 42L /
Maximum water pressure 0.6Mpa
Overall dimension 902 x 537 x 974 (mm)
Net weight 30 kg
Pump Input Power 45W
This manual suits for next models
3
Table of contents
Popular Washer manuals by other brands

Zanussi
Zanussi FLE 3000 Instructions for the use and care

Electrolux
Electrolux EWT 1540 Instruction book

Whirlpool
Whirlpool LA4OOOXK Use and care guide

GE
GE WWA8354V Use and care

Siemens
Siemens WM14N21ODN User manual and installation instructions

grandimpianti
grandimpianti WFC 5 Instructions for installation and use