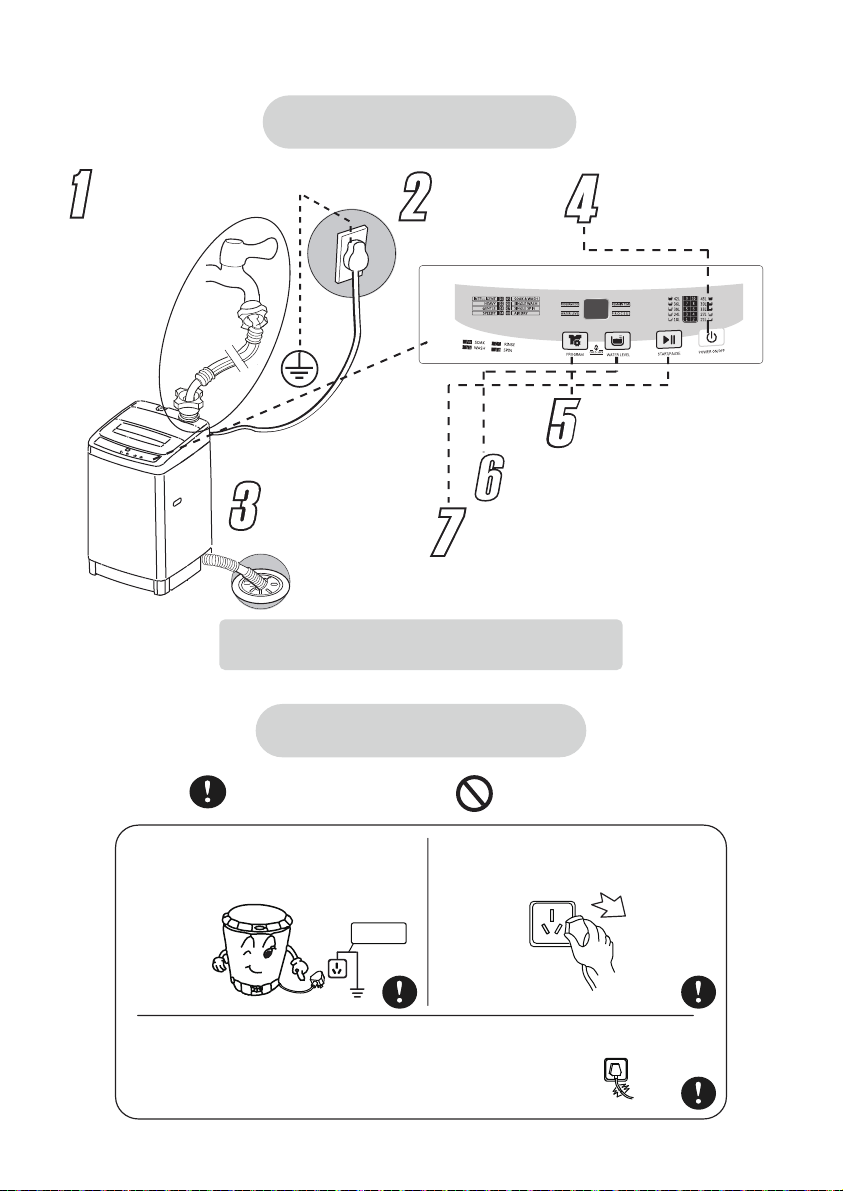
Power Cord Connection
Never try to connect the earthing of the
washing machine together with that of gas
pipe or water pipe, telephone cord or lightening
rod.
Do not use the damaged cord because it could
cause electricity leakage and fire.
In case cord is damaged, please contact the
local service company, because it is removed
and replaced with special tools.
NOTE:
The grounding wire is indicated by the yellow and green color.
It must be firmly connected to a grounded outlet. Please call a
technician for any assembly assistance.
- 6 -
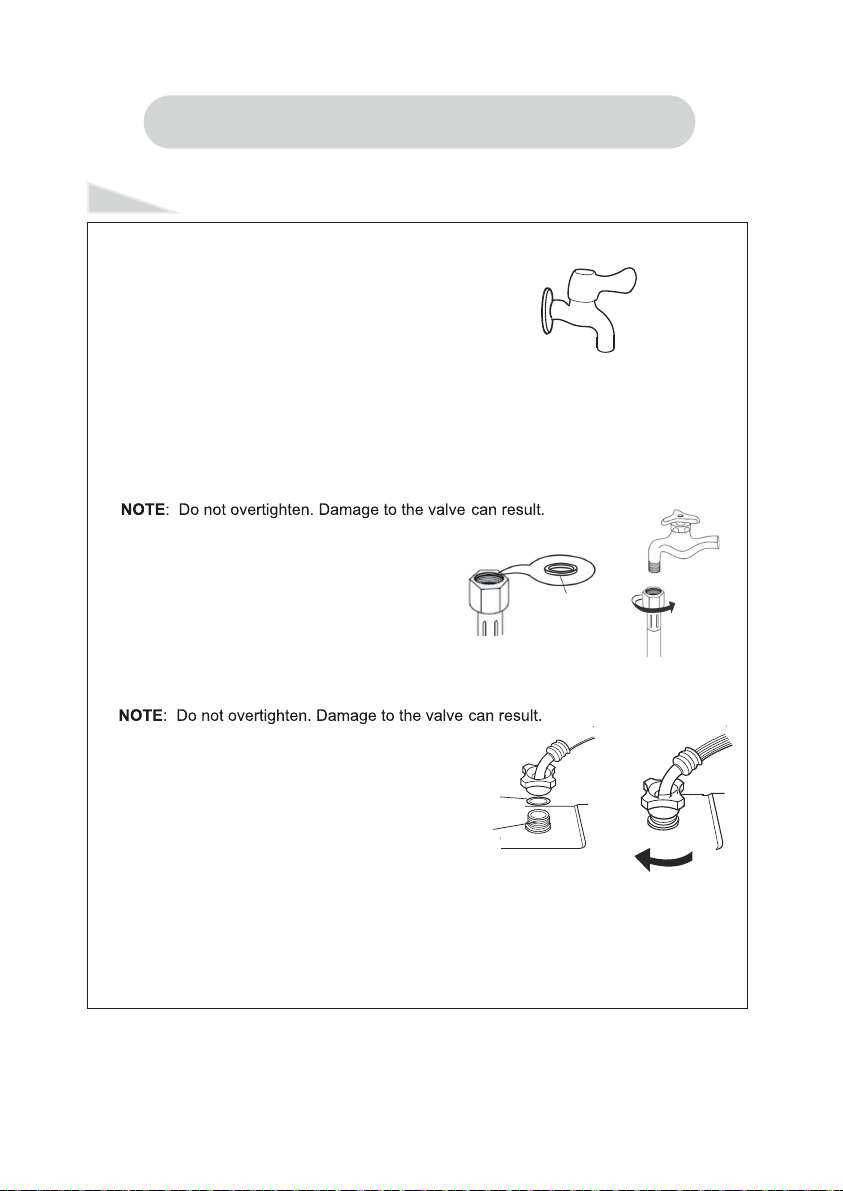
Connection of the drain hose (some modes have been connected)
1. Press down the fix ring, 2. Press down the fix ring, and 3. This machine equips with upper drainage,
it can drain even if drain hose is hung up,
but the hose should not be positioned over
0.9m.
and hitch it over the drain
hose.
then push it to the drain outlet.
Clasping the fix ring to make
sure they are connected well.
<0.9m
The socket should include a 3A fuse.