Lamina T-801BR.SE Operation instructions

Lamina T-801BR.SE
User Operating Manual
Intel Windows 8.1 Tablet PC

Quick Start Guide
Introduction
Thank you for your choosing the new Lamina T-801BR.SE WindowsTablet PC.
This guide serves to enable users to get to know and familiar with our product as soon as possible.
Here we have made a brief introduction to the key layout and definitions in figures and words.
Contents
03
04
05
06
I. Precautions before Use
II Key Layout and Definitions
III Key Descriptions and Applications
Ⅳ. Introduction to Desktop
V. Pikopas Suomi
VI. Hurtigguide på Norsk/Dansk
VII: Snabbstartsguide på Svenska
06
06
06
08
09
1. Windows8.1 Start
Screen
2. Camera usage
3. Image Slide Application
4. apps Introduction
5. Charm Menu Column
6. Double Screen
Application
11
Ⅴ. Basic Operations
12
12
1. Dormancy, Restart, and Power
off
2. Security Management 12

Ⅰ. Precautions before Use
This production is suitable for use in non-tropic areas below 2,000 meters, and the mark the
nameplate indicates the product is suitable for use in non-tropic areas.
2. Prevent the Tablet PC from falling to the ground or being strongly impacted otherwise.
3. Do not use it in the long term in any environment where the air is too cold, too hot (<35℃), too
humid or with too much dust. Do not expose the Tablet PC to sunlight.
4. Avoid using it in the strong magnetic and strong static environment as much as possible.
5. Once any water or other liquid splashes onto the Tablet PC, close it immediately and do not use
it until it dries out.
6. Do not clean the Tablet PC with any detergent containing chemical element or other liquid to avoid
causing damage due to corrosion and becoming damp. If cleaning is really necessary, clean it with dry
soft cloth tissue paper.
7. Our company shall not bear any and all responsibilities for loss or deletion of material inside the
machine caused due to abnormal software and hardware operation, maintenance or any other accident.
8. Please back up your important material at any time to avoid loss.
9. Please do not disassemble the Tablet PC by yourself; otherwise you will lose the
right to warranty.
10. This product supports the overwhelming majority of mainstream brands of 3G DONGLE network
cards. The cases for 3G Dongle may be different. It is suggested that you test it to make sure it is OK
before buying it.
11.Replacement with incorrect type batteries may cause explosion. Make sure to use original
batteries.

1 .Home key:According to the menu list
2 Sound-/sound+: Lower/raise volume
3 Front CCD camera: take photos, and record pictures
4 CCD camera indicator: The CCD camera indicator will be on when the built-in CCD camera
is used.
5 Power button: Press it down to start or close the touch screen panel. You can also let the
computer to enter dormancy through this button or wake from the dormancy mode.
6 DC Indicator: Becomes brighter when charging.
7 Socket for earphone and microphone: This socket can transmit the audio signals of Tablet PC
to loudspeaker or earphone.
8 Micro USB Interface: You can read the data through USB.
9 Mini HDMI Interface: High-Definition Multimedia Interface
10 Micro SD card slot: The built-in storage card reader slot supports MicroSD and MicroSDHC
format.
11 MIC:Microphone
12 Power DC Interface: Recharge your Tablet PC through DC interface.
14 Back CCD camera: take photos, and record pictures
15 Loudspeaker: The built-in loudspeaker enables you to hear the sound without having to
linking additional device.

V. Pikopas Lamina
Kiitos laadukkaan Lamina-tuotteen valinnasta!
Jotta pääset nopeasti ja yksinkertaisesti liikkeelle, seuraa allaolevia
ohjeita.
Jotta pääset nopeasti ja yksinkertaisesti liikkeelle, seuraa alla olevia ohjeita.
1. Suosittelemme, että kytket laitteen verkkovirtaan ennen kuin aloitat.
2. Käynnistä tuote painamalla virtanappia, joka on laitteen oikealla puolella kaikkein
ylimpänä, kun laite on pystyasennossa ja näyttö on käyttäjään päin. Paina nappia muutaman
sekunnin ajan jotta laite käynnistyy.
3. Valitse alue, kieli ja näppäimistöasetukset sekä aikavyöhyke (Suomi UTC + 02:00).
4. Lue ja hyväksy Windows 8.1-käyttöjärjestelmän lisenssiehdot. Lisenssiehdot ovat englanniksi.
5. Muokkaa asetukset toivomuksiesi mukaan. (kuten esim. taustaväri ja tietokoneen nimi).
6. Muodosta yhteys langattomaan WiFi-verkkoon. Tämän voi tehdä myös myöhemmin.
7. Käytä vakioasetuksia ”Express” tai muokkaa asetukset haluamiksesi manuaalisesti valitsemalla
”Customise”. HUOM! Mikäli valitset manuaaliset asetukset, on erittäin tärkeää että annat
Windows Update toiminnon asentaa tärkeät ja suositellut päivitykset automaattisesti!
8. Tilisi asetukset
a. Luo paikallinen tili.
b. Luo tai konfiguroi itsellesi Microsoft-tili. Näin saat esimerkiksi sähköpostit,
internet-suosikit laitteisiisi.
9. Tämän jälkeen laite asentaa ohjelmistot valmiiksi.
10. Tarkista/vaihda kieli.
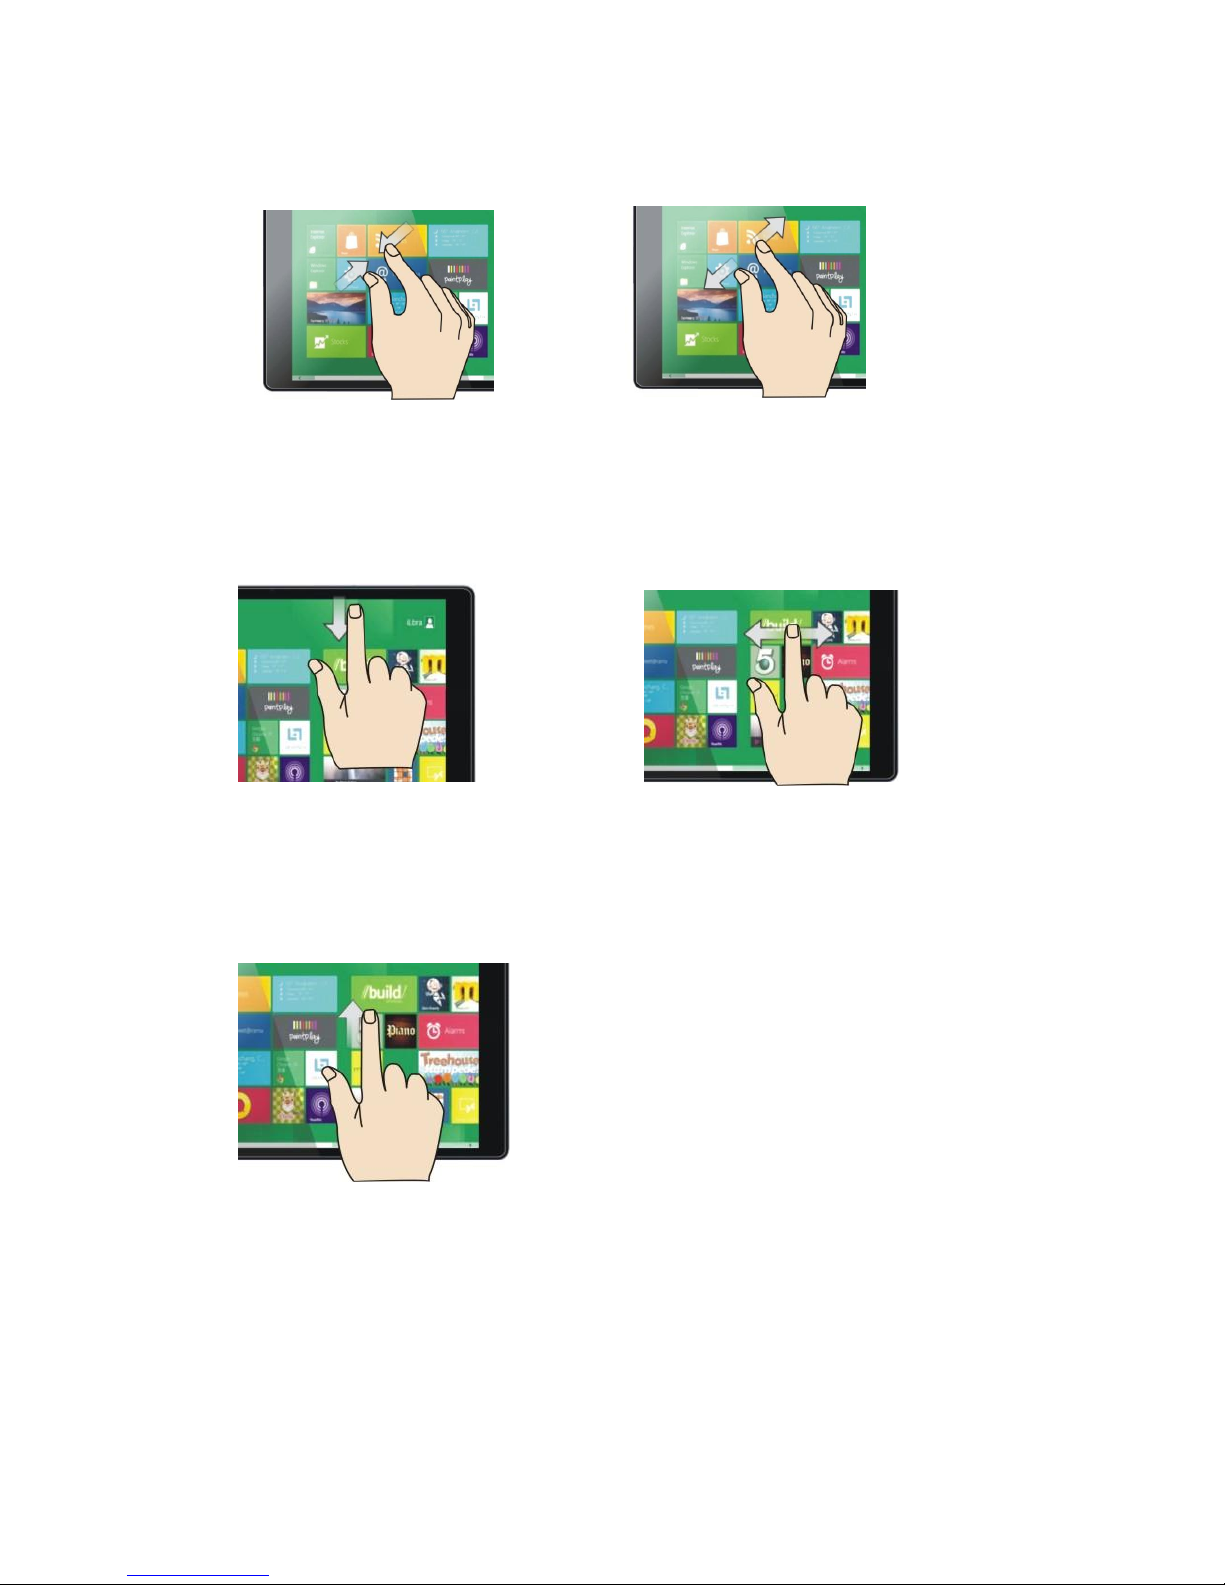
a. Pyyhkäise näytön oikeaa laitaa sivulta keskelle päin ja valitse ”Settings”.
b. Valitse ”PC Settings” näytön alanurkassa.
c. Valitse”Time and language”.
d. Valitse ”Region and laguage”
e. Valisemasi kielen kohdalla lukee ”Checking Windows Update”. Kun näytössä
lukee: ”Language pack available” paina valitsemaasi kieltä a valitse Options.
f. Valitse ”Download” ladataksesi kielipakettisi ja odota kunnes kielipakettisi on asennettu.
g. Pyyhkäise näytön oikeaa laitaa sivulta keskelle päin ja valitse jälleen ”Settings”.
h. Valitse ”Power” - ”Restart”. Laite käynnistyy uudelleen ja valitsemalla kielelläsi.
11. Säädä kellon asetuksia:
a. Pyyhkäise näytön oikeaa laitaa sivulta keskelle päin.
b. Valitse asetukset.
c. Valitse tietokonen asetukset (Linkki sijaitsee oikealla näytön alalaidassa).
d. Valitse aika ja kieli.
e. Kohdassa Aika ja kieli voit tarkistaa että kello on oikeassa ajassa.
f. Mikäli kello ei ole oikeassa ajassa muuta kohta ”Säädä aika automaattisesti”
off-asennosta, on-asentoon.
g. Paina sitten Muuta ja säädä aika oikeaksi.
13. Kaikki valmiina!
Mikäli haluat asentaa Office 365-ohjelmiston (1 vuoden käyttöoikeus tulee laitteen mukana),
mene Office-sovellukseen Start-näkymässä. Jotta saat Office 365-ohjelmiston ja 1 vuoden lisenssin
oikein käyttöösi on erittäin tärkeää, että kello ja päivämäärä ovat oikein säädetty kohdan 11 mukaan.

VI. Instruksjoner/Instruktioner Lamina (NO/DK)
Takk for at du valgte et kvalitetsprodukt fra Lamina!
1. Vi anbefaler at du kobler enheten til et strømuttak før du begynner.
2. Start nettbrettet/tablet ved å trykke på knappen øverst på høyre side, mens du holder nett
brettet i stående retning, mot deg. Du må kanskje holde knappen inne i noen sekunder.
3. Velg region, språk, tastaturutseende og tidssone
4. Les og godta lisensvilkårene for Windows 8.1.OBS! På Engelsk.
5. Tilpass nettbrettet/din tablet, f.eks bakgrunnsfargen og PC-navnet.
6. Tilslut/Koble til WiFi.
7. Bruk standardinstillingene ”Express” eller tilpass ”Customise”(avansert/avanceret)
OBS! Hvis du velger å tilpasse innstillingene, er det viktig at du lar Windows Update installere
viktige og anbefalte oppdateringer automatisk!
8. Din konto
a. Opprett/opret en lokal konto
b. Opprett/Konfigurer en Microsoft-konto. På denne måten kan du få tilgang til
e-post, internett-favoritter og mer på tvers av alle enhetene dine.
9. Enheten konfigureres og appene dine installeres
10. Kontroller/juster språk.
a. Sveip/stryg inn fra høyre og velg ”settings”.
b. Velg ”PC Settings” lengst nede på skjermen.
c. Velg ”Time and language”.
d. Velg ”Region and language”.
e.. Ved ditt valgte språk står det ”Checking Windows Update”. Når det står ”Langua
ge pack avaiable” trykk på det valgte språket og velg ”Options”.
f. Velg ”Download” for å laste ned og vent til ditt valgte språk installeres.
g. Sveip/stryg inn fra høyre og velg ”Settings”.
h. Velg ”Power” – ”Restart”. Enheten starter på nytt, med ditt valgte språk som standard.
11. Kontroller/juster tidsinnstillinger (Forutsetter at du valgte Norsk/Dansk i steg 10):
a. Sveip/stryg inn fra høyre
b. Velg innstillinger.
c. Sveip/stryg inn fra høyre
d. Velg innstillinger.
e. Velg PC-innstillinger (lengst nede på skjermen).
f. Velg Tid og språk.
g. Under dato og tid, kontroller at klokken/uret er riktig .
h. Hvis ikke, så velg Still tid automatiskt (endre fra På til Av).
i. Deretter trykker du Endre og stiller inn klokken/uret på rett tid.
12. Ferdig!
Hvis du ønsker å installere Office 365 (1-års gratis lisens inkludert), gå til Office-appen på startskjermen.
For at det skal fungere å installere Office 365, og du skal få 1 års gratis lisens,
er det viktig å kontrollere/justere klokken/uret sombeskrevet i punkt 11 ovenfor.

VII: Snabbstartsinstruktion Lamina
Tack för ditt val av en kvalitetsprodukt från Lamina
För att Du ska komma igång så snabbt och enkelt som möjligt, följ nedanstående instruktion.
1. Vi rekommenderar att du ansluter plattan till strömadapter och ett eluttag innan du börjar.
2. Starta plattan genom att trycka in knappen längst upp på högersidan, när du håller plattan i
stående format, vänd mot dig. Du kan behöva hålla in knappen någon sekund.
3. Välj region, app-språk, tangentbordsutseende och tidszon (Sverige UTC + 01:00).
4. Läs och acceptera licensvillkoren för Windows 8.1. De är avfattade på engelska.
5. Gör anpassningar, av t.ex. bakgrundsfärg och datornamn.
6. Anslut till WiFi.
7. Använd standardinställningar ”Express” eller anpassa ”Customise” (avancerat)
OBS! Om du väljer att anpassa inställningar, är det viktigt att du låter Windows Update instal
lera viktiga och rekommenderade uppdateringar automatiskt!
8. Ditt konto
a. Skapa ett lokalt konto
b. Skapa/Konfigurera ett Microsoft-konto. På så sätt kan du komma åt din e-post,
internet-favoriter och annat på alla dina enheter.
9. Plattan konfigureras och dina appar installeras.
10. Kontrollera/ändra språk.
a. Svep in från höger och välj ”Settings”.
b. Välj ”PC Settings” längst ned på skärmen.
c. Välj ”Time and language”.
d. Välj ”Region and laguage”
e. Vid ditt valda språk står det ”Checking Windows Update”. När det står ”Language
pack available” tryck på det valda språket och välj Options.
f. Välj ”Download” för att ladda ner och vänta tills ditt valda språkpaket installerats.
g. Svep in från höger och välj ”Settings”.
h. Välj ”Power” - ”Restart”. Enheten startar om, med ditt valda språk som standard.
11. Kontrollera/justera klockans inställning (utgår ifrån att du valt svenska i steg 10 ovan):
a. Svep in från höger.
b. Välj Inställningar.
c. Välj Datorinställningar (längst ned på skärmen).
d. Välj Tid och språk.
e. Under Datum och tid, kontrollera att klockan går rätt.
f. Om inte, tryck på Ställ in tiden automatiskt (ändra från På till Av).
g. Tryck sedan Ändra och ställ in klockan på korrekt tid.
12. Klart!
Om du vill installera Office 365 (1 års fri licens ingår), gå till Office-appen på Start-skärmen.
För att det ska fungera att installera Office 365 och du ska få din 1 års fria licens är det viktigt
att kontrollera/justera klockan enligt instruktionerna under punkt 11 ovan.

Ⅲ. Introduction to Desktop
1. Windows 8.1 start image: On the start screen, you can see many programs
fixed in the image. These application programs are displayed in the form of “magnet”.
As long as you click them, you can easily visit them.
You need to log on your Microsoft account before the application program completely runs.
2.Camera usage
1. In Windows menu tap this① camera, to<Picture 2>.

1 Photo button: tap this slightly to take pictures
2 Video button: tap this to enter video model
3 Change camera button: swift front & rear camera
4 Timer button: choose suitable time
5 Exposure button: adjust the brightness when taking pictures
look for the taken pictures
2. Image slide applications
Slide to right Slide to left
Slide to the left from the right side
of the screen to start Charm menu
column.
Slide to the right from the left
side of the screen to start the
application program in running.

Reduce Enlarge
On the touch screen, widen two fingers On the touch screen, narrow two
fingers to reduce the image. to enlarge the image.
Slide downward Slide with finger
In start screen, slide from the top of the screen In start screen, slide finger right and left
to view all application programs to move the image.
Slide upward
In the start screen, slide upward from the bottom of the screen to visit all
application program (APPS) interfaces.
3. Introduction to app Interface
Besides the application programs already fixed on the start screen, you can also start other

application programs in all application programs, such as other software application
programs attached to the Tablet PC.
If you want to fix more application programs on the start interface, see the operation in
the figure below, (1) lightly touch, press and hold the application program magnet for
about one second and then let go, and select (2) to fix to the start screen.
Conversely, if you want to cancel or delete a certain application in the start screen,
(1) lightly touch, press and hold the application program magnet for about one second
and then let it go and run, and select (2) attribute column to cancel the programs such as
fixation and deletion and then it

can be completed.
4. Charm menu column
Slide it to the left from the right side of the screen to start Charm menu column,
including: Start, Device, Setup, Share, and Search Program.
Slide it to the left from the right side of the screen to start Charm menu column,
including: Start, Device, Setup, Share, and Search Program.
Can let you search the files and application programs in the Tablet PC.
Can let you share the program through social exchange website or e-mail.
Can return to the start screen. From the start screen, you can also use this
function to return the application program that is opened in the latest.
Can let you read, write and share files, connect external screen or printer with
the device connected to the Tablet PC.
Can let you set up the Table PC.

Search menu Share menu
Device Menu Set up Menu
5. Dual-Screen Application
On my computer in (Figure 1), slide it inward from the left side of the screen, drag it and
hold. Let go when seeing double interfaces appear.
In (Figure 2), press the partition button on the middle partition line and drag right and
left to partition the display proportion of the double screens.
(Figure 1)

(Figure 2)
Ⅴ. Basic Operations
1. Dormancy, restart and power off
2. Security Management
User and password setup

Method for quick setup:
Click the “Setup” button in “Charm” setup, and select “Change computer setup”. Select
“User” on the left and click “Create local account” in “Your account” on the right side.
After inputting the password of Complete Windows Live Id Account, input username,
password, confirm password and password prompt.

Supportinformation.
Table of contents
Other Lamina Tablet manuals