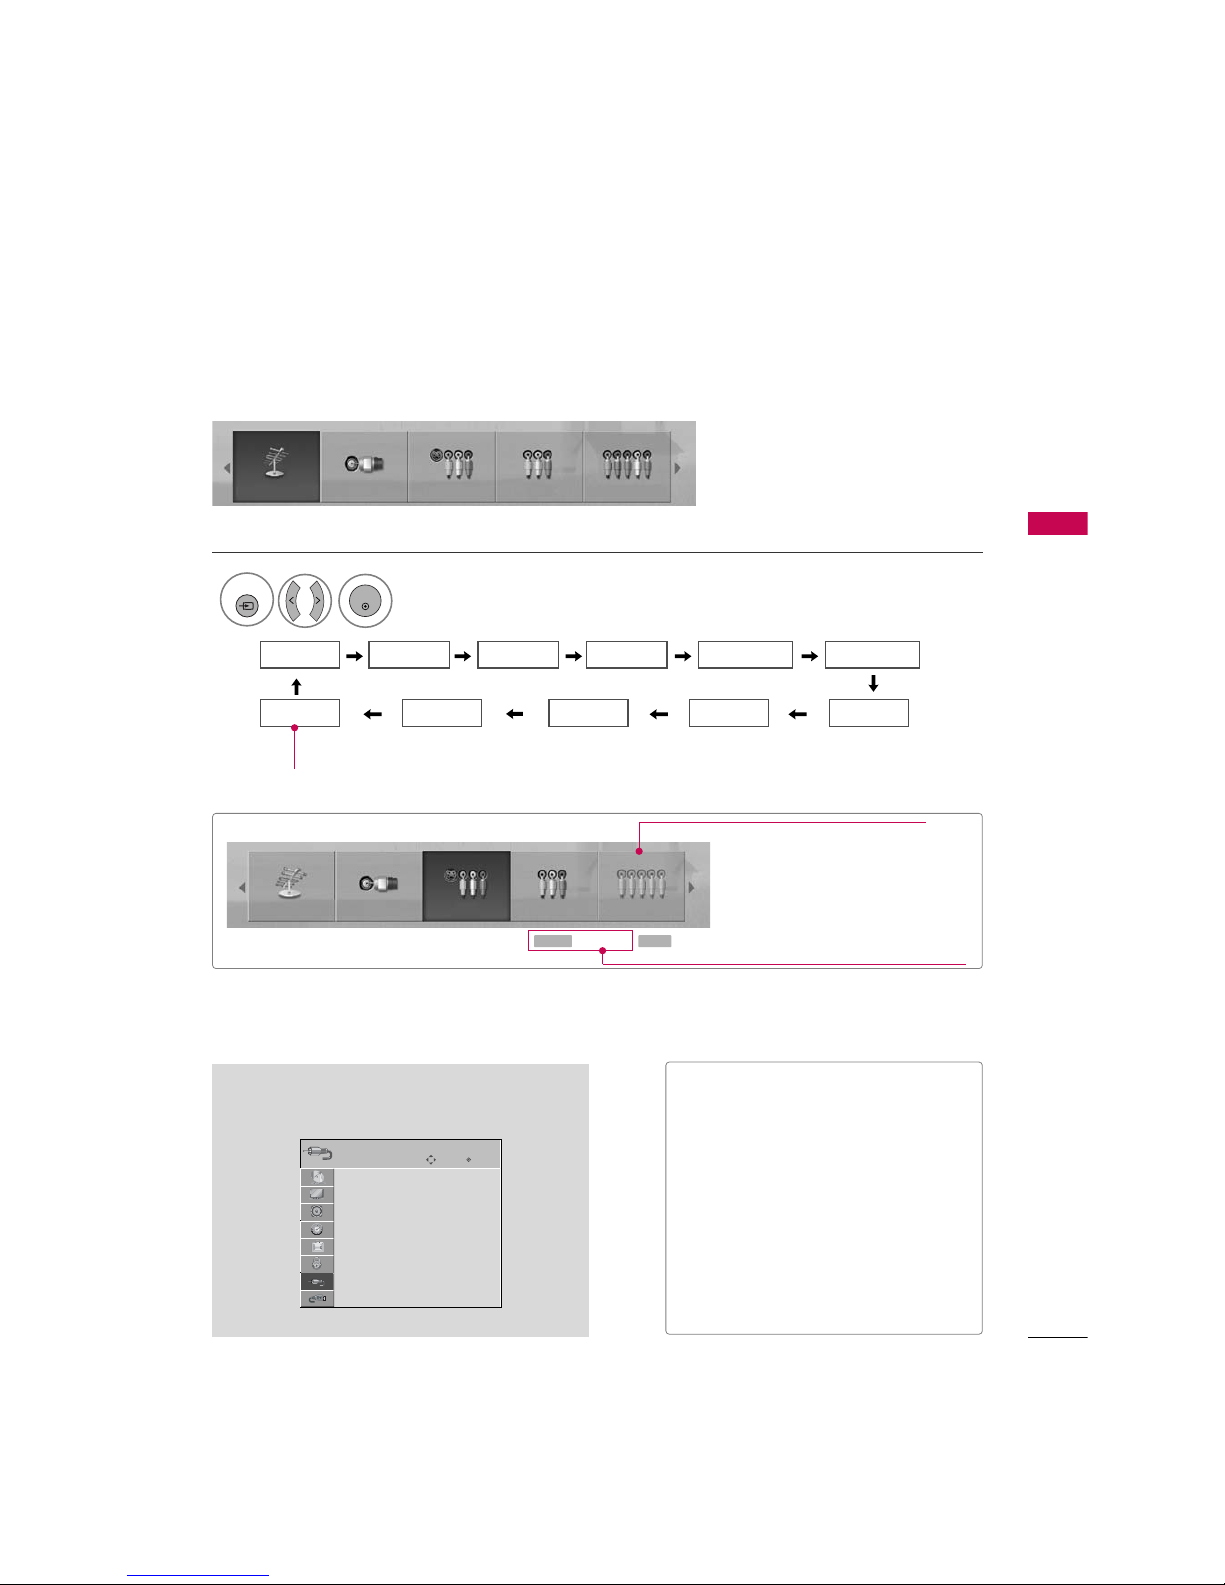
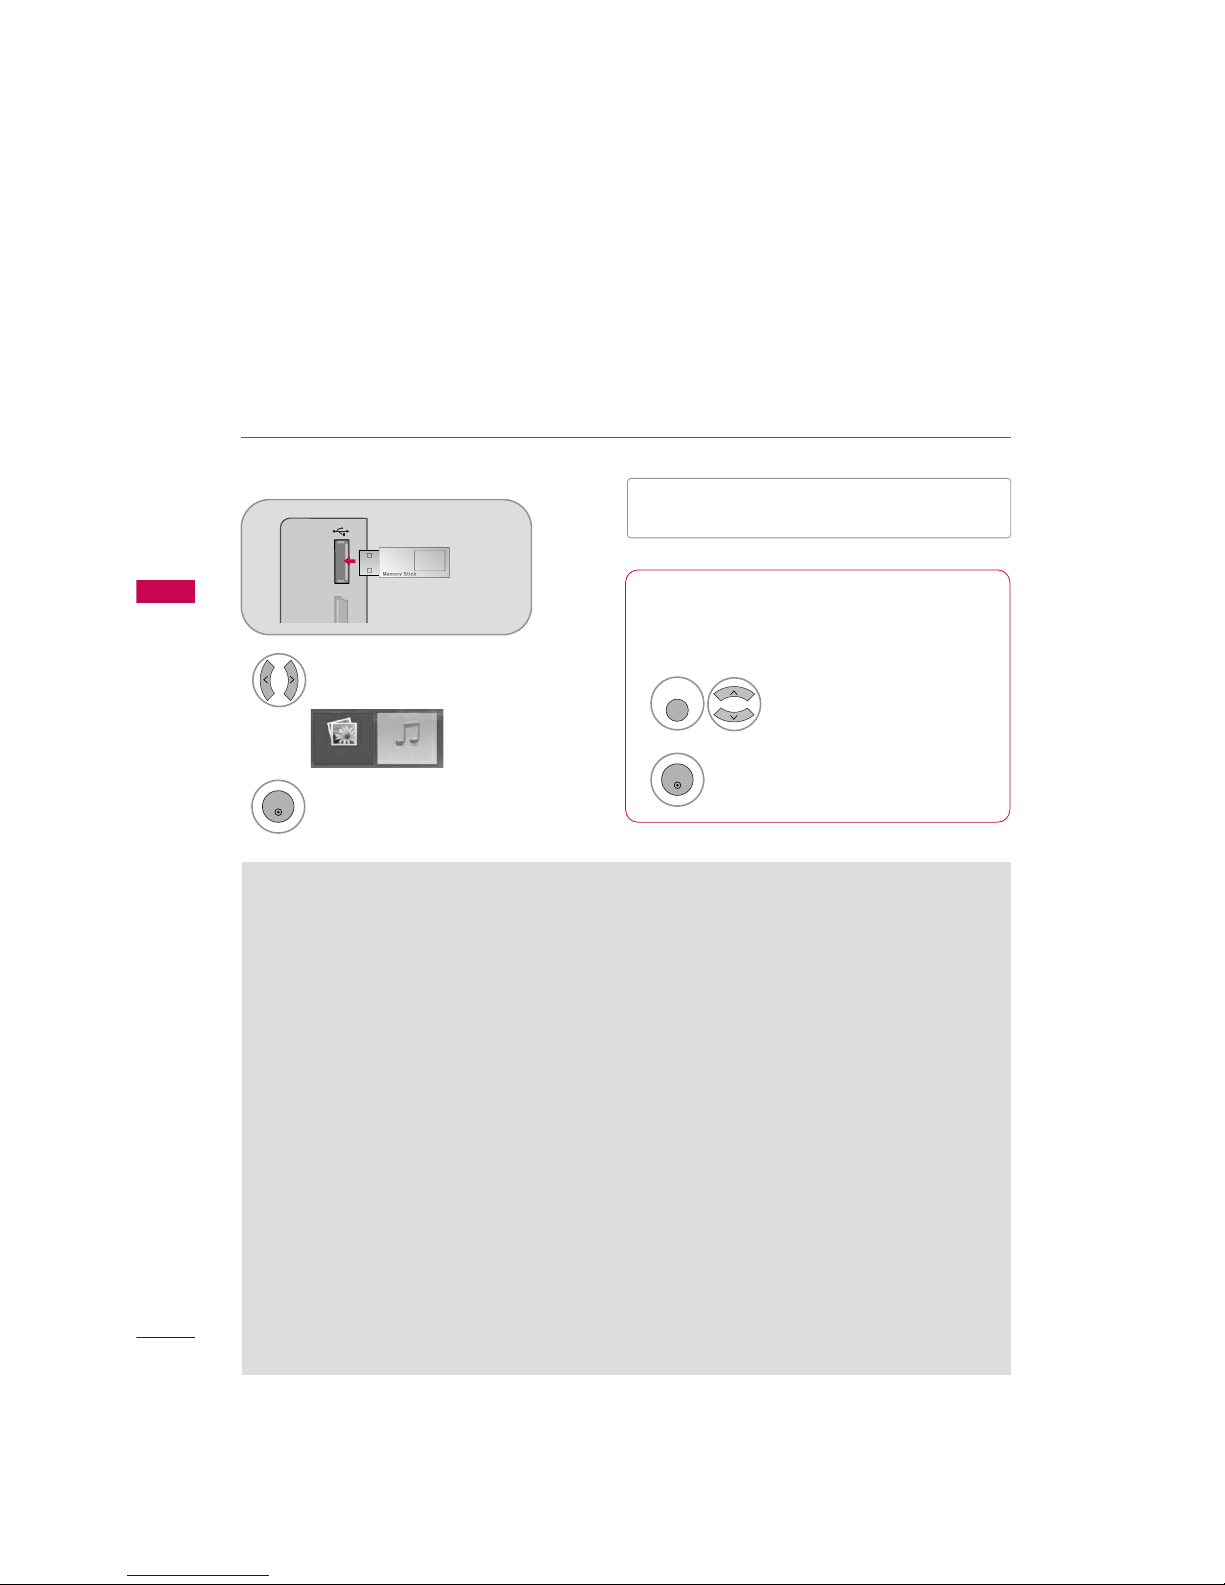
LG 47LG70 Series User manual

WATCHING TV / CHANNEL CONTROL
56
CHANNEL SETUP
WATCHING TV /CHANNEL CONTROL
Auto Scan (Auto Tuning)
Automatically finds all channels available through antenna or cable inputs, and stores them in memory on the
channel list.
Run Auto Tuning again after any Antenna/Cable connection changes.
Select CHANNEL.
Select Auto TTuning.
Select Yes.
Run Auto ttuning.
Enter
Move
CHANNEL
Enter
Move
CHANNEL
1
MENU
3
2
ENTER
ENTER
4
ENTER
Auto Tuning
Manual Tuning
Channel Edit
Auto Tuning
Manual Tuning
Channel Edit
Press ‘Yes’ button to begin
auto tuning.
Yes
No
■A password is required to gain access to
Auto Tuning menu if the Lock System is
turned on.
5
RETURN
Return to the previous menu.
MENU
Return to TV viewing.

WATCHING TV / CHANNEL CONTROL
57
Select CHANNEL.
1
MENU
2
ENTER
If selecting DTV or CADTV input signal, you can view the on-screen signal strength monitor to see the quality
of the signal being received.
Add/Delete Channel (Manual Tuning)
Enter
Move
CHANNEL
Enter
Move
CHANNEL
Channel
Select channel type and
RF-channel number.
F
DTV
G
2
Close
Delete
Auto Tuning
Manual Tuning
Channel Edit
DTV 2-0
Bad Normal Good
Select Manual TTuning.
Select DTV, T V, CADTV, or CATV.
Select channel you want to add
or delete.
3
ENTER
4
Select Add or Delete.
5
ENTER
Auto Tuning
Manual Tuning
Channel Edit
■A password is required to gain access to
Manual Tuning menu if the Lock System
is turned on.
6
RETURN
Return to the previous menu.
MENU
Return to TV viewing.

WATCHING TV / CHANNEL CONTROL
58
CHANNEL SETUP
WATCHING TV / CHANNEL CONTROL
Select a channel.
Select channel you want to add or
delete.
3
ENTER
4
ENTER
From the default channel list created from the Auto Tuning channel search, you can create two different types
of channel lists in memory: “custom list” and “favorite channel list”.
A custom list can be created by toggling each channel on or off with ENTER button. The channels in the Custom
List are displayed in black and the channels deleted from the Custom List are displayed in gray.
Once a channel is highlighted you can add or delete the channel by referring to the small window at the top-
right corner of the screen.
Channel Editing
Enter
Move
CHANNEL
Auto Tuning
Manual Tuning
Channel Edit
Select CHANNEL.
1
MENU
2
ENTER
Select Channel EEdit.
RETURN
Return to TV viewing.
Return to the previous menu.
5
MENU
Add/Delete Move Page
CH
Move Previous
MENU Exit
RETURN

WATCHING TV / CHANNEL CONTROL
59
INPUT LIST
Only these input signals which are connected to a TV can be activated and selected.
Select the desired input source.
1
INPUT
■You can also select the desired input source in
the INPUT menu (Except 32/37/42 LG30).
Antenna Cable AV1 AV2 Component1
HDMI4 HDMI3 HDMI2 HDMI1 RGB-PC
Component2
Antenna Cable AV1 AV2 Component1
ENTER
■Antenna: Select it to watch over-the-air
broadcasts.
■Cable: Select it to watch cable and dig-
ital cable.
■AV 11-2: Select them to watch a VCR or
other external equipment.
■Component 11-2: Select them to
watch DVD or a Digital set-top box.
■RGB-PC: Select it to view PC input.
■HDMI1-4: Select them to watch high
definition devices.
Enter
Move
Antenna
Cable
AV1
AV2
Component1
Component2
RGB-PC
HDMI1
INPUT
E
Except 32/37/42LG30, 37/42/47/52LG50
Antenna Cable AV1 AV2 Component1
Input Label
Q.MENU Exit
RETURN
Select a desired input source (except
Antenna or Cable). Then, you can select
your desired Input Label with using Q. MENU
button. Gp.60
Disconnected input is inactivated.
ie)

WATCHING TV / CHANNEL CONTROL
60
INPUT LABEL
WATCHING TV / CHANNEL CONTROL
You can set a label for each input source when it's not in use.
Enter
Move
OPTION
Enter
Move
OPTION
Language : English
Input Label
SIMPLINK : On
Key Lock : Off
Caption : Off
ISM Method : Normal
Power Saving : Level 0
Set ID : 1
Language : English
Input Label
SIMPLINK : On
Key Lock : Off
Caption : Off
ISM Method : Normal
Power Saving : Level 0
Set ID : 1
AV1
AV2
Component1
Component2
RGB-PC
HDMI1
HDMI2
HDMI3
HDMI4
F G
Close
EE
Except
32/37/42LG30,
37/42/47/52LG50
Select OPTION.
Select Input LLabel.
Select the label.
1
MENU
2
ENTER
Select the source.
3
ENTER
4
5
RETURN
Return to the previous menu.
MENU
Return to TV viewing.
With using OPTION menu
Select the source.
Select the label.
1
INPUT
2
Q. MENU
3
RETURN
Return to the previous menu.
MENU
Return to TV viewing.
With using INPUT button
■When new external device is connected, this popup menu is displayed automatically.
If selecting Yes, you can select input source that you want to appreciate.
■But, when selecting “SIMPLINK - O n” in HDMI mode, this popup menu is may not displayed.
No
Yes
!New external device is connected.
Do you want to enjoy this?
!
Select input source that you want to appreciate.
AV1
AV2
Component1

WATCHING TV / CHANNEL CONTROL
61
AV MODE
You can select the optimal images and sounds.
1
AV MODE
2
Off Cinema
Game Sport
Press the AV MMODE button repeatedly to select the desired source.
ENTER
■If you select “Cinema” in AV mode,
Cinema will be selected both for “PIC-
TURE menu - Picture Mode” and “AUDIO
menu - Sound Mode” respectively.
■If you select “Off” in AV mode, the
“Picture MMode” and “Sound MMode”
return to previous selected value.

WATCHING TV / CHANNEL CONTROL
62
WATCHING TV / CHANNEL CONTROL
This function operates only with devices with the logo.
If connected other brand device with the logo, it may not work.
This allows you to control and play other AV devices connected with HDMI cable without additional cables and
settings.
To start using SIMPLINK, turn it on in the user menus.
Enter
Move
OPTION
Select OPTION.
Select SIMPLINK.
Select On or O ff.
Enter
Move
OPTION
E
1
MENU
3
2
ENTER
ENTER
Language : English
Input Label
SIMPLINK : On
Key Lock : Off
Caption : Off
ISM Method : Normal
Power Saving : Level 0
Set ID : 1
Language : English
Input Label
SIMPLINK : On
Key Lock : Off
Caption : Off
ISM Method : Normal
Power Saving : Level 0
Set ID : 1
Off
On
NOTE
!
GConnect the HDMI/DVI IN or HDMI IN terminal of the TV to the rear terminal (HDMI terminal) of the
SIMPLINK device with the HDMI cable.
GWhen you switch the Input source with the INPUT button on the remote control, the SIMPLINK device
will stop.
GWhen you select a device with home theater functionality, the sound output automatically switches to
the home theater speakers.
GIf a connected SIMPLINK home theater system doesn't play the audio from the TV, connect the DIGITAL
AUDIO OUT terminal on the back of the TV to the DIGITAL AUDIO IN terminal on the back of the SIM-
PLINK device with an OPTICAL cable.
E
4
RETURN
Return to the previous menu.
MENU
Return to TV viewing.

WATCHING TV / CHANNEL CONTROL
63
■Direct PPlay: After connecting AV devices to the TV, you can directly control the devices and play media with-
out additional settings.
■Select AAVddevice: Enables you to select one of the AV devices connected to TV.
■Disc pplayback: Control connected AV devices by pressing the ,
ENTER,
G
,
A
, lll
,
FF and GG buttons.
■Power ooff aall ddevices: When you power off the TV, all connected devices are turned off.
■Switch aaudio-out: Offers an easy way to switch audio-out.
■Sync PPower oon: When you play the connected AV device, TV will automatically turn on.
(A device, which is connected to the TV through a HDMI cable but does not support SIMPLINK, does not provide
this function)
Note: To operate SIMPLINK, an HDMI cable over Version 1.2 with *CEC function should be used. (*CEC: Consumer
Electronics Control).
SIMPLINK Menu
TV vviewing: Switch to the previous TV
channel regardless of the current mode.
DISC pplayback: Select and play discs.
When multiple discs are available, the titles
of discs are conveniently displayed at the
bottom of the screen.
VCR pplayback: Control the connected
VCR.
HDD RRecordings pplayback: Control
recordings stored in HDD.
Audio OOut ttoHHome TTheater sspeak-
er/Audio OOut ttoTTV: Select Home
Theater speaker or TV speaker for Audio
Out.
SIMPLINK Functions
1
2
3
4
5
G
When no device is connected
(displayed in gray)
G
Selected Device
G
When a device is connected
(displayed in bright color)
1
2
3
4
5
Display SIMPLINK menu.
Select the desired device.
Control connected AV devices.
1
TV
SIMPLINK
3
2
ENTER
ENTER

ENTRY MODES
USB
64
USB
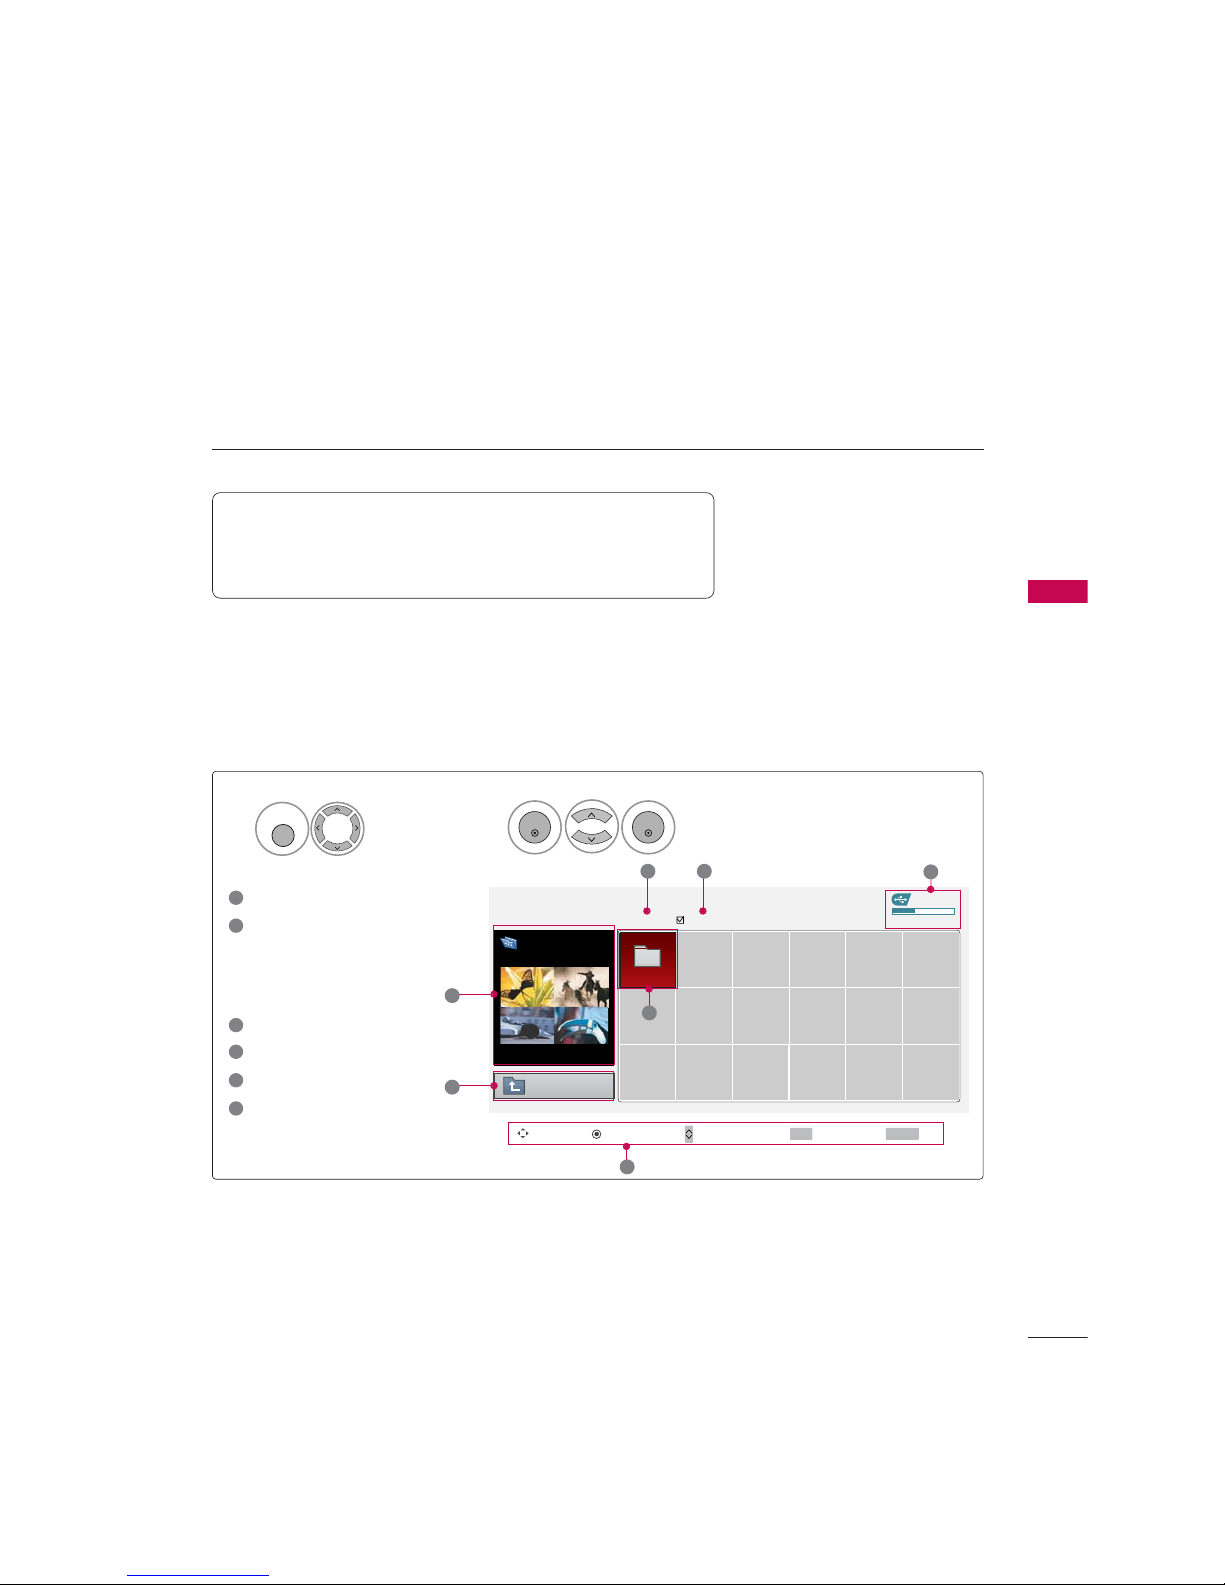
When you connect a USB device, this screen is displayed automatically.
In USB device, you can not add a new folder or delete the existing folder.
Precautions when using the USB device
GOnly a USB storage device is recognizable.
GIf the USB storage device is connected through a
USB hub, the device is not recognizable.
GA USB storage device using an automatic recogni-
tion program may not be recognized.
GA USB storage device which uses its own driver
may not be recognized.
GIn case of a card reader, up to four memory cards
are concurrently recognizable.
GThe recognition speed of a USB storage device
may depend on each device.
GPlease do not turn off the TV or unplug the USB
device when the connected USB storage device is
working. When such device is suddenly separated
or unplugged, the stored files or the USB storage
device may be damaged.
GPlease do not connect the USB storage device
which was artificially maneuvered on the PC. The
device may cause the product to malfunction or
fail to be played. Never forget to use only a USB
storage device which has normal music files or
image files.
GPlease use only a USB storage device which was
formatted as a FAT or NTFS file system provided
with the Windows operating system. In case of a
storage device formatted as a different utility pro-
gram which is not supported by Windows, it may
not be recognized.
GPlease connect power to a USB storage device
which requires an external power supply. If not,
the device may not be recognized.
GPlease connect a USB storage device with cable is
offered by USB maker. If connected with cable is
not offered by USB maker or an excessively long
cable, the device may not be recognized.
GSome USB storage devices may not be supported
or operated smoothly.
GFile alignment method of USB storage device is
similar to Window XP and filename can recognize
up to 100 English characters.
GPlease backup important files because data on
USB device may be damaged. Data management is
consumer's responsibility and as a result, the man-
ufacturer does not cover data damage.
When removing the USB device
Connect the USB device to the USB IIN
jacks on the side of TV.
3
Select PHOTO LLIST or MUSIC LIS T
1
MI IN 3 USB IN
PHOTO LIST MUSIC LIST
Select USB EEject.
Select the USB EEject menu before removing the
USB device.
2
ENTER
1
Q. MENU
2
ENTER
* This feature is only for 37/42/47/52LG50, 32/37/42/47/52LG60, 32/42/47/52LG70, Plasma TV.
■It doesn’t support USB HDD
■This TV supports JPG and MP3.

PHOTO LIST
USB
65
You can view .JPG files from USB storage devices.
The On Screen Display on your model may be slightly different.
Screen Components
Moves to upper level file
Preview: Display the
thumbnail/folder name of
the photo in the selected
folder
Current page/Total pages
Total number of marked photos
Usable USB memory
Corresponding buttons on
the remote control
Supported photo file: *.JPG
■You can play JPG files only.
■Only baseline scan is supported among JPG.
USB Device
Page 1/1 No Marked
PHOTO LIST
Upper
Free Space 150MB
Navigate PopUp Menu Move Page Mark Exit
2Folders, 4Files
3 4 5
1
1
2
Select USB.Select PHOTO LLIST.
2
TOP FOLDER
Drive1
1
MENU
ENTER
ENTER
1
2
3
4
5
6
Drive1
CH FAV RETURN
6

USB
66
USB
Photo Selection and Popup Menu
USB Device
Page 1/1
No Marked
PHOTO LIST
Upper
Free Space 150MB
2Folders, 4Files
USB Device
Page 1/1
No Marked
PHOTO LIST
Upper
Free Space 150MB
1366x768 125KB
Select the target folder or drive.
Select the desired photos.
2
Show the Popup menu.
3
1
■Use the CH button to navigation in the
photo page.
■Use the FAV button to mark or unmark a
photo. When one or more photos are marked,
you can view individual photos or a slide show
of the marked photos. If no photos are marked,
you can view all photos individually or all pho-
tos in the folder in a slide show.
TOP FOLDER
Drive1
4Select the desired Popup menu.
ENTER
ENTER
ENTER
Navigate Move Page Mark Exit
CH FAV RETURN
PopUp Menu
Navigate Move Page Mark Exit
CH FAV RETURN
PopUp Menu
Drive1
Drive1
Butterfly
Upper Photo X.Box 1366x768
125KB
View
Mark All
Delete
Cancel
When you select a file (not folder), this PopUp
menu is displayed.
GView: Display the selected item.
GMark AAll: Mark all photos on the screen.
GUnmark AAll: Deselect all marked photos.
GDelete: Delete the selected photo item.
GCancel: Close the pop-up menu.

USB
67
Full Screen Menu
You can change the Photo List view so that it fills the screen. More operations are available in full
screen mode.
■Use the CH button to navigation in the
photo page.
The aspect ratio of a photo may change the size of
the photo displayed on the screen in full size.
1/17
Sideshow BGM Delete Option Hide
Select the target folder or drive.
Select the desired photos.
Show the Popup menu.
5
Select View.
The selected photo is displayed in
full size.
2
3
1
4
ENTER
ENTER
ENTER
USB Device
Page 1/1
No Marked
PHOTO LIST
Upper
Free Space 150MB
2Folders, 4Files
USB Device
Page 1/1
No Marked
PHOTO LIST
Upper
Free Space 150MB
1366x768 125KB
TOP FOLDER
Drive1
Navigate Move Page Mark Exit
CH FAV RETURN
PopUp Menu
Navigate Move Page Mark Exit
CH FAV RETURN
PopUp Menu
Drive1
Drive1
Butterfly
Upper Photo X.Box 1366x768
125KB
View
Mark All
Delete
Cancel

USB
68
USB
1/17
Sideshow BGM Delete Option Hide
Select the Sideshow, BGM, (Rotate),
Delete,Option, or Hide.
Press FGGto set the time interval between slides.
Slide Speed Fast
Cancel
...
Music Folder
ENTER
■Use button to select the previous or
next photo.
■Use button to select and control
the menu on the full-sized screen.
ENTER
6
GSideshow: Selected photos are displayed during the
slide show. If no photo is selected, all photos in the cur-
rent folder are displayed during slide show.
■Set the time interval of the slide show in Option.
■A slide show continues for a maximum of 4 hours.
After 4 hours, the slide show will end and go to TV
mode or external input mode.
GBGM: Listen to music while viewing photos in full size.
■Set the BGM device and album in Option.
G(Rotate): Rotate photos.
■Rotates the photo 90°, 18 0 °, 270°, 360°clockwise.
GDelete: Delete photos.
GOption: Set values for Slide SSpeed and Music
Folder.
■Use button and ENTER button to set values.
Then go to and press ENTER to save the set-
tings.
■You cannot change Music FFolder while BGM is
playing.
GHide : Hide the menu on the full-sized screen.
■To see the menu again on the full-sized screen, press
ENTER button to display.
NOTE
!
GThis TV will not be able to decode
most JPEG images saved using the
Progressive option.

MUSIC LIST
USB
69
You can use the Music List menu to play MP3 files form a USB storage device.
This TV cannot play back copy-protected files.
The On Screen Display on your model may be slightly different.
Screen Components
Supported music file: *.MP3
Bit rate range 40Kbps ~320Kbps
• Sampling rate (Sampling Frequency)
MPEG1 : 32000, 44100, 48000Hz
MPEG2 : 16000, 24000, 22050Hz
MPEG2.5 : 16 ~48KHz
Moves to upper level file
Preview: If any album jacket
for the file exists, this jack-
et is displayed.
Current page/Total pages
Total number of marked
musics
Usable USB memory
Corresponding buttons on
the remote control
1
3
4
5
6
2
Select USB.Select MUSIC LLIST.
12
MENU
ENTER
ENTER
USB Device
MUSIC LIST
Upper
Free Space 150MB
3945 KB, 128 Kbps
Title Play Time
Upper
Good Bye
Arirang 04:12
05:30
3 4 5
1
2
Navigate PopUp Menu Move Page Mark Exit
CH FAV RETURN
6
Page 1/1 No Marked
Drive1
Arirang

USB
70
Music Selection and Popup Menu
■Use the CH button to navigation in
the music page.
■Use FAV button to mark or unmark a music
file. If no music is marked, all the music in the
folder will be played in sequence. When one or
more music files are marked, the marked music
files will be played in sequence. If you want to
listen to only one song repeatedly, just mark
that one file and play.
Up to 6 music titles are listed per page.
Select the target folder or drive.
Select the desired musics.
Show the Popup menu.
Select the desired Popup menu.
2
3
1
4
ENTER
ENTER
ENTER
5
RETURN
Return to TV viewing
USB Device
Page 1/1
No Marked
MUSIC LIST
Upper
Free Space 150MB
3945 KB, 128 Kbps
Drive1
Arirang
Navigate Move Page Mark Exit
CH FAV RETURN
PopUp Menu
Play TimeTitle
Upper
Good Bye
Arirang
USB Device
Page 1/1
No Marked
MUSIC LIST
Upper
Free Space 150MB
3945 KB, 128 Kbps
Drive1
Arirang
Navigate Move Page Mark Exit
CH FAV RETURN
PopUp Menu
Play TimeTitle
Upper
Good Bye
Arirang
05:30
04:12
3945 KB
128 Kbps
Play
Play with Photo
Mark All
Delete
Cancel
GPlay (During stop): Play the selected music.
Once a song finishes playing, the next selected
one will be played. When there are no selected
musics to play, the next one in the current fold-
er will be played. If you go to a different folder
and press the ENTER button, the current
music in playback will stop.
GPlay MMarked: Play the selected musics. Once
a music finishes playing, the next selected one
will be played automatically.
GStop PPlay (During playback): Stop the play-
ing musics.
GPlay wwith PPhoto: Start playing the selected
musics and then move to the Photo List.
GMark AAll: Mark all musics in the folder.
GUnmark AAll: Deselect all marked music.
GDelete: Delete the selected music.
GCancel: Close the pop-up menu.

USB
71
■The play information box (as shown below) will automatically
move across the screen when there is no user input to pre-
vent a fixed image remaining on the screen for a extended
period of time.
NOTE
!
GWhen music is playing, is displayed in front of the music play time.
GA damaged or corrupted music file that does not play displays 00:00 as the play time.
GMusic files with copy-protection will not play.
GPress ENTER, A, or RETURN button to stop the screen saver.
GThis TV can not play music files less than 16 Kbytes.

PICTURE CONTROL
72
PICTURE SIZE (ASPECT RATIO) CONTROL
PICTURE CONTROL
This feature lets you choose the way an analog picture with a 4:3 aspect ratio is displayed on your TV.
■ RGB-PC input source use 4:3 or 16:9 aspect ratio.
NOTE
!
GIf a fixed image is displayed on the screen for a long time, the image could become imprinted on the
screen and remain visible.
This phenomenon is common to all manufacturers and is not covered by warranty. Although, after watch-
ing video that did not fill the screen, any after-image from the black bars will normally dissipate after a few
minutes.
■You can also adjust Aspect RRatio in
the Q-Menu.
Enter
Move
PICTURE
E
Enter
Move
PICTURE
E
RG
Aspect Ratio : 16:9
Picture Mode : Standard
• Backlight 80
• Contrast 90
• Brightness 50
• Sharpness 60
• Color 60
• Tint 0
Aspect Ratio : 16:9
Picture Mode : Standard
• Backlight 80
• Contrast 90
• Brightness 50
• Sharpness 60
• Color 60
• Tint 0 RG
Set By Program
4:3
16:9
Zoom1
Zoom2
Just Scan
Select PICTURE.
Select Aspect RRatio.
Select the desired picture format.
1
MENU
3
2
ENTER
ENTER
4
RETURN
Return to the previous menu.
MENU
Return to TV viewing.

PICTURE CONTROL
73
Set by program
Selects the proper picture proportion to match
the source’s image.
4:3
Choose 4:3 when you want to view a picture
with an original 4:3 aspect ratio.
16:9
Adjust the picture horizontally, in a linear pro-
portion to fill the entire screen.
Zoom 1
Choose Zoom 1 when you want to view the pic-
ture without any alteration. However, the top and
bottom portions of the picture will be cropped.
Zoom 2
Choose Zoom 2 when you want the picture to be
altered, both vertically extended and cropped.
The picture taking a halfway trade off between
alteration and screen coverage.
Just Scan
Following selection will lead to you view the pic-
ture of best quality without loss of original pic-
ture in high resolution image.
Notes: If there are noise in original picture, you
can see the noise at the edge.
Just SScan operates only in
DTV/CADTV/Component/HDMI-DTV/DVI-DTV
(720p/1080i/1080p) input source.
(4:3 4:3)
(16:9 16:9)

PICTURE CONTROL
74
PRESET PICTURE SETTINGS
PICTURE CONTROL
Picture Mode - Preset
There are factory presets for picture settings available in the user menus. You can use a preset, change each
setting manually, or use the Intelligent Sensor.
Enter
Move
PICTURE
E
Select PICTURE.
Select Picture MMode.
Select Intelligent SSensor (Except
32/37/42LG30, Plasma TV), Vivid,
Standard, Cinema, Sport, or Game.
■Intelligent SSensor, Vivid, Standard,
Cinema, Sport, and Game Settings are
preset for the optimum picture quality at
the factory and are not adjustable.
■When selecting Intelligent SSensor
(Except 32/37/42LG30, Plasma TV),
the most suitable picture is automatically
adjusted according to the surrounding
conditions.
■You can also adjust Picture MMode in
the Q. MMenu.
Enter
Move
PICTURE
E
1
MENU
3
2
ENTER
ENTER
Aspect Ratio : 16:9
Picture Mode : Standard
• Backlight 80
• Contrast 90
• Brightness 50
• Sharpness 60
• Color 60
• Tint 0
Aspect Ratio : 16:9
Picture Mode : Standard
• Backlight 80
• Contrast 90
• Brightness 50
• Sharpness 60
• Color 60
• Tint 0 RG
Intelligent Sensor
Vivid
Standard
Cinema
Sport
Game
Expert1
Expert2
RG
4
RETURN
Return to the previous menu.
MENU
Return to TV viewing.

PICTURE CONTROL
75
Color Tone - Preset
Choose one of three automatic color adjustments. Set to warm to enhance hotter colors such as red, or set to
cool to see less intense colors with more blue.
Enter
Move
PICTURE
E
Select PICTURE.
Select Color TTemperature.
1
MENU
3
ENTER
Select Cool, Medium, or Wa rm.
4
• Brightness 50
• Sharpness 60
• Color 60
• Tint 0
• Advanced Control
• Reset
Screen (RGB-PC)
TruMotion Demo
Select Advanced CControl.
2
ENTER
5
RETURN
Return to the previous menu.
MENU
Return to TV viewing.
RG
Enter
Move
PICTURE
E
• Brightness 50
• Sharpness 60
• Color 60
• Tint 0
• Advanced Control
• Reset
Screen (RGB-PC)
TruMotion Demo
RG
Color Temperature
FMedium G
Fresh Contrast
Off
Fresh Color
Off
Noise Reduction
Auto
Gamma
Medium
Black Level
Low
Eye Care
Off
Real Cinema
Off
TruMotion
High
Close
Other manuals for 47LG70 Series
1
Table of contents
Other LG LCD TV manuals