Linden Group L55UTV17b User manual
55” (139cm) UHD LED LCD TV
Instruction Manual
L55UTV17b
24 Month Manufacturer’s Warranty
Table of Contents
Television Overview 2
Remote Control 4
Important Safety Instructions 6
Contents in the Box 9
Basic Setup Guide 10
Caring for the Environment 12
Connection Overview 13
Input Source 16
Channel Menu 17
Picture Menu 21
Sound Menu 23
Time Menu 26
Option Menu 29
Lock Menu 35
Hotel Mode 38
Media Operation 40
Photo Menu 45
Music Menu 46
Movie Menu 47
Text Menu 47
EPG 48
USB Record Function 51
USB Multimedia Playback Format 54
Resolution 55
Troubleshooting 56
Technical Specifications 57
2
Television Overview
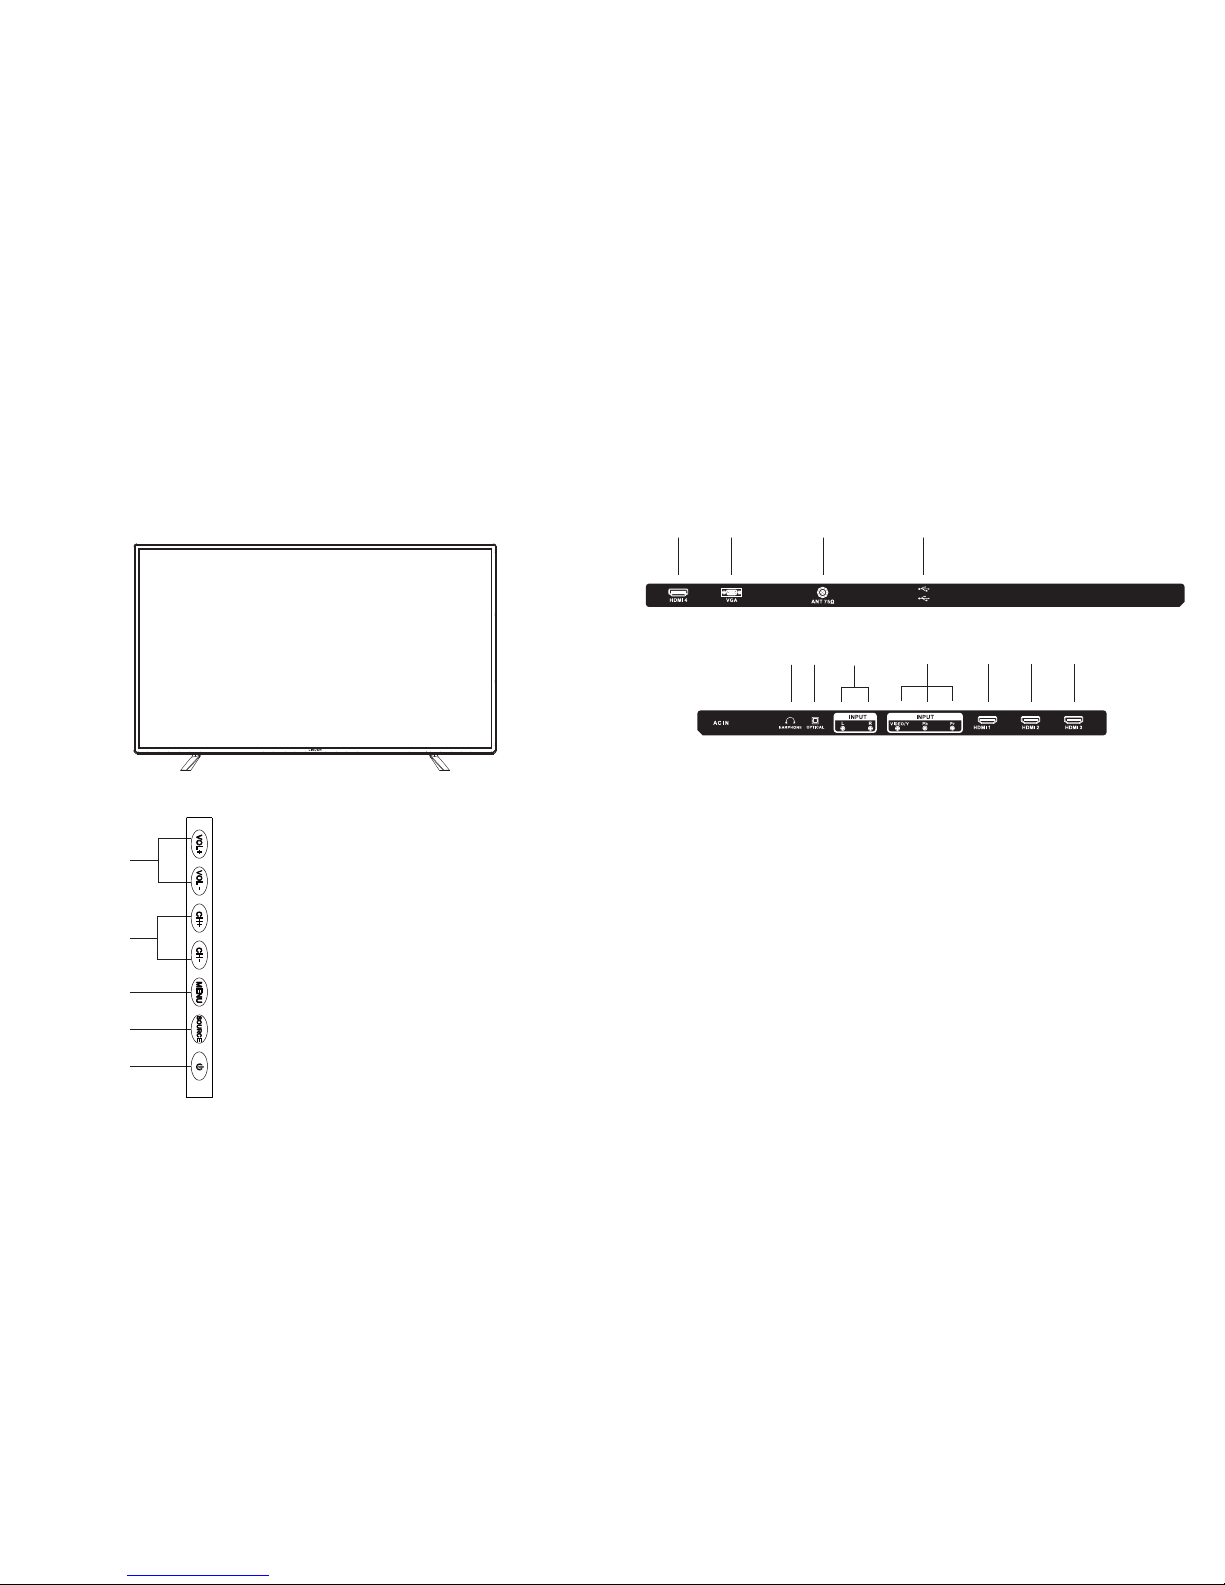
Side Buttons
Side
1. Power Button: Turn television on / off
2. Source: Source select
3. Menu: Enter or exit from Menu
- Use CH +/- to select an option
- Use VOL +/- to adjust an item
4. CH +/- : Select channel
5. VOL +/- : Adjust volume
1
2
3
4
5
3
Television Overview
Back Inputs & Outputs
Back
6.
7.
HDMI 4: HDMI connection port
67 8 9
12 13 14 15 16
10 11
8. ANT 75: Antenna (RF) connection
9. USB: USB 2.0
Optical: Optical cable out11.
10. Earphone Output
12. AV Input: External AV signal input and relevant right / left sound channel inputs
13. Video/Y - Pb - Pr: Component input and relevant video input
VGA Input
14. HDMI 1 : HDMI connection port
15. HDMI 2: HDMI connection port
16. HDMI 3: HDMI connection port
USB2
USB1
#4%
4
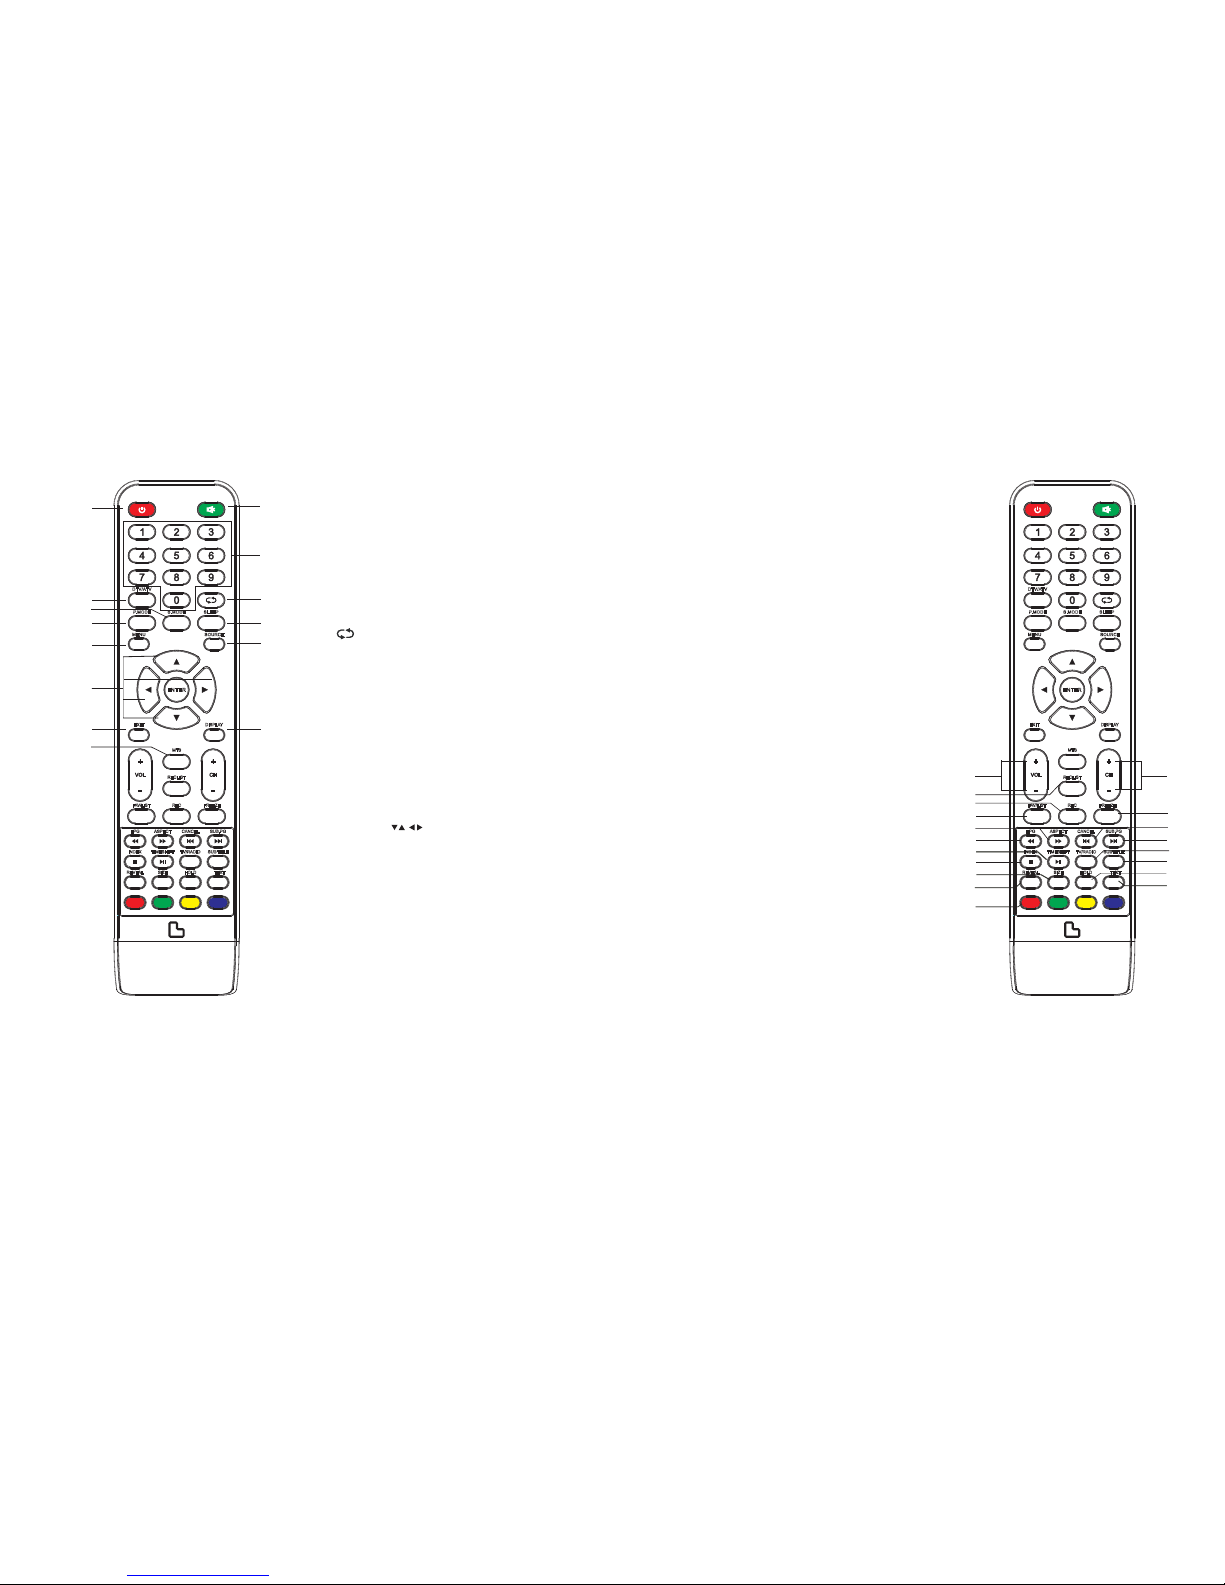
Remote Control Overview
1. Power: Turn your television on or put on standby
mode.
2. Mute: To mute sound. Press again or press VOL + to
unmute.
3. 0-9: Select a channel directly while watching televi-
sion. The channel will change after 2 seconds.
4. DTV / ATV: Switch between analog or digital televi-
sion.
5. Return to the previously viewed programme.
6. S.MODE: Scroll through the different sound
settings.
7. SLEEP: Select a timer before television turns itself off
automatically.
8. MTS: Scroll through Audio modes.
9. P.MODE: Scroll through different picture settings.
10. MENU: Opens the Main Menu.
11. SOURCE: Press to view and select available input
sources
12. ENTER and : Allows you to navigate the
on-screen Menus and adjust the system settings to
your preference.
13. EXIT: Exit from the menu or sub-menu and cancel the
current in process ( if applicable )
14. DISPLAY: Press to display the source and channel’s
info.
15. VOL + / - : Increase / decrease the volume.
16. TV / RADIO: Allows you to switch between TV and
Radio modes while watching television.
Battery Installation
Remove the battery compartment cover on the rear of the remote control by unlocking the clip and
pulling off. Insert two AAA batteries inside the battery compartment with their + and – ends aligned
as indicated. Do not mix old and new batteries or different types of batteries. Press the cover until you
hear it click into place.
MEN U SOU RCE
EN TER
EXI T
SLEEP
P.MOD E S.MO DE
DISPLAY
INDEX
REVEAL SIZE
TIMESHIFT
RECLIST
TEXT
EPG ASPECT CANCEL
FREEZE
HOLD
TV/RADIO SUBTITLE
FAV/LIST REC
RED GREEN YELLOW CYAN
SUB.PG
DTV /ATV
MTS
12
8
4
6
9
10
12
13
3
5
7
11
14
5
Remote Control Overview
17. EPG: (a) Launches the Electronic Programme Guide
(b) Rewind in PVR or Media Player mode.
18. TIMESHIFT: (a) DTV channel Timeshift Function.
(b) Play / pause during PVR or media playback.
19. CANCEL: When a page is selected in text mode, it may
take some time before it becomes available. CANCEL
button will return to TV mode. When the required page
is found, the page number will appear at the top of the
television. Press the CANCEL key to return to the text
mode.
20. INDEX: (a) Request the index page in Teletext mode.
(b) Exit while in PVR or Media Player.
21. SIZE: Change the size of display in Teletext mode.
22. REVEAL: Reveal or Hide the hidden words.
23. COLOURED BUTTONS: In the on-screen menus, these
buttons have different functions as specified by the
colours shown on-screen.
24. CH+ / - : Scan through channels.
25. FAV/LIST: Open the favourite list to select your
favourite channel(s)
26. ASPECT: (a) Adjust picture scale.
(b) Fast forward in Media Player mode.
27. FREEZE: Pause the programme.
28. SUB.PG: (a) Access the sub page.
(b) Next chapter in PVR or Media Player.
29. SUB TITLE: To show subtitles when watching digital
television (depending on availability).
30. HOLD: Hold On or Off for current page display.
31. TEXT: Switch Teletext On and Off.
32. REC LIST: Shows the list of recorded programmes.
33. REC: Begin recording current programme to a
connected USB storage device in PVR Mode.
Note: Teletext is not currently available in Australia.
MEN U SOU RCE
EN TER
EXI T
SLE EP
P.MOD E S.MO DE
DISPLAY
INDEX
REVEAL SIZE
TIMESHIFT
RECLIST
TEXT
EPG ASPECT CANCEL
FREEZE
HOLD
TV/RADIO SUBTITLE
FAV/LIST REC
RED GREEN YELLOW CYAN
SUB.PG
DTV /ATV
MTS
15
18
32
33
26
17
19
20
21
22
23
24
27
16
25
28
29
30
31

6
Important Safety Instructions
1. Read, keep and follow this Instruction Manu-
al, ensuring to heed all warnings.
2. Keep out of reach of young children. This
television is not suitable for use by young
children or infirm persons without
supervision. Young children must be
supervised to ensure that they do not play
with the television.
3. This television is not intended for use by
persons (including young children) with
reduced physical, sensory or mental
capabilities, or lack of experience and
knowledge, unless they are supervised or
have been given instructions concerning
the use of the television by a person who is
responsible for their safety.
4. Ensure that the television is positioned in a
stable location to avoid the risk of the
television falling. Many injuries, particularly
to children, can be avoided by taking simple
precautions such as:
- Using a stable and appropriately
sized television cabinet. Ensure its
stability by using a television safety
strap to attach the television to the
cabinet.
- Use the stand which has been
supplied with your television set.
- Ensuring the television is not
hanging over the edge of supporting
furniture.
- Not placing the television on tall
furniture (e.g. cupboards, book cases
etc.) without anchoring both the
furniture and the television to a suit
able support.
- Ensure that the television is placed
directly on supporting furniture,
avoiding placing fabric, cloth or
Symbols
The symbols used in this manual or on the back cover of the television set means:
When using any electrical apparatus, always observer safety regulations and use basic safety precau-
tions to reduce the risk of fire, electric shock, and/or personal injury including any of the following:
Read this Instruction Manual before use
Enclosures contain dangerous voltages
Please refer to important operating and maintenance/servicing instructions that
accompany the appliance
7
other materials between the television
and the supporting furniture.
- Educating children about the
dangers of climbing on furniture to
reach for the television and/or its
controls
5. WARNING! Do not insert any objects into
any openings of the television.
6. WARNING! Do not touch any moving parts
of the television.
7. WARNING! Do not use this television near
water, or in an area exposed to water
splashes or dripping. To avoid the risk of fire
or electric shock, do not expose this televi-
sion to rain and/or moisture.
8. WARNING! Do not place objects filled
with liquid, such as vases, on or above the
television.
9. DO NOT immerse in any liquid whilst in use
or whilst cleaning. Clean only with a damp
cloth and dry with a dry towel. Do not use
harsh abrasives as these may
damage plastic parts.
10. DO NOT block ventilation openings. Keep
away from curtains, newspapers and
restricted areas. Install in accordance with
specific manufacturer instructions. Always
allow sufficient space around the
television to avoid overheating.
11. DO NOT install near heat sources such as
radiators, gas heaters, stoves or other
apparatus (including amplifiers) that
produce heat. Do not place the television in
direct sunlight.
12. WARNING! Do not place naked flame
sources, such as lit candles, on the
television.
13. WARNING! Connect to a suitable
100-240V ~ 50/60 Hz power supply only.
14. Use the power cord with care - do not dam-
age the power cord in any way. If the power
cord is damaged, it must be replaced by
either the manufacturer, the
manufacturer’s service agent or qualified
service personnel. The power cord must be
replaced only with an authorised
replacement from an authorised
service agent.
15. Only use attachments/accessories
specified by the manufacturer.
16. Unplug this television during lightning
storms or when unused for long periods of
time.
17. Please consider the environment when
disposing of any batteries.
18. Refer all servicing to qualified personnel.
Servicing is required when the apparatus
has been damaged in any way, such as
when the power supply cord or plug is dam-
aged, liquid has been spilled or
objects have fallen into the apparatus, the
apparatus has been exposed to rain or
moisture, does not operate normally, or
has been dropped.
19. WARNING! Do not use the television
outdoors.
20. For household use only; this television is not
intended for commercial use.
21. This television is intended to be used in
household and similar applications such as;
- offices and other working
environments;
- farm houses;
- by clients in hotels, motels, bed
and breakfast and other residential
type environments.
22. If this apparatus is to be used by a third
party, please supply these instructions
with it.
8
23. No liability will be accepted for any
personal injury or damage caused by
failure to follow these instructions.
24. Danger of explosion if battery is incorrectly
replaced. Replace only with the same or equiva-
lent type.
25. Batteries (battery pack or batteries installed)
shall not be exposed to excessive heat such as
sunshine, fire or the like.
26. The mains plus is used as the disconnect
device, the disconnect device shall remain
readily operable.
9
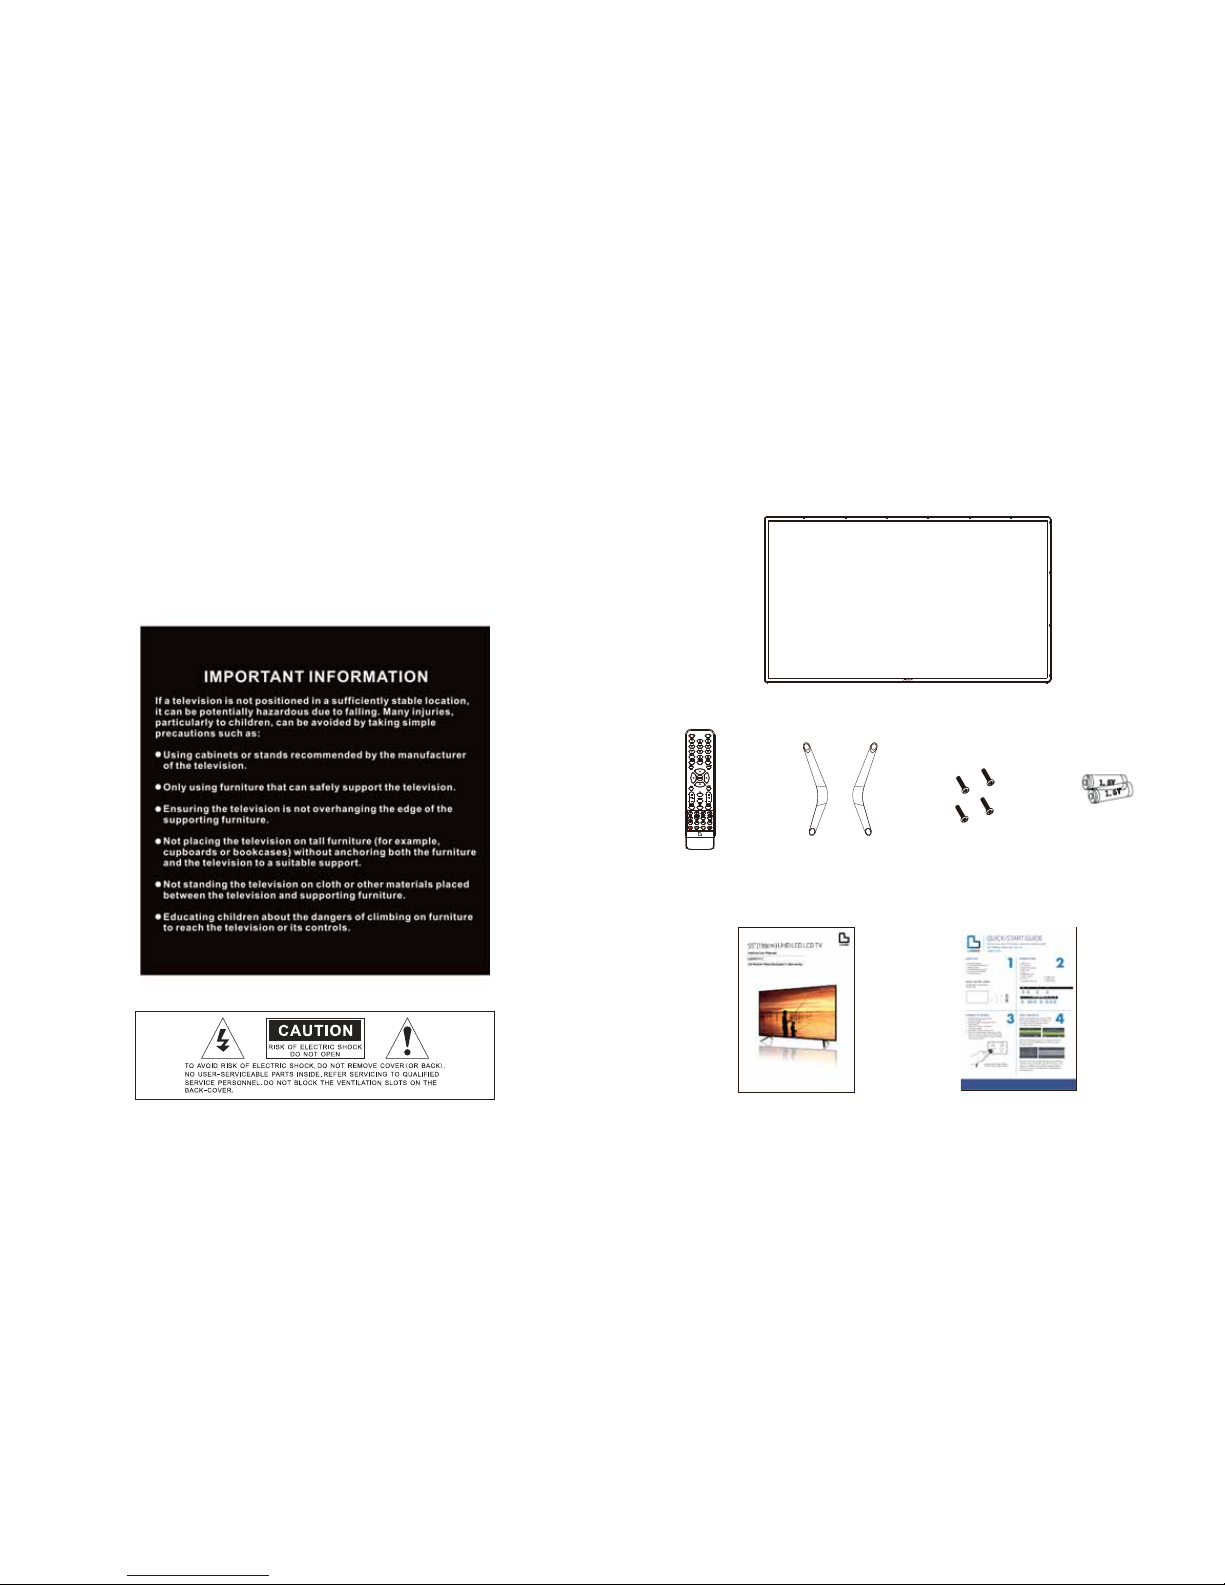
Contents in the Box
Television
Check that you have been provided with the following:
Screws
(4 qty)
AAA Batteries
(2 qty)
Remote Control
MENU SOURCE
ENTER
EXIT
SLEEPP.MODE S.MODE
DISPLAY
INDEX
REVEAL SIZE
TIMESHIFT
RECLIST
TEXT
EPG ASPECT CANCEL
FREEZE
HOLD
TV/RADIO SUBTITLE
FAV/LIST REC
REDG REEN YELLOWC YAN
SUB.PG
DTV/ATV
MTS
Left and Right Feet
Instruction Manual Quick Start Guide
b
b
10
Basic Setup Guide
Attach Feet
Follow these instructions carefully to assemble the feet to the television.
Each foot has a front and back side - they are not interchangeable. Ensure that you align the
front of the foot with the front of the television, and the back of the foot with the back of the television.
1. Lay your television screen down onto a soft and clean surface.
2. Use the correct sized screw driver to affix the foot, using 2 screws for each side. Repeat the
process for the other side.
IMPORTANT: Ensure that you do not over-tighten the screws.
Position and Placement
Make sure that you place your television on supporting furniture that can bear its weight.
Do not expose the television near water, fire places and/or heating apparatuses such as
heaters, candles, lighting etc.
Ensure that the back of the television is free from obstructions in order to keep the
ventilation from being blocked.
11
Basic Setup Guide
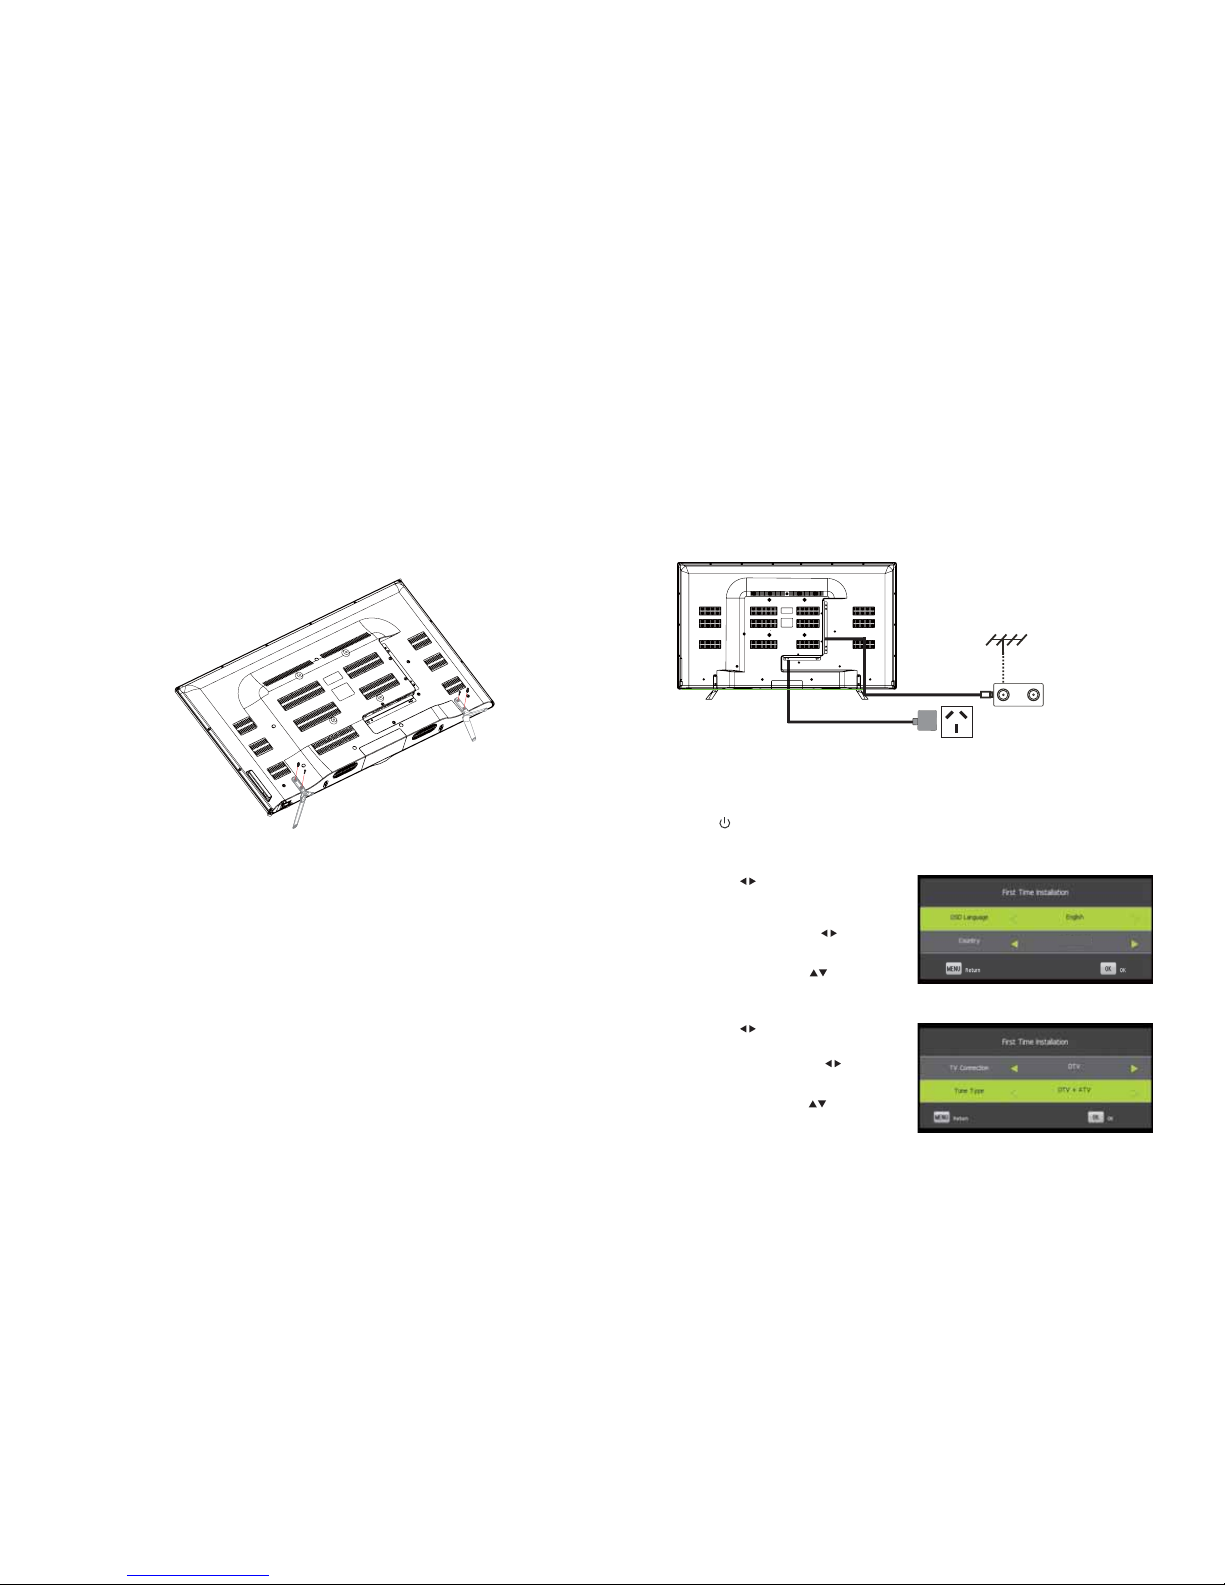
Turning your Television On & First Time Installation
Press the power button on the remote control to turn your television on. The television screen will
show the First Time Installation Menu.
• Use the buttons to select the OSD
Language to be used for On Screen
Display (OSD).
• Scroll down and use the
buttons to select the Country.
• Scroll down using the buttons to
select the OK.
Connecting the Antenna and Power
1. Connect one end of the antenna cable to the antenna socket (RF IN) at the back of the television set.
Please note that the antenna cable is not included with your television.
2. Plug the power lead into your nearest power
outlet. For your safety, we recommend using a
power outlet with a power surge protector.
AC power outlet
TV signal output
Australi a
• Use the buttons to select the TV
Connection type.
• Scroll down and use the
buttons to select the Tune Type.
• Scroll down using the buttons to select
the OK.

12
Caring for the Environment
Responsible Disposal of Packaging
The packaging of your television has been selected from environmentally friendly materials and can
usually be recycled. Please ensure the packaging is disposed of correctly. Plastic wrap can be a suf-
focation hazard for babies and young children, so please ensure packaging materials are out of reach
and are safely disposed of, and are recycled where possible.
Responsible Disposal of Appliances
At the end of its working life, do not throw out this television with your household rubbish. An envi-
ronmentally friendly method of disposal will ensure that valuable raw materials can be recovered and
used again. Electrical and electronic appliances contain materials and substances which, if handled or
disposed of incorrectly, could be potentially hazardous on the environment and human health.
Observe any local regulations regarding the disposal of electrical consumer goods and dispose of it
appropriately for recycling. Contact your local authorities for advice on recycling facilities in your area.
The plug must be rendered useless and the cable cut off directly behind the television to prevent misuse.
Basic Setup Guide
After the OSD Language, Country, TV
Connection Type and Tune Type have been
set, your television will start to automatically
tune channels onto your television.
If you don’t want to start Auto Tuning, press
MENU or EXIT and select Yes to exit or Do it
Next Time.
13
Connection Overview
The following pages outline the basic connection options available with this Linden television.
Audio/Video (AV) Input
Press the SOURCE button using either the remote control or the button located on the side of the televi-
sion set and select the AV option.
Earphone Output
#4%
#4%

14
Connection Overview
PC Input
Press the SOURCE button on either the remote control or the button located on the side of the
television set and select the PC option.
USB2
USB1
15
HDMI Input
Press the SOURCE button on either the remote control or the button located on the side of the
television set and select the appropriate HDMI option.
For HDMI1(ARC) Function,
please refer to HDMI CEC
Section on Page 33.
Component Video Input
Press the SOURCE button on either the remote control or the button located on the side of the television
set and select COMPONENT source.
Connection Overview
YPbPr Output
Audio Output
16
USB Input
Press the SOURCE button on either the remote control or the button located on the side of the television
set and select the MEDIA option.
USB
Connection Overview
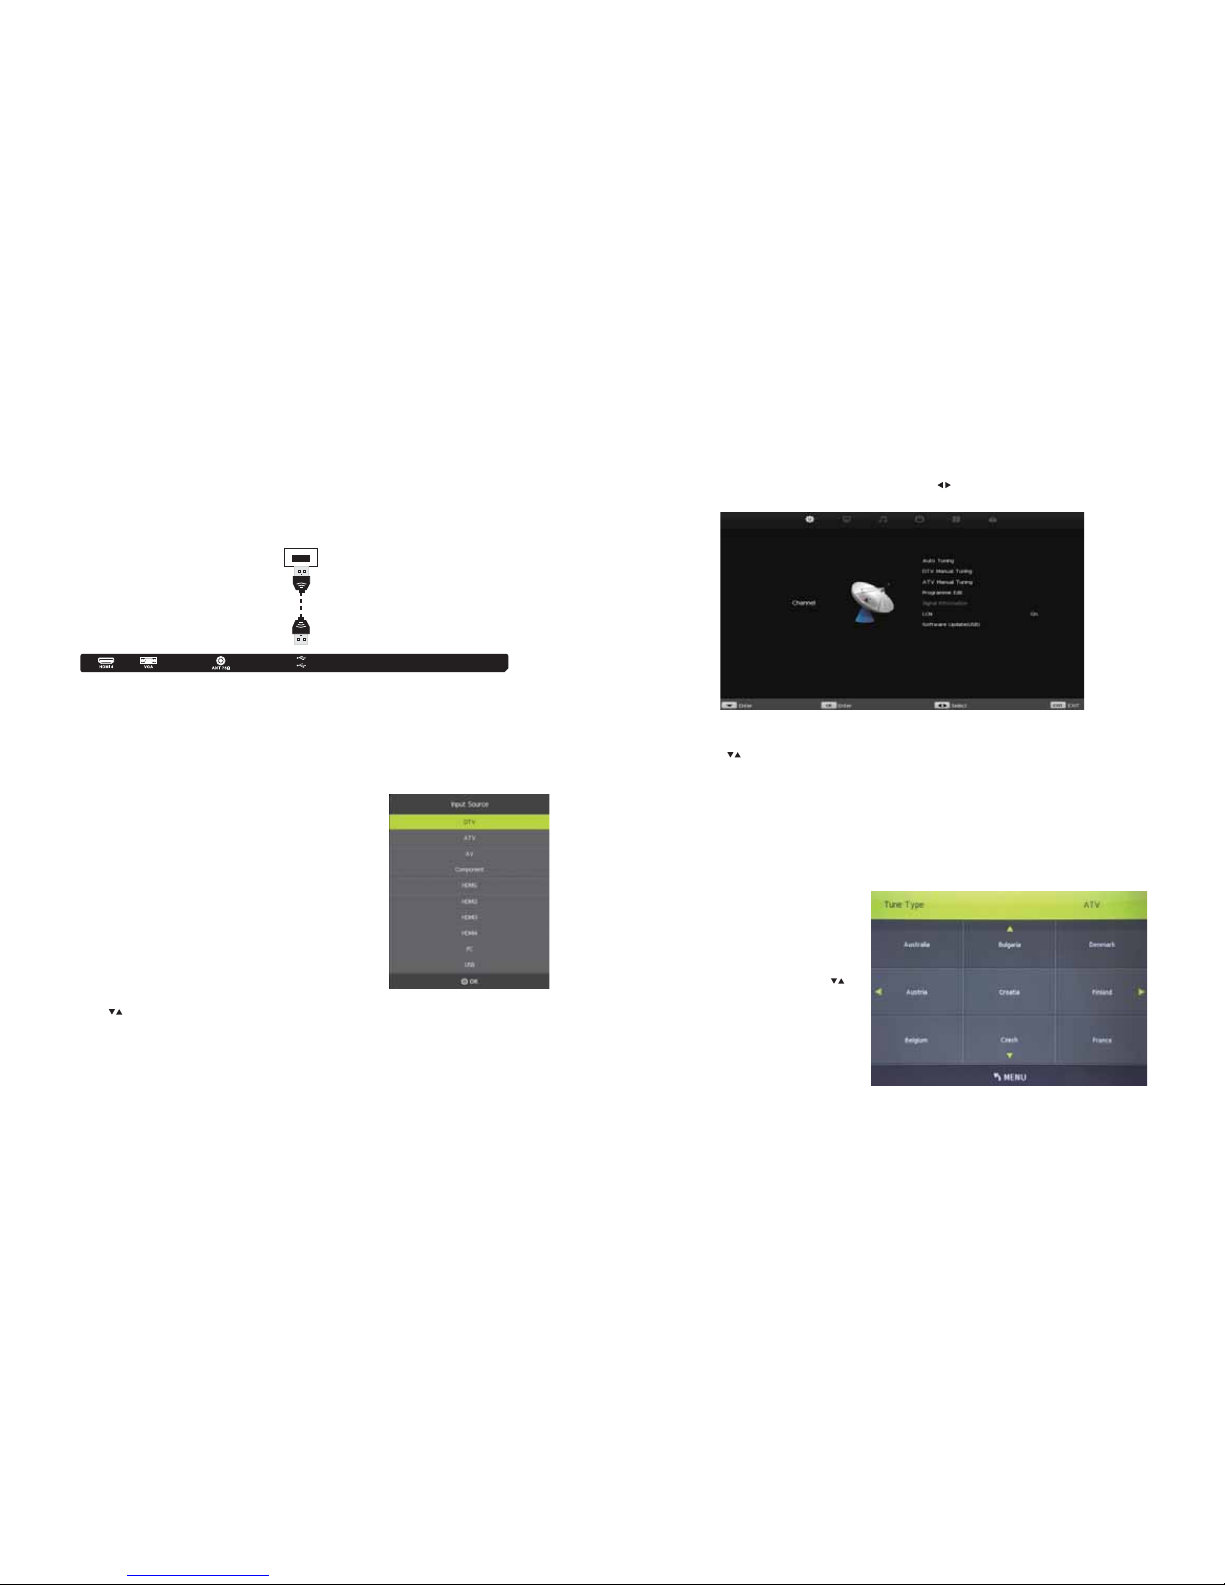
Input Source
DTV Digital Television Source
ATV Analogue Television Source
AV Audio/Video Input Source
Component Component Input Source
HDMI1/2/3/4 HDMI Input Source
PC PC Input Source
USB USB Input Source
Press SOURCE button to display the input source list:
Press or SOURCE button to scroll through Input Source options.
Press ENTER button to select the highlighted input source. Check the selected Input Source has an
active device attached.
Press EXIT button to quit the Input Source menu.
USB2
USB1
17
Channel Menu
Press the MENU button to enter the Main Menu. Use the buttons to select the Channel Menu.
1. Use the buttons to select the option you want to adjust in the Channel Menu.
2. Press the ENTER button to adjust.
3. Press the ENTER button to save your adjustment and return to the previous menu.
From the Channel Menu, use the
buttons to select Auto Tuning then
press the ENTER button to enter the
Auto Tuning sub-menu.
Select from Analogue TV (ATV) or
Digital TV (DTV) tune type and select
the country.
Press the ENTER button to start auto
tuning.
Auto Tuning
This allows you to automatically tune channels onto your television.
18
ATV Manual Tuning
This is used to manually tune analogue television channels.
From the Channel Menu, use the buttons to select ATV Manual Tuning then press the
ENTER button to enter the ATV Manual Tuning sub-menu.
Use the buttons to select the channel, then press the ENTER button to manually tune the channel.
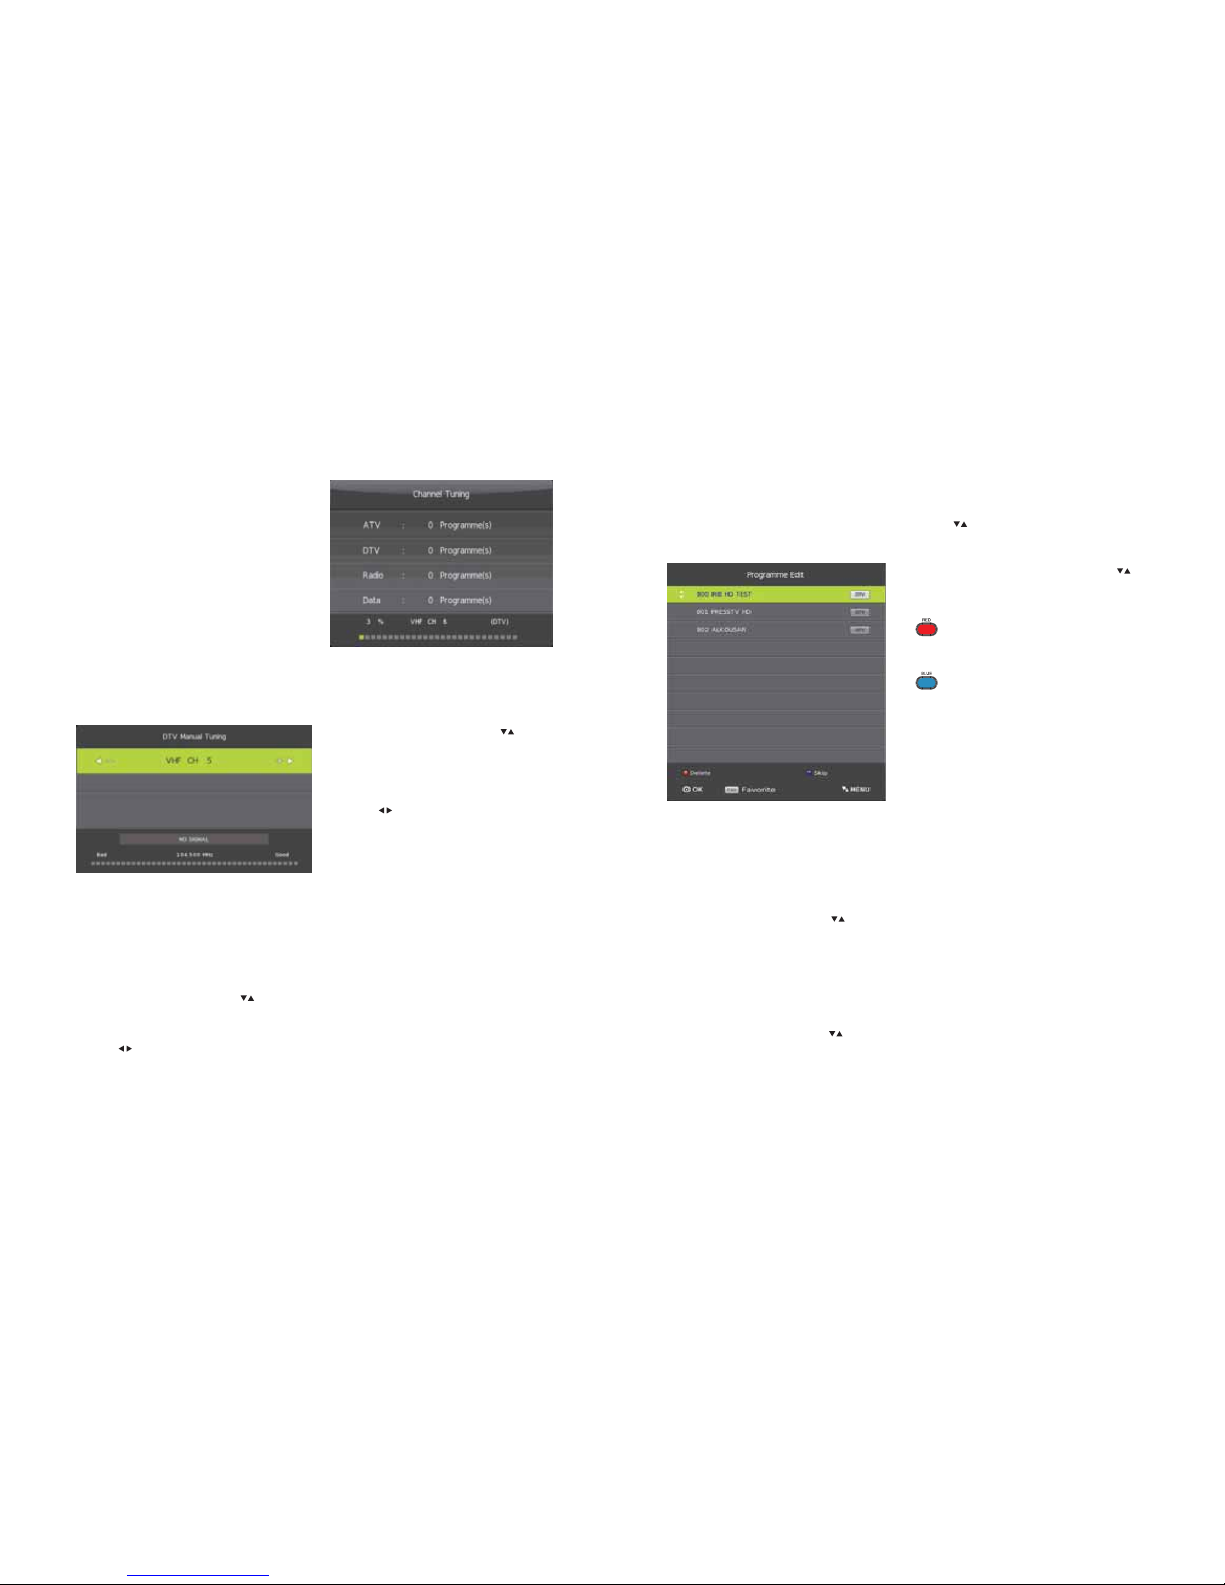
Channel Menu
This Channel Tuning page will appear when your
television is auto tuning. There is a progress bar
along the bottom showing the progress rate of
the television channel tuning.
From the Channel Menu, use the buttons
to select DTV Manual Tuning then press the
ENTER button to enter the DTV Manual Tuning
sub-menu.
Use the buttons to select the channel, then
press the ENTER button to manually tune the
channel. A Signal Strength Indicator is shown
along the bottom of the DTV Manual Tuning
page.
DTV Manual Tuning
This is used to manually tune digital television channels.
19
From the Programme Edit sub-menu, use the
buttons to select the desired channel to edit.
Press the RED button to delete
the selected channel.
Press the BLUE button to skip
the selected channel.
Press the FAV button to add or remove the channel
to your favourite list. Removing a channel will make
your television skip the channel automatically when
using the CH+/- buttons to scroll through the chan-
nels.
Programme Edit / Channel Edit
The Programme Edit sub-menu allows you to delete, move or skip television channels which have been
tuned onto your television. From the Channel Menu, use the buttons to scroll and select Pro-
gramme Edit, then press the ENTER button to enter the Programme Edit sub-menu.
Channel Menu
Logical Channel Numbering (LCN)
This allows the television to automatically match the television’s channel numbers to the local broad-
cast’s Electronic Programme Guide (EPG) channel numbers.
From the Channel Menu, use the buttons to select LCN then press the ENTER button to enter the
LCN sub-menu and select ON or OFF.
Signal Information
This allows you to see the strength of the signal received by your television, and is only available when
there is signal from digital television.
From the Channel Menu, use the buttons to select Signal Information then press the ENTER button
to enter the Signal Information sub-menu.

20
Software Update
For Service Use Only. Please contact our Customer Support Line on1300 530 800 for further details.
Please note that programming incorrect software onto the television can compromise the functions of
the television and void the warranty.
Channel Menu
21
Press MENU button to display the Main Menu.
Press buttons select Picture in the Main Menu, then press ENTER or button to enter.
Picture Menu
1. Press buttons to select options in the PICTURE menu.
2. Press ENTER and buttons to adjust settings for Brightness, Contrast etc.
3. Press MENU button to save your adjustments and return back to the previous menu.
Picture Mode
From the Picture Menu, use the buttons to select Picture Mode then press the ENTER button to
enter the Picture Mode sub-menu.
Alternatively, press PMODE button on your remote to enter Picture Mode.
You can adjust the Picture Mode to Standard, Dynamic, Mild, User.
You can adjust Contrast, Brightness, Colour, Sharpness from User Mode
Use the buttons to select your desired option, then press buttons to adjust.
Contrast
Adjusts the highlight intensity of the picture, how-
ever, shadows of the picture is unaffected.
Brightness
Adjusts the optical fibre output of the entire pic-
ture, affecting dark areas of the picture.
Colour
Adjusts colour saturation of the picture.
Sharpness
Adjust the peaking in the detail of the picture.

22
Aspect Ratio
The Aspect Ratio is the proportion between the height and width of a picture.
From the Picture Menu, use the buttons to select Aspect Ratio then press the ENTER button to
enter the Aspect Ratio sub-menu. Use the buttons to select between Auto, 4:3, 16:9, Zoom1 and
Zoom2
Noise Reduction
This is used to reduce image noise and soften images on the television to improve picture quality.
From the Picture Menu, use the buttons to select Noise Reduction then press the ENTER
button to enter the Noise Reduction sub-menu. Use the buttons to select between:
Off No noise reduction
Low Detect and reduce some image noise
Middle Detect and reduce moderate image noise
High Detect and reduce enhanced image noise
Color Temperature
You can adjust the overall colour hue of the television’s picture from Color Temperature.
From the Picture Menu, use the buttons to select Color Temperature then press the ENTER button
to enter the Colour Temp sub-menu.
From the Color Temperature sub-menu, use the use the buttons to choose between Cold, Normal
and Warm and press ENTER.
To adjust the value of Cold, Normal, and Warm, use the buttons, then press MENU to save your
changes.
Cold Increases blue tones
Normal Balances blue and red tones
Warm Increases red tones
Picture Menu
23
Sound Menu
Press MENU button to display the Main Menu.
Use the buttons select Sound, then press ENTER or to enter.
Sound Mode
From the Sound Menu, use the buttons to select Sound Mode then press the ENTER button to
enter the Sound Mode sub-menu, or press SMODE on your remote control. Use the buttons to
select between:
Music Preserves original sound
Movie Enhances treble and base for a rich sound experience
Sport Enhances vocals - ideal for sports programmes
Standard Produces a balanced sound in most environments
User Select to customise your Sound Settings.
1. Press buttons to select the option that you want to adjust in the Sound Menu.
2. Press ENTER button to adjust.
3. Press MENU button to save your adjustments and return to the previous menu.

24
Balance
This allows you to adjust your speaker’s output for optimal sound based on your position in
the room.
From the Sound Menu, use the buttons to select Balance then press the ENTER button to enter the
Balance sub-menu.
Use the buttons to adjust.
Auto Volume Level
This reduces the difference in volume between the channel and the programme automatically.
From the Sound Menu, use the buttons to select Auto Volume Level then press the ENTER button to
enter the Auto Volume Level sub-menu.
Use the buttons to turn Auto Volume ON or OFF.
Surround Sound
This helps create an effect where the sounds surrounds the viewer.
From the Sound Menu, use the buttons to select Surround Sound then press the ENTER button
to enter the Surround Sound Level sub-menu.
Use the buttons to turn Surround Sound ON or OFF.
SPDIF Mode
From the Sound Menu, use the buttons to select SPDIF Mode then press the ENTER button to enter
the SPDIF Mode sub-menu.
Use the buttons to select between PCM / AUTO.
Sound Menu
25
Audio Description (AD) Switch
Certain broadcast programmes have Audio Descriptions available.
The AD (Audio Description) describes the sounds of the scenes which are being played on the
television eg. explosion, people walking, jazz music playing etc.
From the Sound Menu, use the buttons to select AD Switch then press the ENTER button to enter
the AD Switch sub-menu.
Use the buttons to turn Audio Descriptions ON or OFF.
If a broadcasted programme has Audio Descriptions available, audio descriptions will be displayed on
screen.
TV Speaker
This allows you to switch between using the television’s built-in speakers for sound, or a speaker that is
connected to the television via the HDMI 1 (ARC) output.
From the Sound Menu, use the buttons to select TV Speaker then press the ENTER button to enter
the TV Speaker sub-menu.
Use the buttons to switch between External Amp or the television’s built-in speakers.
Sound Menu
26
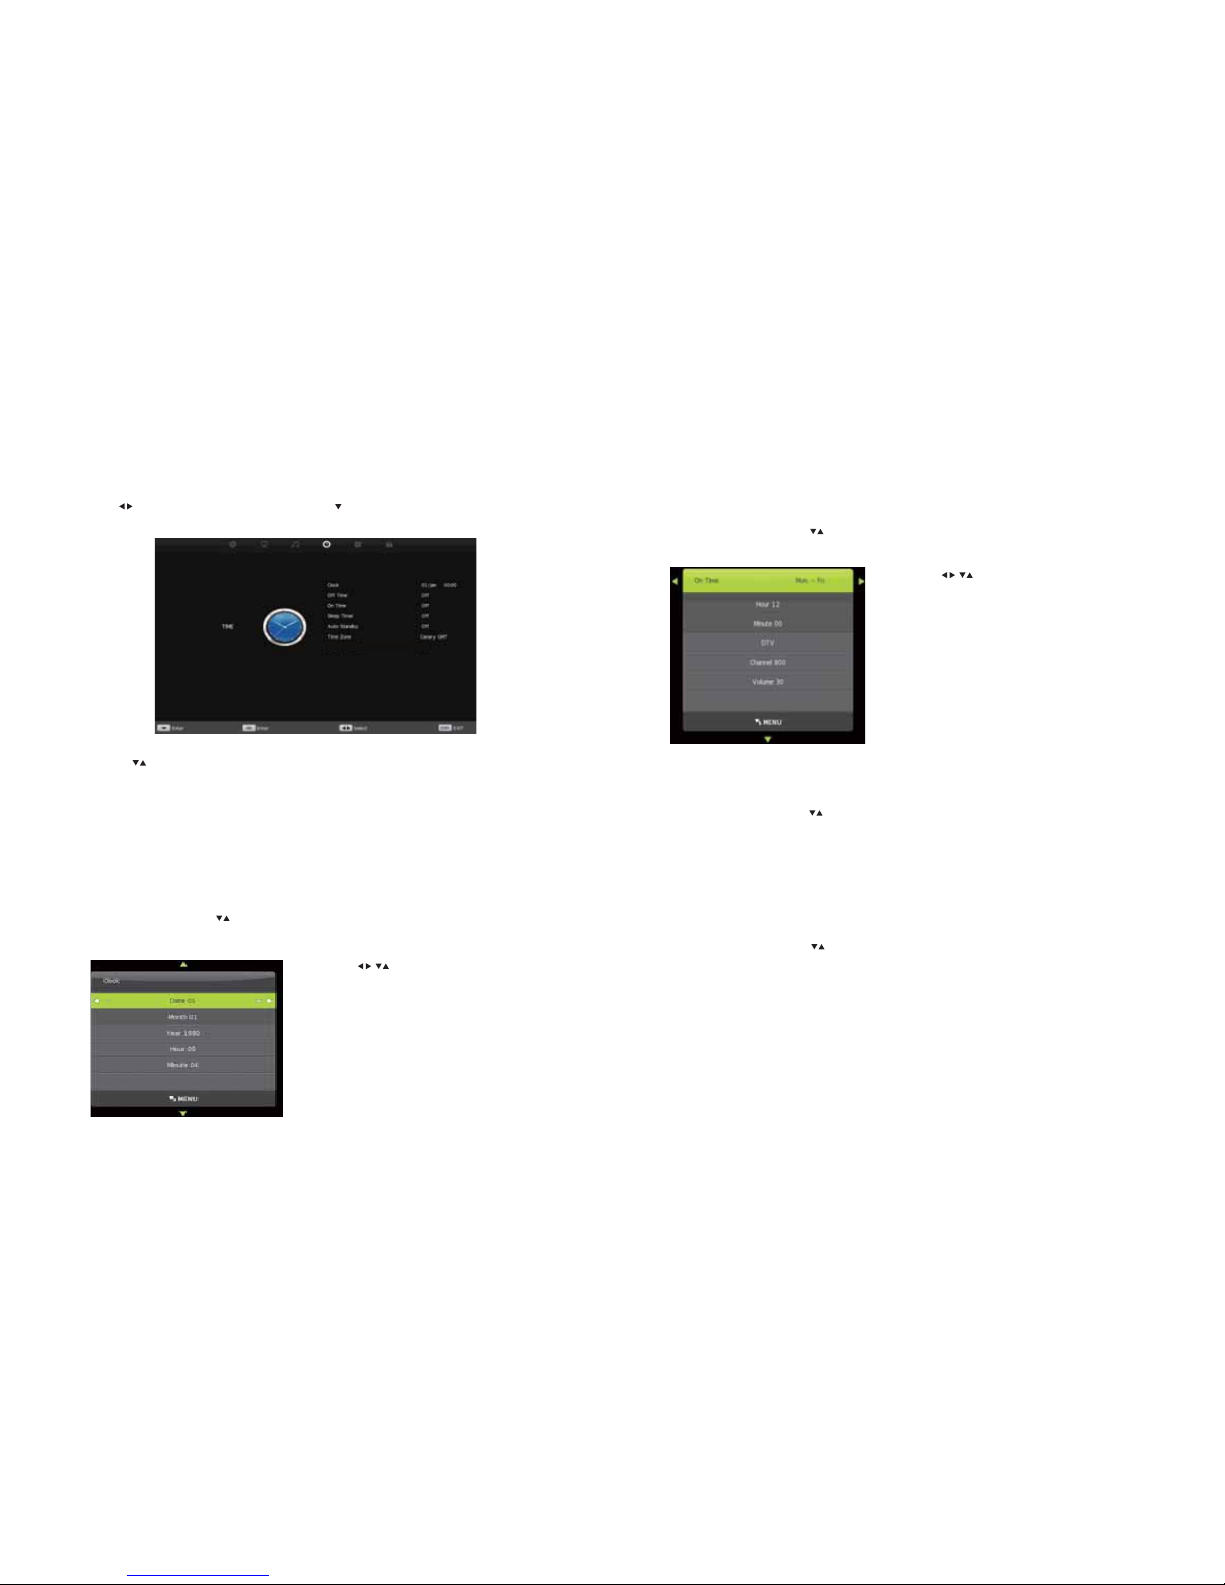
Time Menu
Press MENU button to display the Main Menu.
Use the buttons select Time, then press ENTER or to enter.
1. Press buttons to select the option that you want to adjust in the Time Menu.
2. Press ENTER button to adjust.
3. Press MENU button to save your adjustments and return to the previous menu.
Use the buttons to set the correct date,
month, year and time.
Clock
This allows you to set the time on your television.
From the Time Menu, use the buttons to select Clock then press the ENTER button to enter the
Clock sub-menu.
27
Time Menu
Sleep Timer
This allows you to set a timer to automatically turn your television to Sleep Mode.
From the Time Menu, use the buttons to select Sleep Timer then press the ENTER button to enter
the Sleep Timer sub-menu.
Select from Off, 15 min - 240 mins. Then, the timer will start.
Auto Standby
This allows you to set a timer to automatically set your television to standby.
From the Time Menu, use the buttons to select Auto Standby then press the ENTER button to enter
the Auto Standby sub-menu and select from the timer options.
Auto Standby and Sleep Timer - Differences
If you set your television to Auto Standby and use the remote control, the timer starts again. If you
do not use your remote control after you have set your television to Auto Standby, your television will
switch to Standby Mode.
If you want to use your remote control but want your television to switch to sleep within your
selected time, use the Sleep Timer function instead.
Off Time and On Time
This allows you to set a time to automatically turn your television OFF or ON.
From the Time Menu, use the buttons to select Off Time or On Time then press the ENTER button
to enter the Off Time or On Time sub-menu.
Use the buttons to set the date, month, year
and time you want to set the television to automati-
cally turn OFF or ON.
28
Time Menu
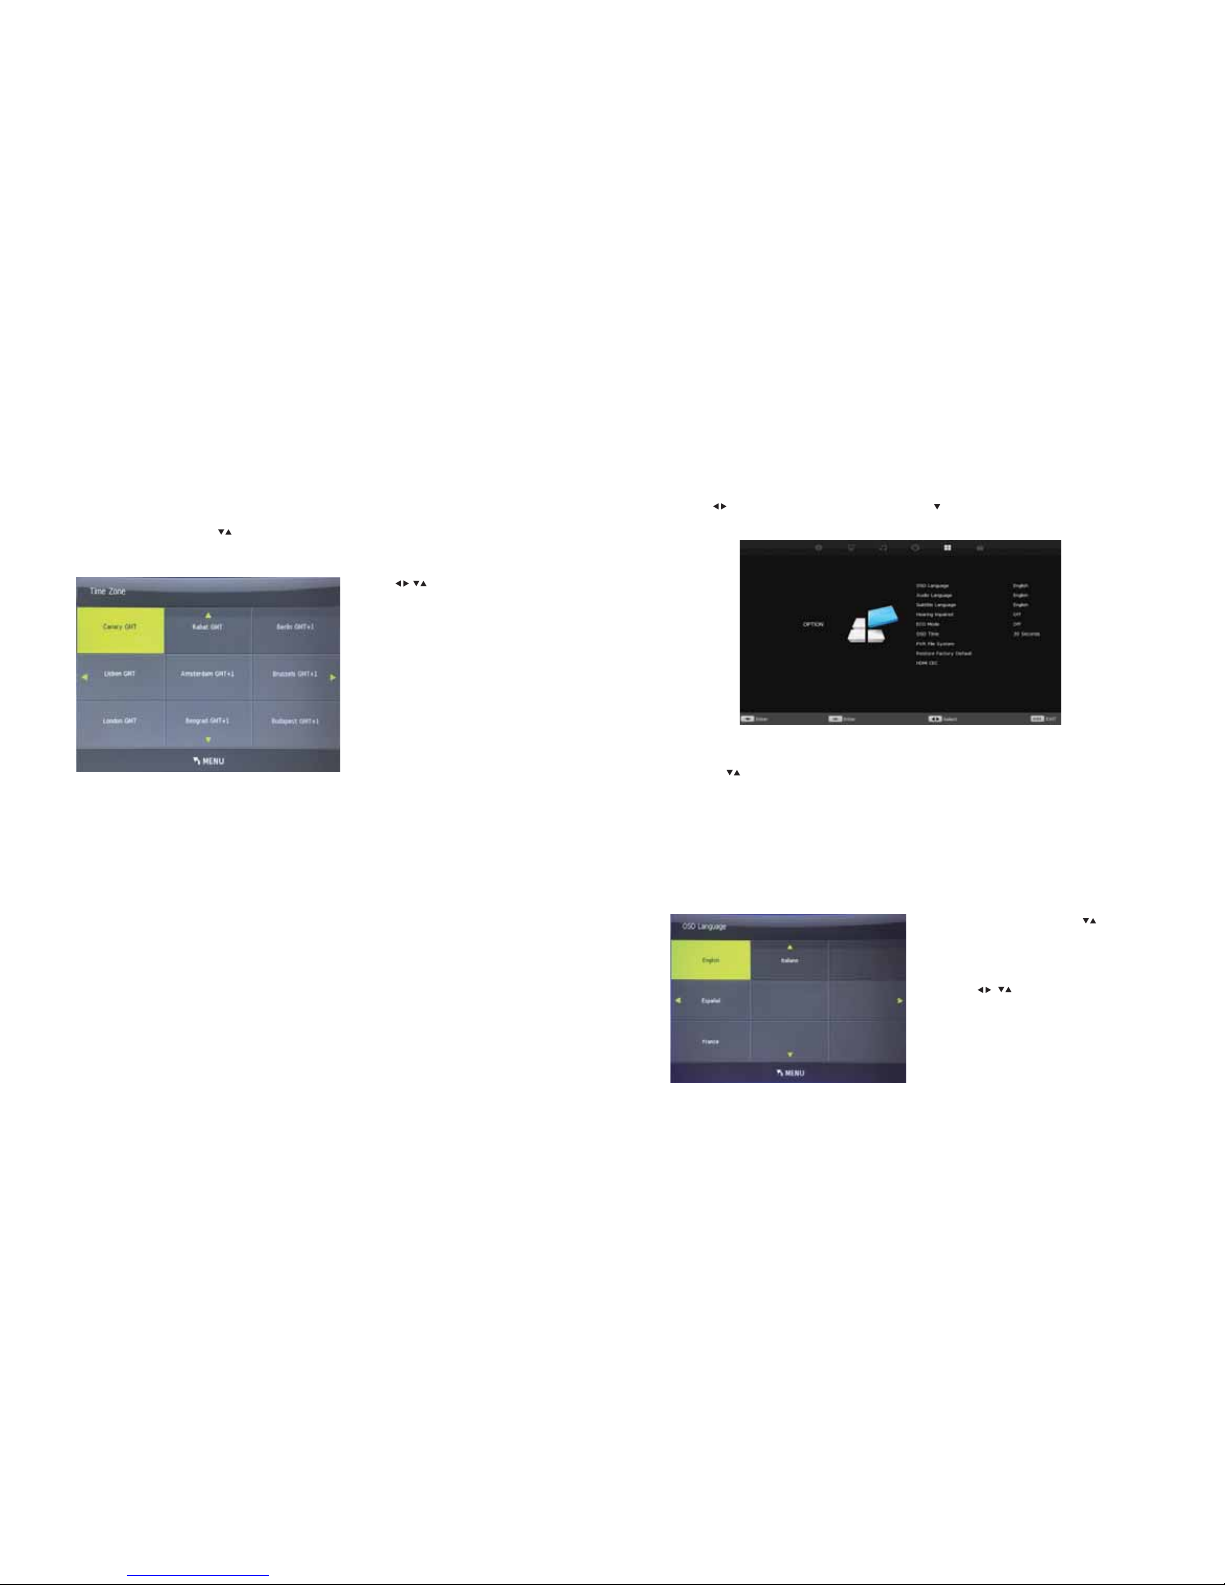
Time Zone
This allows you to set the time zone on your television.
From the Time Menu, use the buttons to select Time Zone then press the ENTER button to enter the
Clock sub-menu.
Use the buttons to set the correct time
zone.
29
Option Menu
Press MENU button to display the Main Menu.
Use the buttons select Option, then press ENTER or to enter.
1. Press buttons to select the option that you want to adjust in the Option Menu.
2. Press ENTER button to adjust.
3. Press MENU button to save your adjustments and return to the previous menu.
On Screen Display (OSD) Language
This allows you set the language displayed in your On Screen Display (OSD).
From the Option Menu, use the
buttons to select OSD Language then press
the ENTER button to enter the Language
sub-menu.
Use the buttons to select your
desired language, then press ENTER to set.

30
Option Menu
Audio Languages
Certain broadcast programmes have different audio languages available.
From the Option Menu, use the buttons to select Audio Languages then press the ENTER but-
ton to enter the Audio Languages sub-menu.
Use the buttons to select your desired language, then press ENTER to set.
Subtitle Language
Certain broadcast programmes have subtitles available in different languages. This allows you to set
the language of the subtitles, if available.
From the Option Menu, use the buttons to select Subtitle Language then press the ENTER but-
ton to enter the Subtitle Language sub-menu.
Use the buttons to select your desired language, then press ENTER to set.
Hearing Impaired
Certain programmes broadcasted have subtitles available for those who are hearing impaired.
To turn this function on, from the Option Menu, use the buttons to select Hearing Impaired
then press the ENTER button to enter the Hearing Impaired sub-menu.
Use the buttons to turn ON or OFF.
Subtitles will display if a broadcasted programme has this feature available.
ECO Mode
This allows you to change the light output level of the television screen.
From the Option Menu, use the buttons to select ECO Mode then use the buttons to select
between Low, Middle, High.
OSD Time (On Screen Display Menu)
This allows you to set how long your On Screen Display Menu (OSD) is active before it switches off and
returns to the programme you’re currently watching.
From the Option Menu, use the buttons to select OSD Timer then press the ENTER button to enter
the OSD Timer sub-menu.
Use the buttons to select be the timer options: 5 seconds, 15 seconds, 20 seconds, 30
seconds, Off.
31
Option Menu
Personal Video Recording (PVR) File System
The PVR File System allows you to use a check and format a USB hard drive that is plugged into your
television. To record a television programme, you must have USB storage device connected to the televi-
sion as the television set has no built-in memory.
From the Option Menu, use the buttons to select PVR
File System then press the ENTER button to enter the PVR
File System sub-menu.
Scroll down to Check PVR File System and press ENTER.
This dialogue box will appear, showing the details of the
USB hard drive, particularly the size (how many minutes
of recording time) the USB hard drive has.
Standard Definition (SD)
The recordable time available if you are recording an SD
television programme.
High Definition (HD)
The recordable time available if you are recording an HD
television programme.

32
Formatting a USB Storage Device
If you are having problems recording, check that there is sufficient memory left on the USB storage device.
If required, format the USB storage device by:
Option Menu
6. The following progress box will appear:
1. Save any data currently stored on your USB
storage device onto another storage device,
as any data will be deleted during formatting.
2. Press MENU and scroll across to the
Option Menu and press ENTER.
3. Once in the Option Menu, scroll down to PVR
File System and press ENTER.
4. Once in the PVR File System sub-menu, scroll
down to Format and press ENTER.
5. The following dialogue box will appear:
Press the button to start formatting the USB
hard drive.
7. Once formatting is completed, the dialogue
box will return to the following menu, and
the USB hard drive is ready to use.
33
HDMI CEC
HDMI CEC (Consumer Electronics Control) is a feature of HDMI that allows you to control devices con-
nected to the HDMI ARC1 port with your television remote control.
Please note that this function is only available with devices that have HDMI CEC capability.
From the Option Menu, use the buttons to select HDMI CEC then press the ENTER button to enter
the HDMI CEC sub-menu.
Restore Factory Default
This allows you to reset all the settings in the Option Menu back to factory default.
From the Option Menu, use the buttons to select Reset then press the ENTER button to enter the
Reset Factory Default sub-menu.
Option Menu
HDMI CEC Use the buttons to turn HDMI CEC
ON or OFF.
Auto Standby This allows you to set your television to
Standby Mode when an HDMI CEC
capable device is set to Standby Mode.
Use the buttons to turn Auto
Standby ON or OFF.
Auto TV ON This allows you to turn your television ON
when an HDMI CEC capable device is
turned ON.
Use the buttons to turn TV Auto
Power ON or OFF.
Device Control This allows you to control HDMI CEC capa-
ble devices via your television.
Use the buttons to select ON or OFF.
Device List Press the ENTER button to enter the Device
List sub-menu to see the number of devices
connected to your television via HDMI.
34
Option Menu
Store Mode
For use only in store.
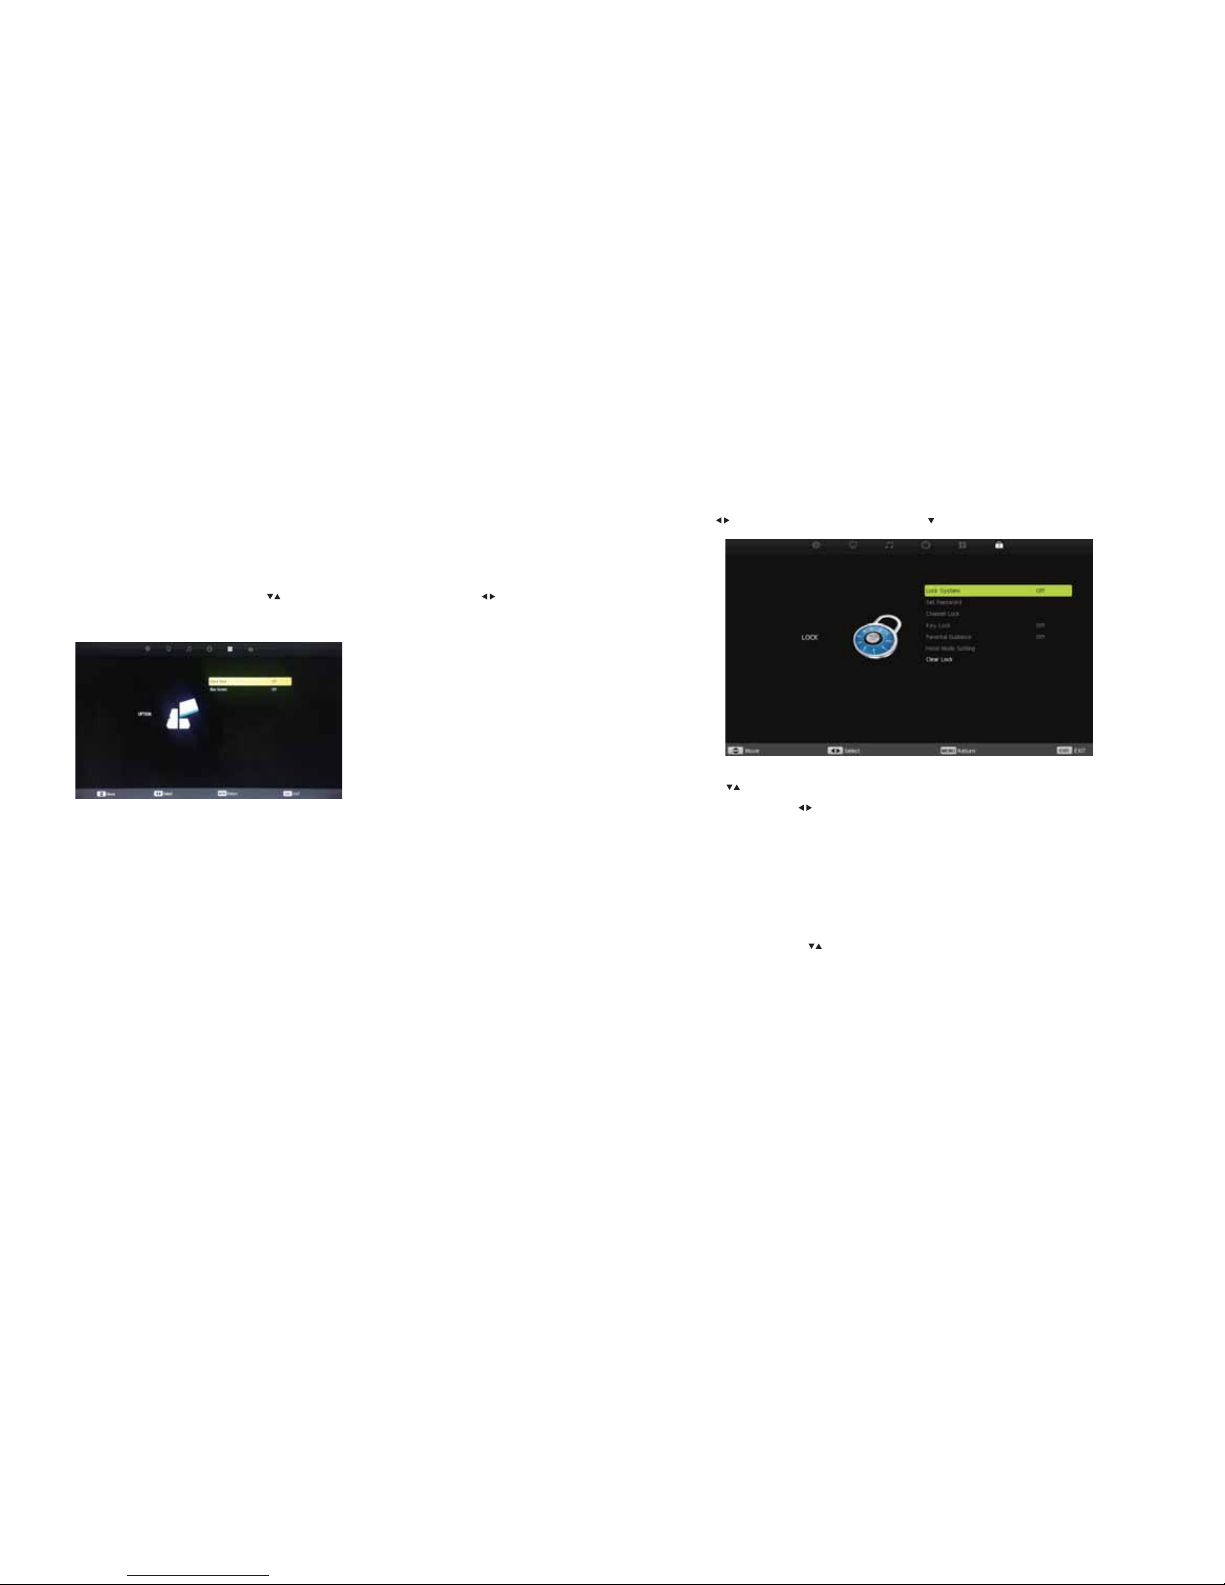
Blue Screen
When there is no signal available, this allows you to set the screen to blue instead of the white noise
screen. From the Option Menu, use the buttons to select Blue Screen then use the
buttons to select ON or OFF.
35
Lock Menu
Press MENU button to display the Main Menu.
Use the buttons select Lock, then press ENTER or to enter.
1. Press buttons to select the option that you want to adjust in the Lock Menu.
2. Press ENTER and/or buttons to adjust.
3. Press MENU button to save your adjustments and return to the previous menu.
Lock System
This allows you to lock/unlock from making changes in the Lock Menu.
From the Lock Menu, use the buttons to select System Lock then press the ENTER button to enter
the Lock Menu.
Enter the password to unlock the Lock Menu, then press ENTER.
Default password is 0000.
36
Lock Menu
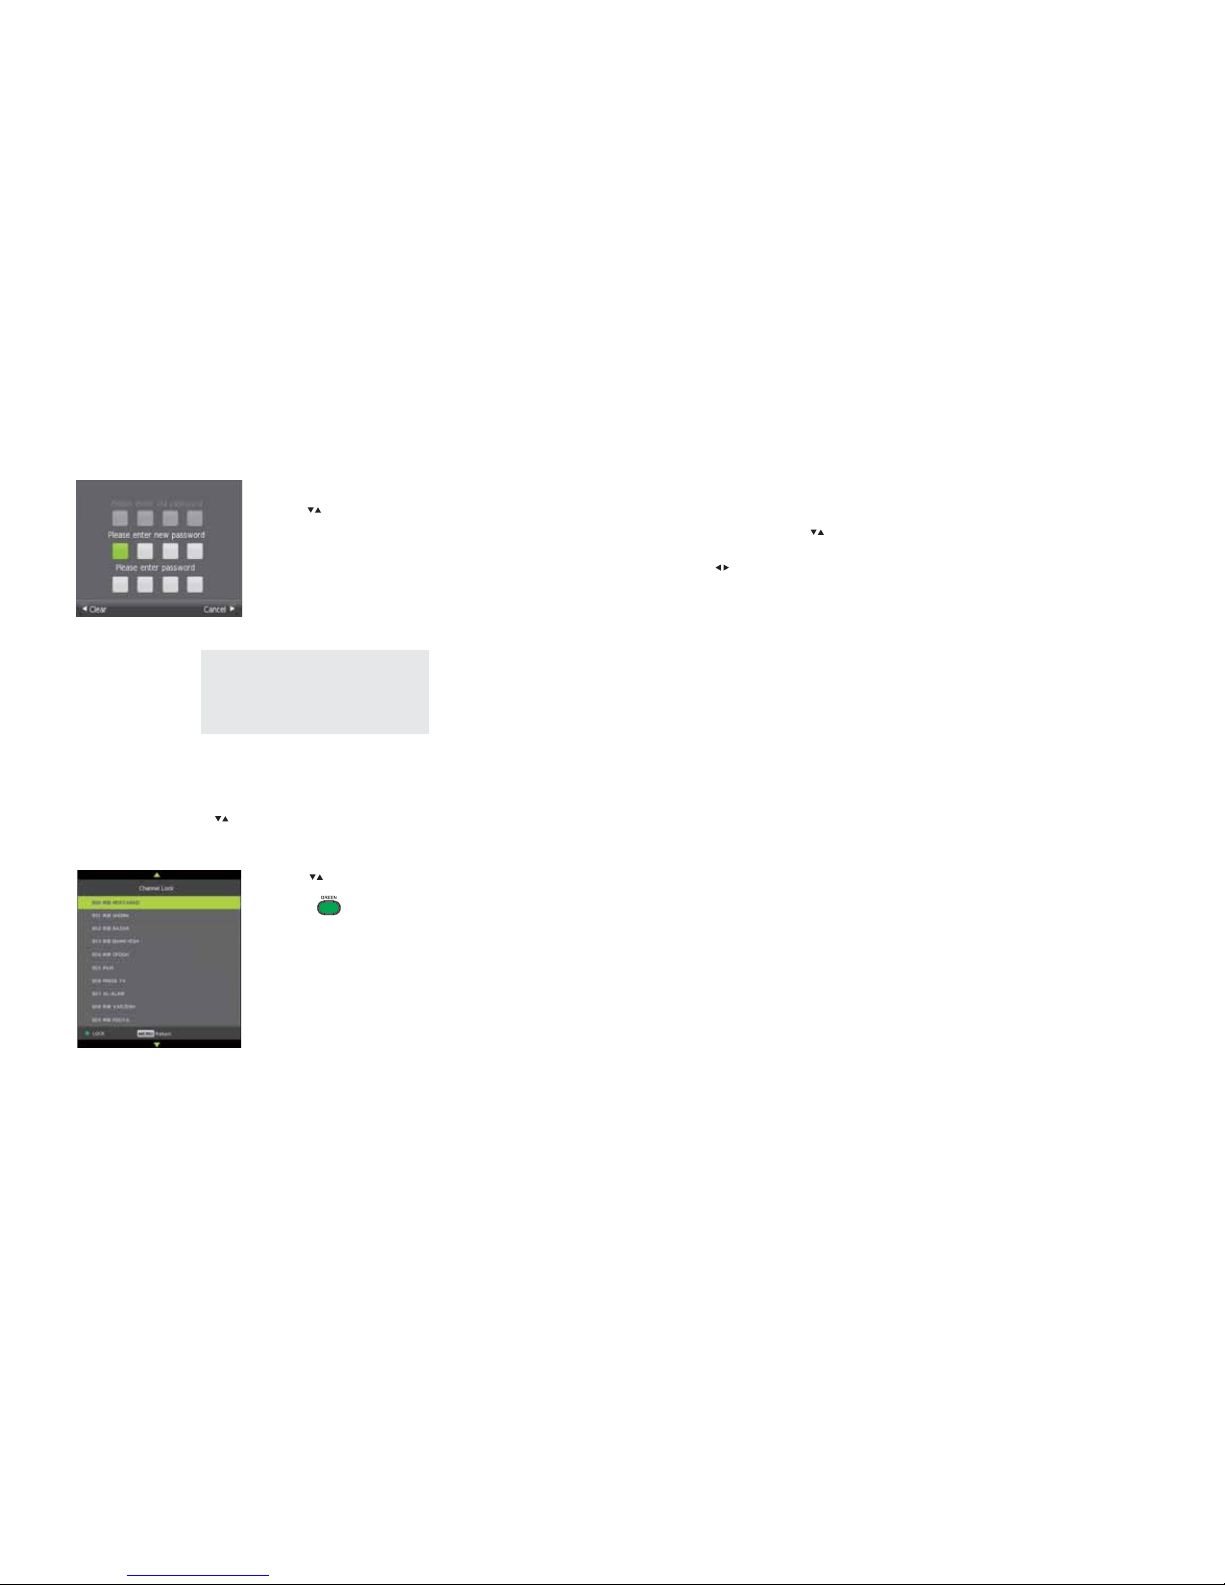
Master Password
If you forget the password you have set, use
the master code 4711
Set Password
Use the buttons to select Set Password then press ENTER.
Enter the password (default password is 0000) then press ENTER.
Enter new password, and confirm new password, then press
ENTER to set new password.
Channel Lock
This allows you to lock/unlock access to channels on your television.
From the Lock Menu, use the buttons to select Channel Lock then press the ENTER button to enter
the Channel Lock sub-menu.
Use the buttons to select the channel you want
to lock.
Press the button on your remote to lock
the channel.
37
Lock Menu
Key Lock
This allows you to lock/unlock the buttons on the back of your television.
From the Lock Menu, use the buttons to select Key Lock then press the ENTER button to enter the
Lock Menu.
Use the buttons to select ON or OFF.
38
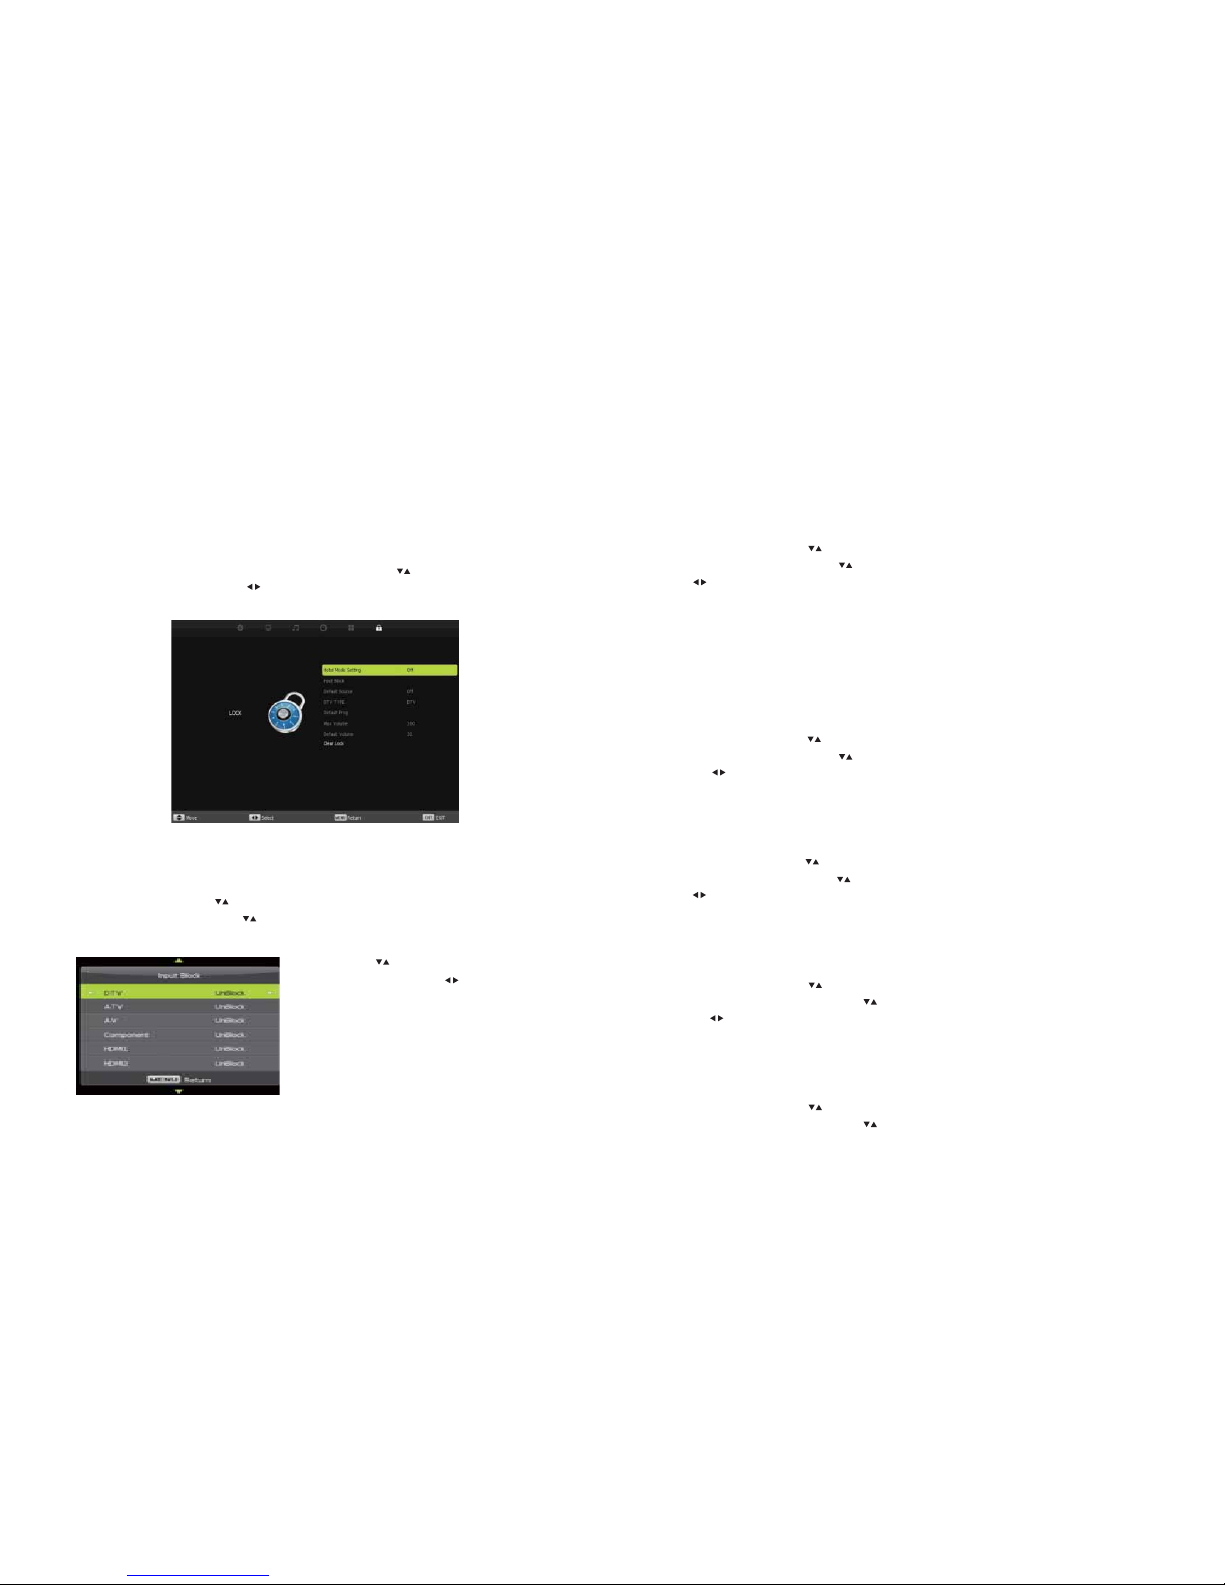
Hotel Mode
This allows you to control the settings that are on your television. In order to change settings of Hotel
Mode, the System Lock must be set to ON. See Page 35.
Hotel Mode Setting
This switches Hotel Mode ON or OFF. From the Lock Menu, use the buttons to scroll down and
select Hotel Mode Setting. Use the buttons to select ON or OFF.
Input Block
This allows you to lock/unlock the Input Source available on the television.
From the Lock Menu, use the buttons to select Hotel Mode then press the ENTER button to enter
the Hotel Mode sub-menu. Use the buttons to scroll down and select Input Block then press the
ENTER button to enter the Input Block sub-menu.
Use the buttons to scroll through the
Source options. Use the buttons to Lock/
Unlock (ON/OFF) the Input Source Options.
39
Default Source
This allows you to set which Source Input will be the default for the television when the television is
turned on.
From the Lock Menu, use the buttons to select Hotel Mode then press the ENTER button to enter
the Hotel Mode sub-menu. Use the buttons to scroll down and select Default Source then use
the buttons to scroll through the Source options to select the default source.
DTV Type
Set to DTV (digital television).
Default Prog
This allows you to set which television channel will appear when the television is switched on.
From the Lock Menu, use the buttons to select Hotel Mode then press the ENTER button to enter
the Hotel Mode sub-menu. Use the buttons to scroll down and select Default Prog then
use the buttons to scroll through the channels to select the default channel.
Max Volume
This allows you to set the maximum volume level on the television.
From the Lock Menu, use the buttons to select Hotel Mode then press the ENTER button to enter
the Hotel Mode sub-menu. Use the buttons to scroll down and select Max Volume then use
the buttons to select the maximum volume level.
Default Volume
This allows you to set the default volume level when the television is switched on.
From the Lock Menu, use the buttons to select Hotel Mode then press the ENTER button to
enter the Hotel Mode sub-menu. Use the buttons to scroll down and select Default Volume then
use the buttons to select the default volume level.
Clear Lock
This allows you to reset all the settings in Hotel Mode.
From the Lock Menu, use the buttons to select Hotel Mode then press the ENTER button to
enter the Hotel Mode sub-menu. Use the buttons to scroll down and select Clear Lock then press
the ENTER to reset the settings in Hotel Mode.
Hotel Mode
Table of contents
Other Linden Group LCD TV manuals


