manuals.online logo
Brands
  1. Home
  2. •
  3. Brands
  4. •
  5. M32
  6. •
  7. Windsurfing Equipment
  8. •
  9. M32 MAST User manual

M32 MAST User manual

1
Manual summary Tuning guide
Mast assembly instructions
Conversion chart
TABLE OF CONTENTS
13
4
2
M32 MAST
ASSEMBLY MANUAL
VERSION 2020
For further information visit
m32.world.com/manual
2
M32 NEW MAST MANUAL
MANUAL SUMMARY
WE WANT TO STRESS THE IMPORTANCE OF HAVING THE RIG ACCORDING TO THE RECOMMEN-
DED SETTINGS WITH THE SPREADER ANGLE, PREBEND, DIAMOND TENSION AND MAST RAKE
BEING THE KEY PARAMETERS.
•The base setting for the mast is 190
mm spreader angle, 30 of diamond
tension and a 93 mm of prebend.
•Spreader angle should be between
180 and 220 mm. The prebend should
be between 86 and 124 mm. The
diamond tension should be between
23,5 and 43.
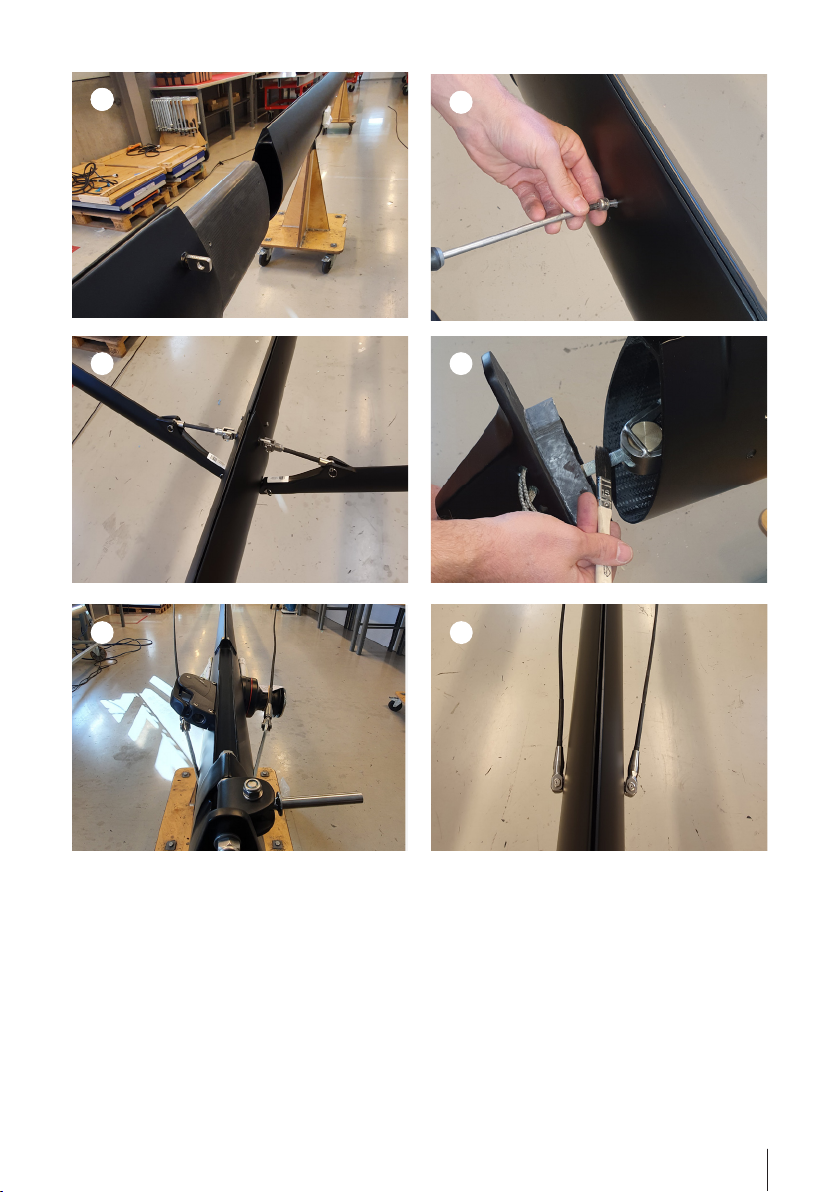
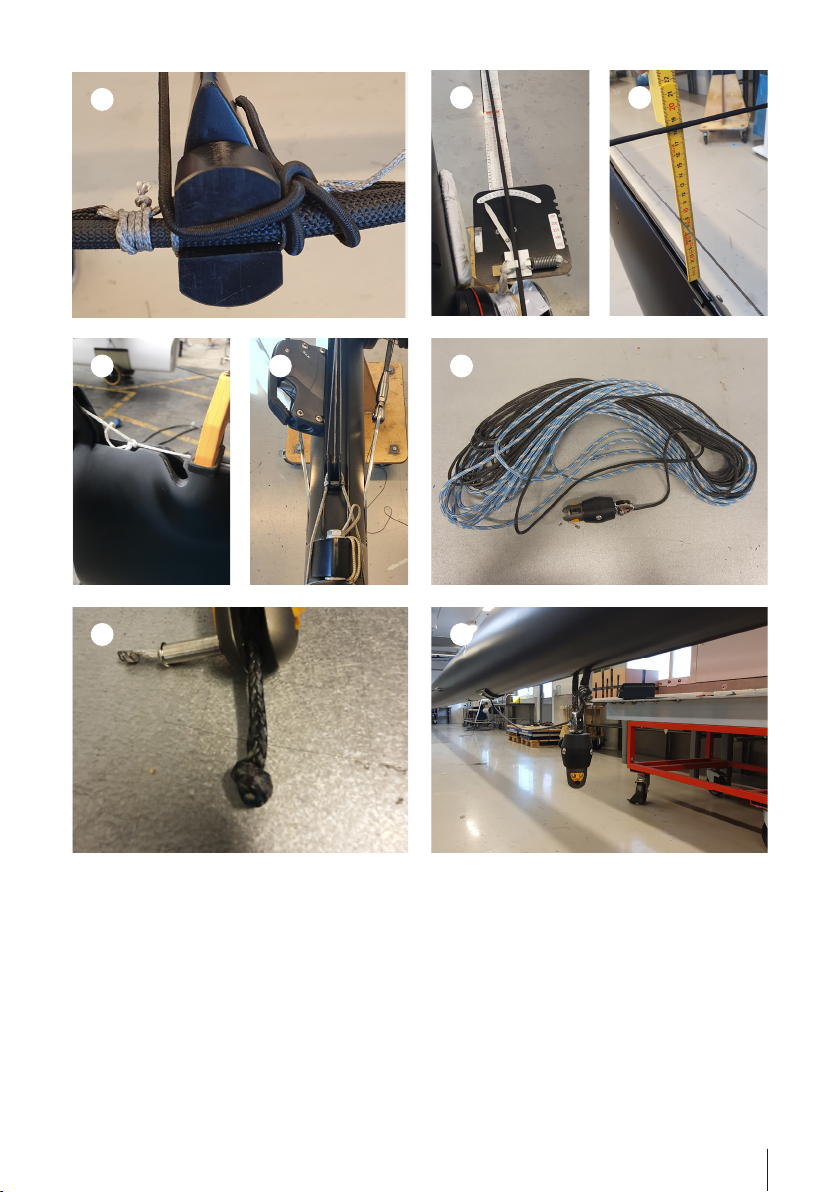
•When measuring the prebend the
mast supports shall be placed at the
rst reeng point and just below the
mast winch. The line for measuring the
prebend should be a 2 mm dyneema
line lashed to the main halyard tting
at the top, and through the friction
ring for the cunningham at the bot-
tom. Make sure the 2 mm dyneema is
alined with the mast track entry and
exit (described in the manual).
•The diamond is tensioned and me-
asured using the Loos & Co. gauge
RT-10 M with the base of the gauge
just above the mast winch. Make
sure you have the updated stainless
wheels from Aston Harald Composite
and be aware of that the new EC-Six
diamonds needs less tension than the
old ones.
•Mast rake should be 480mm. Instruc-
tions on how to measure the rake can
be nd in the M32 Assembely Manual.
•The forestays and shrouds should be
tight at all times. The load on the aft
shoruds should be 300 kg ±50 kg
measured with a Spinlock Rig Sense
RGS/0508.
•Inspect the soft schakel for the genna-
ker halyard lock before each time
going sailing.
Make sure you read the manual and the EC-6 manual
before assembly.
IMPORTANT!
3
KG
400
500
600
700
800
900
1000
1100
1200
1300
1400
OLD RIGG AND NEW RIGG CONVERSION CHART
EC-Six
16
24
30
33
38
41
44
47
50
53
55
Old Diamonds
33
38
42
47
50
52
59
60
61
63
65
Loose Gauge
23,5
25
27
30
31
33,5
35
36,5
38
39,5
41,5
43
TUNING GUIDE
Turns ±
−3
−2
−1
0 (base)
1
2
3
4
5
6
7
8
Wind (kts)
0-4
4 - 6
6-8
8-12
12-14
14-16
16-18
18-20
20-22
22-26
26-30
30 +
Pre bend (mm)
86
90
93
93
97
100
104
108
111
114
118
124
Reef
Full main
Full main
Full main
Full Main
Full Main
Full Main
1st reef
1st reef
1st reef
1st reef
1st reef
2nd reef
4
Place the lower and upper mast tubes
collinear to each other either on stands
or padding on the ground. Push the
two mast halves together.
Connect the spreaders to the mast; the
key ring shall be on the lower side. Only
the 2 Clevis pins closest to the mast
shall be disconnect when removing a
spreader.
The diamond turnbuckle needs to be
properly greased and clean to function.
It’s a good opportunity to clean and
service the turnbuckle when the mast
is disassembled. Clean the bolt, bronze
nut and washer. Put grease on the enti-
re thread of the bolt and bronze nut +
some grease on the washer. We recom-
mend “Rocol ANTI-SEIZE Stainless”.
Insert and tighten lightly the 6 M6
screws that locks the lower and upper
mast tubes together, (2 on the leading
edge and 2 on each side close to the
trailing edge).
MAST ASSEMBLY
INSTRUCTIONS
MAST ASSEMBLY
1
3
4
2
Attach the diamonds to the hanger.
Make sure the screw is tightened and
fastened with Loctite.
Attach the diamonds to the upper
diamond tting. Make sure the screw
is tightened and fastened with Loctite.
Lube the mast joint and the mast track
for easier assembly and hoisting of
sails.
5
6
Lash the diamonds to the spreader
end tting as shown on the ECSix
rigging instruction.
7
Make sure the diamonds are not
twisted. One tip is to make markings
along the diamonds ber with a white
permanent marker. Then you can easily
see if the diamonds twisted or not.
The diamond nut must be all the way
down in the hanger, this must be
controlled while tensioning the bolt to
ensure that it is not on the side.
IMPORTANT!
MAST ASSEMBLY
INSTRUCTIONS
5
12
43
5 6
6
Tension the diamond turnbuckle until you
get your required prebend (base 30 on the
Loos Gauge).
How to measure prebend:
Prebend is dened in this case as the distan-
ce between the trailing edge at the spreader
and a 2 mm dynema line pulled between the
upper most point and lowest point of the
lu track (see pictures). When measuring the
prebend the mast supports shall be placed
at the winch and at the rst reef point. Pull
the string tight by hand and use the cun-
ningham friction ring as purchase.
10
11
Make sure the knot for the gennaker halyard
lock is tight and stitched together. The tail of
the knot should be short, othervise it can get
caught in the top furler.
Attach the gennaker halyard lock to the soft
schakel on the mast. Run the halyard below
the sheave at the front end of the mast, and
above the sheave closest to the sail track and
down to the clutch.
12
13
How to check the spreader angle:
Pull a shock cord tight between the spreader
tips. The string should be pulled just above
the end tting on top of the diamond stay.
8
The dyneema soft schakel for the
gennaker halyard lock has to be inspec-
ted each time before sailing.
IMPORTANT!
Measure the distance between the string and
the trailing edge of the mast straight down
from the shock cord. Standard measurement
is 190mm. A halft turn on the turnbuckles gi-
ves approximately a 5mm change in spreader
angle.
9
Take out the main halyard sheave, run the
halyard and put back the sheave. Pull down
the halyard to the goose neck.
14
Further instructions of stepping the mast
and boat assembly is found in the M32 As-
sembly Manual at m32world.com/manual
15
7
10
12b
12a
8
13
9
11a 11b

Popular Windsurfing Equipment manuals by other brands

NEILPRYDE RS:One Rigging guide

NEILPRYDE

NEILPRYDE RS:One Rigging guide

Sailworks Revolution SR4 quick start guide

Sailworks

Sailworks Revolution SR4 quick start guide

Ozone Dragonfly Pilot's manual

Ozone

Ozone Dragonfly Pilot's manual

Ezzy Transformer Bump & Jump Tuning guide

Ezzy

Ezzy Transformer Bump & Jump Tuning guide

Sailworks GEAR 2000 Tuning guide

Sailworks

Sailworks GEAR 2000 Tuning guide

Genetrix Origin user manual

Genetrix

Genetrix Origin user manual

Flexifoil BLADE III Instruction and safety manual

Flexifoil

Flexifoil BLADE III Instruction and safety manual

manuals.online logo
manuals.online logoBrands
  • About & Mission
  • Contact us
  • Privacy Policy
  • Terms and Conditions

Copyright 2025 Manuals.Online. All Rights Reserved.