Majority Concert CNC-KAR-BLK User manual

Majority Concert
Portable Karaoke System
CNC-KAR-BLK
User Guide

Contents
Watch video tutorials and register your product for
a FREE 3-year warranty at www.majoritytech.co.uk
3
Y
E
A
R
F
R
E
E
E
X
T
E
N
D
E
D
W
A
R
R
A
N
T
Y
Controls and Functions.....................................................1
Remote Control and Functions ...................................................2
TV Connection.............................................................4
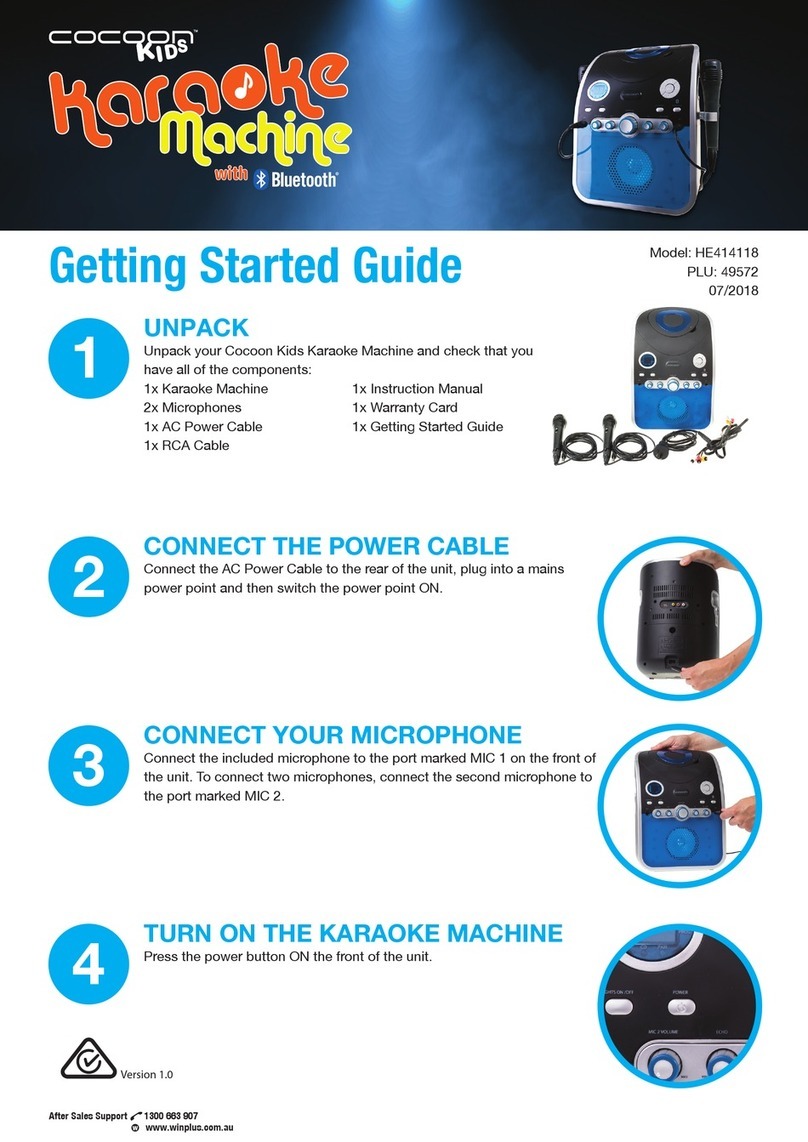
What’s in the Box? .........................................................4
Instruction Guide ..........................................................5
Basic Operation..................................................................5
FM Radio ........................................................................ 5
Bluetooth Connection ...........................................................5
USB Port ........................................................................5
System Setup Menu .............................................................6
CD Ripping ......................................................................7
Technical Specication .....................................................8
Warranty ..................................................................8
Important Safety Information ..............................................8

Controls and Functions
1
16
12
11
1
4
15
13
14
6
7
5
8
2
3
18
1 3
7
8
9
2
4 65
17
109
16
12
11
1
4
15
13
14
6
7
5
8
2
3
18
1 3
7
8
9
2
4 65
17
109
1. Standby
2. Previous
3. Source
4. Rewind
5. Play/Pause
6. Next
7. Stop
8. Forward
9. Volume
10. Dual Mic
11. Dual Mic Volume
12. USB
13. Echo
14. Vocal
15. Indicator
16. Display Screen
17. CD Compartment
18. CD Open Button
1. Coaxial
2. AV Out L
3. Aux L
4. AV Out Video
5. AV Out R
6. Aux R
7. DC IN
8. Power On/Off
9. Battery Compartment
Main Unit

Controls and Functions
2
1
2
4
6
8
10
3
11 29
12 13 31 30
14 15 33 32
16 17 35 34
7
9
19
21
23
25
18
22
24
26
27
20
28
5
1. Power On/Off
2. Number Keys
3. Time
4. Set Up
5. Navigation
6. Title
7. Rewind
8. Source
9. Previous
10. Volume
11. Stop
12. Language
13. Left/Right
Mono/Stereo
14. Subtitle
15. Angle
16. Programme
17. Vocal
18. Mute
19. A/B
20. Repeat
21. PBC
22. Slow
23. Zoom
24. Enter
25. Menu
26. Forward
27. Next
28. Vol +/-
29. Play/Pause
30. Return
31. N/P
32. Display
33. USB/Disc
34. Riping/Copy
35. Record/Stop
Remote Control

3
POWER (Ref.1) - Press this button to turn the unit on from
standby or press again to put back into standby.
MUTE (Ref. 18) - Press this key to stop sound output, press
again to return to normal status.
A/B (Ref.19) - This function will allow the user to repeat a
desired portion of playback. To choose the part of the DVD,
CD or MP3 track you would like to playback press the ‘A-B’
button (Ref.19) to mark point A. Then press the‘A-B’ button
again (Ref.19) to mark point B. The DVD or track section will
repeatedly playback between these points. To cancel the
playback and to continue watching or listening to the DVD
or track press the A/B button (Ref.19) a third time.
NOTE: 1. This function works for DVD, MP3 and CD but not
for CDG or Kodak picture CD discs.
2. For CD and MP3, the start and end point of the A-B
selection must be within the same track.
REPEAT (Ref.20) - This function will allow the user to repeat
a particular chapter, title or track. Press the 'Repeat' button
multiple times to view options.
For DVD disc: Chapter/Title/All/Off
For CDG and CD Discs: Track/All/Off
PLAYBACK CONTROL (PBC) (Ref.21) - This function only
works for video discs. User can access a specific chapter by
entering the chapter number through the number buttons
(0-10) on the remote control.
SLOW (Ref.22) - User can press the SLOW button repeatedly
to adjust the speed of slow motion as desired. This only
works on DVD discs.
TIME (Ref.3) - Pressing the ‘Time’ button during normal
playback will allow the TV to display different time modes.
SET UP (Ref.4) - This will take you to the system set up, see
page 7.
ZOOM (Ref.23) - This unit has six different zoom modes.
Pressing the‘Zoom’ button on the remote control
repeatedly will display the various options.
TITLE (Ref.6) - The title button will take you back to the
main menu of the DVD not for CD/CDG use.
MENU (Ref.25) – The‘Menu’button will take you to the
main DVD menu. To resume play, press the menu button
again. For CD/CDG you can switch between “Intro” and
“Sequence Play” using the ‘Menu’ button. Intro will play the
start of each song and Sequence will play one song after
the other. To view the list of tracks for CD/CDG, press the
‘Return’ button (Ref.30).
SOURCE (Ref.8) - To change the source, press this button to
switch between CD/DVD, AUX, Bluetooth and FM Radio.
LANGUAGE (Ref.12) - DVD discs can contain more than one
audio sound track. Therefore the user can select the sound
track they want by using the‘Language’button on the
remote control. Pressing the‘Language’button repeatedly
will display different audio modes if available.
LEFT/RIGHT MONO/STEREO (Ref.13) - For CD/CDG only,
press multiple times to change between Stereo, Mono L,
Mono R or Mix Mono. For some DVD karaoke discs you can
remove the vocals using the ‘L/R’ button. Also see‘Vocal’
button (Ref.17).
NTSC/PAL - (Ref. 31) NTSC is the video system or standard
used in North America and most of South America. PAL is
the predominant video system or standard mostly used in
Europe.
RETURN (Ref.30) - To exit from an application press ‘Return’.
For CD/CDG it will take you to the list of tracks.
SUBTITLE (Ref.14) - To view subtitles press this button, to
turn off press again.
ANGLE (Ref.15) - Some DVD discs contain scenes which
have been shot from a number of different angles
simultaneously. Therefore, the same scenes can be viewed
from different angles by pressing ‘Angle’ button repeatedly.
(The recorded angles differ from disc to disc).
NOTE: 1. This function only works on DVD disc.
2. If the DVD disc is recorded with only one angle,
this function will not be available.
USB/DISC (Ref.33) – To play a USB, press this.
DISPLAY (Ref.32) – Press ‘Display’ to show chapter and time
information for DVD.
PROG (Ref.16) – Press Programme to programme CD songs
in a preselected order. Use the navigation buttons (Ref.5)
and 'Enter' button (Ref.24) to make your track selection,
then click on the play icon.
VOCAL (Ref.17) – Some DVD Karaoke Discs have various
vocals that can be removed, to do this press the‘Vocal’
button to remove the vocal. In some cases there are more
than one vocal track, press ‘Vocal’ again to remove the
second vocal. This function only works for DVD karaoke
discs as most CDG discs are backing tracks without vocals.
RECORD/STOP (Ref.35) – Press to start recording source to
USB, press again to stop recording.
RIP/COPY (Ref.34) – Some discs can be copied (CD and
MP3), press this button to copy and save in the menu.
Controls and Functions
What’s in the Box?
4
How to connect to your TV
The unit can be connected to your TV using an audio video
cable 3 RCA to 3 RCA (Supplied). This will allow any picture
to appear on your television screen once you have chosen
the correct input on your television - all televisions are
different so please refer to your TV manual for this.
To connect the karaoke unit, put one end of the audio cable
into you television AV connection points and the other end
into the rear of the karaoke unit - Video (Ref.4), Audio Right
(Ref.5) and Audio Left (Ref.2). The plugs are colour coded.
●Majority Concert Karaoke Machine
●Remote Control
●UK Standard Plug DC 15V Power Supply
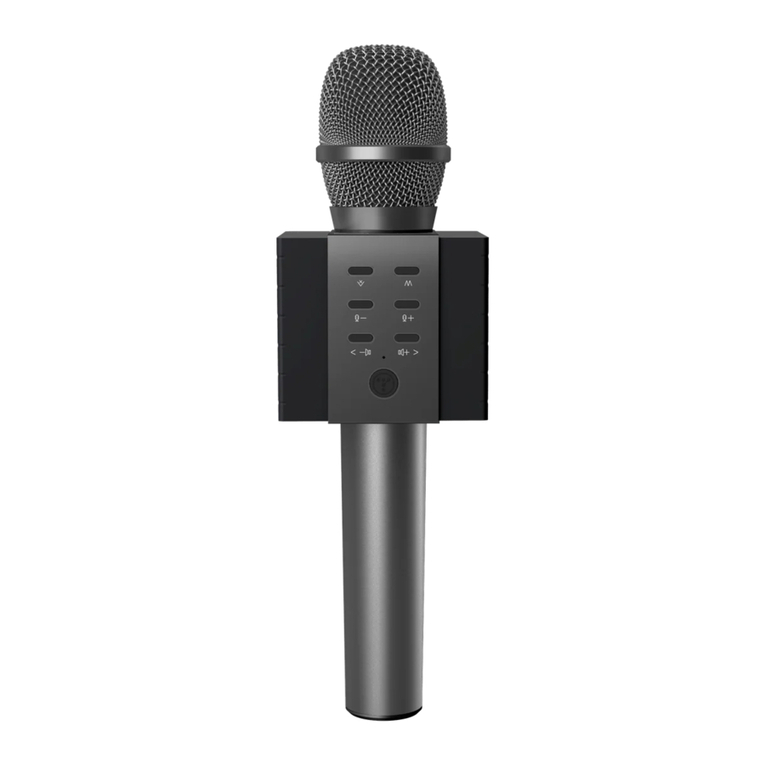
●2 x Microphones
●Instructions Guide
●1 x 3 RCA Cable
COAXIAL
COAXIAL IN
LR
L R VIDEO
AUX IN
TV IN
R
R
R
L
L
RL
L
TV Connection

5
Instructions Guide
Please note all (Ref.) refer to the Main Unit Controls and Functions mapping guide on Page 1 or,
where specied, the Remote Control Controls and Functions Mapping Guide on Page 2.
Basic Operation
Plug the 15V adapter connector into the back of the system
labelled DC 15V (Ref.7) and the power supply into the mains.
Turn on the ‘On/Off’button (Ref.8) on the back of the machine.
Press the‘Standby ’ button to turn on the unit (Ref.1). The
unit will go straight to DVD/CD Mode and read the disc and
start playing.
To select a source press the‘Source’ button (Ref.3). Press
multiple times until your required option is selected which
will show on the display screen.
There are four options:
CD/DVD
AUX
Bluetooth
FM Radio
Standby
To place the music system back on standby, press the
‘Standby’ button (Ref.1) then switch the ‘On/Off’ button
(Ref.8) t o “ O ff ”.
To turn off fully switch the machine off at the mains. The
cord must be out of reach of children.
FM Radio
To select FM Radio mode, press through your choices using
the ‘Source’ button (Ref.3). Your choices will be displayed on
the front display screen (Ref.16) – choose “FM”.
Press ‘Play/Pause’ button (Ref.5) and the music system will
automatically save up to 40 stations that have a good signal.
To select saved stations use the‘Previous’ (Ref.2) or ‘Next’
(Ref.6) buttons.
To fine tune use the ‘Rewind (Ref.4) and ‘Forward’ (Ref.8)
buttons to tune a frequency by 0.1HZ step-by-step.
How to store and recall a station
Find your station and press ‘Prog’(Ref.16) on the remote
control, the display will show “SAVE [1]”. Click on the
number you want to save it as. The unit will then save it
after a few seconds.
To recall, ensuring you are in FM mode and press the
number you want to recall.
Bluetooth Connection
Bluetooth Mode
You can enjoy audio by pairing and connecting any
Bluetooth-enabled portable device with the unit through
Bluetooth wireless connection.
To select Bluetooth press through your choices using the
‘Source’ button (Ref.3). The choices will be displayed on the
front display screen (Ref.16) – choose“Bluetooth Mode”.
Turn Bluetooth on your phone and “CNC-KAR-BLK” will
appear, click on this to connect.
The unit will play a short musical sound when connected.
To select music you will need to select the album or playlist
from your phone.
USB Port
Connect the USB into the USB port (Ref.12).
To select your source press the ‘Source’ button (Ref.3) to
scroll through your choices which will be displayed on the
front display screen (Ref.16) – choose“Disc Mode”.
Then press the‘USB/Disc’ button (Ref.33) on the remote.
The display will change from“No Disc” to “USB Mode”.
Note: You will need to ensure that any discs have been
removed from the DVD/CD compartment.
USB supports the following formats:
Movie file support: AVI, MPEG, DAT.
Audio file support: MP3, WMA.
Picture file support: JPEG
Operation is the same as the DVD Player with regards to
functions.

6
Instructions Guide
System Setup Menu
Ensure you have selected “Disc Mode”via the ‘Source’
button (Ref.3).
Press the‘Setup’button on the remote control (Ref.4). The
system set up menu will be displayed.
Pressing the‘Up’ and ‘Down’ navigation keys (Ref.5) on the
remote control will take you through the five different set
up options. These are: System Set Up, Language Set Up,
Audio Set Up, Video Set Up and Digital Set Up.
Once on your required option, press the right navigation
button (Ref.5) on the remote control.
Move the cursor using the ‘Left/Right’, ‘Up/Down’ buttons
(Ref.5) and the ‘Enter’ button (Ref.24) on the remote. Use
the ‘Setup’ button (Ref.4) to exit the menu.
System Set Up
TV System
There are four types of colour encoding systems that affect
the visual quality, PAL, PAL60 or NTSC. AUTO can also be
chosen - the system will automatically match the colour.
Screen Saver
Select ON/OFF on the screen using the navigation buttons
on the controller (Ref.5) if you would like the standard
screen saver to automatically show after a period of
inactivity or if you would like it off.
TV Type
Select the best TV Type 4:3PS, 4:3LB or 16:9. Press the 'Enter'
button (Ref.24) to confirm your selection.
Password
The system can be locked and unlocked with the following
code: 8888. Once it has been locked, settings can not be
changed.
Rating
Some discs may not be suitable for children. You can select
various options. This sets the parental rating limits on the
discs being played.
Default
To return the system back to factory settings select “Restore”
on the screen using the navigation buttons on the remote
(Ref.5) and press ‘Enter’ (Ref.24).
Move the cursor using the ‘Left/Right’, ‘Up/Down’ buttons
(Ref.5) and the ‘Enter’ button (Ref.24) on the remote
control. Use the ‘Setup’ button (Ref.4) to exit the menu.
Language Set Up
OSD Language - Select your language preference from:
English, German, Spanish, French, Portuguese and Italian.
Audio Language - Select your audio language preference
from: English, German, Spanish, French, Portuguese, Italian
and Latin.
Subtitle Language - Select your subtitle language
preference from: English, German, Spanish, French,
Portuguese, Italian or Off.
Menu Language - Select your audio language preference
from: English, German, Spanish, French, Portuguese, Italian
and Latin.
Audio Set Up
Audio out, Microphone Set Up, Key and Microphone
Volume have adjustable levels.
Video Set Up
Adjust the system’s brightness, contrast, hue, saturation and
sharpness.
Digital Set Up
Set the dynamic range and choose Stereo or Mono.

7
Instructions Guide
Watch video tutorials and register your product for
a FREE 3-year warranty at www.majoritytech.co.uk
3
Y
E
A
R
F
R
E
E
E
X
T
E
N
D
E
D
W
A
R
R
A
N
T
Y
CD Ripping
When playing a CD/MP3 disc you can copy songs to a USB
device.
Press the‘Rip/Copy’ button on the remote control (Ref.34),
this will open the set up menu.
Use the ‘Up/Down’, ‘Left/Right’ key cursors to select your
options, press‘Enter’ (Ref.24) to confirm.
Options
Encoder Options – Select the transcribe file speed. “1 X”will
transcribe the file with one side playing as normal and the
other side transcribing.“4 X” – the unit will transcribe faster
and there will be no sound.
Bit Rate – There are five bit rate choices when transcribing
the files – choose the most suitable to transcribe the file.
Note: The higher the bit rate the higher quality music.
File Options – Check (click in the box) then create ID3 if you
want to create an ID. Also check (click in the box) then
create playlist box to include the file in a playlist.
Storage Options – After the files have been transcribed,
choose the device for them to be saved to.
Tracks
Track Title – Use the key cursors to move on to“Tracks, then
right key to “Trk Title”, press‘Enter’ and this will choose all
songs on the CD disc. Press‘Enter’ again to cancel. Move
the cursor up and down to make track changes. The length
displays the track time.
Start
Select “Start” using the cursor keys and then“Enter”. Press
‘Enter’ for transcribing to begin.
Total track size: The total tracks waiting to transcribe.
Total time: The total time for the songs waiting to be
transcribed.
Total size: Total size of files waiting to be transcribed.
Quit
To stop ripping go to ‘Quit’ on the menu bar.
NOTE: After CD Ripping there will be a new CD RIP file folder
on the USB device.
How to delete a file
To delete a file when using USB multimedia files, press the
‘Angle’ button (Ref.15) on remote control which will open
the “File Delete Menu”. Under the“Option Menu”, select the
file type you wish to delete. Under“Folders”, select the
folder which is going to be deleted. Under “Tracks” select
the track that is going to be deleted. Under the “Start”
option, click on the file to be deleted and press‘Enter’
(Ref.24) on the remote control. Once the file has deleted go
to “Quit” to leave the operation menu.

8
1. Read these instructions.
2. Keep these instructions. Instructions are also available for
download at www.majoritytech.co.uk
3. Heed all Warnings.
4. Follow all instructions.
5. Do not clean the apparatus near or with water. 6. Clean only
with a dry cloth.
7. Do not block any ventilation openings.
Install in accordance with the manufacturer’s instructions.
8. Do not install near any heat sources such as radiators, heat
registers, stoves, or other apparatus (including amplifiers) that
produce heat.
9. Protect the power cord from being walked on or pinched
particularly at plugs, convenience receptacles, and the point
where they exit from the apparatus.
10. Only use attachments/accessories specified by the
manufacturer.
11. Unplug this apparatus during light storms or when unused for
long periods of time.
12. Refer all servicing to qualified service personnel.
Servicing is required when the apparatus has been damaged in
any way, such as power- supply cord or plug is damaged, liquid
has been spilled or objects have fallen into the apparatus, the
apparatus has been exposed to rain or moisture, does not
operate normally or has been dropped.
13. No naked flame sources, such as lit candles, should be placed
on the apparatus.
14. Dispose of used electrical products and batteries safely
according to your local authority and regulations.
ADDITIONAL WARNINGS
The apparatus shall not be exposed to dripping or splashing and
no objects filled with liquid, such as vases, shall be placed on
apparatus.
Main plug is used to disconnect device and it should remain
readily operable during intended use. In order to disconnect the
apparatus from the main mains completely, the mains plug should
be disconnected from the main socket outlet completely.
Battery shall not be exposed to excessive heat such as sunshine,
fire or the like.
RECYCLING ELECTRICAL PRODUCTS
You should now recycle your waste electrical goods and in doing
so help the environment.
This symbol means an electrical product should not be
disposed of with normal household waste. Please ensure it
is taken to a suitable facility for disposal when finished with.
IMPORTANT: Please read all instructions carefully before use and
keep for future reference
Risk of electric shock.
Do not open
Read all instructions carefully before use
and keep for future reference
When servicing, use only identical
replacement parts
Technical Specications
Signal Output Colour System: PAL/NTSC/AUTO
Audio System: Audio DAC
24bit/96KHz
Video Format MPEG-4, DIVX, DVD Video, DVD
Audio, Super Video, CD, CD-DA,
HDCD, CD-R/RW
Audio Format MPEG1, LAYER1, LAYER2, LAYER3
Radio FM 87.5-108MHz
Power Supply and Batteries
The unit is powered and charged by UK Standard Plug DC 15V.
The unit has a built in rechargeable battery. The light
indicator (Ref.15) on the front of the unit will light up Green
when charging, Blue when fully charged and Red when the
unit is in standby mode. The unit takes approximately 3
hours to fully charge.
The remote control uses a 2 x AAA batteries and the
compartment can be found on the back of the control.
Warranty
All products come with a standard 12 month warranty.
All items must be registered on www.majoritytech.co.uk
for the warranty to be valid. Once on the web page use the
menu to find “register your product”.
You will also be given the chance to extend your warranty
for an additional 24 months free of charge.
IMPORTANT SAFETY INFORMATION
Technical Specifications and Warranty
CAUTION
RISK OF ELECTRIC SHOCK
DO NOT OPEN ATTENTION
RISQUE D'ELECTROCUTION
NE PAS OUVRIR


www.majoritytech.co.uk
Table of contents