Libretto Malber WD 800.FH9 Mon Mar 26 17:07:13 2001 Pagina 3
Colori compositi
SM695 1
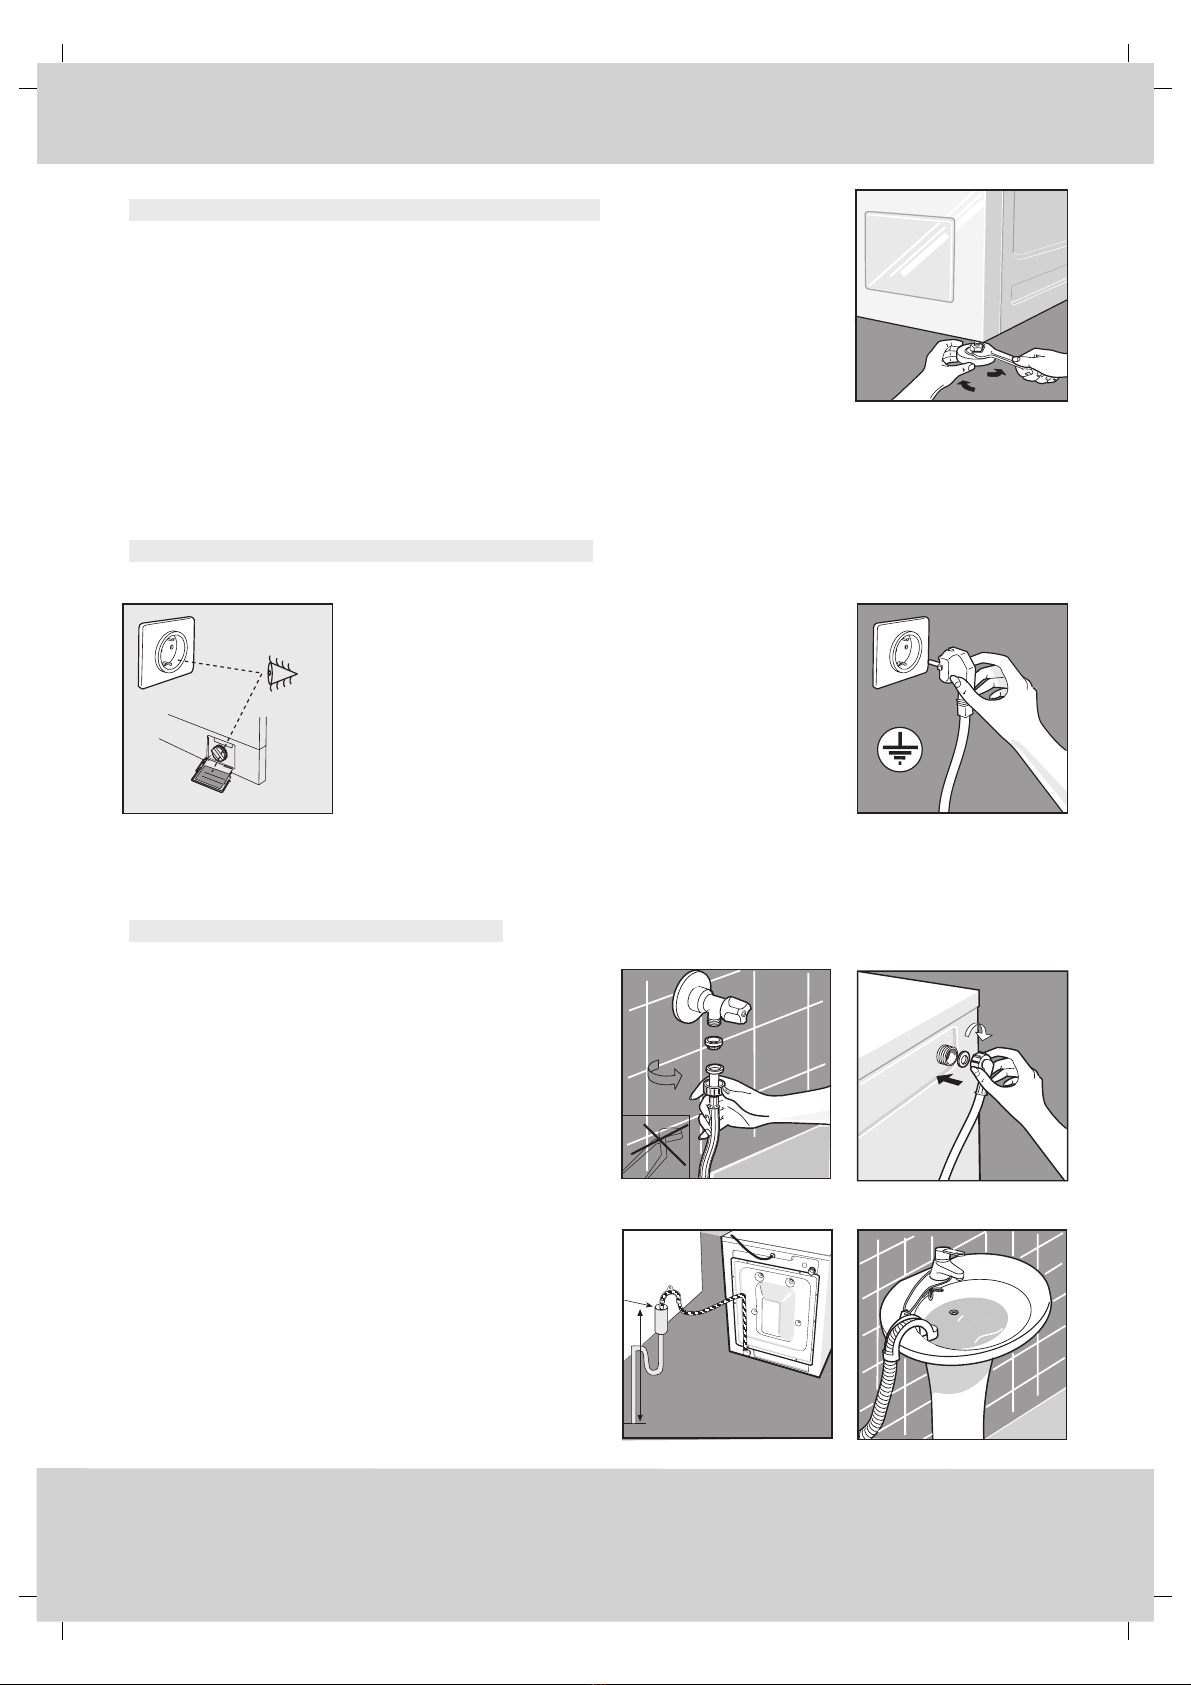
SAFETY
Thank you for having chosen our product.
This appliance is safe and easy to use. It has been constructed according to international safety
standards designed to protect the user. In order to familiarise yourself with the machine and
ensure its long working life, we strongly recommend that you read this instruction manual
carefully.
* The machine must not be installed outdoors,
even if protected by a roof, in that atmospheric
agents may cause irreparable damage
* This appliance has been designed for use as a
domestic washer dryer. Any other use is
considered as improper and therefore
dangerous.
*The appliance must only be used by adults.
* The appliance is very heavy and requires utmost
care when being moved.
*If the machine is to stand on a carpeted floor,
ensure that there is sufficient space for air to
circulate between the floor and the bottom of
the machine.
* The appliance must not be used or touched
barefoot or with wet or damp hands or feet.
* When positioning the appliance, ensure that
the power supply cable is not kinked or
squashed and is accessible.
* If it becomes necessary to replace the power
supply cable, refer exclusively to an authorised
service centre.
* Do not use extension leads, especially in a damp
atmosphere.
* Do not pull the power cable or appliance to
remove the plug from its socket.
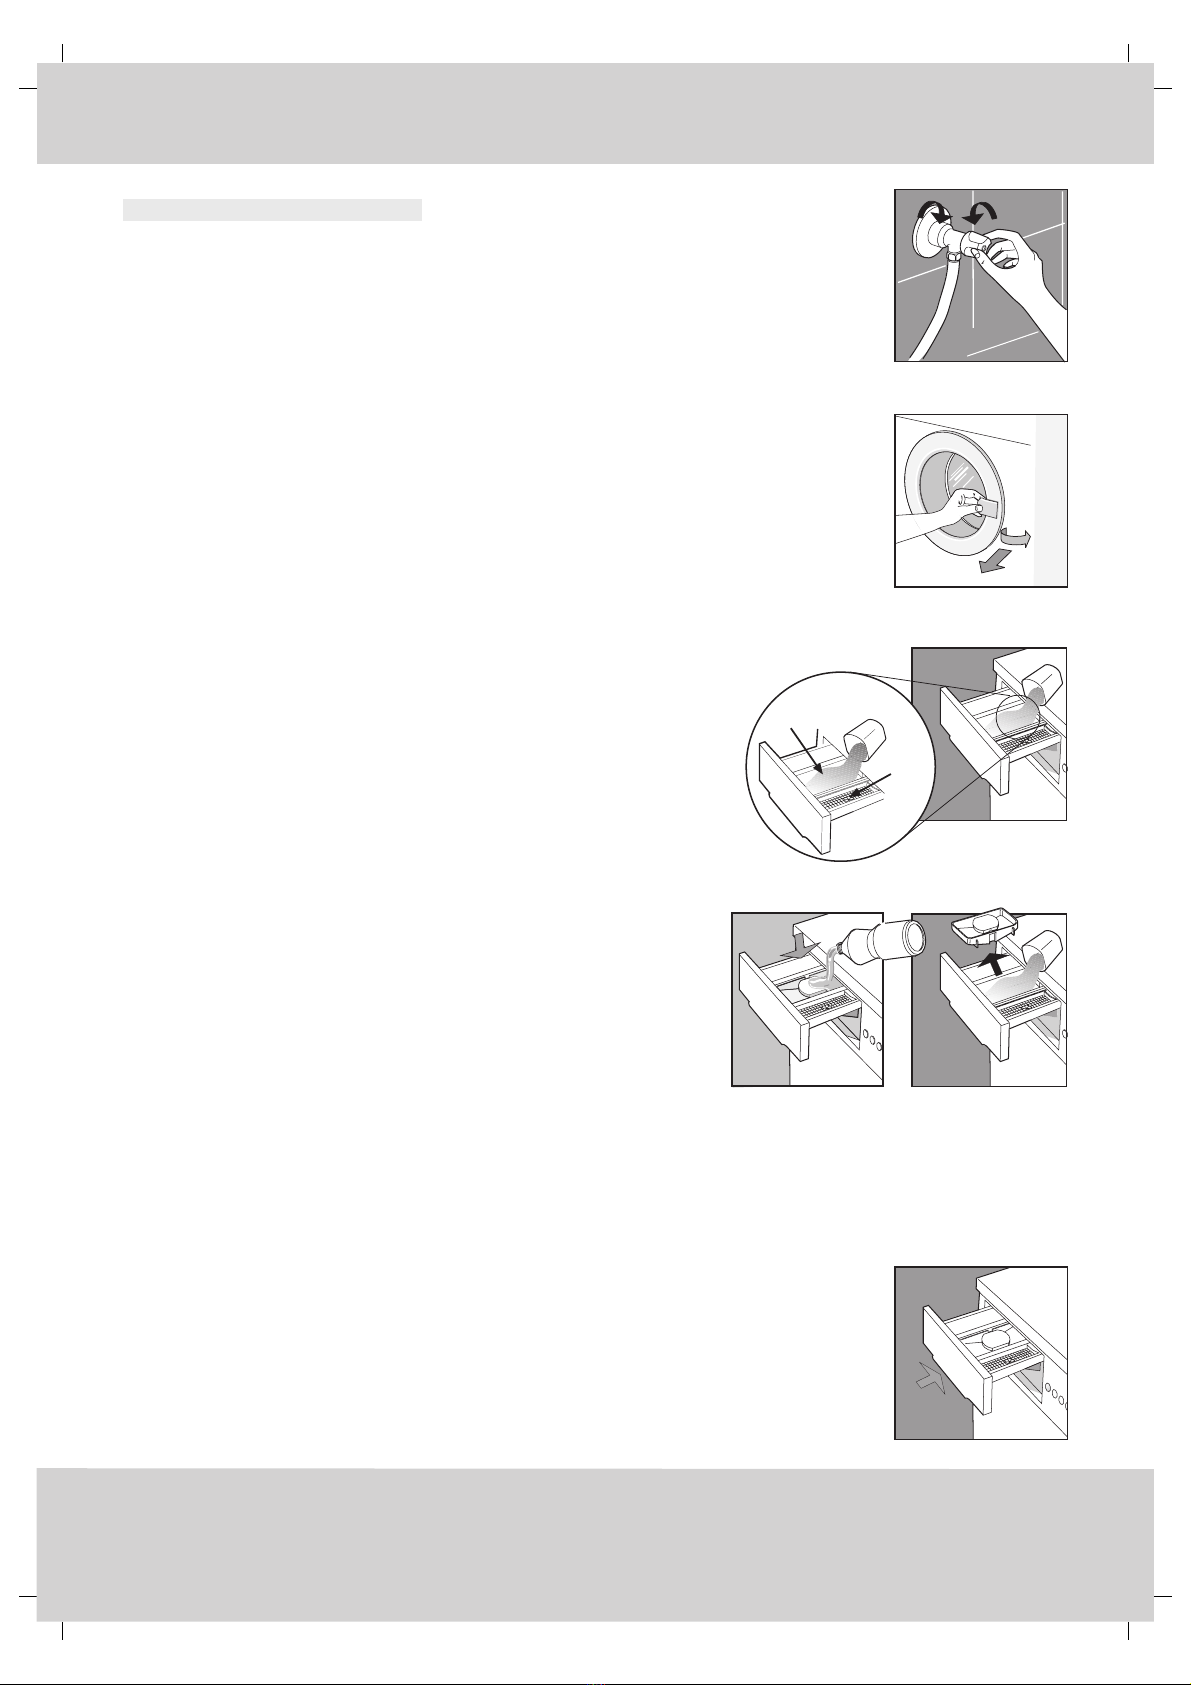
* Do not use detergents designed for hand
washing, in that the excessive suds produced
could damage the internal components.
* When the appliance is in operation, avoid any
contact with the water being discharged through
the drain hose, as it may be very hot.
* Do not touch the door glass, as this will tend
to heat up during a wash.
* At the end of the wash, wait approximately
three minutes before opening the door, in that
it is fitted with a safety device that prevents it
from being opened accidentally.
N.B. for the electronic models to end cycle of
washing the door can be opened when the spy
"end" it will have turned on.
* It is advisable to leave the door open after
completion of the wash cycle.
* In the case of faulty operation, switch off the
machine by removing the plug from its socket
using dry hands. Never try to access internal
components or attempt to repair the machine.