MAMMOTION AWD 5000 User manual
LUBA Robotic Lawn Mower
Model: AWD 5000, LUBA0001, AWD 3000
Quick Start Guide
V 1.0

1
Thank you for choosing MAMMOTION as your garden care kit. This Quick Start Guide will
help you learn and operate MAMMOTION LUBA.
Safety and Regulations
Operating MAMMOTION products requests training and practice. Please readthrough
this
document before operating it in yourgarden. They are:
Do NOT charge the LUBA by third-party charger
Do NOT flip over the mower when running
Do NOT put foot/hand under mower when running
Do NOT push/pull the mower when running
Do NOT disassemble any part when powered on
Do NOT use hands to touch or replace the running blades
Do NOT use hands to touch the charging ports
Do NOT run mower in the puddle
Do NOT run mower on ground with sticks or rubbles
Clean the lawn before deploying the mower for work
Keep the charging port clean and dry

2
Introduction
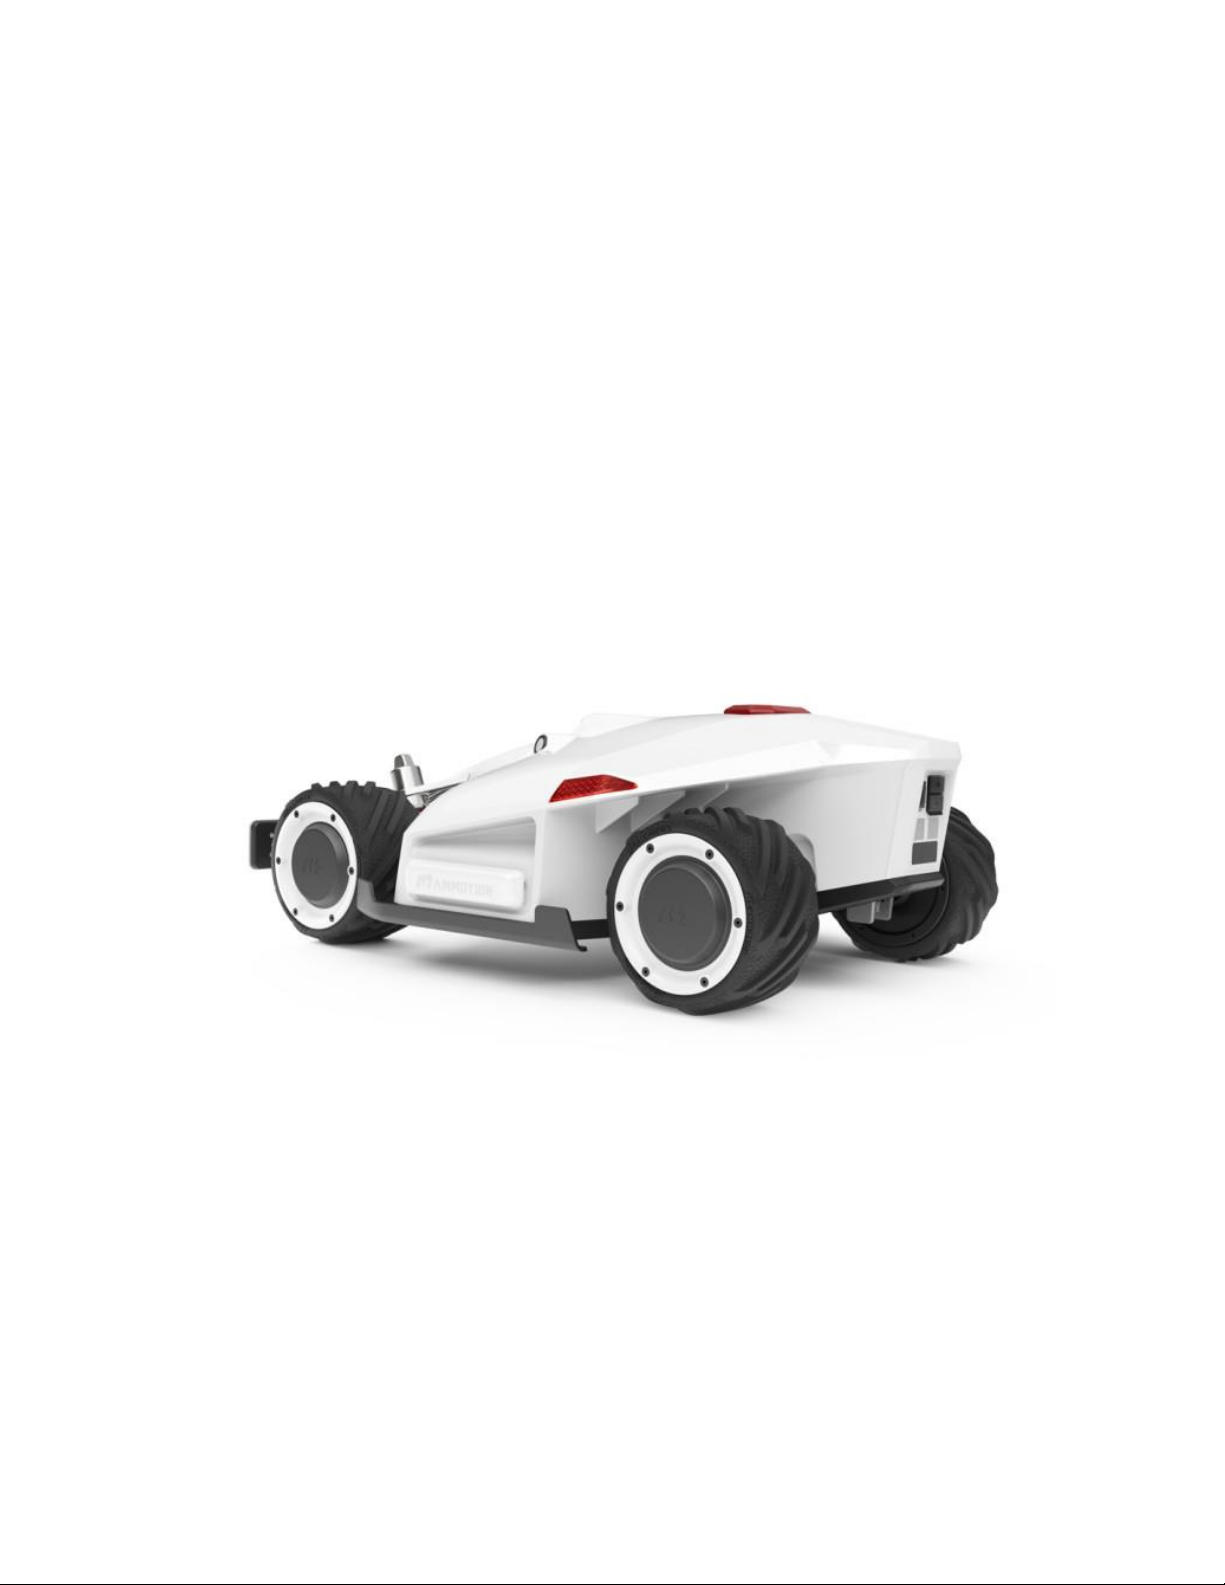
About MAMMOTION LUBA
MAMMOTION LUBA is a 4-wheels-differential (4WD) perimeter wire free robotic lawn mower.
The 4WD and perimeter wire free enable LUBA to break the limits of
mowing jobs
and free the user’s hands.
LUBA Robotic Mower
1.
E-stop
2.
Start button
3.
Power button
4.
Auto-return button
5.
Cutting button
6.
Ultrasonic sensor
7.
Left light
8.
Side collision sensor
9.
Protecting bracket
10.
Front bumper
11.
Connecting indicator
12.
Rain sensor
1
2
3
4
5
6
7
8
9
10
11
6
12
6

3
1. Secure key
2. SIM port(Reserved*1)
3. USB port
4. Charging port
5. Infrared sensor
Note:
1. The reserved port might not function in some previous version mowers.
1. Cutting blade*8 2. Blade disk*2
1
2
3
4
5
4
1
2
2
1

4
Charging Station
1. Mounting hole for RTK base pole
2. Mounting holes*3
3. Charging ports for LUBA
4. Screws*3
5. Power adaptor
6. Extension wire(10meters)
1
2
3
2
4
5
6

5
RTK base
1. Antenna
2. RTK base
3. RTK wire(2.5meter)
4. Mounting pole
1
2
3
4

6
Preparation & Activation
a. Install the front bumper and blade plates on LUBA
The front bumper can be inserted and locked to the front of LUBA body
directly.
As shown in the following figures:
(图)
The blade disks are tightened up
(图)
b. Install MAMMOTION APP
1.
APP download & Installations
Option1. Search the MAMMOTION on App Store (For iOS).
Option2. Go to below download link for the MAMMOTION App (For Android).
Link:https://www.pgyer.com/5WVG
2.
LUBA registration and activation
Keep pressing the POWER BUTTON on the LUBA until you hear“Di...”sound from it.
Then the LUBA is on already.
Open the App for binding and activating the LUBA.
7
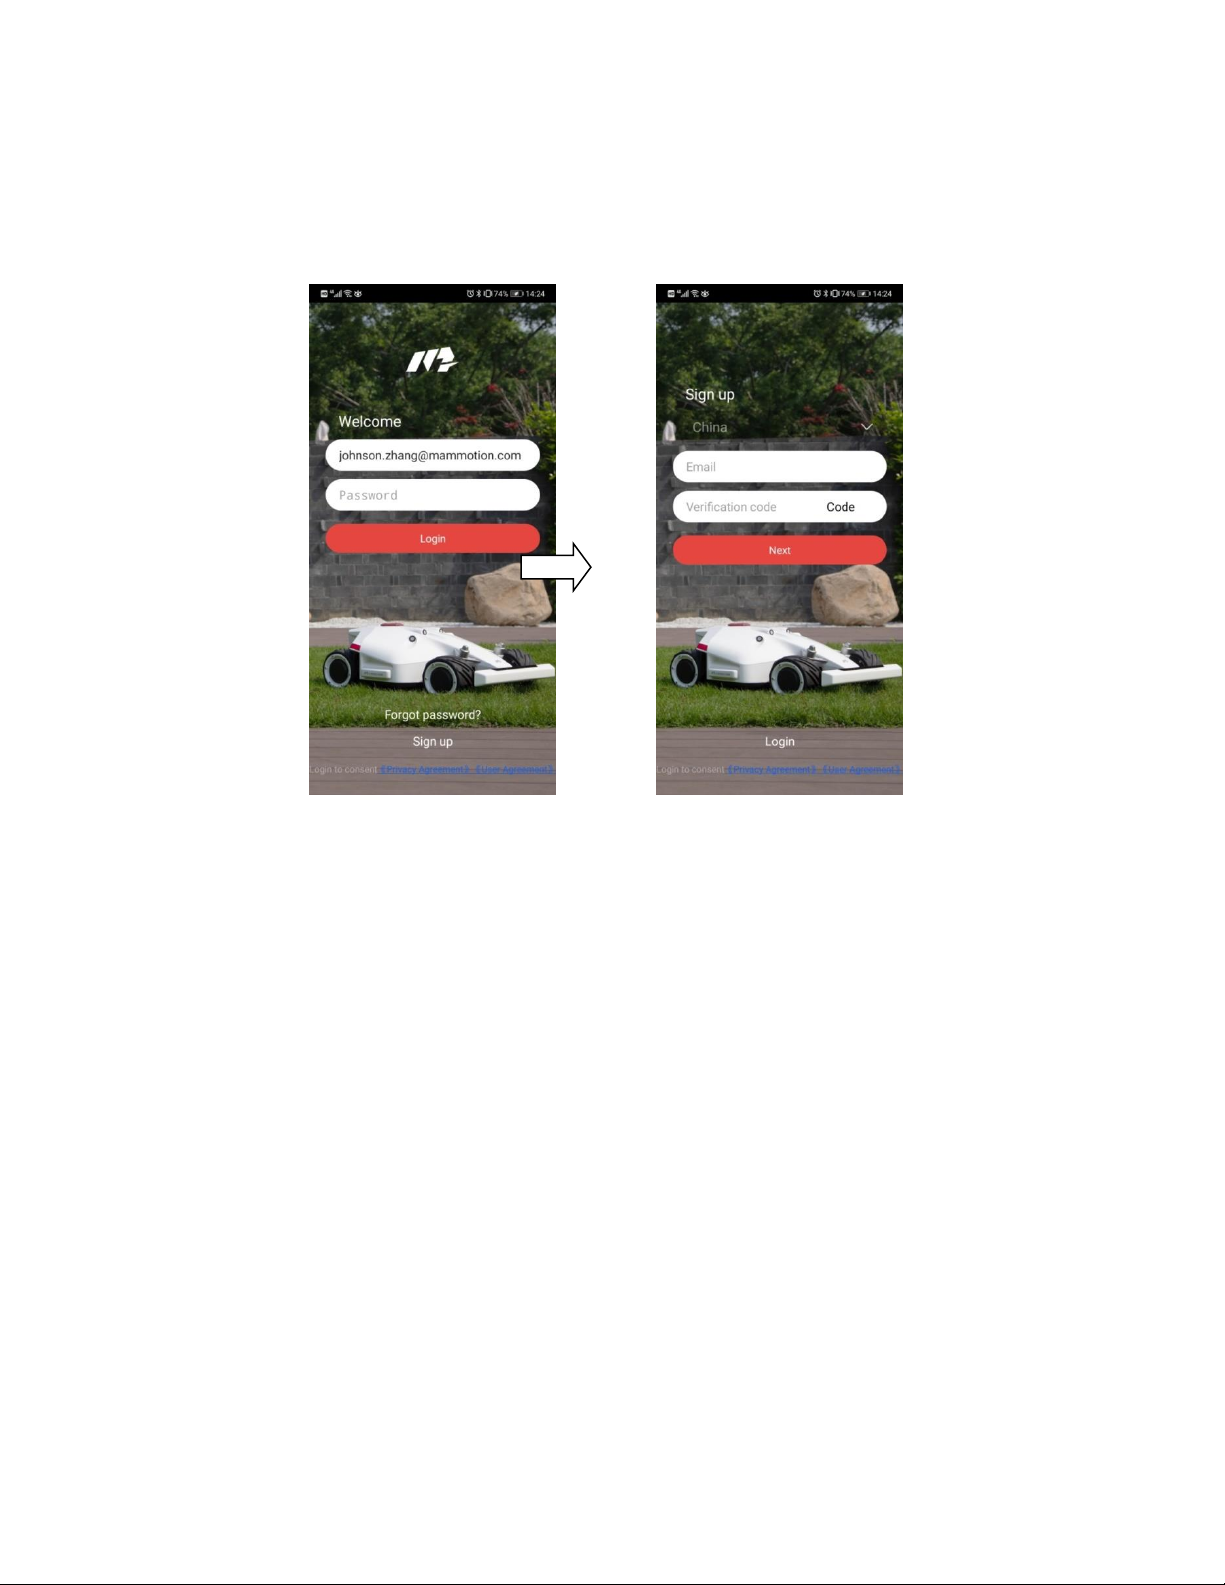
Step 1: Sign up on the App for the first use
Turn on the GPS and Bluetooth on your phone. Select the country and input your email
address.
Then, click Code on the App. It will send a verifying code to your email. Input the six
figures verifying code to the App and click Next to complete the signup.
It will need users to setup their own password for the account.
Step2: Add your LUBA
After you select the correct Bluetooth ID of your LUBA, it will need to connect it to Wi-Fi
for activation.
The App will search the available WiFi signal nearby. Then select your own WiFi, enter
the password and then click Next. Wait until the App shows Device added
successfully. Then click to finish.

8

9
App introduction
As shown in the following figure, the meanings of each icon are listed below:
1:Cutting height setting. When user changes the value of it, the lift motor will drive the blade to the
corresponding height.
2:Positioning/navigation status. There are two statuses. One is GPS and the other is RTK. In
normal work, the status should be in RTK status.
3:Bluetooth connecting status. If the Bluetooth was connected successfully, it will light up to be
blue.
4:Mower battery power left.
5:LUBA SSID. The current LUBA added to the App.
6:LUBA status. There are five status: Initializing, Charging, Standby, Task planning, Working and
Task suspended.
7:Error logs. It’s used for troubleshooting.
8:Map display in the central.
9:Manually drive forward/backward.
10:Create task. Click here to create a new map with mowing task.
11:Setting. Display setting, docking and recharging, user prompts and RTK base reset.
12:Manually drive steering left/right.
1
4
3
2
5
11
12
9
8
7
10
6

10
RTK Base Installation
Recommendation of selecting the RTK base point for typical installation:
1. Install the RTK base on the ground
This way is for the property with relatively opened areas of the yard.
For example, there are no tall buildings around the yard except the owner’s house or the buildings
are far away from it. In such a case, please select the location of RTK base by following the below
recommendations:
Height of the building or obstacle
Distance between the RTK base and the building or obstacle
1m
>1m
2m
>2m
3m
>3m
4m
>4m
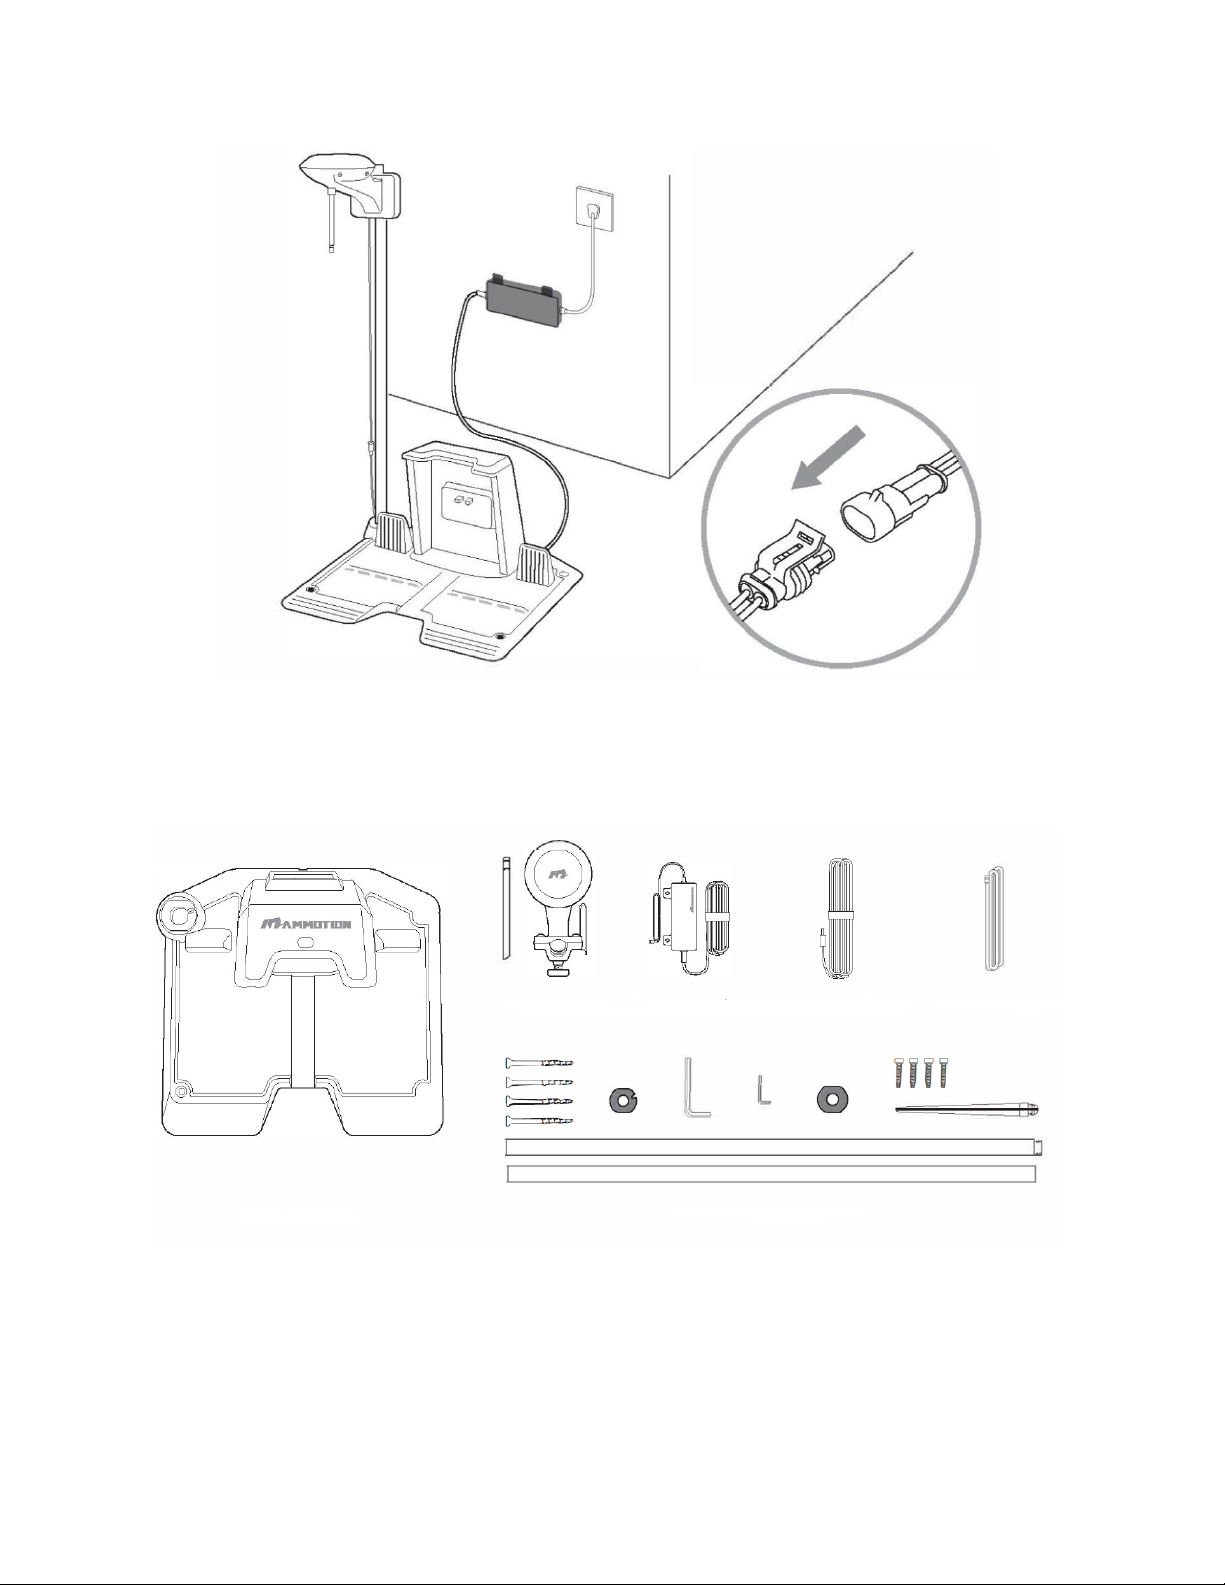
a. RTK base is installed on the charging station
Over view of the installation when it’s completed:
RTK base& charging station
11
Installation Kit:
①Charging station
②RTK base
③Power adaptor for charging station
④Extension wire for charging station(10 meters)
⑤RTK wire(2.5 meters)
⑥RTK base mounting pole with tools
①
②
③
④
⑤
⑥
12
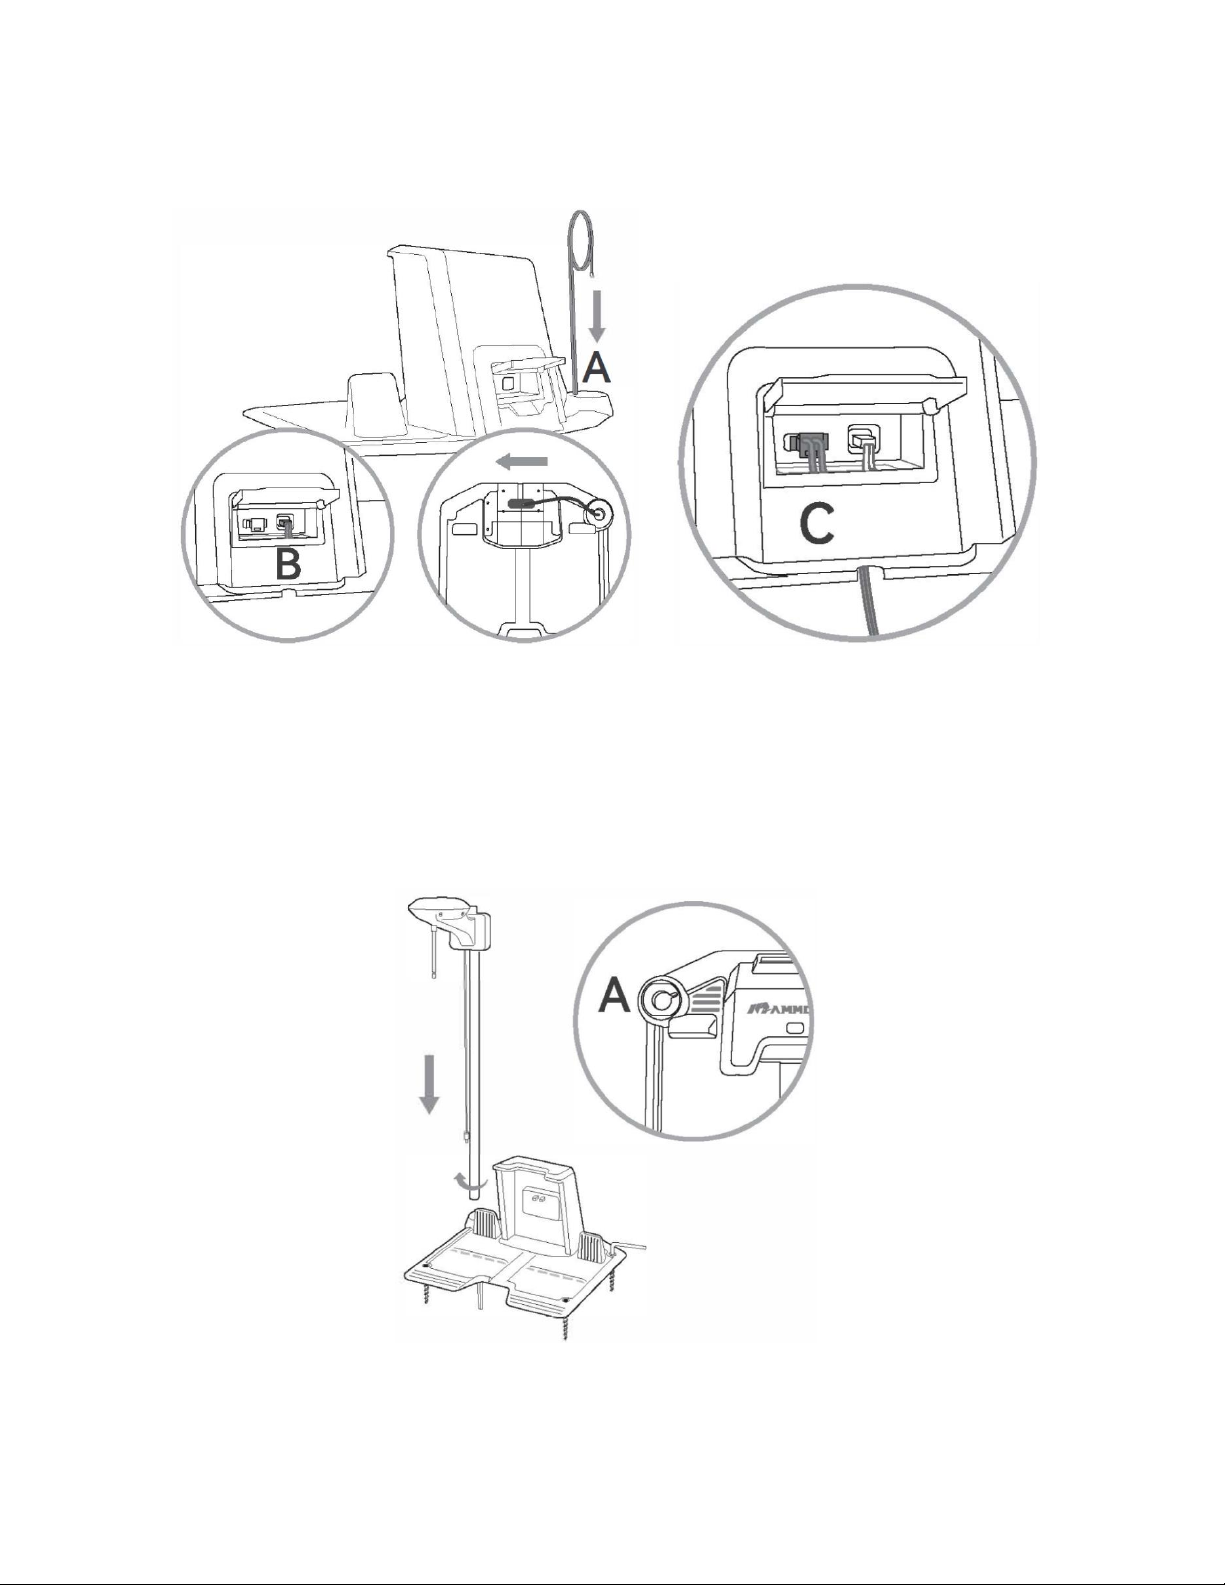
Step1:Go through the 2.5meters RTK wire from Ato Band then connect it to C.
Step2:Insert and fix the RTK bas mounting pole to the ground from hole Aon charging station.
13
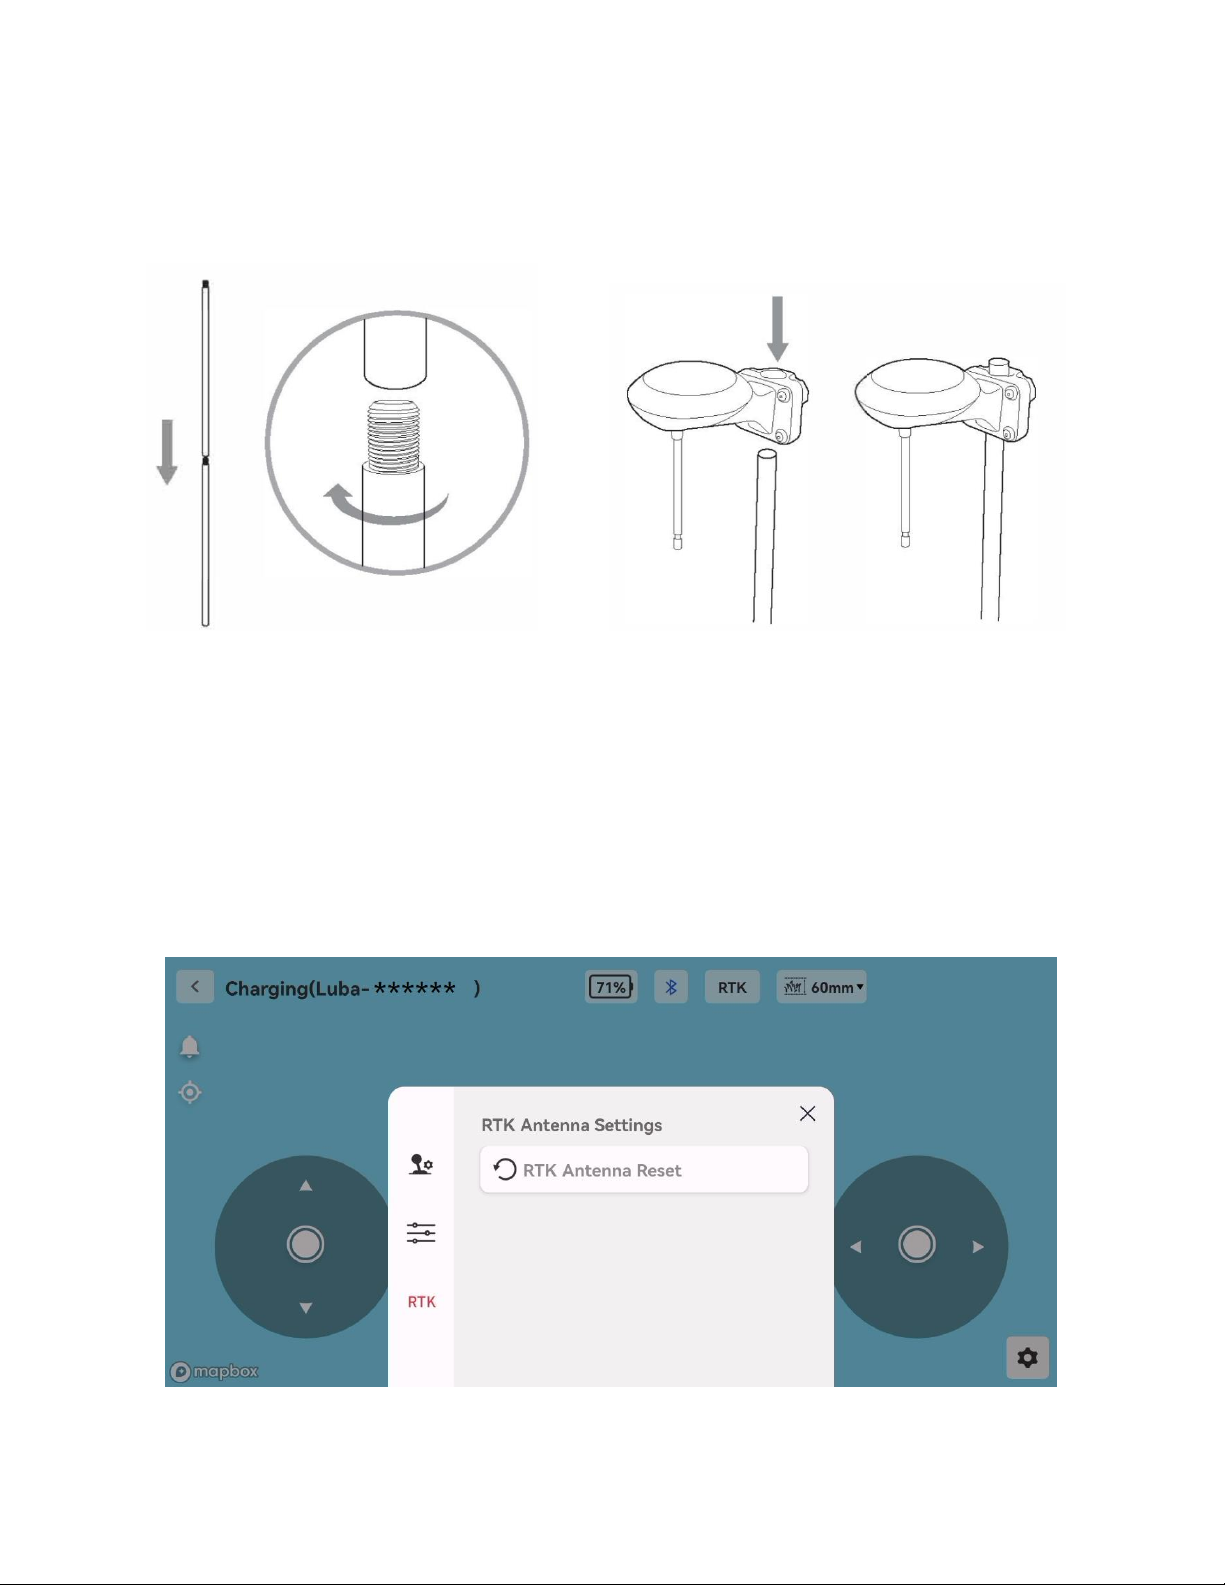
Step3:Screw the other part of RTK base mounting pole together. Fix the RTK base to the mounting
pole. The RTK base can be locked on the pole by driving the plastic screw on the back. Users can fix
the RTK base on the pole first before fixing the pole to the ground as well.
Step5: Then connect the wires for each part. Done!
Setup mowing task
Step1:RESET RTK antenna
When the LUBA is in charging state, go to Setting--->RTK Antenna Reset. Reset the RTK antenna.
Then the LUBA will recognize the current point of the charging station. This step is very important for
the success of automatic recharge.

14
Note:
1. The LUBA status must be on Charging when clicking to reset the RTK antenna.
2. The RTK antenna reset will clear all the previous planed data. So it’s only done for a new place of
charging station or setting.
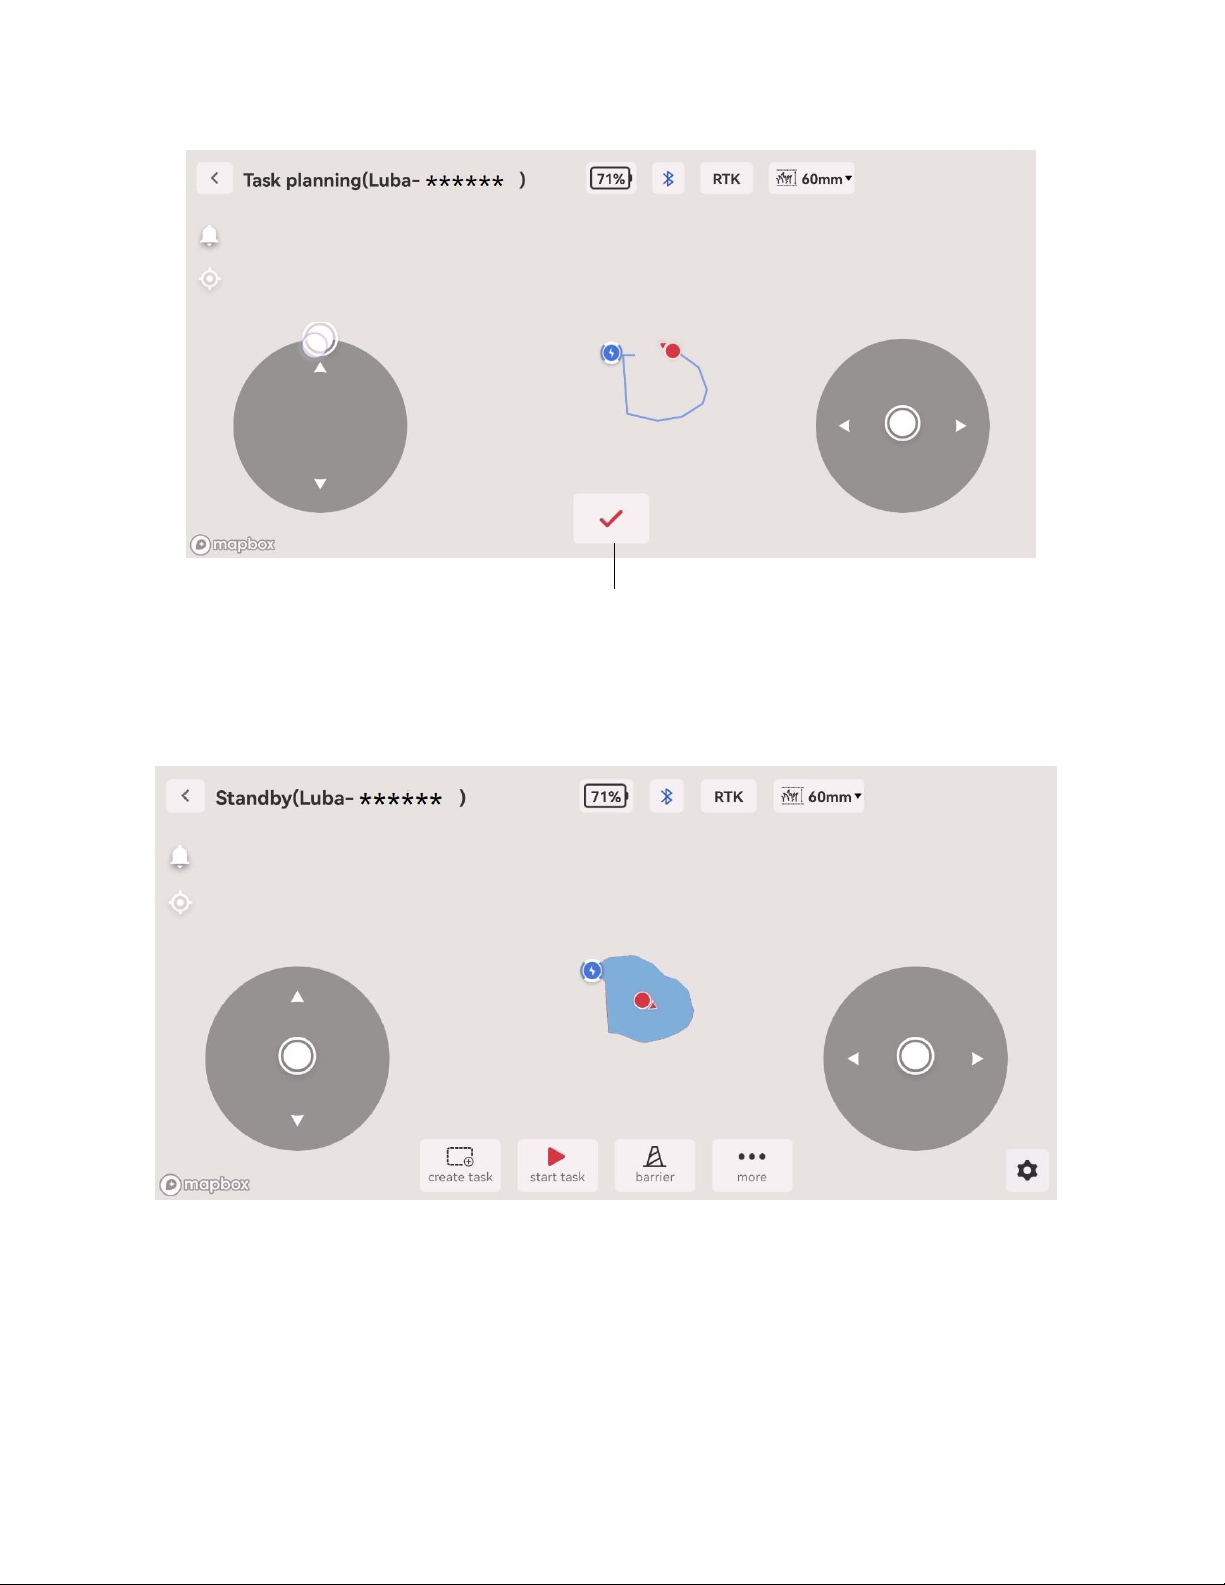
Step2:Draw map
After the RTK antenna is reset, drive the LUBA out from the charging station for about 1meter away.
The LUBA will turn to Standby status.
Then click Create task. Give it a name and confirm to start drawing the map. Then drive the mower
around the boundary of your lawn area to build up the virtual boundary.
When the map is started to draw, the LUBA status will turn to Task planning. Then drive the LUBA to
complete boundary drawing.
15
When the LUBA is driven closely to the start point, the virtual boundary will be closed automatically.
Then it will pop the message:Planning to complete. LUBA status will turn to be Standby when it’s
completed.
Note:
Users can manually click to complete the virtual boundary drawing. But it may not accurate
enough when the boundary closed.
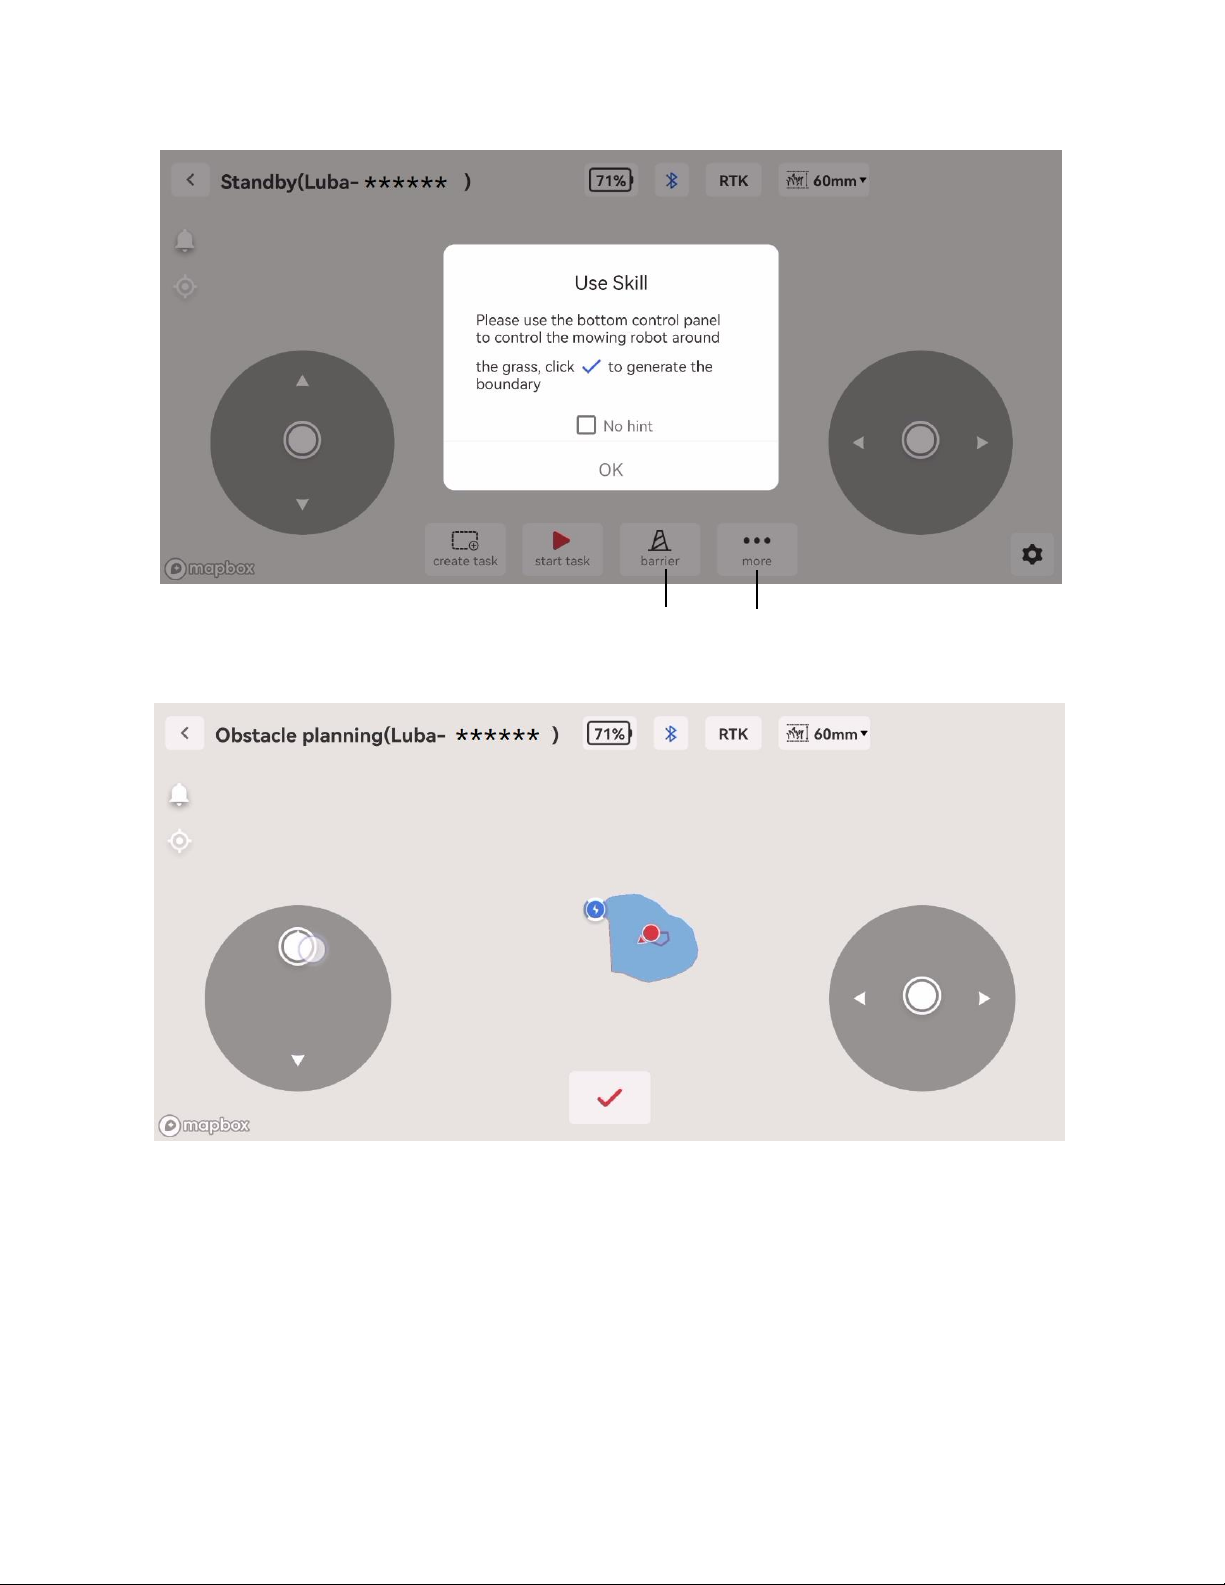
Then draw the no-go-zone areas on the map if needed. Drive the LUBA to the no-go-zones first and
then click Barrier on the bottom to start drawing the virtual boundary for them. Click OK to start.
Manually complete the boundary drawing.
16
In more plans, users can set the working height of cutting blade, working modes, time, response
to rain and device choosing accordingly.
Draw no-go-zones
More

17
Step3:Start task
After the planning of map has been completed, click Start task at the bottom of the App. Then it will
pop up the confirmation message. Confirm the mowing settings and start operation, the LUBA will
work automatically.

18
When the LUBA is automatically starting, the status will turn to be Working.
Note:
1. When clicking Start Task to start mowing, the LUBA will go around all the virtual boundaries and
no-go-zone areas automatically first. Then it will go to the Start Point of running line to start the
mowing task.
2. After the map is completed, the mowing direction and running lines will be generated automatically.
The LUBA will work according to the direction and lines.
3. If the map wasn’t shown in the middle on the screen of App, users can click on the screen to
make it better.
Step4:Return to charging station for recharging when working normally
There are two situations that the LUBA can go back for recharging.
1. The LUBA battery is in low power. About 15% left. In this condition, LUBA will go back to
charging station automatically for recharging.
2. User suspends and ends the current task on the App when it’s connected. Then if user clicks End
on App, the LUBA will go back to charging station automatically. As it’s shown in the following
figure:
Working
Charging station

19
Note:
The LUBA can be driven back for recharging manually on the App as well. But it will need the App
connect to the LUBA successfully.
Maintenance
As for maintenance details, please refer to MAMMOTION official website or user manual.
This manual suits for next models
2
Table of contents
Other MAMMOTION Lawn Mower manuals


