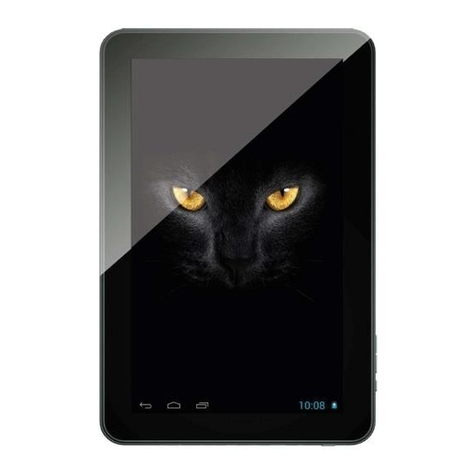
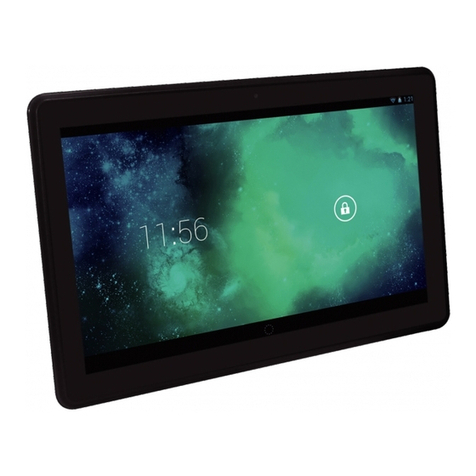
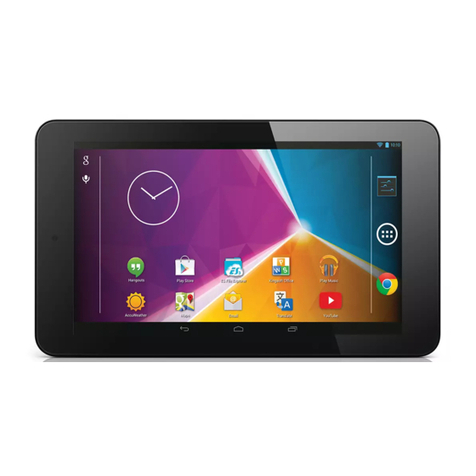
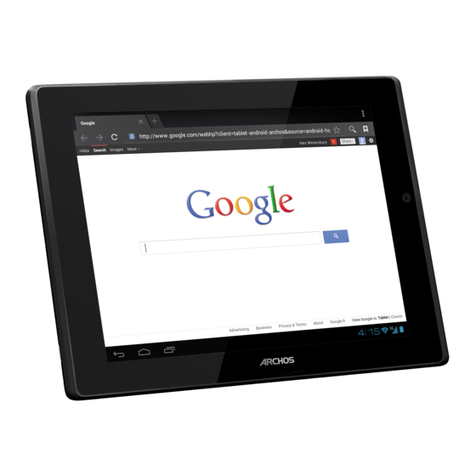
Manta QUAD POWER MID1013 User manual

INSTRUKCJA OBSŁUGI - PL
USER’SMANUAL - EN
BEDIENUNGSANWEISUNG - DE
MANUALDEUSUARIO - SP
MANUALE UTENTE- IT
NOTICED’UTILISATION- FR
- BG
MANUAL DE INSTRUÇÕES- PT
UPUTA RUKOVANJA- HR
NÁVOD K OBSLUZE - CZ
NAUDOJIMO INSTRUKCIJA- LT
Tablet QUAD POWER
MID1013
UWAGA! Wszystkie ilustracje w tej instrukcji załączono tylko dla
orientacji. Podane informacje mogą podlegać zmianom bez uprzed-
niego powiadomienia.

2
Wygląd i przyciski
Przycisk zasilania (POWER)
Włączanie: po wciśnięciu i dłuższym przytrzymaniu przycisku zasilania, układ
przejdzie do ekranu głównego.
Blokada ekranu: po krótkim wciśnięciu przycisku zasilania („Power”)
nastę-
puje zablokowanie lub odblokowanie ekranu.
Głośność +, Głośność -
Przyciskami u góry, „Volume+” i „Volume –“ zwiększa
się lub zmniejsza
poziom głośności.
Gniazdosłuchawek–Gniazdo standardowegowtyku słuchawkowego 3,5 mm.
Karta pamięci – Szczelina TF-CARD: zewnętrzna karta pamięci TF
FLASH.
Mikro USB – do podłączenia komputera do transmisji danych i podłączenia
ze-
wnętrznego napędu USB flash.
INSTRUKCJA OBSŁUGI PL
Power
Vol+
Vol-
Reset
Gniazdo
słuchawek TF-CARD SIM 1
SIM 2
Kamera

Pasek stanu na dole ekranu.
Odlewej:Przycisk volume-, przycisk cofania, powrót do ekranu główne-
go, ostatnio otwarta
aplikacja, przycisk volume +.
Pasek stanu na górze ekranu.
Odprawej:ikonastanunaładowaniaakumulatora,ustawionyczas,ikony
systemowe.
INSTRUKCJA OBSŁUGI PL
3
Opis ekranu głównego
Po włączeniu, wyświetli się ekran główny.
Opis paska stanu
Zarządzanie ikonkami programowymi: po wciskaniu ikonki przez 3
sekun
dy, zostanie ona powiększona i można ją wtedy przeciągnąć w
dowolne
miejsce na ekranie.
Usuwanie ikon: po wciśnięciu przez 3 sekundy, przeciągnij ikonkę
na
ikonkę kosza na śmieci, i gdy stanie się czerwona, można ją puścić, po
czym ikonkę usunąć.

4
Podłączenie komputera
Używając portu USB do łączenia MID z komputerem.
Pojawi się symbol
ikony USB , a po
przeciągnięciu i upuszczeniu paska stanu, pojawi się
następujący ekran:
Wciśnij „Turn on USB storage” („Włącz nośnik USB”).
Ustawienia
WWWiii---FFFiii – umożliwia konfigurację i połączenie z siecią Wi-Fi
DDDźźźwwwiiięęękkk – umożliwia konfigurację dźwięków systemowych i powiadomień
WWWyyyśśśwwwiiieeetttlllaaaccczzz – Umożliwia konfigurację wyświetlacza (Jasność ekranu,
Tapeta, Uśpienie, itp.)
PPPaaammmiiięęęććć – pokazuje ilość wolnej i zajętej pamięci
BBBaaattteeerrriiiaaa – pokazuje czas pracy na baterii oraz wykorzystanie przez aplika-
cje
JJJęęęzzzyyykkk,,, kkklllaaawwwiiiaaatttuuurrraaa,,, gggłłłooosss – umożliwia wybór języka, klawiatury, konfigurację
funkcji głosowych
KKKooopppiiiaaa iii kkkaaasssooowwwaaannniiieee dddaaannnyyyccchhh – umożliwia tworzenie kopii systemu oraz
przywracanie ustawień fabrycznych
DDDooodddaaajjj kkkooonnntttooo – umożliwia dodawanie i konfigurację kont Google, Poczty,
IMAP i innych
DDDaaatttaaa iii ccczzzaaasss – umożliwia ustawienie daty i czasu
III nnn fff ooo rrr mmm aaa ccc jjj eee ooo uuu rrr zzz ąąą ddd zzz eee nnn iii uuu – W y ś w i e t l a i n f o r m a c j e o u r z ą d z e n i u , w e r s j ę
systemu, numer modelu, itp.
INSTRUKCJA OBSŁUGI PL

USER’S MANUAL EN
5
PPPOOOWWWEEERRR
Startup: Long Press and hold the power button, the system will enter the main
interface
Shutdown: In the main menu interface, Press the power button about 5second to
shutdown, The system can hint “power off” option, Clike” ok”. you can safely shut
down.
Lock screan: Short press Power button to lock screen or unlock screen.
VVVooollluuummmeee +++, VVVooollluuummmeee ---:The buttons on top Volume +, Volume-achieve changes in the
volume.
EEEaaarrrppphhhooonnneee jjjaaaccckkk::: 333...555 mm standard earphone jack
TF Card –Slot for MicroSD card
MMMiiicccrrrooo UUUSSSBBB–you can use it to connect the computer for data transmission and
external connection USB flash drive
Appearance and button
Power
Vol+
Vol-
Reset
headphone
jack TF-CARD SIM 1
SIM 2
Camera

6
The status bar at the bottom of the screen.
From left: VOLUME button, reversing button, return to the main scre-
en, the last open application,volume + button.
The status bar at the top of the screen.
From right to left: the battery status icon, the set time, system icons.
USER’S MANUAL EN
Main interface describe
After startup will enter the main interface
ManagementmaininterfacesoftwareICONS:long presstheicons3second,
after the icons will bigger, then you can drag anywhere in the interface.
Deleteicons:longpresstheicons3 second,dragthe iconstotheRecycleBin
icon, once it become red, Loosen your hand, after that you can delete icon
Status bar describe

7
Using the USB port to connect the tablet to the computer. Symbol
appears on the USB icon, and drag and drop the status bar, you will
see the following screen:
Click “Turn on USB storage”
Setings:
WWWiiifffiii - allows you to configure and connect to a Wi-Fi
SSSooouuunnnddd - allows you to configure system sounds and notifications
DDDiiisssppplllaaayyy - Allows you to configure the display (brightness of the screen,
wallpaper, Sleep, etc.)
MMMeeemmmooorrryyy - shows the amount of free and used memory
BBBaaatttttteeerrryyy - shows the battery life and the use by applications
LLLaaannnggguuuaaagggeee,,, kkkeeeyyybbboooaaarrrddd,,, vvvoooiiiccceee - allows you to select the language, keyboard,
voice feature configuration
CCCooopppyyy aaannnddd dddeeellleeettteee dddaaatttaaa - allows you to backup and restore the system to
factory settings
AAAdddddd AAAccccccooouuunnnttt - You can add and configure your Google Accounts, Mail,
IMAP, and other
DDDaaattteee aaannnddd tttiiimmmeee - to set the date and time
CCCooorrrrrreeecccttt iiinnnfffooorrrmmmaaatttiiiooonnn ooonnn ttthhheee dddeeevvviiiccceee - Displays information about the devi-
ce, system version, model number, etc.
USER’S MANUAL EN
Connection with PC

Power
Vol+
Vol-
Reset
Kopfhörerbuchse TF-CARD SIM 1
SIM 2
Kamera
BEDIENUNGSANWEISUNG DE
8
Aussehen und Tasten
AAAnnntttrrriiieeebbbssstttaaasssttteee (((PPPOOOWWWEEERRR)))
Anschalten: wenn Sie die Antriebstaste drücken und gedrückt halten, we-
chselt das System zum Hauptbildschirm.
Bildschirmsperre: nach dem kurzen Drücken auf die Antriebstaste („Power”)
wird der Bildschirm gesperrt oder entsperrt.
LLLaaauuutttssstttääärrrkkkeee +++,,, LLLaaauuutttssstttääärrrkkkeee ––– mit den oberen Tasten, „Volume+” und „Volume -”
kann das Lautstärkeniveau erhöht oder verringert werden.
KKKooopppfffhhhööörrreeerrrbbbuuuccchhhssseee – Buchse für den 3,5 mm Standardkopfhörerstecker.
SSSpppeeeiiiccchhheeerrrkkkaaarrrttteee --- TTTFFF---CCCAAARRRDDD SSSccchhhllliiitttzzz: externe TFFLASH Speicherkarte.
MMMiiikkkrrrooo UUUSSSBBB – zum Anschließen des Computers an die Datentransmission und
Anschließen eines externen USB flash Antriebs.

9
Statusleiste unten im Bildschirm.
Von links: VOLUME-Taste, Rücktaste, um zum Hauptbildschirm zurück-
zukehren, die letzte offene Anwendungsvolumen + Taste.
Die Statuszeile an der Oberseite des Bildschirms.
Von rechts nach links: der Batteriestatussymbol, der eingestellten Zeit,
System-Icons.
Beschreibung des Hauptbildschirms
Nach dem Einschalten wird der Hauptbildschirm angezeigt.
Beschreibung der Statusleiste
Management von Programmicons: drücken Sie ein Icon für 3
Sekunden, um es zu vergrößern und anschließend an eine beliebige
Stelle auf dem Bildschirm zu ziehen.
Löschen von Icons: drücken Sie ein Icon 3 Sekunden lang, ziehen
Sie es danach bis zum Papierkorb (Recycle Bin Icon), und wenn es rot
wird, kann es losgelassen und gelöscht werden.
BEDIENUNGSANWEISUNG DE

10
Computeranschluss
Beim Benutzen des USB-Anschlusses für MID-Verbindungen mit dem
Computer. Es erscheint ein USB-Iconsymbol, und nach dem Durchzie-
hen und Loslassen der Statusleiste erscheint der folgende Bildschirm:
„Turn on USB storage” drücken („USB-Speicher anschalten”).
Einstellungen
WWWiii---FFFiii– ermöglicht die Konfiguration und Verbindung mit dem Wi-Fi-Netz
TTTooonnn – ermöglicht die Konfiguration von Systemtonsignalen und Benachrichtigun-
gen
DDDiiisssppplllaaayyy – ermöglicht die Konfiguration des Displays (Bildschirmlichtstärke,Hinter-
grundsbild, Standbymodus, u. Ä.)
SSSpppeeeiiiccchhheeerrr – zeigt den besetzten und freien Speicherplatz an
BBBaaatttttteeerrriiieee – zeigt die Dauer des Batteriebetriebs und Nutzung durch Applikationen
SSSppprrraaaccchhheee,,, TTTaaasssttteeennnfffeeelllddd,,, TTTooonnn – ermöglicht die Wahl der Sprache, des Tastenfelds, die
Konfiguration von Tonfunktionen
Kopie und Datenlöschen – ermöglicht die Erstellung von Systemkopien und
Rückkehr zu Werkeinstellungen
Konto hinzufügen – ermöglicht das Hinzufügen und Konfigurieren von Google-,
Post-, IMAP- und anderen Konten
Datum und Zeit – ermöglicht die Einstellung von Datum und Uhrzeit
Gerätsdaten – Zeigt die Daten des Geräts, Systemversion, Modellnummer, u. Ä. an.
BEDIENUNGSANWEISUNG DE

Power
Vol+
Vol-
Reset
toma de
auriculares TF-CARD SIM 1
SIM 2
de la cámara
MANUAL DE USUARIO ES
11
AAAssspppeeeccctttooo eeexxxttteeerrrnnnooo yyy bbboootttooonnneeesss
BBBoootttóóónnn dddeee eeennnccceeennndddiiidddooo (((PPPOOOWWWEEERRR)))
Encender: mantener pulsado el botón. El dispositivo abrirá la pantalla princi-
pal.
Bloqueo de pantalla: pulsar brevemente el botón de encendido („Power”),
para bloquear o desbloquear la pantalla
VVVooollluuummmeeennn +++,,, VVVooollluuummmeeennn --- Los botones permite aumentar o reducir el volumen
de sonido.
EEEnnnccchhhuuufffeee dddeee aaauuurrriiicccuuulllaaarrreeesss --- Enchufe estándar de auriculares 3,5 mm.
TTTaaarrrjjjeeetttaaa dddeee mmmeeemmmooorrriiiaaa - Ranura para tarjetas TF-CARD: tarjeta de memoria
externa TFFLASH.
MMMiiicccrrrooo UUUSSSBBB - para conectar al ordenador y transmitir datos o bien, para co-
nectar un dispositivo externo USB flash.

12
Barra en la parte inferior de la pantalla
Desde la izquierda: botón de volumen, botón de marcha atrás, volver a
la pantalla principal, el último volumen de aplicación abierta + botón.
La barra de estado en la parte superior de la pantalla.
De derecha a izquierda: el icono de estado de la batería, el tiempo
establecido, los iconos del sistema.
Descripción de pantalla principal
Después de encender el dispositivo, aparece la pantalla principal.
Descripción de barra de estado
Administración de iconos de programas: pulsar el icono durante 3
segundos, para aumentar y desplazar a cualquier lugar de la pantalla.
Eliminar iconos: pulsar durante 3 segundos, desplazar el icono a la
papelera y soltar, cuando se vuelva roja. Seguidamente, eliminar el
icono.
MANUAL DE USUARIO ES

13
Conectar al ordenador
Utilizar el puerto USB, para conectar el dispositivo MID con el or-
denador. Aparece un icono USB, desplazar y soltar el icono sobre la
barra de estado, para abrir siguiente pantalla:
Pulsar „Turn on USB storage” („Conectar dispositivo USB”).
Configuración
Wi-Fi - permite configurar y conectar a red Wi-Fi
Sonido -permiteconfigurarlossonidosdelsistemaymensajes
Pantalla - permite configurar la pantalla (brillo, escritorio, protector de pantalla,
etc.)
Memoria - muestra el espacio disponible y ocupado en la memoria
Batería - indica el tiempo de trabajo de batería y el consumo de energía gene-
rado por aplicaciones
Idioma, teclado, voz - permite elegir el idioma, el teclado y configurar las
funciones de voz
Copia y borrado de datos - permite crear una copia del sistema y recuperar
la configuración inicial del dispositivo
Añadir cuenta - permite añadir y configurar cuentas Google, Correo, IMAP y
otros
Fecha y hora - permite ajustar la fecha y hora
Informaciones acerca del dispositivo - Muestra informaciones relativas al
dispositivo, versión del sistema, número de modelo, etc.
MANUAL DE USUARIO ES

Power
Vol+
Vol-
Reset
Jack per
cuffie TF-CARD SIM 1
SIM 2
Macchina fotografica
14
Aspetto e pulsanti
TTTaaassstttooo dddiii aaacccccceeennnsssiiiooonnneee (((PPPOOOWWWEEERRR)))
Attivazione: premere e mantenere premuto il tasto di accensione per qual-
che istante; il sistema passa allora alla schermata principale.
Blocco dello schermo: dopo una breve pressione del tasto di accensione
(„Power”) lo schermo viene bloccato o sbloccato.
VVVooollluuummmeee +++,,, VVVooollluuummmeee ---... Con i tasti in alto, „Volume +” i „Volume -” il volume
aumenta o diminuisce.
PPPrrreeesssaaa pppeeerrr cccuuuffffffiiieee ––– Il Jack per cuffie standard da 3,5 mm.
SSSccchhheeedddaaa dddiii mmmeeemmmooorrriiiaaa --- Slot TF-CARD: scheda di memoria esterna TFFLASH.
MMMiiicccrrrooo UUUSSSBBB ––– per il collegamento ad un computer per trasmissione dati e per
il collegamento di un flash drive USB esterno.
MANUALE UTENTE IT

15
Barra di stato nella parte inferiore dello schermo.
Da sinistra: il tasto VOLUME, pulsante di inversione, tornare alla scher-
mata principale, l’ultimo volume applicazione aperta + tasto.
La barra di stato nella parte superiore dello schermo.
Da destra a sinistra: l’icona di stato della batteria, il tempo impostato,
icone di sistema.
Descrizione dello schermo principale
Dopo l’attivazione, viene visualizzata la schermata principale.
Descrizione della barra di stato
Gestione delle icone: premendo l’icona per 3 secondi, essa ver-
rà ingrandita e può essere trascinata in qualsiasi posizione sullo
schermo.
Rimozione delle icone: tieni premuta icona per 3 secondi, poi
trascina l’icona sull’icona del cestino e quando diventa rossa, rila-
sciala dopo di ché puoi rimuoverla.
MANUALE UTENTE IT

16
Collegamento del computer
Utilizzando la porta USB per connettere la MID con il computer. Ap-
pare l’icona USB , e dopo aver trascinato e rilasciato la barra di stato,
viene visualizzata la seguente scherma:
Fai clic su „Turn on USB storage” („Attiva il supporto USB”).
Impostazioni
Wi-Fi - consente di configurare e connettersi alla rete Wi-Fi
Suono- consente di configurare i suoni ed i messaggi del sistema
Display (Visualizzatore) –Consentediconfigurareildisplay(Luminositàdello
schermo, Carta da parati, Standby, ecc.)
Memoria -mostralamemoriatotaleinusoelaquantitàdisponibile.
Batteria –Indicaladuratadivitadellabatteriael’utilizzodalleapplicazioni
Lingua, tastiera, voce –permettediselezionarelalingua,latastiera,laconfi-
gurazione delle funzioni vocali
Copia di backup e cancellazione dei dati - consente di creare una copia di
backup del sistema e di ripristinare le impostazioni di fabbrica
Aggiungi account – permette di aggiungere e configurare gli account Google,
Mail, IMAP, e altri
Data e ora – permette di impostare la data e ora
Informazioni sul dispositivo - Visualizza le informazioni sul dispositivo,
versione del sistema, numero di modello, etc.
MANUALE UTENTE IT

Power
Vol+
Vol-
Reset
prise
casque TF-CARD SIM 1
SIM 2
Caméra
NOTICE D’UTILISATION FR
17
Aspect extérieur et boutons
Bouton d’alimentation (POWER)
Allumer :appuyer sur le bouton d’alimentation et le maintenir appuyé
pendant un instant, le système passera àl’écran d’accueil.
Bloquer l’écran :appuyer brièvement sur le bouton d’alimentation (Power)
pour bloquer ou débloquer l’écran
Volume +, Volume –les boutons en haut Volume+ et Volume– permet-
tent de monter ou de baisser le son.
Prise des écouteurs –Prise normalisée pour un jack de 3,5 mm.
Carte de mémoire –Fente TF-CARD :carte de mémoire extérieure
TFFLASH.
Micro USB –Prise pour connecter un ordinateur afin de transmettre des
données ou pour connecter un disque extérieur USB flash.

18
Barre d’état en bas de l’écran.
De droite àgauche: l’icône d’état de la batterie, le temps de jeu, les
icônes du système.
La barre d’état en haut de l’écran.
De droite àgauche: l’icône d’état de la batterie, le temps de jeu, les
icônes du système.
Description de l’écran d’accueil
Après l’allumage, l’écran d’accueil s’affiche.
Description de la barre sur l’écran
Gérer les icônes des logiciels : une icône appuyée pendant 3
secondes s’agrandit et il est alors possible de la déplacer vers un
endroit quelconque sur l’écran.
Supprimer les icônes : appuyer sur une icône pendant 3 se-
condes et la déplacer sur l’icone de corbeille ; lâcher dès qu’elle
devient rouge ; à ce moment, l’icône peut être supprimée.
NOTICE D’UTILISATION FR

19
Connexion àl’ordinateur
Utiliser le port USB pour une connexion MID avec l’ordinateur. Un
symbole de l’icône USB apparaîtra. Glisser et déposer. L’écran
suivant apparaîtra :
Appuyer sur «Turn on USB storage »(« Allumer le support USB »).
Réglages
Wi-Fi –permetdeconfigureretdeconnecterauréseauWi-Fi
Son –permetdeconfigurerlessonssystèmeetceuxdesmessages
Afficheur –permetdeconfigurerl’afficheur(luminosité,écrandefond,écran
de veille, etc.)
Mémoire – indique la mémoire libre et la mémoire occupée
Batterie – indique le temps de travail disponible et la consommation par les
logiciels
Langue, clavier, son –permetdesélectionnerlalangue,leclavieretdeconfi-
gurer les sons
Copie et suppression des données –permetdefaireunecopiesystèmeet
de restaurer les reliages d’usine
Ajouter un compte – permet d’ajouter et de configurer les comptes Google, e-
mail, IMAP et autres
Date et heure –réglagedeladateetdel’heure
Informations sur le dispositif –affichedesinformationssurledispositif,la
version du système, le numéro du modèle, etc.
NOTICE D’UTILISATION FR

Power
Vol+
Vol-
Reset
жаК За
СЛУшаЛКи TF-CARD SIM 1
SIM 2
КамЕра
BG
20
Изглед и бутони
(POWER)
: -
, .
:
(„Power”), .
+, – , „Volume+”
„Volume -” .
–
3,5 mm.
- TF-CARD: TFFLASH.
USB –
USB flash.
Table of contents
Languages:
Other Manta Tablet manuals

Manta
Manta DUO POWER IPS MID802 User manual

Manta
Manta MID1011 User manual

Manta
Manta DUO POWER MID1005T User manual

Manta
Manta MID704 User manual

Manta
Manta MID705 User manual

Manta
Manta MID802 User manual

Manta
Manta MID04 User manual

Manta
Manta MID001 User manual

Manta
Manta MID02 EasyTab 2 User manual

Manta
Manta MID714 User manual

Manta
Manta MID1002 User manual

Manta
Manta PowerTab MID08 User manual

Manta
Manta duo POWER User manual

Manta
Manta DUO POWER MID713 User manual
Manta
Manta MID801 User manual

Manta
Manta PowerTab GPS MID12 User manual

Manta
Manta PowerTab MID708 User manual

Manta
Manta DUO POWER User manual

Manta
Manta t PowerTab DVB-T MID14 User manual
Manta
Manta DUO POWER MID717 User manual