Marrex MX-G10 MKII User manual

www.marrex.cn
User Manual
MX-G10 MKII
GPS Receiver For Canon

Statement
Please read this manual carefully before using and strictly operate and store
in accordance with the instructions. Please save it for your future reference.
If the user manual cannot help you to solve certain problems, please ask
Cautions
• Do not use the unit under water, and don't expose it to rain. Please store
it in a cool, dry place.
• Please charge the unit strictly according to related rules. Otherwise,
damage might be caused to the battery.
• Please do not move it from overheated to supercooled conditions
frequently, as well as keep away from heat sources such as heater and
oven.
• Please be careful to install the MX-G10M MKII gently to avoid damage to
the device or camera.
• Please turn off the power when left unused.
PRODUCT INTRODUCTION
General Introductions
The Marrex MX-G10 MKII is a new version of GPS receiver specially designed
for Canon DSLR cameras. It is very useful for photographers to organize stock
photos. With the MX-G10 MKII, guring out when, where and why a certain
photo was taken is not a problem anymore. When connected to the camera
and positioned successfully, the GPS information (longitude, latitude, elevation
and Coordinated Universal Time) will be recorded as EXIF data. With the
log function, travel routes will be recorded into internal storage. The MX-G10
MKII is equipped with a built-in Li-ion battery and LED indicator. In addition,
the MX-G10 MKII uses a highly sensitive antenna and upgraded GPS chipset
to enhance the speed of positioning.
Highlights
• GPS data-hold
If the GPS signal is lost, the MX-G10 MKII will automatically reuse the last
valid GPS information for tagging the current photo. Once the receiver is
turned off, the stored GPS data will lost.
• Built-in Li-ion battery
A built-in rechargeable battery can continuously run for up to 6 hours. When
connected to a camera, the MX-G10 MKII will not charge from the camera.

Product Structure
Channels 66 capturing channels, 22 tracking channels
Tracking sensitivity -163dBm
Capturing sensitivity -146dBm
Positioning accuracy 3m CEP50 without SA, 2.5m SBAS
Logging mode NMEA-0183, KML
One le per day, based on UTC
Battery 900mAh rechargeable Li-ion battery
Dimension (L×W×H) 73mm x 50mm x 31.5mm
Weight Approx. 68g (2.4oz.)
Power Button
Charge Interface
Data Interface
(connect to camera)
LED
• Fast acquisition
Highly sensitive antenna and upgraded GPS chipset accelerate the satellite
searching speed.
In good weather and open sky, the unit takes 60 seconds for a cold start,
15 seconds for a warm start, and 1 second for a hot start.
• Log function
The MX-G10 MKII will automatically record GPS information once every 5
seconds into the .log, .gpx and. kml les which are saved in built-in storage.
• 3-axis electronic compass
Provide accurate azimuth (Range 0-359°).
Specications
Operation
Charge
Connect the MX-G10 MKII with the provided USB cable to a travel adapter,
a computer (slower charging speed) or any other USB port which provides
standard 5 volts. It will automatically start charging and the LED will blink
red. When the GPS unit has been fully charged, the LED turns to solid green.
Tips: Since the MX-G10 MKII can’t charge from the camera, please fully
charge the unit (usually takes 4 hours) before use. For long time shooting,
please take a power bank with the supplied USB cable with you.

Power On and Off
Press the power button for more than 3 seconds to turn the MX-G10 MKII
on.
Press the power button for more than 3 seconds to turn the MX-G10 MKII
off.
LED Status
Setup Guide
1. Turn the camera off.
2. Press the power button for more than 3 seconds to turn on the GPS
receiver. The LED on the GPS receiver will blink green, indicating that it is
searching for satellites. When a steady satellite signal is captured, the LED
will stop blinking.
It takes about 60 seconds to start the receiver up when cold, 15 seconds
if you just shut it down then restart, and 1 second to wake it up. For
successful positioning, you must be outdoors with good weather and a sky
unobstructed by tall buildings.
3. Mount the MX-G10 MKII to the camera’s hot shoe, or secure it to your
camera’s neck strap or neck strap lug with the supplied strap and clip,
leaving the shoe free for use with a ash or other device.
4. Connect the GPS unit to DSLR camera with the supplied data cable. When
inserting the cable, be sure that the end is oriented correctly and do not use
force.
5. Turn on your camera
6. View geotag information on camera
A. Select “GPS device settings.” B. Select “GPS information display.”
Blinking Green Acquiring satellites
Solid Green Satellite connection successful / Fully charged (under
charging mode)
Blinking Red Charging / Upgrade failed
Solid Red Low battery
Blinking Yellow Upgrading Firmware
Solid Yellow Upgrade successfully
Auto power off Disable
LCD brightness
Date/Time/Zone 14/06/17 22:39
Language English
GPS device settings
Auto time setting
GPS device settings
Auto update
Position update timing
Digital compass Enable
Calibrate digital compass
GPS information display

C. The detailed GPS information is displayed.
Latitude
GPS information display
Longitude
N22°37’38.4”
E114°03’51.6”
2014/06/19 07:59:21
N 0°
3D
Elevation 96m
UTC
Direction
Satellite reception
7. With the MX-G10 MKII turned on, once you begin shooting, the geotag
information of each photo will be displayed on the camera's LCD.
8. Geotag information can be viewed on a computer when images are
uploaded to photo sharing sites like Flickr, or opened in imaging software,
such as Picasa, ACDSee, GeoSetter, Opanda IExif, Adobe Lightroom,
FSViewer.
Log Function
The MX-G10 MKII will record GPS information once every 5 seconds into.log
, .gpx and. kml le which stored in the built-in removable disk .
1. Connect the GPS receiver to a computer by the supplied USB cable and
open the GPS folder. There are three le forms: .kml, .gpx and .log(.txt).
All have the same content but are suitable for different software (.kml is for
Google Earth, .gpx and .log le are for most other softwares).
2. Copy the suitable le to the suggested software. All the GPS dots will
connect together and show as a track.
3. The memory capacity of the built-in disk is 4.35MB. This allows you to
record up to 85,376 positions. The GPS receiver could continuously log for
about 118 hours. The subsequent positions cannot be recorded into the
disk if it is lled. Please export the log les and delete them regularly to
maximize storage space.
Please note:
One log le is created every 24 hours according to Coordinated Universal
Time (UTC). So, depending on the time difference between your shooting
local time and UTC, two separate log les may be created even if logging is
only active over one day. Similarly, only one log le may be created even if
logging is active two days.
Compass calibration
Please calibrate the compass via the camera setting.
1. Select “GPS device settings” as the following screen shows, set “GPS device”
to “Enable”, and then select “GPS device settings”.

2. Set “Digital compass” to “Enable.”
3. Select “Calibrate digital compass.”
4. Press to prepare for calibration. Move the camera as shown.
5. Screen will display the following, indicating the compass calibration is complete.
GPS Firmware Upgrade
In order to x bugs and improved stability, Marrex may release new versions
of the rmware. The new rmware will be released on our website. You
could update your MX-G10 MKII by the following steps:
1. Download update le (.upd) from www.marrex.cn to your computer.
2. Connect the GPS to your computer by the supplied USB cable. The MX-G10
MKII will show up on your computer as a removable drive.
3. Copy the update le (.upd) to the MX-G10 MKII, it will be upgraded
automatically, and the LED will blink yellow.
4. When the upgrade is successful, the LED turns to solid yellow. If fails, the
LED turns to blink red, then please unplug the USB cable and try again.
• On the EOS-1DX and other models that display the above screen, set
“GPS device” to “Enable”, and then select “GPS device settings”

Note: When the GPS receiver is upgrading, please keep powered on and
DO NOT unplug the USB cable. If powered off during upgrading, the GPS
receiver will be seriously damaged, the costs of returns to the factory repair
will be paid by you.
Warranty
Marrex Technology Co., provides a one-year warranty under normal use and
lifelong paid maintenance from the date you purchase this product.
Marrex Technology will repair or replace the product under warranty for free
during the one-year valid period, but customers should pay for shipping and
insurance charges for returning the product to Marrex Technology.
This warranty only applies where a defect has arisen, wholly or substantially,
as a result of faulty manufacture, parts or workmanship during the warranty
period.
This warranty does not cover:
• Any damage caused by human factors, including using the products in
abnormal conditions and operating the device in ways not in accordance
with the user manual.
• Any damage caused by incorrect use or poor maintenance, or when persons
not authorized by Marrex Technology have carried out alterations or repairs.
• Force majeure events such as re, ood, lightning strike, earthquake.
• Customers who cannot show a valid invoice.
Marrex Technology reserves all the rights for the ultimate interpretation.
Compatibility
Canon 1DX, 1DC, 5DMark III, 5DS, 5DS-R, 6D, 7D, 70D, 100D, 650D,
700D, 750D, 760D, 1200D, EOS M, EOS M2
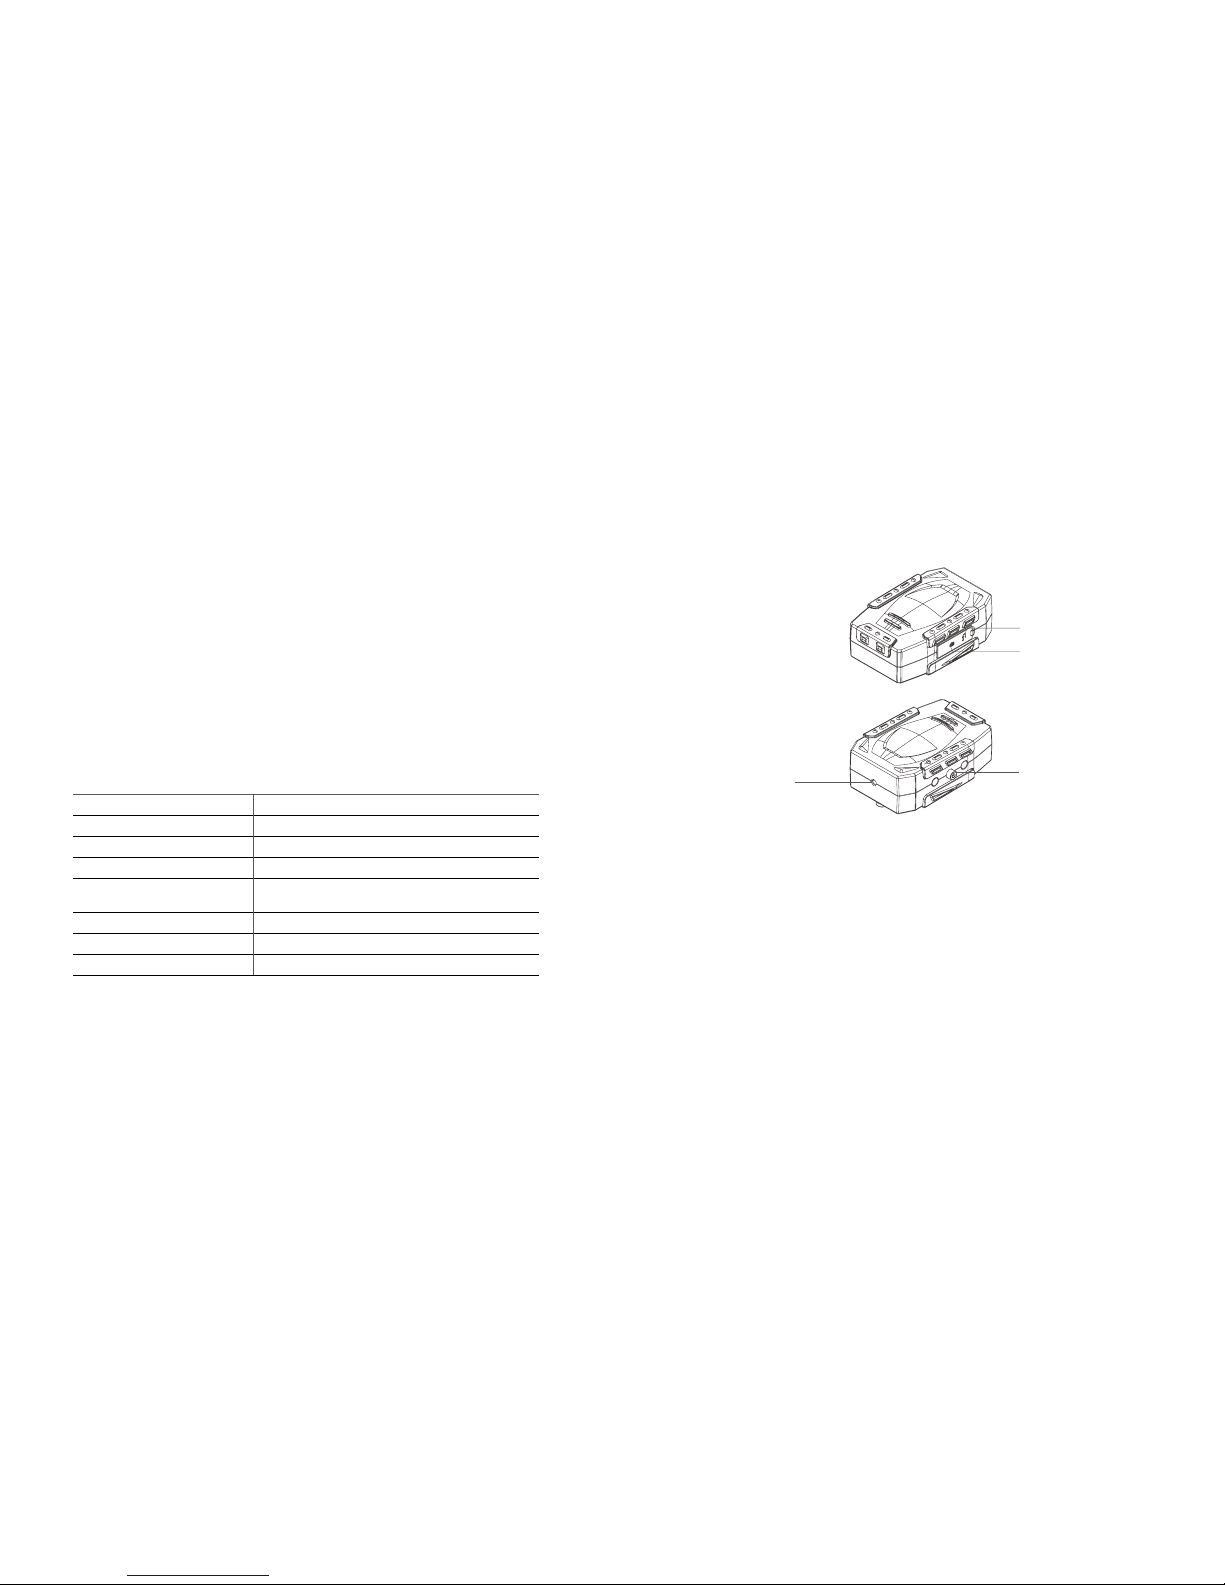
Packing List
• MX-G10 MKII main unit • USB cable • Data cable
• A clip (To attach the MX-G10
MKII to your camera strap.)
• Hanging strap • User manual
• Warranty card


Table of contents
Other Marrex GPS manuals