Media Pointe HD Portal plus User manual

HD Portal plus User Manual
Version 1.5
HD Portal plus
July, 2015

| HD Portal plus User Manual Version 1.5 July, 2015 i
Digital Media Recorder HD Portal plus
©2015 MediaPOINTE, Inc
All rights reserved. This document contains information that is proprietary to MediaPOINTE, Inc. the manu-
facturer of all MediaPOINTE® products. No part of this publication may be reproduced, stored in a retrieval
system, or transmitted, in any form, or by any means, electronically, mechanically, by photocopying, or oth-
erwise, without the prior written permission of MediaPOINTE, Inc. Nationally and internationally recognized
trademarks and trade names are the property of their respective holders and are hereby acknowledged.
MediaPOINTE® is a registered trademark of MediaPOINTE, Inc.
Disclaimer
The information in this document is believed to be accurate and reliable; however MediaPOINTE, Inc. assumes
no responsibility or liability for any errors or inaccuracies that may appear in this document, nor for any
infringements of patents or other rights of third parties resulting from its use. No license is granted under any
patents or patent rights of MediaPOINTE, Inc.
This document was written by MediaPOINTE, Inc. We are fully committed to, and take pride in maintaining
high quality documentation. We welcome and appreciate any comments or suggestions you may have
regarding content, presentation, structure and distribution of this document. Please use the contact
information below for all correspondence:
MediaPOINTE, Inc.
667 Rancho Conejo Blvd.
Newbury Park, CA 91320
USA
suppor[email protected]

| HD Portal plus User Manual Version 1.5 July, 2015 ii
Safety Precautions
For your protection, please read all related safety instructions, observe all warnings and precautions, and exercise com-
mon sense while operating this electronic equipment.
♦Always place the unit on a stable cart, stand or table.
♦Do not use the unit near water or sources of heat.
♦Do not drop or shake the unit. Do not place or install the unit in environments where it can be dropped or shaken.
♦Make sure the unit is powered o while being moved even for short distances.
♦Observe the power requirements of the unit; if you are not sure of the power available, consult your local dealer or
power company.
♦When plugging into a power outlet, insert the plug rmly into the outlet. Route the power cord so as to avoid any
activity that may result in fraying or other damage to the cord or the plug.
♦Under no circumstances should you attempt to override the polarization or grounding protection on the plug.
♦Do not overload wall outlets, integral convenience receptacles or extension cords.
♦Unplug the unit from the wall before cleaning. Do not use liquid or aerosol cleaners.
♦For proper ventilation, do not block the slots and openings. Do not install the unit in a location where the
ventilation slots and openings can be plugged during everyday use.
♦Do not place or install the unit under, on top of or near any heat-producing equipment (i.e. radiators, stoves, or
ampliers), or in a heated place.
♦Unplug the unit during lightning storms, when it will not be used for extended periods of time, or before you have
a scheduled power outage.
♦If the unit is visibly damaged either by not observing the precautions above or for any other reason, contact your
local dealer immediately. If the unit does not operate to the specications set forth in this user guide, or exhibits a
distinct change in performance, this may be an indication of a problem needing repair.
Environmental Operating Limits of HD Portal plus
Operating Temperature: 0°C to 32°C (32°F to 90°F)
Relative Humidity: 10% to 90% non-condensing
Storage & Transport Temperature: -20°C to 80°C (-4°F to 140° F)
Electrical requirements
Input: 100-240V ~50/60Hz
Service Support and Training
MediaPOINTE, Inc., is committed to providing the service, support and training needed to install, manage, and
maintain your MediaPOINTE® equipment. All MediaPOINTE® products are sold through a wide network of Authorized
MediaPOINTE, Inc. Dealers. For help with your products, contact your local dealer for assistance rst. If for any reason,
you would like to contact MediaPOINTE, Inc. directly for information regarding service programs and extended
warranty information, training, installation or usage, we are glad to be of assistance. You can contact us at the phone
number listed below, or visit our website.

| HD Portal plus User Manual Version 1.5 July, 2015 iii
Technical Support
MediaPOINTE, Inc. Technical Support
Hours: 8:30 a.m. – 5:30 p.m. Pacic Standard Time
(866) 709-0444 TOLL FREE
(805) 214-7911 INTERNATIONAL
suppor[email protected]
http://www.mediapointe.com
HD Portal plus Package Contents
• 1 - MediaPOINTE HD Portal plus
• 1 – RCA Video Cable
• 1 – Male VGA (RGBHV) Cable
• 1 - CAT-5e LAN Cable
• 1 - 3.5mm Stereo to Male RCA Audio Cable
• 1 - 3.5mm Mono to Female RCA Audio Adapter
• 1 - AC Power Cable
• 1 – IR Remote Control plus 2 AAA batteries
• 1- 12 Volt AC Power Adapter
• 1- IR Receiver
• 1- DVI Cable
• 1- DVI To DVI+VGA Adapter
• 1 - WiFi® Antenna (if WiFi®option purchased)

| HD Portal plus User Manual Version 1.5 July, 2015 iv
Warranty
MediaPOINTE, Inc. warrants that the HD Portal plus (excluding spare parts if applicable, external peripheral devices
and consumables) will be free from any defect in materials or workmanship and shall perform in accordance
with its specication for a period of 30 days for MediaPOINTE, Inc. software and 1 year for hardware, starting on
shipment date of the initial purchase of the equipment. MediaPOINTE, Inc. disclaims any and all implied warranties
of merchantability or tness for a particular purpose. MediaPOINTE, Inc.’s sole liability for breach of this warranty
will be (at its option) to provide access to software for download or to repair or replace the defective unit or
component after customer has shipped the product to MediaPOINTE, Inc. for return-to-factory repair. Customer
must obtain an RMA (return material authorization) number from MediaPOINTE, Inc. prior to returning equipment.
Replacement parts may be new or equivalent to new. Part(s) replaced will be covered for the remaining term of the
warranty. MediaPOINTE, Inc. shall not be liable for any loss of prots or incidental or consequential loss for whatever
reason. This warranty will be void if the equipment has been subject to any unauthorized modications, improper
operation, user negligence, service by an unauthorized person, accident, neglect, misuse, tampering, acts of God, or
any event other than ordinary use.

TABLE OF CONTENTS | v
Table Of Contents
About this guide
Disclaimer . . . . . . . . . . . . . . . . . . . . . . . . . . . . . . . i
Safety Precautions & System Specications . . . . . . . . . . . . . . . . ii
Service Support and Training . . . . . . . . . . . . . . . . . . . . . . . ii
Technical Support and HD Portal plus Package Contents . . . . . . . . . . iii
Warranty . . . . . . . . . . . . . . . . . . . . . . . . . . . . . . . . iv
1Introduction and Overview 1
Introduction . . . . . . . . . . . . . . . . . . . . . . . . . . . . . . . . 1
Key Features . . . . . . . . . . . . . . . . . . . . . . . . . . . . . . 1
How It works . . . . . . . . . . . . . . . . . . . . . . . . . . . . . . 1
Front Panel Controls . . . . . . . . . . . . . . . . . . . . . . . . . . . . 2
Power Switch . . . . . . . . . . . . . . . . . . . . . . . . . . . . . . 2
USB Port . . . . . . . . . . . . . . . . . . . . . . . . . . . . . . . . 2
WiFi System Antenna (Optional) . . . . . . . . . . . . . . . . . . . . . 2
Back Panel . . . . . . . . . . . . . . . . . . . . . . . . . . . . . . . . 3
Connectors and Functions . . . . . . . . . . . . . . . . . . . . . . . 3-4
Basic Setup Diagram. . . . . . . . . . . . . . . . . . . . . . . . . . . 4
2Setting Up the HD Portal plus 5
System Administration . . . . . . . . . . . . . . . . . . . . . . . . . . . 5
Initial Login . . . . . . . . . . . . . . . . . . . . . . . . . . . . . . . . 5
Access Rights . . . . . . . . . . . . . . . . . . . . . . . . . . . . . . . . 5
Administrator . . . . . . . . . . . . . . . . . . . . . . . . . . . . . . 5
Author . . . . . . . . . . . . . . . . . . . . . . . . . . . . . . . . . 5
User . . . . . . . . . . . . . . . . . . . . . . . . . . . . . . . . . . 5
Congure Security and Other Settings . . . . . . . . . . . . . . . . . . . . . 5
Changing Administrator Password. . . . . . . . . . . . . . . . . . . . . 5
Author Login Security . . . . . . . . . . . . . . . . . . . . . . . . . . 6
User Login Security . . . . . . . . . . . . . . . . . . . . . . . . . . . 6
Setting Date & Time . . . . . . . . . . . . . . . . . . . . . . . . . . . 6

| TABLE OF CONTENTS vi
IP Settings . . . . . . . . . . . . . . . . . . . . . . . . . . . . . . . . . 6
System Name . . . . . . . . . . . . . . . . . . . . . . . . . . . . . . 6
Conguring Static IP Address . . . . . . . . . . . . . . . . . . . . . . . 7
Conguring DHCP IP Address . . . . . . . . . . . . . . . . . . . . . . . 7
USB Network Conguration . . . . . . . . . . . . . . . . . . . . . . . . . 7
SMTP Mail . . . . . . . . . . . . . . . . . . . . . . . . . . . . . . . . . 7
3. Controlling the HD Portal plus 8
Web Portal Overview . . . . . . . . . . . . . . . . . . . . . . . . . . . . 8
Main System Toolbar. . . . . . . . . . . . . . . . . . . . . . . . . . . 8
Main System Toolbar Icon Table . . . . . . . . . . . . . . . . . . . . . . 8
On-Screen Menu . . . . . . . . . . . . . . . . . . . . . . . . . . . . 9
External Control. . . . . . . . . . . . . . . . . . . . . . . . . . . . . . . 9
Telnet (TCP/IP) . . . . . . . . . . . . . . . . . . . . . . . . . . . . . 9
Infra-Red . . . . . . . . . . . . . . . . . . . . . . . . . . . . . . . . 9
RS-232 . . . . . . . . . . . . . . . . . . . . . . . . . . . . . . . . . 9
4 Recording, Archiving, Streaming and VOD 10
Recording and Streaming . . . . . . . . . . . . . . . . . . . . . . . . . .10
Playback on HD Portal plus . . . . . . . . . . . . . . . . . . . . . . . . . . 10
Archiving. . . . . . . . . . . . . . . . . . . . . . . . . . . . . . . . . . 10
Download Manager . . . . . . . . . . . . . . . . . . . . . . . . . . . 10
USB Ooad/Upload . . . . . . . . . . . . . . . . . . . . . . . . . . . 10
Streaming . . . . . . . . . . . . . . . . . . . . . . . . . . . . . . . . .10
Manual FTP Upload . . . . . . . . . . . . . . . . . . . . . . . . . . . . .10
Metadata. . . . . . . . . . . . . . . . . . . . . . . . . . . . . . . . . . 10
Transcoding. . . . . . . . . . . . . . . . . . . . . . . . . . . . . . . . . 10
Titles & Credits . . . . . . . . . . . . . . . . . . . . . . . . . . . . . . .11
Changing Proles . . . . . . . . . . . . . . . . . . . . . . . . . . . . . . 11
Video On Demand (VOD) . . . . . . . . . . . . . . . . . . . . . . . . . . . 11
VOD Channel Settings . . . . . . . . . . . . . . . . . . . . . . . . . . . . 11
Viewing VOD Channels . . . . . . . . . . . . . . . . . . . . . . . . . . . . 11
Edit Proles Icon Table . . . . . . . . . . . . . . . . . . . . . . . . . . . . 11

TABLE OF CONTENTS | vii
5 Creating and Modifying Proles 12
Proles . . . . . . . . . . . . . . . . . . . . . . . . . . . . . . . . . .12
Creating/Modifying a Prole . . . . . . . . . . . . . . . . . . . . . . . . . 12
Creating a Prole . . . . . . . . . . . . . . . . . . . . . . . . . . . .13
Modifying a Prole . . . . . . . . . . . . . . . . . . . . . . . . . . .14
Setting Screen Layouts. . . . . . . . . . . . . . . . . . . . . . . . . . 15
6. Management and System Tools5. . . . . . . . . . . . . . 16
AV Controls . . . . . . . . . . . . . . . . . . . . . . . . . . . . . . . . . 16
AV Test . . . . . . . . . . . . . . . . . . . . . . . . . . . . . . . . . . . 16
Live Video Test . . . . . . . . . . . . . . . . . . . . . . . . . . . . . . .16
Notications . . . . . . . . . . . . . . . . . . . . . . . . . . . . . . . . 16
Storage Limits . . . . . . . . . . . . . . . . . . . . . . . . . . . . . . .16
Job Management . . . . . . . . . . . . . . . . . . . . . . . . . . . . . . 16
Logging . . . . . . . . . . . . . . . . . . . . . . . . . . . . . . . . . . 16
Upgrade System Software . . . . . . . . . . . . . . . . . . . . . . . . . . 17
Disabling and enabling multicast . . . . . . . . . . . . . . . . . . . . . . . 17
Reset Conguration . . . . . . . . . . . . . . . . . . . . . . . . . . . . . 17
System Info. . . . . . . . . . . . . . . . . . . . . . . . . . . . . . . . . 17
Shutdown . . . . . . . . . . . . . . . . . . . . . . . . . . . . . . . . . 17
7 Options
Installing Upgrade Packages . . . . . . . . . . . . . . . . . . . . . . . . . 18
Setting up the WiFi® Option . . . . . . . . . . . . . . . . . . . . . . . . .18
Keycard Automation Option . . . . . . . . . . . . . . . . . . . . . . . . .18
Video On Demand (VOD) . . . . . . . . . . . . . . . . . . . . . . . . . . . 18
VOD Channel Settings . . . . . . . . . . . . . . . . . . . . . . . . . . . . 18
Viewing VOD Channels . . . . . . . . . . . . . . . . . . . . . . . . . . . . 18

| HD Portal plus User Manual Version 1.5 July, 2015 1
1
Introduction and Overview
Introduction
Welcome to the user’s guide for the MediaPOINTE® HD
Portal plus. The HD Portal plus is one of the easiest
to use, most cost-effective and reliable capture,
recording, streaming and archiving products on the
market today. It can archive important audio, video,
and graphical data while simultaneously transmitting
it anywhere on your network.
This user’s guide describes how to set up and use
the HD Portal plus to record and transport graphics,
video and audio content over IP networks. As with all
MediaPOINTE® AV-over-IP products, you can control
the HD Portal plus by different methods. These
methods include: Web Portal interface, InfraRed
remote control, RS-232 serial port or Telnet.
This guide is written for units running version 5.3
software. If your HD Portal plus is operating on a
different version of software, some capabilities and
screen shots may be different.
Key Features
The HD Portal plus may be used in a variety of
situations for live communication and collaboration,
including:
• Capture, record, stream and archive live events,
meetings, conferences, seminars, colloquia
in digital High Denition. All content can be
easily accessed and published with full security
privileges dened by the content owner.
• Capture, record, stream and archive one HD and
one composite video source simultaneously. The
HD video input supports graphics content from
computing devices such as laptops
• Archive media content from multiple independent
sources.
• Share visual information, designs, and concepts
with dispersed groups of people to gather input
during a video conference.
• Stream important video conferences to other
locations such as overow rooms or remote
conference locations over your corporate
network.
• Conduct customer or employee training across vast
geographical areas.
• Discuss research, engineering, architecture,
product design, or process analysis when the
participants are not able to meet in one central
location.
• Access a centralized data bank of expertise from a
eld location.
How It Works
(Method of Operation)
The HD Portal plus can capture, record, stream and
archive video, computer graphics and audio media. The
HD Portal plus accepts DVI-D, analog RGBHV, composite
video, and unbalanced audio input. The Content input
accepts DVI and VGA sources. The audio input signal
is connected via 3.5 mm mono unbalanced input. The
HDMI and RGBHV outputs allow easy connection to a
monitor. Audio is output via 3.5 mm stereo unbalanced
output. HDMI input is also available via a DVI-to-HDMI
adapter or cable. Audio via the HDMI cable is not
supported. The HD Portal plus combines the video,
audio and graphics inputs into a single media stream
that is captured into a le which can be simultaneously
streamed live over your network and archived.
Users can select from several congurable parameters
(proles) for capturing and subsequent playback
of the recorded material. These proles are fully
congurable, allowing the user to specify the input
source, capture resolution, visual layout style, bit and
frame rates.
The archived recordings are stored on the HD Portal
plus’s hard drive. The recorded le can then be
viewed on your PC locally or replayed directly from
the HD Portal plus on a local monitor using the VGA
or HDMI output connector. The content can also be
copied to a USB memory stick, downloaded to a PC, or
automatically transferred (FTP) to a server after the
le has been indexed.
The HD Portal plus records content in standard H.264/
MPEG-4 AVC format, which can be played on a variety
of desktop client players including QuickTime, VLAN
and others. It supports multiple resolutions.

| HD Portal plus User Manual Version 1.5 July, 2015 2
HD Portal plus Front Panel
Front Panel Controls
The front panel consists of a power switch, USB
port and a WiFi®antenna. The following is a brief
description of each of these components.
1. Power Switch
The HD Portal plus has a power button on the front
panel. Press the button once to power up the unit.
Press the illuminated power button to power down the
unit.
2. USB Port
The USB 2.0 port on the front panel is used to transfer
les to and from the HD Portal plus. The USB Port may
also be used with the optional MediaPOINTE KEYCARD
AUTOMATION SYSTEMS
3. WiFi System Antenna (Optional)
2
3
1

| HD Portal plus User Manual Version 1.5 July, 2015 3
CONNECTORS AND FUNCTIONS
Connector Function/Name Description
1DC Power Input
The 12 Volt 3 Amp DC input provides DC power
to the unit. The DC connector goes to the AC/DC
Power Adapter
2HDMI Output
The HDMI connector sends digital video to the
display. This connector does not support audio.
One (only one) monitor must be connected.
3RGBHV Output
The HD-15 (VGA) connector sends analog video
to a display. One (only one) monitor must be
connected.
4USB 2.0 Ports
The USB ports on the back of the unit can be
used for upload or o load of video content or for
network conguration
5LAN Connection
The RJ-45 connector allows the included standard
10/100Mb CAT-5e LAN cable to connect the HD
Portal plus to a network.
6Audio Output
(Unbalanced)
The standard 3.5 mm stereo connector outputs
stereo unbalanced audio from the HD Portal plus.
7Audio Input
(Unbalanced)
The standard 3.5 mm mono connector takes input
from unbalanced mic or line level signals.
10 HD Portal plus Back Panel
1
2 3 4 5
6 7
89 10 11

| HD Portal plus User Manual Version 1.5 July, 2015 4
CONNECTORS AND FUNCTIONS
Connector Function/Name Description
8IR Infrared Input
The 3.5 mm mini stereo connector is used
to connect the included IR receiver to the
unit for IR remote control.
9RS-232 Serial Port
The standard serial DB-9 connector allows
connection for serial control (Note: a null-
modem serial cable is required)
10 Video Input
The RCA video connector allows
connection of a composite NTSC video
source
11 Content Input
DVI-RGBHV Video
The DVI connector is used to input an
digital or analog computer video signal
Basic Setup Diagram
| HD Portal plus User Manual Version 1.5 July, 2015 5
2
Setting Up the HD Portal plus
System Administration
Use this information when you are ready to install the
HD Portal plus hardware at your site. First, plug a
local monitor into the HDMI or RGBVH output on the
back of the unit and power it on. Plug the supplied RJ
45 cable into your network, connecting the cable from
your network to the LAN connector on the back of the
unit. Plug the connector from the AC Power Adapter
into the 12 VDC connector on the back, then connect
the Power Adapter to AC power. Start the unit by press-
ing the front panel Power Button
Initial Login
This section describes the procedure for a rst time
Administrator login, and for setting the HD Portal
plus access rights. Administrator rights are required
to access or change any of the settings under the
Congure and Manage sections in the main menu and
to change all features of the HD Portal plus.
To log into the HD Portal plus, browse to its IP address
using your Internet web browser. The default IP
address is:192.168.1.253
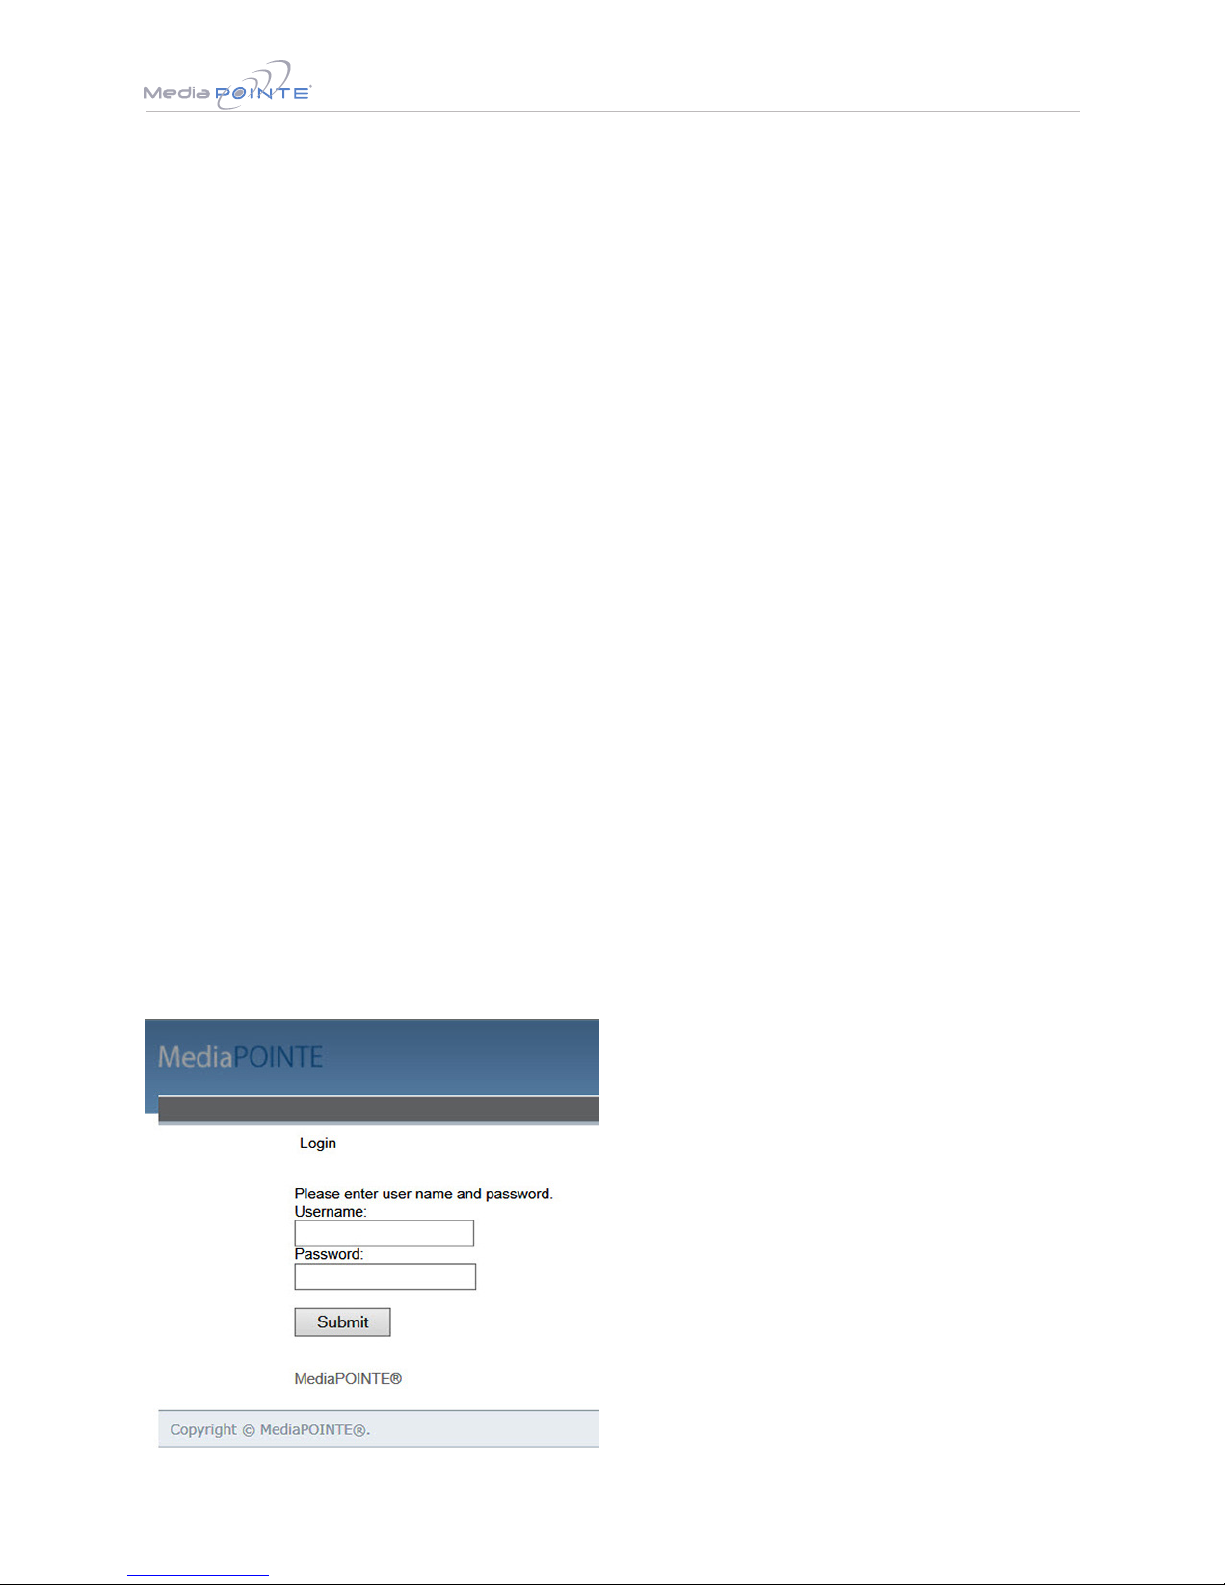
Once you have navigated to the website, you will be
presented with the a login page. The screen capture
below shows the login elds. For the initial login, use
the Login ID “admin” and the default password of
“MediaPOINTE”. Note that the Login ID and password
are case sensitive. The login page is shown below.
Access Rights
There are three levels of access rights: admin, au-
thor and user. The Adminstrator can control all of the
functions of the HD Portal plus. The author can record,
stream and view content. The user can only view con-
tent. Note that the Login ID and the password are case
sensitive. It is not possible to change any of the login
names. Only the passwords can be changed.
Adminstrator (Username: admin)
The Administrator maintains all rights to the HD Portal
plus. Exclusive Administrator access allows the congu-
ration of: the date and time; security; IP settings; com-
mand line; e-mail and managing notications; logging;
AV controls; AV test; jobs; and software upgrades.
Author (Username: author)
The Author maintains content creation rights on the HD
Portal plus. The Author can access or change any of the
settings under the “Record/Stream” section in the main
menu. No password is required for the “author” login as
a default.
User (Username: “user”)
The user can watch content. No password is required
for the “user” login as a default.
Congure Security
Changing the Administrator Password
By default, the Administrator Username and Password
are set to “admin” and “MediaPOINTE” respectively.
To change the Administrator password, enter a new Ad-
ministrator password in the New Admin Password eld
(10 characters maximum) reenter the new password in
the conrm password eld and click the Update button.
The next time the HD Portal plus is accessed, the new
admin password will take effect.
Be sure to write down the new administrator
password and keep it in a safe place. If you forget
the admin password, the HD Portal plus must be reset
back to the factory defaults to enable administrator
access.

| HD Portal plus User Manual Version 1.5 July, 2015 6
Author Login Security
The Administrator needs to enable the security login
for author. Checking the Enable Author Security box
will enable the author password. Enter an author
password in the author password eld then reenter
the new password in the conrm password eld and
click the Update button.
Unchecking the Enable Author Security check box
deactivates the author login password. Press Update
to conrm the change.
Note that the Login ID and the password are case
sensitive.
User Login Security
By default, a login password for the user is disabled.
Checking Enable User Security will enable the User
password. Enter a user password in the User Password
eld, then reenter the same password in the Conrm
User Password eld and click the Update button.
Setting Date & Time
When content is recorded using the HD Portal plus it
is given a time and date stamp. The time and date
stamp can be set in the Date & Time section of the
main menu. The date can be selected from the pop-up
calendar. The Time Zone can be selected from the
drop down menu. Current time can be selected from
the drop down menu. Conrm any changes by clicking
on the Submit button.
If desired, the NTP (Network Time Protocol) feature
can be enabled to synchronize the clock of the HD
Portal plus to an NTP server; click on the “Enable
NTP” box and enter the server information, then click
on Submit.
IP Settings
System Name
The factory set system name is MediaPOINTE. You
can change the name in the IP setting menu page by
entering a new name in the text eld. A reboot is
required for the new name to take effect. The name
can be up to 15 characters long and consist of alpha-
numeric characters. No special characters or symbols
will be accepted except for a hyphen.
The System Name and all network settings can be set
in the IP Settings section of the main menu. Network
settings may also be congured via USB memory stick
conguration.
NOTE:To change the default IP settings of the HD Portal
plus or any of the other conguration settings, you must
log in with administrator rights as (admin).
To quickly nd the system’s IP Address, connect a local
monitor to the VGA or HDMI output. Use the InfraRed
remote to navigate to the System Info page of the on
screen menu.
IP addresses may be assigned to the HD Portal plus in
two ways: DHCP and Fixed (Static) IP. If your network
is congured for DHCP, the IP address will be provided
automatically and will be visible on the local output
of the HD Portal plus. To set the IP address, follow the
procedure on the next page.
NETWORK CONFIGURATION
Setting Description
DHCP
Client
Enable DHCP settings for automatic address
retrieval from DHCP Server. Disabling the
DHCP client will require a static IP address
(with subnet mask and default gateway) to be
entered.
IP
Address
Assign a static IP address to HD Portal plus. This
eld will also display the currently assigned IP
address
IP
Subnet
Mask
Assign subnet mask to HD Portal plus. This eld
will also display the currently assigned subnet
mask
Default
gateway
Assign a default gateway to the HD Portal
plus. This eld will also display the currently
assigned default gateway
DNS
server
If the network supports DNS, enter the DNS
Server IP address(es) here. This eld will also
display the currently assigned default gateway

| HD Portal plus User Manual Version 1.5 July, 2015 7
Use this option with caution as you are changing the
default of this conguration le and will implement the
settings from the le.
If the dmx_ip_conf.txt le is intentionally left blank
with no text of any type within the body of the le,
the HD Portal plus will write its network settings to this
le. This is an easy way to obtain the unit’s network
settings.
SMTP Mail
The HD Portal plus has the ability to send emails.
To send the emails you must enable the SMTP
conguration. After enabling it, enter the address of
the SMTP server in the appropriate text box and the
e-mail account that you use to send emails in the
appropriate box. Conrm any changes to the SMTP mail
conguration by clicking Submit.
Conguring a Static IP Address
1. On your Internet browser, enter the current IP
address of the HD Portal plus. (Note: If the unit has
factory settings, the default static IP address is:
192.168.1.253)
2. Login to the HD Portal plus using the procedure
shown in the Logging In section.
3. Navigate to the network settings page by selecting
IP Settings.
4. To change to a Fixed or Static IP address, set the
DHCP Client check box to “Disable”. Fill in the
IP Address, IP Subnet Mask and Default Gateway
elds.
5. Once you have completed all of the above steps,
select the Apply Changes button. You will receive a
pop-up window warning you to use this option with
caution as you are changing the default address
and should remember the new settings.
Conguring a DHCP IP Address
1. Follow the rst three steps above.
2. To enable the HD Portal plus to pick up an
IP address, set the DHCP Client check box to
“Enable”.
3. If you have made any changes to the network
settings, select the Apply Changes button. You will
receive a pop-up window warning you to use this
option with caution as you are changing the default
address and should remember the new settings.
USB Network Conguration
This section describes how to congure the HD Portal
plus using a USB memory stick. The network parameters
of the HD Portal plus can be set via a special
conguration text le on a USB memory stick. Insert the
memory stick into one of the HD Portal plus USB ports
at any time. The unit will look for the presence of this
conguration le and will implement the settings from
the le. Use a simple ASCII text editor to create the le
named dmx_ip_conf.txt.
dhcp=(bool)0
dns_1=(string)192.168.0.2
dns_2=(string) 192.168.0.3
ethernet=(string)auto
gateway=(string)192.168.1.1
ipaddress=(string)192.168.1.253

| HD Portal plus User Manual Version 1.5 July, 2015 8
The HD Portal plus can be controlled by several different
methods. These include, a Web Portal interface, IR remote
control, RS-232 serial port, or Telnet. This section will cover
each of these controls.
Web Portal Overview
The HD Portal plus has a fully featured Web Portal
that can be
accessed via a web browser. Enter the
unit’s IP address in the web browser’s address bar and
logon. From this portal you can start and stop a re-
cording session, play or download previously archived
material, set recording preferences and move content
on,off or within the HD Portal plus.
The Watch Videos page will
appear upon login. The screen
capture on the left indicates
when you are in the Watch Videos
page. Selecting the Watch Videos
selection from the main menu
will show a list of all current
recordings in the Root directory.
Main System Toolbar
When logged in, selecting the Watch Videos selection
from the main menu provides the main system
toolbar. The Main System Toolbar Icons Table on the
right shows the icons found at the top of the web
page in the Watch Videos web page.
MAIN SYSTEM TOOLBAR TABLE
Icon Function Description
Create
New Folder
Creates a new folder without
password protection.
Rename
Folder
Changes the name of the name of
the selected folder
Delete
Folder
Permanently deletes folder including
all content
Folder
Password
Allows the user to password protect
the currently selected folder. If
the folder is already password
protected, it allows user to change
the password.
Show
Folders
Displays the Folder management
Trees
Close All
Folders
Shows only the highest tier folder of
the folder tree.
Close
Folder
View
Hides all folders on the HD Portal
plus.
Open All
Folders
Shows all folders on the HD Portal
plus
Move To Allows content to be moved from
one folder to another.
Copy to Allows a copy of a media le to be
created in a dierent folder.
Delete
Selected
Deletes the selected content. There is
no recovery process for content that
has been deleted.
Download
to my PC
Opens Download Manager to allow
content to be moved to the local PC.
3
Controlling the HD Portal plus

| HD Portal plus User Manual Version 1.5 July, 2015 9
RS-232
On the back of the HD Portal plus there is a serial con-
trol port congured as a DTE that supports the RS-232
protocol. A Null-Modem cable should be used between
the HD Portal plus and the COM port on your PC.
Terminal session settings required for RS-232 control
are: 9600, 8, None, 1 with No Flow Control.
There is no password protection on this interface and,
by default the RS-232 port is enabled. The administra-
tor has the ability to disable the port by unchecking the
COM port enable check box.
On-Screen Menu
The On-Screen Menu is displayed on the VGA or HDMI
output of the HD Portal plus. The HD Portal plus IR
remote will provide some of the conguration features
of the Web Portal as well as provide the ability to
navigate and playback non-password protected content
stored on the HD Portal plus.
Currently the on screen menus give the user the
following capabilities:
♦Start/Stop Recording
♦Browse and Play non-password protected
content
♦Browse and Play recent content
♦Copy content to USB
♦Set audio input recording level
♦Adjust the Menu opacity, position and timeout
♦Retrieve System Information
External Control
Telnet (TCP/IP)
The telnet client within the HD Portal plus provides
access to the Command Line Interface through the
TCP/IP protocol. By default, TCP telnet is disabled but
can be activated from the Web Portal with an optional
password. The available commands are the same as
listed in the RS-232 section.
To turn on Telnet control, set the Telnet port number
(typically Port 23) and check the TCP/IP port enable
check box. A password for the Telnet session can be
activated by entering a password in the Password for
TCP/IP connection text box. If a password is not desired
on the Telnet session, leave the text box blank.
Once logged in, type ‘help’ or ‘?’ for a list of
commands.
Infra-Red
The Infra-Red (IR) receiver for the remote control plugs
into a jack located on the back of the HD Portal plus. It
can also be used for IR control via control systems such
as AMX or Crestron.

| HD Portal plus User Manual Version 1.5 July, 2015 10
Recording/Streaming
A recording/streaming session can be started and
stopped from the Start/Stop section of the main toolbar
and from the prole listing of the Web Portal. The
“default” prole will be used unless another prole is
selected. To select an alternate prole, use the Change
button to bring up a prole listing.
The Web Portal will display a “Recording” message at
the top of the page. The record/stream parameters
will be as specied in the prole that was chosen.
To stop the recording and create an archived le,
press the Stop button to begin the “indexing” process.
Playback on HD Portal plus
Content stored on the HD Portal plus can be viewed via
the HDMI or RGBHV output connected to a local mon-
itor. Selecting the Play Locally button on the Watch
Videos page will start the content playback.
During playback, the pause, stop, skip forward and skip
backward controls may be selected.
In order to play les, an MPEG-4 capable playback
application (such as Quicktime Player) is required on
the viewing PC.
Archiving
Download Manager
Files and Folders can be downloaded to the browsing
computer using the Download Manager.
Select the Download Manager icon from the Watch
Videos paging using this icon:
The Download Manager Toolbar will appear
USB Ooad / Upload
The front USB port can be used to move media to or
from the HD Portal plus. Connect the USB memory stick
and a folder named USB will appear in the Folder tree
in the left pane. While the USB is connected, media can
be copied to and from this folder.
Streaming
The Watch Live Stream page allows users at their
personal computers to launch client media players,
which will receive and decode the media streams for
playback.
Manual FTP Upload
Under the actions menu for any video there is a manual
FTP icon. Clicking this icon will allow you to manually
transfer a video le and associated XML le to a remote
server. SCP, FTP, and FTPS are all available options for
transferring les. To transfer your desired le, choose
the Manual FTP icon in the actions menu. Enter the
server destination, Port number (optional for non
standard ports), Destination path, and credentials. You
can choose to delete the content after a successful
upload.
Metadata
Metadata tagging allows you to tag a video le with
information such as Author, Title, Keywords and more.
This information is stored in the header of the Video
le. A second copy of this information is stored within
an XML le that is downloaded or transferred alongside
the le. To add metadata to the le, select the video
you wish to edit and click on the metadata icon in the
Actions Menu associated with that le. Then enter your
desired information into the available elds.
Transcoding
The HD Portal plus supports le transcoding. This is a
manual post process procedure. To transcode a video
select the transcode icon under the actions menu for
the desired video. Select the desired formats you wish
to transcode from the pop-up menu. You can choose:
H.264, WMV, iPod and Flash formats. The transcoding
will happen in the background and appear as a new
le in your media library. The new le will have the
transcoded video type appended to the beginning of the
original le name for easy recognition. To see waiting
jobs reference the Job Management page.
4
Recording, Archiving,Streaming and VOD

| HD Portal plus User Manual Version 1.5 July, 2015 11
Titles & Credits
JPEG images can be uploaded to the HD Portal plus
in the Titles & Credits selection of the main menu.
Images uploaded here can be specied in the prole
parameters. Images must be in JPEG format.
To upload an image, browse to the JPEG you wish to
use and click on the Upload button. Individual images
can be viewed or deleted using the controls provided on
each graphic.
Changing Proles
On the Start/Stop page, you can click on the Change
icon and you will get a list pop-up with all available
proles. Select on the prole of your choice and the
Start/Stop page will automatically be updated.
Video On Demand (VOD)
A VOD channel is a way to link up to other units
simultaneously. The following table describes the HD
Portal plus play/stream VOD capabilities.
VOD Channel Settings
By clicking on “Add New Channel” a window will open
allowing you to enter the IP address of the device you
want to connect to.
Viewing VOD Channels
If you go to the Live Streams page you will see current
live streams from all your VOD channels. To view
the stream click on the play icon under Actions and a
window will open and display the stream.
CHANNEL FEATURES HD Portal plus
View/Play recorded
content Yes
View/Play live stream Yes
Make recorded content
available Yes
Stream live content Yes
EDIT PROFILE ICONS TABLE
Icon Function Description
Start
Record/
Stream
Starts a recording/streaming
session using the settings specied
in Prole.
Stop
Record/
Stream
Stops both the recording and
the live stream and will begin the
indexing process.
Streaming Indicates that Streaming is enabled
on this prole.
Recording Indicates that recording is enabled
on this prole.
Info Provides a quick view of all
congured settings in prole.
Copy Creates a copy of a prole that can
be customized.
Edit Prole
Allows a user dened prole to be
edited. To create a custom prole,
copy one of the 8 Originals.
Delete
Prole
Permanently deletes a custom
prole.
Default
Prole
Used when a recording is started
without a prole specied.
Identied by a Gold Star.
Set Default
Prole
Changes the Default prole when
clicked.

| HD Portal plus User Manual Version 1.5 July, 2015 12
This section describes how to set up all congurable recording
options on the HD Portal plus; only author and admin users
have access to these settings.
Proles
A Prole is a collection of settings that denes the
operating characteristics for a streaming/recording
session. Parameters include:
• Prole name - The name you choose
• Auto start - Enables automatic video conference
recording
• Format - Selects the type of encoding
• Main source - Selects input or template
• Frame size - Selects capture resolution
• Frame rate - Sets maximum frame rate
• Bitrate - Sets maximum bitrate
• Audio format - 64 kbps or 32 kbps
• Archive folder - Selects local le location
• Archive prex - The lename (max 10 chars)
• Enable FTP upload - When checked sets parameters
for automatic le transfer
• Transcoding selects for automatic le transcoding
• Custom settings - Enable titles and credits
Follow the steps below to create a new prole.
1. The Portal plus comes with two precongured
proles that cannot be modied. These can be
copied to create custom proles. The “Prole
Listing” screen capture from the HD Portal plus
Web Portal is shown below.
5
Creating and Modifying Proles
COPY
4. The Copy Prole
web page shown
below will appear.
Creating/Modifying a Prole
2. To create a custom prole, choose one of the two
proles outlined below in red as a starting point.
(Composite or Content.)
3. After you choose the prole in step 2, click on
the Copy Icon from the Prole Listing page for the
prole you want to copy. The Copy Icon is in the
Actions column as circled in red below.
Other manuals for HD Portal plus
1
Table of contents


