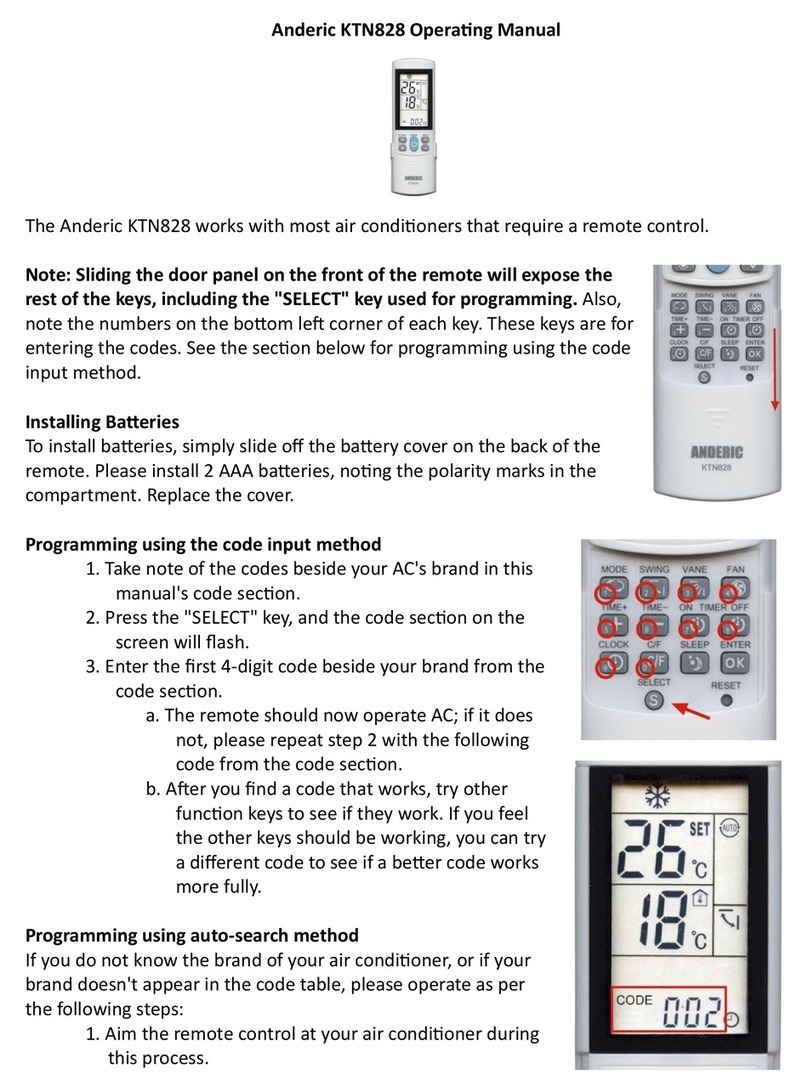
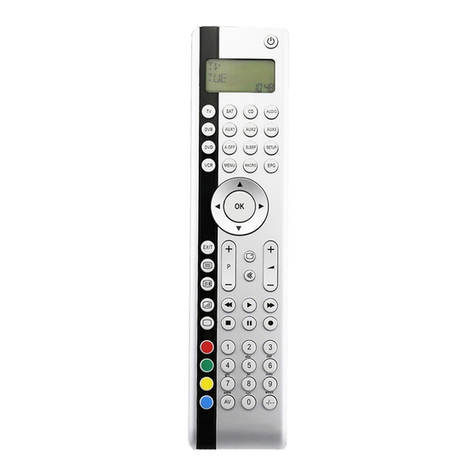
X10 UR24E User manual

UR24E
8 in 1 Universal
Remote Control
User Guide ------------------------------ 4
Bedienungsanleitung ------------- 14
Guide utilisateur --------------------- 25
Instruçóes de operaçáo ---------- 35
Gebruiksaanwijzing ---------------- 43

CE DECLARATION OF CONFORMITY
UK
We, X10 Europe, 3 Rue de Penthièvre - 75008 Paris - France, herewith declare that the
following designated product : 8 in 1 Universal Remote Control UR24E,is in compliance
withtheessentialrequirementsandotherrelevantprovisionsofDirective1999/5/EC.
DE
Hierbijverklaart X10 Europe,3 Rue dePenthièvre - 75008Paris - France -dat het toestel:
8 in 1 Universal-Fernbedienung UR24E inovereenstemmingismetdeessentiëleeisenen
deandere relevante bepalingenvan richtlijn1999/5/EG.
FR
Nous, X 10 Europe, 3 Rue de Penthièvre - 75008 Paris - France, déclarons que le produit
suivant:Télécommande Universelle 8 en 1 UR24E est en conformité avec lesexigences
essentielles et aux autres dispositions pertinentes de la directive 1999/5/CE.
S
PormediodelapresenteX10Europe, 3RuedePenthièvre-75008Paris-France, declara
que el 8 in 1 Mando a Distancia Universal UR24E cumple con los requisitos esenciales y
cualesquieraotrasdisposiciones aplicables oexigibles de la Directiva1999/5/CE.
NL
HierbijverklaartX10Europe,3RuedePenthièvre-75008Paris -France dathettoestel 8in1
Afstandsbediening UR24E in overeenstemming is met de essentiële eisen en de andere
relevantebepalingenvanrichtlijn1999/5/EG
0889

1
7
5
3
9
2
8
6
4
10
13
11
15
17
21
19
23
12
14
16
18
20
22
24

8 in 1 Remote Control
General Security Note :
Technicalmanipulation of the product oranychangesto the product are forbidden, because
ofsecurityand approval issues.
Takecare of proper startingupthe device - consultyouruser guide. Children should usethe
deviceonly under adultsupervision.
Avoidthefollowing:
· strong mechanical tear and wear
· hightemperature
· strongvibrations
· high humidity
Please also respect the additional security notes in the various user guide chapters. For
questionsnotcovered in the userguide please contactyour seller. Toinsurea proper set up
pleaseread the manual and security notes carefully.
Battery change :
The device may only be used with 4AAA batteries - never try to connect to another power
supply. When inserting batteries be sure the polarity is respected. Remove the batteries
when the device is not used for a long period. Make sure that the batteries are not short
circuitedandare not disposed infire(danger of explosion)
Batteries do not belong in children hands. Don't let batteries lay around openly - they might
be swallowed by children or animals. If this happens see a doctor immediately.
Leaking or damaged batteries can upon contact with skin cause burning or acid damage -
use suitable gloves if necessary.
Disposal of batteries :
Batteriesare special waste and do not belong in generalhousehold waste disposal.
Theend-user is by lawrequiredtodisposeofusedbatteries by returning them-disposalwith
or through household waste is forbidden.Your used batteries can be returned in any of our
shops or in our headquarters, as well to all local authorised collection points.
Keepthe environmentsafe.
4

Quick start guide
1) Put the batteries in
1.Open the cover on the back of the 8 in 1 remote control
2. Insert 4 batteries (LR03 alkaline). Make sure the batteries are the same brand and are
NEW
2) Program your 8 in 1 remote control
1. Turn on the equipment that you wish to control (TV, VCR, DVD, SAT, CD etc ...)
2. Takethe codebooksuppliedwith the remote control andfindthe brand of the equipment
you wish to control. E.g. if you have a Thomson TV look for Thomson under the TV
section.
3. Press on the key marked " SETUP " (4) pressing the key until the red LED stays
permanently bright. This takes about 3 seconds.
4. Press on theTV, VCR, DVD, SAT... mode key (5), in accordance with the appliance you
wish to control.
5. Fromthecodebooktakethe first number corresponding to your equipmentandenterthe
numberby pressing the 0-9 key pad (10). Eachtime you pressa key thered LED (1)will
flash.
6. If the number is correctly entered the red LED will switch off. If the number is incorrect
then the red LED will flash fast. If incorrect you will need to begin at 1.
7. Alternative to 5: If your brand is listed hereafter:
BRAND CODE BRAND CODE
Philips/Radiola 1 Telefunken/Saba/Normende 4
Sony/Panasonic/JVC/ 2 Grundig/Blaupunkt 5
Sharp/Akai/Toshiba/Daewoo
Thomson/Brandt 3 Nokia/ ITT 6
Enterthe code corresponding to your brand, point the remote control in the direction of your
equipment, press once only CHANNEL+(14) continue to point the remote control at your
equipment until the equipment changes channel. (The remote control sends an IR signal
every second. So please wait until your equipment reacts). When your equipment does
react, press on the key ENT (11) to confirm. If accidentally you miss the code, you can stop
theautosearch bypressingCHANNEL-(14)and byrepeatedlypressingthiskeyreturn tothe
right code. Press ENT (11) to confirm.
8. Press on the key POWER (2). If your equipment switches off you have found the right
code. If it does not switch off, you will need to re-start from 3.
Sometimesthereareseveralcodeswhich have similar features. If you findthatyour8in
1 does not work for some functions, you may need to search for another code.
5

Universal Remote 8 in 1 - UR24
Contents
1) Introduction
2) Put in the batteries
3) Generalpoint
4) Functions of the key
5) Programming for theTV, VCR, Satellite, CD, DVD and CBL
6) Manual code search"AUTOSEARCH"
7) Automatic code search
8) Identifyingcodesfound
9) Learningcommands
10) Clearinglearnedcommands
11) Macrofunction
12) Controlling your house with X10 home automation modules
13) ChangingtheX10HouseCode
14) Troubleshooting
1) Introduction
The8 in 1remotecontrolisdesignedtocontrol up to8devices(TV,VCR,DVD,Satellite,CD,
CBL and PC, plus X10 modules). The remote control contains a library of codes which are
pre-programmedintotheremotecontrol. Thislibrarycoversnearlyalltheaudiovideoproducts
on the market today.
Tomakeiteasyfor youtofindtherightcodeforyouraudio videoequipment,weadvise touse
theAUTOSEARCHfeature.
2) Put in the batteries (always use NEW alkaline batteries LR03)
1.Openthe coveron the back of the remote.
2.Insert4AAAbatteries- LR03 alkaline, verify that they areplacedcorrectlywiththe+onthe
battery in the same position as marked inside the battery compartment.
3) General Point
The RF transmission: It is simultaneous to the IR signal. It allows you to control your TV,
VCR ... through walls and floors, thanks to the Power Mid (optional).
The double function : itallows you to controlthevolume and the "mute " button ofyour TV
even when you are in VCR, DVD, SATor CD or SAT mode.
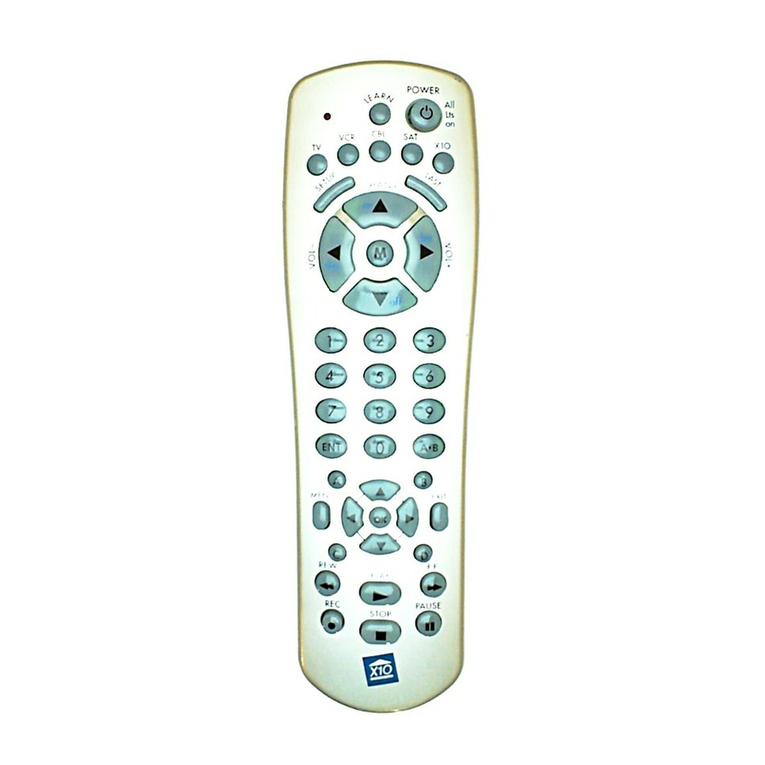
4) Functions of the keys
[1] LED indicator : The indicator light flashes when the remote is operating or lights
continuouslywhileyouare programming the remote.
[2] POWER / ALL LIGHTS ON:
For A/V applications : Allows you to switch off the last selected appliance.
In Home Automation Mode : allows you to switch ON all the lights connected to an X10
module.
6

[3] LEARN: Letsyou learn IR commandsfrom an existing remote,that might not bein the 8
in 1 library
[4] SETUP: Thisallows you toprogram your remote before the first use.
[5] TV, VCR, SAT, DVD, CBL and CD : These keys allow you to select the appliance you
wish to control.
[6] PC: In combination with the optional USB-RF receiver, this key will allow you to control
MP3,DVD and CD function on your PC.Ask your dealerfor more information.
[7] X10 mode: To control the lights/appliances connected to an X10 module
[8] SHIFT: Lets you have access to secundary function like: menu, exit, ok, left, right, up,
down,etc.In the Shift mode, the LED is ON continuously.To end the SHIFTmode press the
SHIFTkeyonce more.
[9] Showview:
In VCR mode: Programming of a ShowView or VIDEOPLUS+ recording (see equipment
manuals).
In TV, CAB, SAT and CD mode: allowstosequentially scan up available program channels
[10] Numeric keys 0 - 9 : To enter device code
For A/V applications: Work the same way as your original remote
In Home Automation Mode: to select one X10 module, to change the X10 House code
[11] ENT: If you are in programming mode - automatic code search - you can confirm the
code of the device you want to control. In connection with the numeric keys (11) this button
allows you, with some equipment, to select directly channels higher than 9.
[12]A.B: Selection of the SCARTplug to view DVD, SAT, VCR, … on your TV screen.
[13] INFO : Displays information of the selected appliance, work the same way as your
originalremote
[14] Channel + / - :
For A/V applications : Selects the next or the previous channel of the last selected mode,
in Shift mode: lets you navigate up and down in the menu of the selected equipment.
In Home Automation Mode : allows you to turn ON / OFF any light / appliance connected
toanX10module.
[15] Mute / OK / ALL OFF:
ForA/V applications :Allowsyou to turnON/OFFthe sound of thelastselected appliance,
in Shift mode: confirm the menu selection of the selected equipment.
In Home Automation Mode : allows you to switch OFF all the lights and appliances
connectedtoanX10module.
[16] Volume + / -:
For A/V applications : Controls the volume in VCR, TV , DVD, SAT, CD mode, in Shift
mode:letsyou navigate Leftand Right in the menuof the selectedappliance.
In Home Automation Mode : allows you to DIM / BRIGHT a light connected to an X10
module.
[17] M1 M2: Macrokey. Letsyouexecutepre-programmed sequence ofIR commands.
7

[18]L1L2:SparelearnKeys.Thesekeysarenotpre-programmedandletsyoulearnadditional
keyfroman original remotecontrol
[19] Teletext Mix : Allows to mix the Teletext and the picture of the selected channel
[20] Teletext Hold : Stops page change in teletext mode
[21] VCR button Play , FF , Stop, Rew , Pause :
InVCR CD & DVD mode:Thesebuttonsworkdirectlyfor themajorityofthe availablebrands
and work the same way as in your original remotes
In TV mode: Fast text function.
[22] Teletext ON, in Shift mode: turn on the menu of the selected appliance
[23] Teletext OFF, in Shift mode: turn off the menu of the selected appliance
[24] REC (record ): Thiskeyworksthesameway as the oneonyouroriginalremoteforyour
VCR. In order to avoid a mistake you have to press this key twice to activate this feature.
Default Volume Control
Becausesomesatellitedecoderdoesnothave volume control, the 8 in 1 remotecancontrol
thetelevision’svolumeinSATmode. (No need to selectTV mode).Tochoose the equipment
that the Mute and Volume keys will control in SAT mode, just proceed as follow :
1. PressandreleasetheTVModebutton(5)-remotemustbeinTVmodeforthisprocedure.
2. Press and hold SETUP (4) button until LED remains on.
3. ReleaseSETUPbutton.
4. Press and hold the Mute (15) key for approximately 8 seconds : during this period, the
LEDwillstayoffor 8seconds,thenblinkoncemoretoindicatevolumedefaultacceptance.
The LED will remain off. Release the Mute key.
5. Remotevolume default is now set. If the 8 in 1 remote control was previously controlling
thetelevisionvolume in SATmode, itwillnow control the volumeofthe satellite decoder.
If it was previously controlling the volume of the satellite decoder, it will now control the
volumeof thetelevision.
5) Programming your TV, VCR , DVD, SAT, CD and CBL
Note : you can dedicate any appliance (TV, DVD,SAT...) to the VCR, DVD, SAT, CD, CBL
and PC keys: you need first to enter the 3 digit code of the appliance you wish to control
(found in the code book). In any case, follow the method below:
1. Press and hold the SETUP (4) key until the LED indicator lights continuously. Release
the SETUP key.
2. Press and release the mode key (5) of the device you want to control (for example TV).
3. Makesureyour equipment is switched on(for example TV)
4. Enterthe3digitcode(10)fromthelibrarytable.The LED (1) turns off after the last digit is
entered.IfyouenteredawrongcodetheLEDblinksfor3secondsandthengoesoff.You
havetorepeat from step 2.
5. Pointtheremote in the direction ofyourTV andpressthePOWERbutton(2).Yourdevice
shouldturnoff.Check other functions (forexamplefor a VCR: FF orREWetc.). If certain
functionsarenotrespondingthisindicatesthattheenteredcodeisnotthecorrectone. In
8
thatcaserepeat the above procedurewiththe next corresponding codeofyour brand.
6. Repeatthisprocedure for the other equipment you want to control (TV, VCR, DVD, SAT,
CD,andCBL)
6) Manual code search
If your equipment (TV, SATetc...) does not respond, try the other codes for your brand. If it
still does not respond, try the Code Search method.
If you wish to dedicate another appliance to the VCR, DVD, SAT, CBLor CD keys you need
firsttoenter the 3 digitcodeof an appliance similarto the appliance youwantto control. i.e.:
tosearchforaSATcodefirst enterthecode(found inthecodebook) ofanySATasdescribed
in § 5. Then follow the steps below :
1. Make sure your equipment is switched on. If not switch it on manually
2. Press and hold SETUP(4) until the LED indicator lights steadily. Release SETUP
3. Pressthe mode key (5)thatmatchestheequipmentyouwantto control (for exampleTV).
4. Press Channel +(14) repeatedly until the channel changes. If you step past the correct
code, use Channel - (14) to go back to the right code
5. When the equipment you want to control reacts press ENT (11) to confirm the code.
That'sall!
Note: Ifyourequipmentdoesn'thaveChannel + youcanusePLAY(VCRorDVD)(21)or
POWER (2) key
Thesearchstartsafterthe last registered code. If thatwas030,thesearch starts at 031 until
the last possible code and then goes from 000 to 029.
Note : if certain functions of your equipment can't be controlled you have to find a different
codeforyour brand
7) Automatic code search
When searching an unknown code, you can step through the library automatically
(AutoSearch). When your equipment responds, you can stop the searching process and
storethecodeyouhave found.
If you wish to dedicate another appliance to the VCR, DVD, SAT, CBLor CD keys you need
firsttoenter the 3 digitcodeof an appliance similarto the appliance youwantto control. i.e.:
tosearchforaSATcodefirst enterthecode(found inthecodebook) ofanySATasdescribed
in § 5. Then follow the steps below :
1. Turnonthe device you want to control.
2. Press and hold SETUP (4) until the LED indicator (1) lights steadily. Release SETUP
button.
3. Press the mode button (5) that matches the equipment you wish to control. The LED (1)
blinks once.
4. PressCHANNEL+(14)once.Aftera few seconds the remotestartssteppingthroughthe
code library (fast search, 1 code per second). You can press CHANNEL+ (14) to switch
to slow search (1 code per 3 seconds). You can step back by pressing CHANNEL- (14)
9

(you can step forward by pressing CHANNEL+(14) in case you went too far back). As
soonasthe device respondsagain, press the ENTkey (11) to store thecode you found.
8) Identifying codes found using the search procedure
1. Press and hold SETUP (4) until the LED indicator (1) lights steadily. Release SETUP
2. Pressthemode key (5)for the equipmentyou want toidentify (TV,VCR, DVD, SAT, CD,
CBL). The LED blinks once.
3. Press again SETUP.The LED blinks once.
4. Toidentify thefirstdigitpresseachnumberbuttonfrom0-9(10)untiltheLEDblinks.The
number you pressed is the first digit of the code.
5. Press each number key from 0 - 9 as above to find the second digit.
6. Presseachnumberkey from 0 - 9asabove to find the thirddigit.When the third digit has
been found the LED will go off. Don't forget to write down the code on the label of the
batterycompartment.
9) Learning commands
Your 8 in 1 remote has the codes for most TVs, VCRs etc. in its code library. However, if the
codeforyour particular device is notfoundinthelibrary,youcanlearnthesecodesfromyour
existing remote. Or if you find a code from the tables in this manual that "almost" matches
your device, but a few buttons are missing, you can learn just those buttons.
1. Point your existing remote at the 8 in1 remote control (front to front) with a distance of
about2,5 centimeters between theremotes.
2. Press and hold SETUP (4) until the LED indicator lights steadily.
3. Press the MODE button (TV, CD, SAT, etc.) that matches the equipment you wish to
learn.The LED (1) blinks once.
4. Press and release the LEARN button (3) . The LED (1) blinks once.
5. Pressandreleasethebuttononthe8in1remotecontrolwhichwilllearnthefunction.The
LED blinks once.
6. Pressthefunction key onyour existing remote thatyou want to transmit.Hold the button
until the LED on the 8 in 1 remote control blinks off shortly.
7. Repeat steps 5 and 6 for each function you want to learn.
8. Whenyou'vefinished learning all the keys, press SETUP(4).
10) Clearing learned commands to free up memory
To Clear allstoredLearned Commands under aMode:
You can clearlearned commands foreach device individually (TV,VCR. Etc.):
1. Press and hold SETUP (4) until the LED indicator light steadily. Release the SETUP
button.
2. Press the desired mode button (TV, VCR, etc.) (5). The LED flashes once.
3. Press and release the LEARN (3) key twice.
4. Press the SETUP(4) key. The LED (1) will turn off after a few seconds.
5.All learned commandsentries under thatmode are nowcleared.
10

Master Clear - To Clear all stored Learned Commands (recommended on first time
Learning) :
1.PressandholdSETUP(4)untiltheVisibleLED(1)remainson(approximately2-3seconds)
2.ReleaseSETUP button.
3. Press and release the Learn key (3) twice. LED (1) will blink off to indicate the keypress
acceptance.
4. Press and release the SETUP (4) key. Visible LED will turn off after a few seconds.
5.All Learned Command entriesarenowcleared.
Notes for learning your remote:
- Makesureyouhave fresh batteries in bothremotesbefore learning.
- Take carenot to move either remote while pressingthe buttons.
- NofunctionsmaybestoredundertheLearn,Setup,TV, VCR, CBL, SAT,CD,CBL,PCor
any of the X10 control keys.
- Experiment by learning 2 or 3 keys initially (to ensure compatibility) and then clear the
storedlearnedcommandsbeforecompletelylearningyouroriginalremote'skeyboard.
- Experimentwiththe distance betweenthe remotes if youhave a problem learning.
- Some remotes do not have their IR sender LED in the centre so you might need to
experimentwith the side-to-side positionof the remotesrelative to each other.
- Donotproceedindirect sunlight,underafluorescentorincandescentlamp whileteaching
the 8 in 1 remote.
- Ifyouhaveproblems learning keys, try clearingthememoryand try learning themagain.
- Use button L to learn code for which the 8 in 1 does not have a corresponding button.
11) Macro function
Your 8 in 1 remote control has 2 Macro keys M1 and M2. You can program these 2 keys to
execute a series of commands with one press of these buttons. This feature is ideal for
switchingonallyour audio and video equipmentorchoosea preferred setting of yourHome
TheatreSystem.
Programming the macro key M1 and M2
1. Press and hold Setup (4) until the LED indicator lights steadily. Release the Setup key
2. Press the Macro key you want to program (17)
3. Pressthekeys on your 8in1remote control which youwant to store undertheMacro key
(the maximum is 14 commands). The first key stored in a Macro must be a Mode key.
Theorder of programming isalso the orderof execution of the Macro. The indicatorlight
(1) blink at each keypress. Use the mode keys (5) for any mode changes.
4. To store the macro, press the Macro key once more. If you reach the maximum of 14
commands the Macro will be automatically stored on the 14th keypress and the Visible
11

LED(1)will turn off.
Note for programming Macro's:
Itmaybe necessary tohave "delays" included inthe Macro sequence (e.g.to allow your TV
warm-up time). Delays can be achieved by using the Pause key followed by the number of
secondsdelayrequirede.g. to enter a delay of 4 seconds, pressandreleasePausefollowed
by4. Maximum delay is 9 seconds. It is not possible to have a "0" digit entered after Pause
i.e. there is no zero delay.
There is an automatic delay of 1 second between each IR transmission in the sequence
To Delete a Macro :
1. Press and hold the Setup (4) button until the Visible LED remains on. Release Setup.
2. Pressandreleasethe Macro key (M1 or M2) youwanttodelete.TheLEDwillblink off to
indicate the keypress acceptance.
3. Press and release the Setup key. The LED will turn off and the Macro is deleted.
12) Controlling your house with home automation modules from X10
The 8in1 remote control allows you to command all electric appliances you have in your
house. In addition to transmitting infrared signals, which control your TV, VCR, SAT, CD,
DVD and CBL, your remote is equiped with a radio transmitter sending X10 signals, which
will enable you to control from a distance lamps and electric appliances.
Here are some examples that you can do with your 8 in 1 remote using X10:
- Switch on/off , dim lights while you watch TV.
- Switch on the lights at night to frighten intruders when you detect something suspicious
- Switch on your electric blanket before the film ends to have it warm when you go to sleep
For controlling your lamps or appliances, you will need additional X10 home modules. The
modules are simply plugged into a/c outlet with no additional wiring required. Contact your
retailerfor additional information.
- Toswitchon/ off anappliance pluggedinto an X10 module :Pressthe X10 key(7),then
presstheunitcodeofthe X10 module on the keypad(10)andthen press CHAN+ / - (14)
- To dim/brightalight plugged into an X10module: press itsunit code on thekeypad(16)
and then press VOL+ / - (16)
- To turn ON all the X10 Lamp modules: Press the Power key (2)
- Toturn Offall theX10 modules (Lampand appliance): press the Mute key (15)
13) Changing the X10 House Code
The preset house code is A and in the majority of cases it is not necessary to change this
setting except if there is interference from neighbouring X10 systems. In that case :
1-Press X10 key (7)
2- Press and hold SETUP (4) until the LED lights continuously
12

14) Problems and troubleshooting
Theremote doesn’t work or looses codes entered :
· Confirmwith your original remotethat the equipment workscorrectly
· Makesure that you havepressed the correspondingmode key of the equipment or device
that you want to control.
· If the listed code does not work, try theAUTOSEARCH method or enter the next code of
thatbrand.
· Tofindthe corresponding code foryour equipment use theautomatic search.
· Check that the batteries respect the polarity of the battery compartment.
· Theprogrammingoftheremoterequires4AAAbatteries(new).Iftheremoteloosescodes
within a few days/weeks the problem can be solved by using 4 new batteries of the same
brand.
· If the LED is lit permanently, it will generally be necessary to replace the batteries.
13
3-Releasethe SETUP (4) button
4-Usethedigit keys to enter thenumberequivalentto the chosen home code (1=A,2=B,...
16=P).
5- Press the ENT(11) to confirm your command. The LED will turn off
Note:The code you havechosenhastobethesameas the one selected ontheTransceiver
module TM13 or the security console, which you control with your remote.

8 in1 Universal-Fernbedienung - UR24E
Allgemeine Sicherheitshinweise
WegenSicherheits-undZulassungsbestimmungenistjeglichetechnischeManipulationoder
VeränderungdesGerätsverboten.
Achten Sie bitte auf korrekte Einstellung des Geräts - lesen Sie die Gebrauchsanleitung.
KinderdürfendasGerät nur unter elterlicherAufsichtbenutzen.
Unbedingtvermeiden:
- starkemechanischeAbnutzung
- hoheTemperaturen
- starkeVibrationen
- hoheLuftfeuchtigkeit
BeachtenSie bitte auch diezusätzlichenSicherheitshinweiseindenverschiedenenKapiteln
derGebrauchsanleitung.BeivonderGebrauchsanleitungnichtbeantwortetenFragenwenden
Siesich bitte an IhrenVerkäufer
Um die richtige Einstellung des Geräts sicherzustellen, lesen Sie die Gebrauchsanleitung
unddieSicherheitshinweisebitte sorgfältig.
Batteriewechsel:
DasGerätdarfnurmit 4AAA-Alkalibatterienbenutztwerden-versuchenSie niemals, es an
eineandereStromversorgunganzuschließen ! WennSie dieBatterien einlegen, achten Sie
bitteauf die richtige Polarität.NehmenSiedieBatterienheraus, wenn dasGerätlängereZeit
nicht benutzt wird. Vergewissern Sie sich, dass die Batterien nicht kurzgeschlossen sind
undnicht ins Feuer geworfenwerden(Explosionsgefahr).
Batterien gehören nicht in Kinderhände. Lassen Sie Batterien nicht offen herumliegen - sie
könnten von Kindern oder Tieren verschluckt werden. In diesem Fall sofort einen Arzt
hinzuziehen.
LeckendeoderbeschädigteBatterienkönnenbeiHautkontaktBrand-oderSäureverletzungen
hervorrufen-wennerforderlich, geeigneteHandschuhebenutzen.
Beseitigen Sie Batterien bitte gemäß den örtlichen Vorschriften.
14

Anleitung zum Schnellstart
1) Einlegen der Batterien
1.ÖffnenSiedieAbdeckung auf der Rückseite derUR24E.
2.Legen Sie 4 Batterien (LR03 Alkali) ein. Vergewissern Sie sich, dass die Batterien die
gleiche Marke haben und dass sie NEU sind.
2) Programmieren der UR24E
1. SchaltenSiedas Gerät, das Sie bedienen möchten ein(TV,Videorecorder usw.)
2. Nehmen Sie das mitgelieferte Code Buch zur Hand und suchen Sie die entsprechende
Marke des zu bedienenden Gerätes. Wenn Sie z. B. einen Thomson Fernseher haben,
sehen Sie unter Thomson imTVAbschnitt nach.
3. DrückenSie die" Setup " (4) TastebisdieroteLEDAnzeigeununterbrochen aufleuchtet.
Dasdauert ungefähr 3 Sekunden.
4. Drücken Sie TV, VCR, SAT, DVD, CBL oder CD (5) je nachdem welches Gerät Sie
bedienenmöchten.
5. EntnehmenSiedemCodeBuchdieersteNummerentsprechendderMarkeIhresGerätes
undgeben Sie die Nummer auf demTastenfeld(0 - 9) ein (10).Beijedem Drücken einer
Tasteleuchtet die rote LED (1)Anzeige auf.
6. WenndieNummerrichtigeingegebenist,schaltetdieLEDAnzeigeaus.WenndieNummer
falscheingegebenwurde,leuchtetdie LEDAnzeigeschnell.WennSiedie Nummerfalsch
eingegebenhaben,müssenSiewiederbei1.anfangen.
7. Alternativezu5: Wenn Ihre MarkeimFolgenden angegeben ist:
MARKE CODE MARKE CODE
Philips/Radiola 1 Telefunken/Saba/Normende 4
Sony/Panasonic/JVC/ Sharp 2 Grundig/Blaupunkt 5
Akai/Toshiba/Daewoo
Thomson/Brandt 3 Nokia/ITT 6
GebenSiedenderMarkeentsprechendenCodeein,zeigenSiemitderUR24EFernbedienung
inRichtungdes Gerätes, drücken Sie nureinmal CHANNEL+ (14),zeigen Sie weiterhin mit
derUR24EFernbedienungaufIhrGerätbisdasGerätdenKanalwechselt.(DieFernbedienung
sendet jede Sekunde ein IR Signal.Also warten Sie bitte bis Ihr Gerät reagiert.) Sobald Ihr
GerätreagiertdrückenSiebitteENT (11) zurBestätigung. Falls Sie aus Versehenden Code
verpassen,drückenSieCHANNEL-(14)unddurchwiederholtesDrückendieserTastekönnen
Siezum richtigen Code zurückgehen.Drücken Sie ENT (11) zur Bestätigung.
8. DrückenSiePOWER (2).WennIhrGerät sich abschaltet habenSiedenrichtigen Code
gefunden. Falls es nicht abschaltet, müssen wieder mit 3. beginnen.
Manchmal gibt es einige Codes, die ähnliche Funktionen haben. Wenn Sie feststellen,
dass Ihre UR24E Fernbedienung einige Funktionen nicht ausführt, müssen Sie nach
einemanderen Code suchen.
15

8in1 Universal Fernbedienung UR24E
Inhalt
1. Einleitung
2. Einlegen der Batterien
3. Allgemein
4. Funktionstasten
5. Programmierung der TV, VCR, SAT, DVD, CBL und CD
6. Manuelle Code Suche " AUTOSEARCH "
7. Automatische Code Suche
8. Identifizierung der gefundenen Codes
9. Eingeben von Befehlen
10. Löschen von eingegebenen Befehlen
11. Macro Funktionen
12. Kontrollieren Sie Ihr Haus mit X10 Home Automation Modulen
13. Ändern des X10 Haus Codes
14. Problemlösung
1) Einleitung
DieUR24EFernbedienungwurdeentwickeltumbis zu 8 Geräte (TV,VCR,SAT,DVD, CBL,
CD, PC, sowie X10 Module) zu bedienen. Man kann damit auch elektrische Geräte, z.B.
Lampen und Anwendungen, in Verbindung mit X10 Modulen bedienen. Die UR24E
Fernbedienungenthält eine ListemitvorabeinprogrammiertenCodes.Diese Liste decktfast
alleAudio-Video Geräte ab, die heutzutage auf dem Markt sind.
Um es für Sie einfach zu machen, den richtigen Code für Ihre Audio-Video Ausrüstung zu
finden,empfehlenwirIhnen,dieAUTOSEARCHFunktionzunutzen.
2) Einlegen der Batterien (benutzen Sie immer NEUE Alkali Batterien LR03)
1. ÖffnenSiedieAbdeckungaufderRückseitederUR24EFernbedienung.
2. Legen Sie 4 AAA Batterien - LR03 Alkali ein, vergewissern Sie sich, dass diese
entsprechendderMarkierung (+ und -Pol)eingelegt sind.
3) Allgemeine Punkte
Die RF Übertragung: mit dem Power Mid auch durch Wände und Stockwerke hindurch
ausführen.
Doppelfunktion: Sieermöglicht IhnendieLautstärkeunddie"Mute"TasteIhresFernsehers
zu betätigen, auch wenn Sie im VCR oder SATModus sind.
4)Funktionstasten
[1] LEDAnzeige: DieAnzeigeleuchtetkurzauf,wenndieFernbedienunginBetriebistoder
leuchtetpermanent wennSiedieFernbedienungprogrammieren
16

[2] POWER / ALL LIGHTS ON:
Für A/V Anwendungen: Schaltet das zuletzt ausgewählte Gerät
Im Home Automation Modus: schaltetalle mit einem X10Modul verbundenen Lichter an
[3] LEARN : Mit dieser Taste können Sie IR Befehle von einer bereits vorhandenen
Fernbedienungübernehmen,dienichtinderUR24E Liste enthalten sind
[4]SETUP:ErmöglichtIhnendieProgrammierungIhrerFernbedienungvordemerstenEinsatz
[5] TV, VCR, SAT, DVD, CBL und CD : Mit diesen Tasten wählen Sie das zu bedienende
Gerät.
[6]PC:MitdemzusätzlicherhältlichenRF-USBEmpfängerkönnenSiemitihrerFernbedienung
auchMP3, DVD und CD Funktionen Ihres Computerbedienen. Bei IhremHändler erhalten
Siemehr Information.
[7] X10 mode: Um Lichter und Geräte in Verbindung mit einem X10 Modul zu schalten
[8]SHIFT:HiermitkönnenSieaufsekundäreFunktionenbeibestimmtenAudio-Video-Geräten
zugreifen (z. B. Menu Ein, MenuAus...). In Shift modus, die LED erleuchtet bleibt.Drücken
Sie die ShiftTaste um Shift Modus zu verlassen.
[9] Showview:
In VCR Modus: MitdieserTastekönnenSiedieShowviewoderVideoplusFunktionenIhres
Videorecordersbenutzen(wennIhr Videorecorder diese Funktionen besitzt).
Im TV, CAB, CD und SAT Modus: Scan-Funktion.
[10] Numeric keys 0 - 9:
For A/V applications: GleicheFunktionwie bei der original Fernbedienung
Im HomeAutomation Modus: zurAuswahleines X10 Moduls, umden X10 HausCode zu
ändern
[11] ENT: Wenn Sie im Programmiermodus sind - automatische Code Suche - können Sie
denCode deszu bedienenden Gerätes bestätigen. In Verbindungmit den Nummerntasten
(11) könnenSie beieinigen älteren Gerätendirekt in Kanälehöher als 9schalten.
[12] A-B: Auswahl der SCART Buchse um DVD, SAT, VCR auf dem Fernsehmonitor zu
sehen
[13] Info: VermitteltInformationenüberdasgewählteGerät.
[14] Channel + / - , Up/Down, On/Off:
Für A/V Anwendungen: Wählen Sie den nächsten oder vorhergehenden Kanal Ihres TV,
SAT, in Shift modus: Menü-Navigationstasten; Sie können damit im Menü nach oben und
nachuntennavigieren.
In Home Automation Mode: erlaubtIhnen dasEIN/AUSSchaltendermiteinemX10Modul
verbundenenGeräte
[15] Mute / OK / ALL OFF:
Für A/V Anwendungen: schaltet den Ton ein oder aus.
17

18
navigieren.
In Home Automation Modus: Dimmen+/- der miteinemX10 Modul verbundenen Lichter
[17] M1 M2: Einstellungstasten.MitdiesenTastenkönnenmiteinemTastendruckeineReihe
vorprogrammierterBefehleausgeführtwerden.
[18]L1 L2: ErmöglichtdasEinlernenvon anderenFunktionenIhrerOriginalfernbedienung.
[19] Teletext Mix: GleichzeitigeAnsicht vonTeletext und Bild des gewählten Kanals
[20] Teletext Hold: Behält den Teletext Modus
[21] VCR button Play , FF , Stop, Rew , Pause:
Im VCR CD & DVD Modus: DieseTastenfunktionierenmitdenmeistenzurZeiterhältlichen
MarkenundhabendiegleicheFunktion wie die auf Ihrer Original Fernbedienung
Im TV Modus: Schnelltext Funktion
[22] Teletext ON, Menu: Teletext Start/Stopp, Im Shift-Modus: Menü Ein.
[23] Teletext OFF, Exit: Teletext Stopp, Im Shift-Modus: MenüAus.
[24] REC (record ): Diese Taste hat die gleiche Funktion wie die auf Ihrer original
Fernbedienung.UmFehlerzuvermeiden,müssenSiedieseTastezweimal drücken, um die
Funktionzuaktivieren.
"Default" Lautstärken Kontrolle
Da einige Satelliten-Decodierer keinen Pegelregler besitzen, kann die 8-in-1-Universal-
FernbedienungdenTV-Lautstärkepegel imSAT-Modussteuern (WahldesTV-Modus nicht
erforderlich). Um das Gerät auszuwählen, welches von den Mute- und Volume-Tasten im
SAT-Modusgesteuert werdensoll,gehenSiewiefolgtvor:
1. Drücken und lassen Sie die Taste TV Mode (5) los - die Fernbedienung muss sich für
dieseProzedurimTV-Modusbefinden.
2. Drücken und halten Sie dieTaste SETUP (4), bis die LED erleuchtet bleibt.
3. SETUP-Taste loslassen.
4. Drücken und halten Sie die Taste Mute (15) für circa 8 Sekunden. Die LED blinkt und
bleibtwährenddes8-Sekunden-Zeitraumsweg,blinktdannnocheinmal,umdieErfassung
des Pegelreglermangels anzuzeigen und erlischt anschließend. Lassen Sie die Mute
Taste los.
5. DerperFernbedienungausgeglichenePegelreglermangelistjetzteingestellt.
Siekönnen die "Mute"-FunktionIhresFernsehapparatsselbstdannbedienen, wenn Siesich
imModusVCR, DVD oderSATbefinden. WahldesTV-Modusnichterforderlich.
in Shift-Modus: OK-Taste;bestätigtMenü-Auswahl.
Im Home Automation Modus: schaltet alle mit einem X10 Modul verbundenen Geräte/
Lampen"aus"
[16] Volume + / -, Left/Right, Bright/Dim:
Für A/V Anwendungen: Kontrolliert die Lautstärke im TV, VCR, SAT, DVD, CBL, CD
Modus,inShift-Modus: Menü-Navigationstasten;SiekönnendamitimMenülinksundrechts

19
sie wieder los (z.B. TV).
4. Geben Sie den dreistelligen Code (10) aus der Übersicht ein. Die LED (1)Anzeige hört
nachEingabe der letztenZahlaufzublinken.WennSie einen falschenCodeeingegeben
haben, blinkt die LED Anzeige für 3 Sekunden und geht danach aus. Sie müssen mit
Schritt2fortfahren.
5. Zeigen Sie mit der Fernbedienung in Richtung Ihres Fernsehers und drücken Sie die
POWER (2)Taste. Das Gerätsollteabschalten.PrüfenSieandereFunktionen(z.B. beim
Videorecorder Vor- oder Rücklauf etc.). Wenn einigeAnwendungen nicht funktionieren
bedeutet das, dass der eingegebene Code nicht richtig ist. In diesem Fall müssen Sie
den oben genannten Vorgang mit dem nächsten Ihrer Marke entsprechenden Code
wiederholen.
6. WiederholenSiedenVorgang für andere Geräte, die Sie fernsteuern möchten (TV,VCR,
SAT, DVD, CBL und CD )
6) Manuelle Code Suche
WennIhrGerät(TV, SATetc.)nichtreagiert, probierenSiedieanderen CodesfürIhreMarke.
Wenn es immer noch nicht reagiert, versuchen Sie es mit der Code Such Methode.
Anmerkung:da Sie jedesGerät(TV,DVD,SATusw.) denTastenVCR,SAT, DVD, CBL oder
CD zuordnen können, müssen Sie zuerst irgendeinen 3-Ziffer-Code für dieArt des Geräts
eingeben, das Sie steuern möchten (aus dem Code-Buch), z. B.: Wenn Sie einen
Satellitenempfänger(SAT)mitderCBL-Tasteprogrammierenwollen,sogebenSieirgendeinen
SAT-CodeausdemCode-BucheinundgehendanninfolgendenSchrittenvor:
1. Vergewissern Sie sich, dass Ihr Gerät eingeschalten ist. Falls nicht, schalten Sie es ein.
2. Halten Sie die Setup (4) Taste gedrückt bis die LED Anzeige permanent aufleuchtet.
Lassen Sie die Taste los.
3. Drücken Sie die Modus Taste (5), die dem Gerät entspricht, das Sie bedienen wollen
(z.B. TV).
4. DrückenSieChannel + (14) so oft bisderKanalwechselt. Wenn Sie denrichtigenCode
verpassendrücken Sie Channel - (14) um zum richtigen Codezurückzugehen.
5. Wenn das Gerät, das Sie kontrollieren wollen reagiert, drücken Sie ENT (11) um den
Code zu bestätigen. Das ist alles.
6. Wenndie8-in-1-Universal-FernbedienungvorherdenTV-LautstärkepegelimSAT-Modus
gesteuerthat,sosteuertsiejetzt den Pegel des Satelliten-Decodierers. Wennsievorher
den Pegel des Satelliten-Decodierers gesteuert hat, so steuert sie jetzt den TV-
Lautstärkepegel.
5) Programmieren Ihres TV, VCR, SAT, DVD, CBL und CD
Hinweis:Sie können dem VCR,SAT,CD,DVDundCBLModus KeyaucheinanderesGerät
zuordnen (z.B. SAT): geben Sie dazu den entsprechenden 3-stelligen Code für das Gerät
(SiefindendiesenimCode Buch). Gehen Sie dabei wienachstehendbeschriebenvor.
1. Vergewissern Sie sich, dass das Gerät eingeschalten ist. (z.B. TV)
2. Halten Sie die Setup (4) Taste gedrückt bis die LED Anzeige permanent aufleuchtet.
Lassen Sie die Setup (4) Taste los.
3. DrückenSiedieModusTasteaufdemGerät,dasSiekontrollierenwollen und lassen Sie

20
anhaltenund dengefundenenCodespeichern.
Anmerkung:da Sie jedesGerät(TV,DVD,SATusw.) denTastenVCR,SAT, DVD, CBL oder
CD zuordnen können, müssen Sie zuerst irgendeinen 3-Ziffer-Code für die Art des Geräts
eingeben, das Sie steuern möchten (aus dem Code-Buch), z. B.: Wenn Sie einen
Satellitenempfänger(SAT)mitderCBL-Tasteprogrammierenwollen,sogebenSieirgendeinen
SAT-CodeausdemCode-BucheinundgehendanninfolgendenSchrittenvor:
1. SchaltenSie das zubedienende Gerät an.
2. HaltenSie SETUP (4) gedrücktbis dieLEDAnzeige permanent aufleuchtet.Lassen Sie
die Setup Taste los.
3. Drücken Sie die Mode Taste (5) (TV, VCR, etc.) die dem Gerät entspricht, das Sie
bedienenmöchten.Die LEDAnzeige blinkteinmal.
4. Drücken Sie CHANNEL+ (14). Nach ein paar Sekunden beginnt die Fernbedienung die
Code Liste zu durchsuchen (schnelle Suche, 1 Code pro Sekunde). Wenn das Gerät
reagiert,können SieCHANNEL+ (14)einzweitesMal drücken,umzurlangsamen Suche
umzuschalten(1Codein 3Sekunden).SiekönnenzurückschaltenindemSieCHANNEL-
(14)drücken(SiekönnenvorwärtsschaltenindemSieCHANNEL+ (14) drücken,fallsSie
zu weit zurück geschaltet haben). Sobald das Gerät wieder antwortet, drücken Sie ENT
(11),umdengefundenenCodezuspeichern.
8) Identifizierung der gefundenen Codes durch den Suchvorgang
1. HaltenSie SETUP (4) gedrücktbis dieLEDAnzeige permanent aufleuchtet.Lassen Sie
die Setup Taste los.
2. DrückenSiedieMode Taste(5) (TV,VCR,DVD,SAT,CD,CBL)diedemGerätentspricht,
das Sie identifizieren möchten. Die LEDAnzeige blinkt einmal
3. Drücken Sie noch einmal Setup taste (4). Die LEDAnzeige blinkt einmal.
4. Umdie erste Zahl zuidentifizierendrückenSiejedeTasteaufdemNummernfeld(10) von
0 - 9 bis die LEDAnzeige blinkt. Die gedrückte Nummer entspricht der ersten Zahl des
Codes.
5. Drücken Sie jede Taste auf dem Nummernfeld von 0 - 9 wie oben beschrieben, um die
zweiteZahlzufinden.
6. Drücken Sie jede Taste auf dem Nummernfeld von 0 - 9 wie oben beschrieben, um die
dritte Zahl zu finden. Wenn die dritte Zahl gefunden wurde, hört die LEDAnzeige auf zu
blinken.Vergessen Sienicht, den Code aufdas Etikett des Batteriefacheszu schreiben.
Achtung:FallsIhrGerätkeine Channel +Tastehat,könnenSiePLAY(21) (VCR/DVD)oder
diePOWER (2)Tasteverwenden.
Die Suche beginnt nach dem zuletzt registrierten Code. Wenn das 030 war, beginnt die
Suche mit 031 bis zum letzten möglichen Code und danach von 000 bis 029.
Achtung:WenneinigeFunktionenanIhremGerätnichtreagieren,müssenSieeinenanderen
Codefür IhreMarkefinden
7) Automatische Code Suche (autosearch):
Wenn Sie nach einem unbekannten Code suchen, können Sie die Liste automatisch
durchsuchenlassen(AutoSearch).WennIhrGerätantwortet,könnenSiedenSuchprozess
Table of contents
Languages:
Other X10 Universal Remote manuals

X10
X10 UR74A User manual

X10
X10 SUPERREMOTE UR24A User manual

X10
X10 SUPERREMOTE UR24A User manual

X10
X10 IconRemote IR34A User manual

X10
X10 Wireless MouseRemote UR86A User manual

X10
X10 IconRemote IR19A User manual

X10
X10 IconRemote IR18A User manual

X10
X10 TV Buddy UR41A User manual

X10
X10 UR74A Administrator guide

X10
X10 IconRemote IR32A User manual