Medical Developments International OXI-dive 1 User manual
OXI-dive™1
CLOSED CIRCUIT OXYGEN
RESUSC
IT
ATOR
FOR
DIVERS
OPERATING
MANUAL
COPYRIGHT RESERVED 2009
No part of this manual may be reproduced in any form without the written permission of Medical Developments International
Limited
™OXI-Dive is a trademark of Medical Developments International Limited, Australia
Revision 4 (Jan 2014)

Operating Manual OXI-diveTM1Page 2 of 19
This manual includes the features, operation and maintenance of the OXI- diveTM1 oxygen
resuscitator. It is not a training manual for resuscitation and/or oxygen administration and must
not be used as a substitute for such training. Only operators who have been trained in the use of
oxygen should use the OXI-diveTM1.
Medical Developments International Limited makes no claim that the information, practices
and procedures given in this manual will warrant correct or adequate treatment.
See Appendix A for brief descriptions of the OXI-dive™2 and OXI-dive™3, which are
alternative models.

Operating Manual OXI-diveTM1Page 3 of 19
TABLE OF
C
ONTENTS
1 Introduction.............................................................................................................4
2 Components of the OXI-dive™1 .............................................................................5
3 Description of Major Components...........................................................................6
4 Using the OXI-diveTM1..............................................................................................9
5 Operation of the Closed Circuit Breathing System.................................................10
6Cleaning and Decontamination.............................................................................13
7Storage and Servicing...........................................................................................13
8Dimensions ...........................................................................................................13
9Spare Parts...........................................................................................................14
10 References………………………………………………………………………………15
11 Warranty...............................................................................................................16
A
PPENDICES
AOther OXI-diveTM Models....................................................................................... 17
B‘Handicant’ (Optional)............................................................................................18
CMTV-100 Manually Triggered Ventilator (Optional)...............................................19

Operating Manual OXI-diveTM1Page 4 of 19
1 Introduction
It is important to administer high oxygen concentrations to divers with suspected
decompression illness as soon as possible. Oxygen accelerates the removal of excess
nitrogen from the body and increases the delivery of oxygen to damaged cells. In a
minor injury this may be all that is required. However if the patient is to be transported
to a recompression facility, oxygen administration must continue during transport to
improve the chances of a complete recovery.
During breathing (in an adult) approximately about 250 ml of oxygen is metabolised per
minute and 200 ml of carbon dioxide is produced. Most resuscitators delivering
100% oxygen use high flow rates of oxygen (8-15 L/min). The excess oxygen (i.e. the
amount in excess of ¼ litre per minute) is exhaled together with the carbon dioxide. This
wasted oxygen dramatically reduces the life of the oxygen cylinder. In the OXI- diveTM1
the recommended flow rate is 0.5-2 L/min so that the amount of wasted oxygen is
reduced significantly. An absorbent (soda lime) in the KAB™absorber removes the
carbon dioxide in the exhaled gas. This is known as a ‘closed circuit’ breathing system
and is similar to the principle of ventilation used during anaesthesia. Also the gas in
the closed circuit is warmed and humidified which in addition to the important medical
advantages, is more comfortable to breathe.
The duration of oxygen supply is a fundamental concern in diving accidents, many of
which may occur several hours from a medical facility. Divers should ensure that there
is sufficient oxygen available to allow an injured diver to breathe oxygen from the site
of a potential accident until reaching an appropriate medical facility.
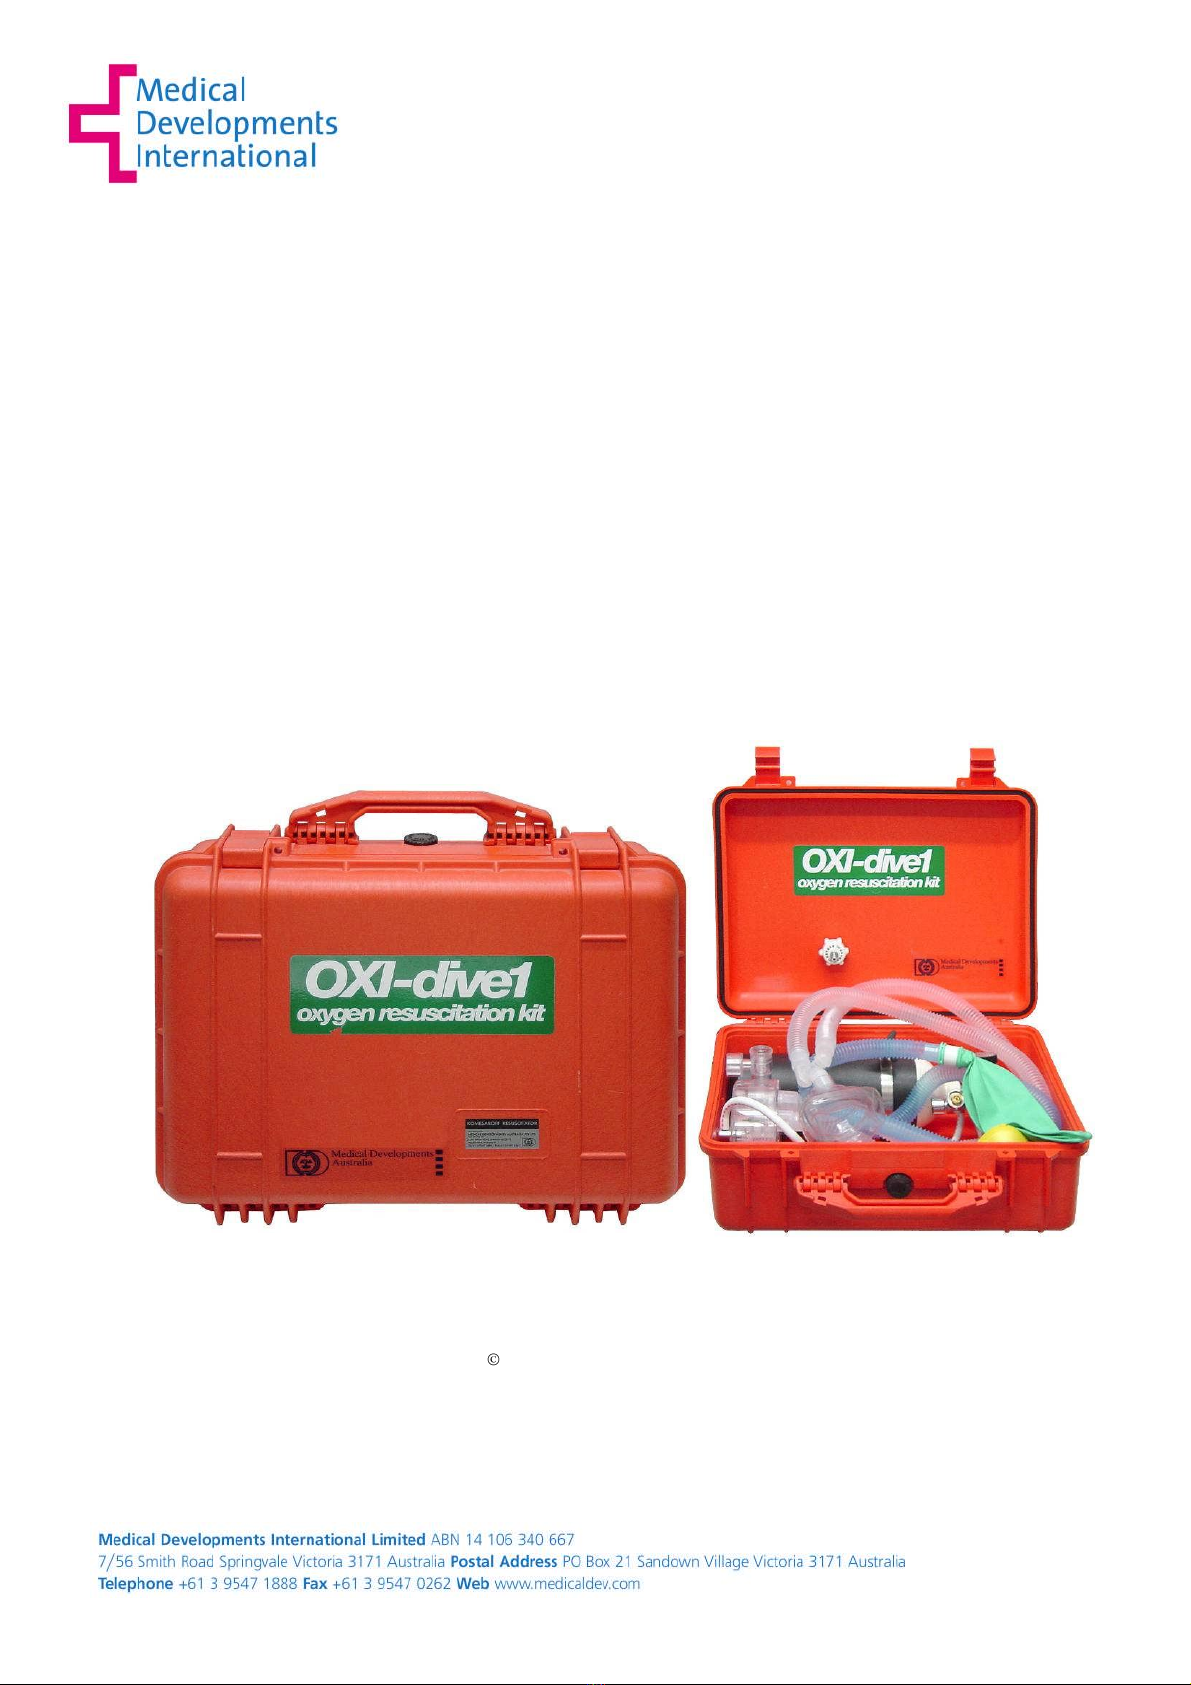
The OXI-diveTM1 is a portable, self-contained closed circuit resuscitator that provides
facilities for simultaneous resuscitation and oxygen therapy. In the hands of a skilled
operator, the OXI-diveTM1, with one 320 litre cylinder, is capable of delivering inspired
oxygen concentrations between 90-100% to a breathing or non-breathing casualty for
2 ½ to 3 hours. This compares with 25–30 minutes for high flow systems.
Larger boats or permanent sites may have the potential for storing large oxygen
cylinders (capacity 3000-7000 litres). The OXI-diveTM1 includes an oxygen hose-line
assembly for connection to a regulator fitted to the larger cylinder. In other
circumstances it may be preferable to have a number of smaller cylinders rather than a
single large cylinder. Small cylinders are also required for the immediate supply of
oxygen and for transportation of the casualty to the hospital or recompression
facility.
The Handicant™(optional) is a decanting tool that enables the small cylinder to be
refilled from a large cylinder on site (Refer to Appendix B).
The OXI-diveTM1 also includes a non-rebreathing therapy mask with a reservoir bag for
use in a breathing casualty and the CPR-PRO™ resuscitation mask for use in non-
breathing patients.
The MTV-100 Manually Triggered Ventilator is an optional extra (See Appendix C).

Operating Manual OXI-diveTM1Page 5 of 19
2 Components of the OXI-dive™1
Pelican case #1520, optional #1600 for full size C cylinders
KDK85 Autovalve™: combined regulator and flowmeter (range 0.5-8 L/min)
with an ‘Oxygen Flush’ at all settings. Incorporates three self-sealing valves
8 L/min oxygen flow restrictor and handwheel assembly
2 m white oxygen tubing fitted with an oxygen handwheel at each end
KAB™carbon dioxide absorber. Disposable single patient use pre-filled with
CO2 absorber
Universal twin hose, single patient use breathing circuit c/w 2 L latex-free
breathing bag and size 5 mask
CPR-PRO™ resuscitation mask with oxygen inlet and 1-way valve. Single
patient use
Non-rebreathing therapy mask with safety vent, reservoir bag and oxygen
tubing. Single patient use
MTV-100 manually triggered ventilator c/w 1.2 m white self-store oxygen hose
and a diameter indexed oxygen handwheel (optional)
Handicant decanting tool (optional)
KDK™ regulator to fit to a large supply cylinder (optional)
Operating manual
Size 3 disposable mask (optional)
OXI-Vac, Venturi suction device (optional)
Guedel airways, set of 4
Does not include oxygen cylinder.

Operating Manual OXI-diveTM1Page 6 of 19
3 Description of Major Components
Oxygen Hoseline
The colour coded white oxygen hoseline is fitted with a diameter indexed oxygen
handwheel at each end. One handwheel is attached to a regulator attached to an external
oxygen supply cylinder if available. The other handwheel is fitted to a self- seal valve of
the KDK85 Autovalve. This is used to provide oxygen from an outside source, thus
conserving the contents of oxygen cylinder in the OXI-diveTM1.
KDK85 Autovalve™
The KDK85 Autovalve is a combined regulator and flowmeter, manufactured by Medical
Developments International Limited. The regulator reduces the cylinder pressure to
approximately 400 kPa and the flowmeter has adjustable oxygen flow rate settings between
0.5 to 8 L/min. An Oxygen Flush valve is incorporated; when depressed it provides an
instantaneous rapid flow of oxygen (in excess of 40 L/min) at all settings.
The KDK85 Autovalve incorporates three
diameter indexed self-sealing valves that can
be used as an inlet for an external oxygen
supply, or as outlets for additional delivery
devices. For example, the 8 L/min flow
restrictor and handwheel assembly can be
attached and used to connect oxygen to
the CPR-PRO resuscitation mask or the non-
rebreathing therapy mask with a safety vent.
The MTV-100/Manually Triggered
Ventilator (optional) is also fitted to a self
seal valve.
The cylinder contents gauge has a range from 0 to 30,000 kPa and is clearly marked
1/4, 1/2, 3/4 and FULL. The scale at the lower and upper ends of the operating range is
coloured red. The cylinder valve connects to the pin-index yoke of the KDK85
Autovalve (Australian Standard AS 2473 Valves for compressed gas cylinders).
Closed Circuit ‘Softbag’ Resuscitation System
The Closed Circuit ‘Softbag’Resuscitation System consists of the KAB circular carbon
dioxide absorber, the Universal Twin Hose lightweight single-patient use breathing circuit,
an elbow fitting which attaches to the facemask and a 2 litre latex- free breathing bag with
or without an extension hose.
Supplemental oxygen enters the breathing circuit through the ’INHALE’ side of the KAB™
CO2absorber. Two, one-way silicone valves ensure that the fresh gas flows into the
inspiratory limb of the twin hose and the expired gas flows out through the expiratory limb.
The expired gas continues through the carbon dioxide absorbent in the right side of the
KAB™absorber into the rebreathing bag which inflates. During inspiration the gas passes
from the breathing bag, through the remainder of the absorbent in the left side of the
KAB absorber, to the inspiratory limb of the breathing circuit.
The movement of the breathing bag reflects the patient’s breathing and provides the
operator with an immediate diagnosis of the respiratory pattern, safely and effectively.

Operating Manual OXI-diveTM1Page 7 of 19
KAB Carbon Dioxide Absorber
The KAB c a rb o n d i o x i d e a b s o rb e r h a s design
registrations and patents. It is transparent and single patient
use only. Manufactured from tough medical grade
polycarbonate it is further strengthened by the circular
design. The integrated uni-directional silicone valves are
vertically orientated and large in diameter to reduce
resistance to breathing. The adjustable pressure limiting
(APL) exhaust valve is also an integral part of the absorber
and includes a 30 mm scavenging port. In accordance with
Australian and International Standards, the exhaust valve
CLOSES by turning clockwise. When OPEN (one turn only
anti-clockwise) the central spindle has free movement and
excess gases in the breathing circuit are automatically vented.
In breathing casualties, with the APL (exhaust) valve open, the
spindle automatically maintains the volume of gas in the breathing
bag without adjustment at all flowrates (0.5-8 L/min).
The KAB carbon dioxide absorber holds 400 g of soda lime lasting in excess of 2½ hours.
The asymmetrical divider and the fluted openings in the grates minimise 'channelling' to
increase the efficiency of absorption. This can be verified by the even change of colour of
the indicator in the soda lime during use. The silicone valves are arranged so that during
expiration the gas flow is directed to the rebreathing bag through that part of the soda lime
in the right side of the absorber. On inspiration the gas is drawn through the remainder of
the soda lime producing an efficient DOUBLE absorption effect.
During operation the soda lime becomes warm and the indicator gradually changes colour.
The soda lime will change from Pink to White as it becomes exhausted.
The ‘INHALE’ and ‘EXHALE’ ports of the KAB absorber have 22 mm male tapers for
attachment of the breathing circuit. The breathing bag mount is a 22 mm female port* to
conform to the Australian/New Zealand Standard (AS/NZS 2496). A 22 mm male/male
elbow fitting is provided for connection to the rebreathing bag either directly or via an
extension hose.
*NOTE: In the corresponding International Standard the breathing bag mount is a
22 mm male port. In this case the 22/22mm male elbow provided should be permanently
fitted to the breathing bag port of the KAB™ absorber.
WARNING: Do not force the control knob of the APL (exhaust valve) in either
direction. The control knob rotates smoothly and easily.
KAB

Operating Manual OXI-diveTM1Page 8 of 19
Self-Sealing Valves
Three self-sealing oxygen valves are activated automatically by screwing the white oxygen
handwheels into place.
1. Oxygen (400 kPa) from a wall outlet or a regulator fitted to a large cylinder, can
be introduced into the KDK85 Autovalve through the self-sealing valve by the
colour coded white hose line with diameter indexed oxygen handwheels at each end
(supplied). The oxygen cylinder in the OXI-diveTM1 must be turned off.
2. The nipple restrictor handwheel (marked with an ‘8’) when attached to a self
sealing valve provides 8 L/min of oxygen for use with an extra casualty, if required.
The therapy tubing is connected to the non-rebreathing therapy mask or the CPR-
PRO Resuscitation Mask.
3. Alternatively the self sealed outlet can be used for attachment of the optional
MTV-100/Manually Triggered Ventilator.
Pelican Case
The Pelican Case is designed to be completely airtight and waterproof if it is closed
properly and the dial is tightened#. If completely closed, no damage should occur to the
enclosed equipment if the case becomes submerged in water. However, individual
components may be damaged if submerged while not protected by the case. In this
event, the exposed parts should be sent to an approved service centre for inspection,
cleaning and servicing if required.
#NOTE: To reopen the case, loosen the dial.

Operating Manual OXI-diveTM1Page 9 of 19
4 Using the OXI-diveTM1
Precautions When Using Oxygen Equipment
Handle with care. Use this device in a responsible manner.
Smoking or other sources of ignition should not be permitted in the vicinity of this
device.
Do not drop on hard surfaces.
Avoid damaging the cylinder valve. If it is suspected that the valve is damaged, the
device must be quarantined and specialist advice sought.
Avoid moisture entering the cylinder by ensuring there is some residual
pressure in the cylinder at all times when possible.
Do not tamper with the valve assembly. The cylinder and valve assembly shall be
returned to the manufacturer for service or repairs.
Avoid contact with sources of heat. Cylinders shall never be exposed to
sources of heat where the cylinder temperature could reach 65 °C.
Where possible store cylinders away from solar and thermal radiation.
If a cylinder is involved in a fire, warn all persons in the vicinity of the cylinder, of
the danger of explosion. Once the fire danger is removed, refer to a certified gas
cylinder test station.
Never expose cylinder and valve to aggressive chemical or industrial
environments that may affect the integrity of the cylinder.
If the cylinder and valve requires cleaning due to contact with flammable or
non-flammable contaminants, refer the cylinder to a certified gas cylinder test
station for cleaning and inspection.
Check the Oxygen Supply
Ensure the KDK85 Autovalve fitted to the oxygen cylinder is secure. Tighten the
stirrup screw if necessary.
Rotate the variable flow control of the KDK85 Autovalve to the 0.5 L/min
setting (clockwise).
Slowly turn the cylinder valve ON at least one full turn (anti clockwise).
Check the contents gauge to determine how much oxygen is available.
If there is a leak, check that the sealing washer (‘Bodok’ seal) is in
place.
Check the Breathing Circuit
Unwind the breathing hoses and free the breathing bag.
Tighten any loose connections with a twisting motion.
Slowly turn the oxygen cylinder valve ON one full turn (anti-clockwise) Check the
contents gauge to determine how much oxygen is available.
To check the breathing circuit, close the APL exhaust valve (clockwise), place a
thumb over the Y-piece outlet and depress the Oxygen Flush cap to rapidly fill
breathing bag. Squeeze the breathing bag firmly to check for leaks and rectify if
necessary.

Operating Manual OXI-diveTM1Page 10 of 19
5 Operation of the Closed Circuit Breathing System
1. Set the KDK85 Autovalve to 2 L/min.
2. OPEN the APL (exhaust valve) by gently rotating the knob one (1) TURN
ONLY in an ANTICLOCKWISE direction.
3. Position the size 5 face mask on the casualty's face with the narrow part
between the casualty's eyes.
4. Depress the Oxygen Flush cap of the KDK85 Autovalve to rapidly fill the
breathing bag until it is about 7/8 full and then release.
5. Observe the breathing bag:
IF THE BREATHING BAG RHYTHMICALLY FILLS AND EMPTIES the
casualty is breathing. Maintain adequate head tilt and jaw support, monitor the
casualty and continue to observe the breathing bag.
IF THE BREATHING BAG DOES NOT MOVE RHYTHMICALLY, close the APL
exhaust valve one turn CLOCKWISE and squeeze the breathing bag. There are only three
possibilities, all of which can be immediately diagnosed:
(i) IF THE BREATHING BAG WILL NOT COMPRESS easily, the casualty's
airway is obstructed (partially or completely).
Check head tilt and jaw support.
Check airway is clear.
Reposition the face mask, depress the cap to fill the bag, and try again:
(ii) IF the breathing bag collapses, there is a leak, probably due to an inadequate
seal of the face mask. Reposition the mask and push the Oxygen Bypass cap
to refill the breathing bag. If necessary, increase the flow rate to compensate
for leaks.
(iii) If the breathing bag compresses readily and refills on release of pressure, the
casualty is not breathing. Ventilate the casualty by compressing the breathing
bag at the appropriate rate, just strongly enough until the chest starts to rise.
Management of A Spontaneously Breathing Casualty
To provide the highest oxygen concentration (90-100 %) to a breathing casualty, the
closed circuit should be used whenever possible.
a) Using the Closed Circuit
1. Ensure that the casualty is breathing.
2. Explain to the casualty what is involved during the administration of
Oxygen.
3. If practicable turn an unconscious, breathing patient into the left
lateral position. However take special care if a spinal injury is
suspected.
4. Ensure the face mask is positioned correctly and that a good mask seal
is obtained.
5. Open the APL exhaust valve (1 full turn anti-clockwise).
6. Set the flow rate to 8 L/min. Depress the Oxygen Flush to rapidly fill
the breathing bag.
7. After 5 minutes, reduce the flow rate to 2 L/min as long as the bag
remains adequately inflated. For a diver with suspected

Operating Manual OXI-diveTM1Page 11 of 19
decompression illness, the system should be flushed every 10-15 minutes by
emptying the bag and then refilling by depressing the Oxygen Flush.
8. For a casualty who may have inhaled toxic gas, keep the flow rate at 8 L/min
to assist in the excretion of toxic gas from the lungs and leave the APL exhaust
valve open throughout the resuscitation.
9. Ask a conscious casualty to breathe normally. Reassure further and advise that
the mask may make them feel claustrophobic, but this is normal.
10. Monitor the breathing by observing movements of the breathing bag.
11. Adjust the flow rate as necessary to compensate for leaks. The APL exhaust
valve in the open position automatically vents excess gas.
12. Carefully monitor the casualty’s condition and never leave the casualty
unattended.
13. Carefully monitor the oxygen supply and remove the mask prior to the supply
becoming exhausted.
b) Using the Non-rebreathing therapy mask with the reservoir bag
Provides about 50 % oxygen. Used as an alternative to the closed circuit or if there
is a second breathing casualty requiring oxygen therapy (in this case connect the
oxygen tubing from the non-rebreathing mask to the 8 L/min nipple restrictor
assembly). The mask incorporates a safety vent which enables the patient to
entrain air from the atmosphere if the reservoir bag empties during inspiration.
1. Explain and reassure the patient what is involved during the
administration of oxygen.
2. If practicable turn an unconscious, breathing patient into the left lateral
position. Take special care if a spinal injury is suspected.
3. Turn the oxygen cylinder valve ON (anti-clockwise).
4. Ensure the oxygen tubing is not kinked and attach it firmly to the flow outlet
on the KDK85 Autovalve. Set the flowrate to 8 L/min and press the Oxygen
Flush to rapidly fill the reservoir bag.
5. Position the non-rebreathing therapy mask over the mouth and nose and
mould the metal band over the bridge of the nose to achieve a better seal and
comfortable position. Place the supporting elastic band around the patient’s head
above the ears and tighten until comfortable and secure. Observe the reservoir
bag to ensure it remains inflated. However, if it does deflate, the patient will
be able to entrain air through the safety vent.
6. Increase or decrease the oxygen flow to ensure the reservoir bag remains
adequately distended (i.e. it should not completely empty after breathing in)
7. Carefully monitor the patient’s condition: DO NOT leaves the patient
unattended.
8. Carefully monitor the oxygen supply. Replace the cylinder BEFORE it is
completelyexhausted.
Management of A Non-Breathing Casualty
o provide the highest oxygen concentration (90-100 %) to a non- breathing casualty, the
closed circuit should be used whenever possible. Clear the patient’s airway before
commencing resuscitation.

Operating Manual OXI-diveTM1Page 12 of 19
a) Using the Closed Circuit to ventilate a non-breathing casualty:
NOTE: Unless an operator is skilled, ventilating a non-breathing casualty may
require two operators - one to maintain the airway and mask seal, and the other to
compress the breathing bag.
1. If practicable turn an unconscious, breathing patient into the left lateral position.
Take special care if a spinal injury is suspected.
2. Ensure the mask is positioned correctly and that a good mask seal is obtained.
3. Gently close the APL exhaust valve (clockwise). DO NOT USE FORCE
4. Set the flow rate to 8 L/min. Depress the Oxygen Flush to rapidly fill the
breathing bag.
5. Ventilate the casualty by rhythmically compressing the breathing bag at an
appropriate rate, until the lower chest and abdomen starts to rise.
6. After 5 minutes, reduce the flow rate to 2 L/min as long as the breathing bag
remains adequately inflated. The flow rate is increased or decreased as necessary
to compensate for leaks or to avoid over inflating the bag. Intermittently open the
APL exhaust valve if the breathing bag overfills. For a diver with suspected
decompression illness, flush the system every 10-15 minutes by emptying the bag
and then refill by depressing the Oxygen Flush.
7. For a casualty who has inhaled a toxic gas, set the flow rate to 8 L/min to assist
in the excretion of the toxic gas from the lungs. Empty the breathing bag
intermittently to flush the toxic gas from the breathing circuit. A tube can be
attached to the 30 mm scavenging port to direct toxic gas away from the operator.
8. Tilt the casualty's head back and support the jaw to achieve an airway.
9. It is usually more effective for the rescuer to be positioned behind the casualty's
head and to open the airway using the jaw thrust/chin lift technique.
10. Carefully monitor the casualty's pulse, colour, and general condition.
11. Monitor the oxygen supply and be prepared to revert to expired air resuscitation if
the oxygen supply becomes exhausted.
b) Using the CPR-PRO Resuscitation Mask to ventilate a non-breathing casualty:
If an operator is having difficulty adequately ventilating a non-breathing casualty
using the closed circuit, the CPR-PRO resuscitation mask can be used to provide
mouth-to-mask ventilation with supplemental oxygen. This mask incorporates an
oxygen port and head strap.
1. If practicable turn the patient into the left lateral position. Take special care if a
spinal injury is suspected.
2. Ensure the green oxygen tubing is firmly attached to the CPR-PRO and to the flow
outlet on the KDK85 Autovalve. Set the flow rate to 8 L/min. (Alternatively use
the 8 L/min nipple restrictor assembly).
3. Position the CPR-PRO resuscitation mask over the mouth and nose, with the
narrow end over the nose, ensuring the best seal possible.
4. With the operator positioned behind the patient’s head, support the jaw and tilt
the head back firmly. If necessary open the airway using jaw thrust.
5. Using a ‘mouth to mask’ technique, ventilate the patient at an appropriate
rate.
6. When spontaneous breathing returns keep the CPR-PRO resuscitation
mask in position or change to the non-rebreathing therapy mask and reservoir bag.
7. Continue to monitor the casualty's condition.

Operating Manual OXI-diveTM1Page 13 of 19
6 Cleaning and Decontamination
Single Patient Use Items
Discard single patient use items into a sealed container suitable for the collection of
medical disposable items.
KDK™85 Autovalve
The body of the KDK85 Autovalve may be wiped clean with soap and water or
alcohol. The unit must not be immersed in liquid.
Pelican case
Most scuffs and stains can be removed with a non-abrasive household cleaner and a
sponge. Do not use anytype of brush that will scratch the surface.
7 Storage and Servicing
Ensure the cylinder is full and turned OFF. Check the KDK85 Autovalve is
depressurised; the gauge reading must be zero.
Store the OXI-diveTM1 equipment in a clean, dry and well-ventilated area, away
from sources of heat and combustible materials. Never allow oil, grease or
flammable substances to come into contact with the equipment.
Regularly check the contents of the cylinder and functioning of the equipment to
ensure proper performance. The frequency of testing should be established
according to usage, but at least every two (2) months.
An appropriately trained technician should inspect the OXI-diveTM1 oxygen
resuscitation unit at yearly intervals.
The KDK85 Autovalve should be serviced every three (3) years or more often if
frequently in use. Contact Medical Developments International Limited.
Ensure the cylinder is currently within the 10 year test period. The date is
stamped on the neck of the cylinder. The oxygen cylinder must only be refilled at
authorised filling stations. Cylinders must be visually examined regularly for signs of
damage and hydrostatically tested at least every 10 years.
Two spare sealing washers (‘Bodok’ seals) should be kept with the equipment.
Since the Pelican case is airtight, moisture can sometimes be trapped inside and
therefore it is recommended that silica-gel moisture absorbing packets are used to
remove moisture if stored for long periods. Check the ‘O’-ring grooves in the base
and lid of the Pelican case for debris. Ensure the large ‘O’-ring within the lid is free
of cuts, abrasions and debris.
8
Dimensions
Case Number #1520
Case Number #1600
W 490 mm
W 616 mm
H 385 mm D 195 mm
H 493 mm D 220 mm

Operating Manual OXI-diveTM1Page 14 of 19
9
Spare Parts
BG-PEL1520 Pelican case #1520
AV-7560-85A3 KDK85 Autovalve with 3 Self Seal Valves
CY-7590-03 320 Litre medical oxygen cylinder C/W Integrated Valve
ST-NDS/149 ‘Bodok’seal
CY-7580-35 Oxygen cylinder key wheel with chain
CI-KAB-NTH Disposable breathing circuit with size 5 mask
AC-7590-17 Non-rebreathing Therapy Mask c/w reservoir bag
AC-CPR-PRO CPR-PRO Resuscitation Mask
SS-7595-38 8 L/min oxygen handwheel/nipple restrictor assembly
RS-7515-MTV MTV-100 Manually Triggered Ventilator c/w Self Store Hose

Operating Manual OXI-diveTM1Page 15 of 19
10 References
1. AS 3848.1-1999 Australian Standard “Filling of portable gas cylinders Part 1: Decant
filling of medical air and oxygen into portable cylinders –Safe procedures.”
2. AS 2030.1-2009 Australian Standard “Gas cylinders –general requirements.”
3. AS 2473.1-2006 Australian Standard “Valves for compressed gas cylinders Part 1:
Specifications, type testing, and manufacturing tests and inspections.”
4. AS 2473.2-2007 Australian Standard “Valves for compressed gas cylinders Part 2: Outlet
connections (threaded) and stem (inlet) threads.”
5. AS 2473.3-2007 Australian Standard “Valves for compressed gas cylinders Part 3: Outlet
connections for medical gases (including pin-indexed yoke connections).”
6. AS 3840.1-1998 Australian Standard “Pressure regulators for use with medical gases
Part 1: Pressure regulators and pressure regulators with flow-metering devices.”
7. AS 2902-2005 Australian Standard “Medical gas systems –Low pressure flexible
hose assemblies.”
8. AS 2488-1995 “Resuscitators intended for use with humans.”

Operating Manual OXI-diveTM1Page 16 of 19
11 Warranty
Medical Developments International Limited (MDI) warrants to the original purchaser
that any part or parts, which on examination by MDI, prove to be defective
within 24 months from the date of delivery to the original purchaser, will be replaced
free of charge. This warranty does not include freight costs, consumables, plastic
and perishable items. MDI will not be responsible for labour or transportation
charges incidental to the replacement of any part or parts. This warranty is in lieu of
all other warranties, obligations or liabilities expressed or implied. MDI neither
assume nor authorize any other person to assume liability in connection with the sale.
This warranty will not apply to any product that has been subject to accident, abuse or
misuse. The warranty is not applicable when unauthorized repairs or modifications
have been attempted, or when entire units or parts are damaged by accident, misuse or
improper handling procedures
When returning the product under warranty, please include the following details:
Manufactured by: MEDICAL DEVELOPMENTS INTERNATIONAL LIMITED
ABN 14 106 340 667
Factory 7, 56 Smith Road Springvale, Victoria 3171 Australia
Tel: +61 3 9547 1888 Fax: +61 3 9547 0262
Web: www.medicaldev.com Email: mdi@medicaldev.com
Purchaser:...........................................................................................................................................................
Address:...............................................................................................................................................................
Post Code:...................... Country:................................................................................................
Model: .................... Serial No:........................ Date of Purchase: ........................................
Invoice No:........................... Supplier:.................................................................................
Operating Manual OXI-diveTM1Page 17 of 19
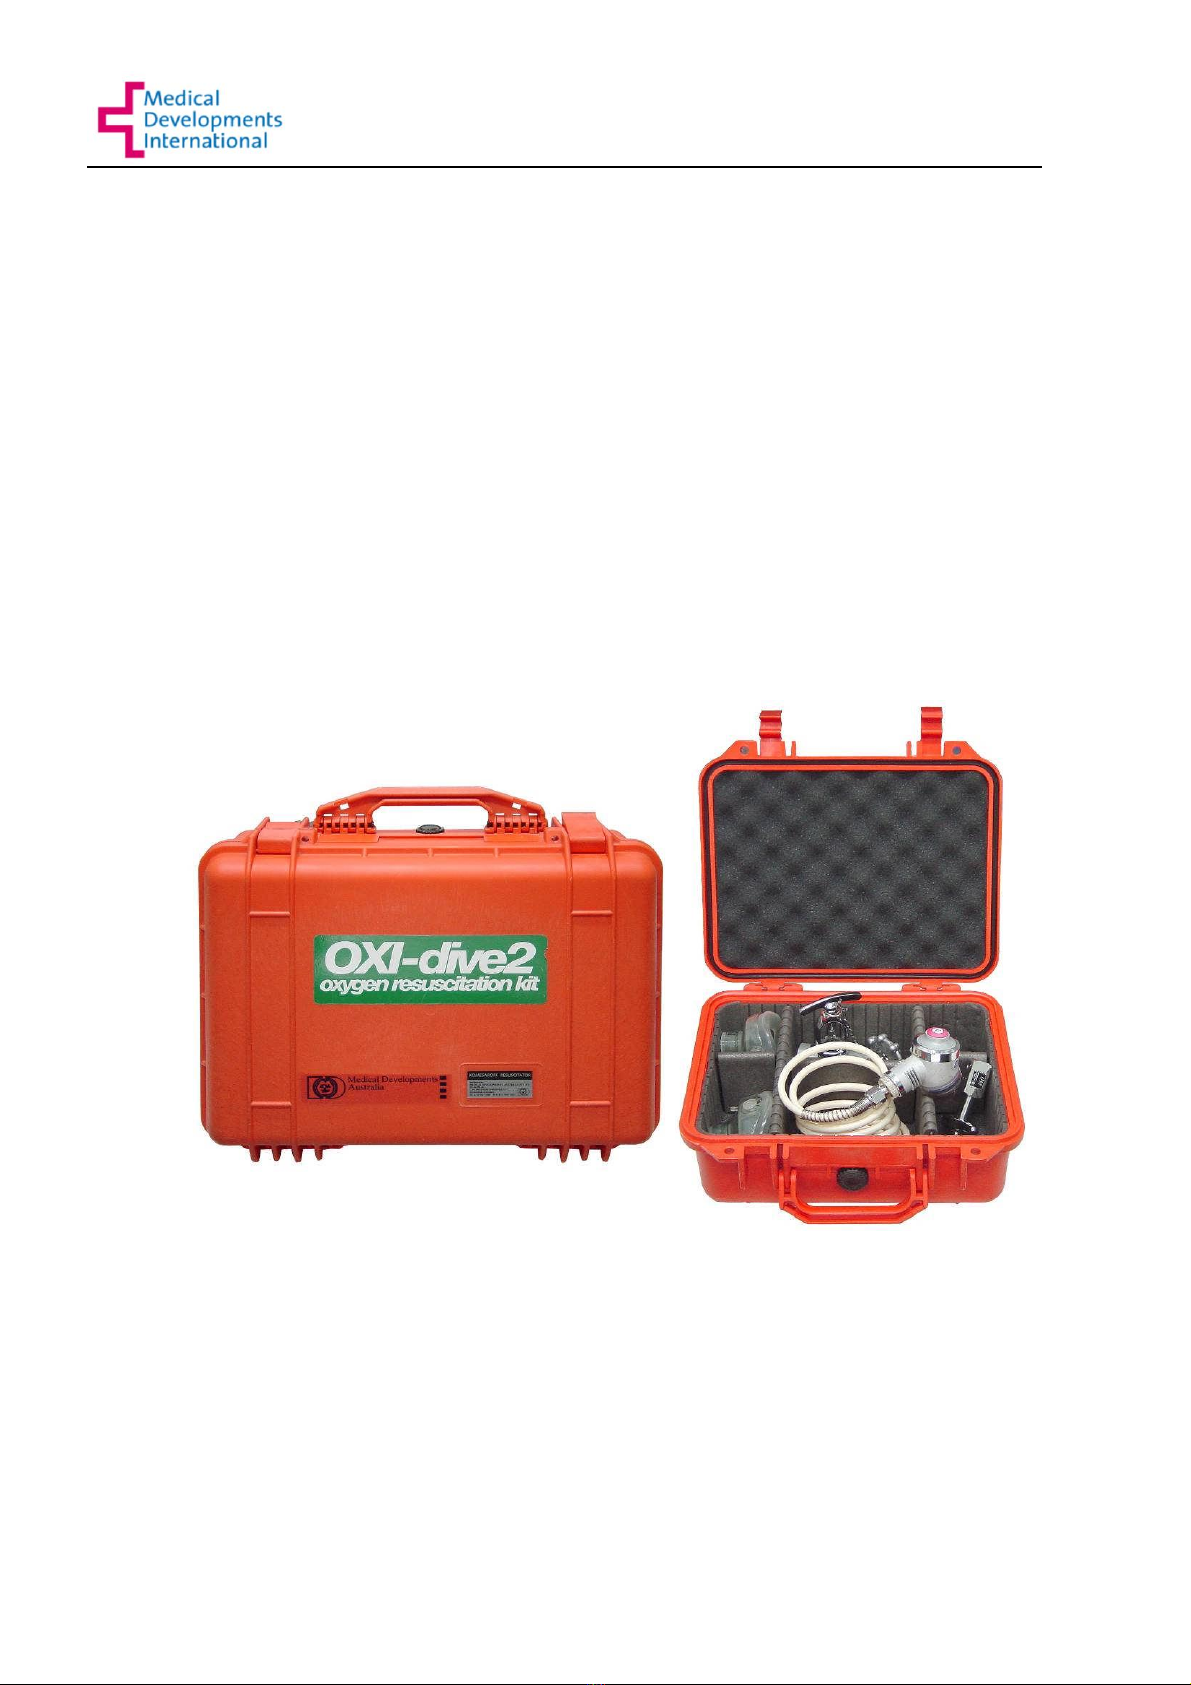
Other OXI-diveTM Models APPENDIX A
OXI-diveTM2: Incorporates the KDK150 Autovalve, the MTV-100/Manually
TriggeredVentilator, a small oxygen cylinder for the first 30-40 minutes
of oxygen administration and fittings to attach to an external oxygen
supply. Optional pin-indexed to bull-nose adapter (PIBN).
OXI-diveTM3: Compact unit with similar features to the OXI-dive 2 but without the
small oxygen cylinder. Operates from an external oxygen supply. The
PIBN adapter is included as standard equipment to connect either pin-
indexed small oxygen cylinders or large threaded oxygen cylinders.
Incorporates the MTV-100/Manually Triggered Ventilator and the LSP
regulator/flowmeter.
OXI-diveTM2
OXI-diveTM3
Operating Manual OXI-diveTM1Page 18 of 19
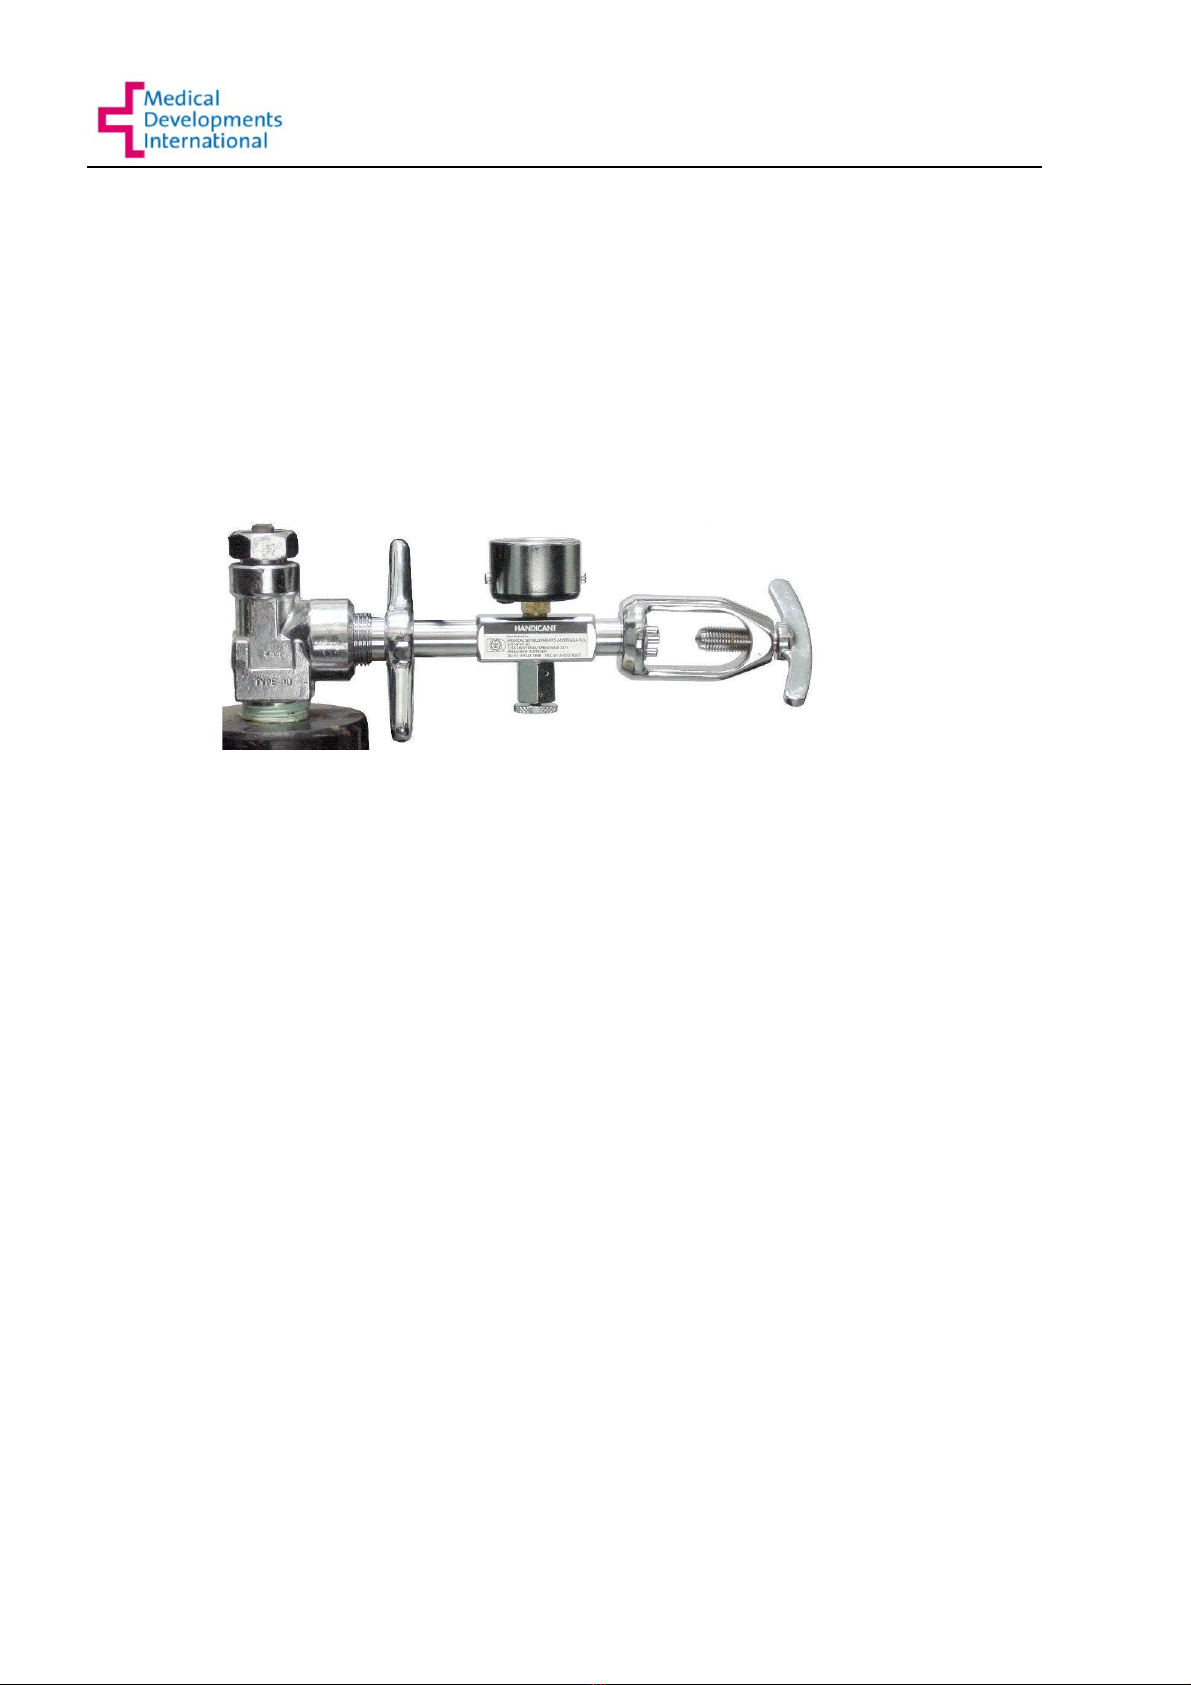
APPENDIX B
‘Handicant’ (Optional)
Pin Indexed Bull Nose Adaptor (PIBN)
OPERATING INSTRUCTIONS
WARNING: Oxygen vigorously supports combustion. Keep clear of fl a mma ble
materials, particularly oil or grease. No smoking. Keep away from sources of
ignition. Use in well-ventilated area. Cylinder contains high pressure. Open valve
slowly. Use only with equipment designed for oxygen service. Do not use any of this
equipment for purposes other than specified. Store all equipment in clean well-
ventilatedarea.
1. Supply Cylinder:
Ensure the supply cylinder is labelled 'medical oxygen' and is colour-coded with white shoulders^.
Check the cylinder valve for any sign of dirt or grease or damage. If in doubt refer to supplier.
^Note: oxygen cylinder colours vary in different countries
2. Cylinder to be Filled:
Do not fill any other cylinder than that owned by the user. Check the cylinder is not corroded nor
has any dints or cuts, or any sign of fire exposure. Ensure that it is labelled "Medical Oxygen"
and is colour-coded for oxygen. Check that 10 years have not elapsed since last test date, which is
stamped on the cylinder shoulder. Check the cylinder valve is clean from oil or grease and has no signs
of damage. If any of these conditions are not satisfied return the cylinder to the nearest Medical Gas
Test Station for inspection.
3. Filling
a. Fit "Handicant" to the supply cylinder and firmly hand tighten the white handwheel. Close the
pressure release valve of the "Handicant".
b. Fit small cylinder to "Handicant". Ensure the pins on the stirrup locate accurately and tighten
the T-screw.
c. Manually support the cylinder throughout the operation.
d. Slowly open the valve of the cylinder to be filled.
e. Slowly open valve of supply cylinder. Filling will take up to 3 or 4 minutes. Chattering may
occur and indicates filling is almost complete. Filling is complete when pressure on gauge stops
rising.
f. Close supply cylinder valve. Check pressure on gauge. If the small cylinder is below 7000 kPa
pressure it should be topped up from a fresh supply cylinder. Repeat steps 3a to e to top up
small cylinder.
g. Close small cylinder valve, open the pressure release valve of the "Handicant” and disconnect
the small cylinder from "Handicant".
h. Listen near the small cylinder valve outlet to detect any leakage.
i. Remove "Handicant" from supply cylinder.
4 After Use
Ensure the "Handicant" is kept in a clean storage area.

Operating Manual OXI-diveTM1Page 19 of 19
APPENDIX C
MTV-100 Manually Triggered Ventilator (Optional)
The MTV-100 Manually Triggered Ventilator is an oxygen-powered breathing device which
complies with the Australian Standard for ‘Resuscitators intended for use with humans’ AS 2488-
1995. It is designed to deliver 100% oxygen to a breathing or non- breathing casualty. It is fitted
with a self-store hose assembly that is connected to the self- seal valve of the KDK85 Autovalve
by the diameter-indexed oxygen handwheel. The appropriate size facemask (provided) is attached
directly to the MTV (alternatively, the CPR-PRO Resuscitation Mask can be attached to the
MTV). With a good face seal, up to 100 % inspired oxygen is provided to a breathing or non-
breathing patient.
In non-breathing patients, hold the MTV-100 Manually Triggered Ventilator and face mask in
place and depress the manual control button until the patient’s chest gently rises. Then release the
button and allow the patient to exhale. Repeat this cycle about 12-14 times per minute for an adult
and 20 times per minute for a child. If the patient begins to breathe spontaneously and triggers the
MTV, maintain the mask seal and the flow of oxygen, but do not depress the manual control
button. The patient will continue to receive up to 100% oxygen.
Note: If the airway is obstructed the MTV will stall. Clear the patient’s airway and retry.
In breathing patients, inspiration triggers the MTV which provides flow rates up to
100 L/min. However the patient must be breathing sufficiently (as with any demand valve), to
create a small negative inhalation pressure (-1 to -2.5 cm H2O) to initiate oxygen flow. If the
patient is breathing too rapidly or weakly to open the valve effectively, the operator must
manually operate the MTV-100.
Table of contents


