MICO Raymor Essentials 736548 User manual

350mm Laundry Cabinet Installation Manual
Product Code: 736548 (RE350LCBNTS1WH)
All dimensions in mm with 1-2mm tolerance. Actual unit may vary slightly from image pictured

2
Product Overview
Content of Packaging
1 x Laundry Tub (incl. waste system, plug & tap hole cover)
1 x Installation Kit (incl. 4 adjustable feet and 2 spare door hinges)
Pre-Installation
Important
•Please read the entire instructions before installing the laundry tub.
•Ensure the household pipes are thoroughly flushed to remove debris before
connecting your laundry tub to the pipe works. To prevent foreign particles
damaging the ceramic cartridge an ‘in-line’ filter is recommended to be
installed prior to the mixer.
Regulation Compliance
Comply with current Drainage and Plumbing Regulations as required by your local
authority. Sanitary plumbing shall only be carried out by a Registered Plumber. All
plumbing work must be done in accordance with local and national building and
plumbing codes as applicable. All electrical work must be done in accordance with
local and national electrical codes as applicable. In some instances this product may
need to be earthed.
3
Determine Site
Determine the most suitable position for the laundry tub. It may be used either to the
left or right of the washing machine. Allow 10mm clearance between the units. Mark
the position on the floor as reference.
Important Safety Information
•This laundry tub is not intended for use by young children or infirm persons
without supervision. Young children should be supervised to ensure that they
do not play with the unit.
•DO NOT use abrasive household cleaner.
Installing Laundry Tub
Before securing the unit to the wall, please check if the door or washing machine
waste inlet needs to be changed from right to left. If so, please refer to information on
page 5 of this manual.
1. Fit four adjustable feet supplied to the bottom of the cabinet and adjust to
align with benchtop or washing machine height. Use the lock nut to secure
feet into required position. Tilt laundry tub slightly to assist with access.
Check the top of the laundry tub with a spirit level to ensure that it is level and
check that the cabinet does not “rock” confirm that the door operates correctly.
2. Line up the laundry tub to the installation and confirm enough room, if
necessary remove the skirting board at the require distance 560 mm this will
allow the unit to sit flush against the wall. (Check with your local council for
building regulations). Remove the laundry tub away from the wall.
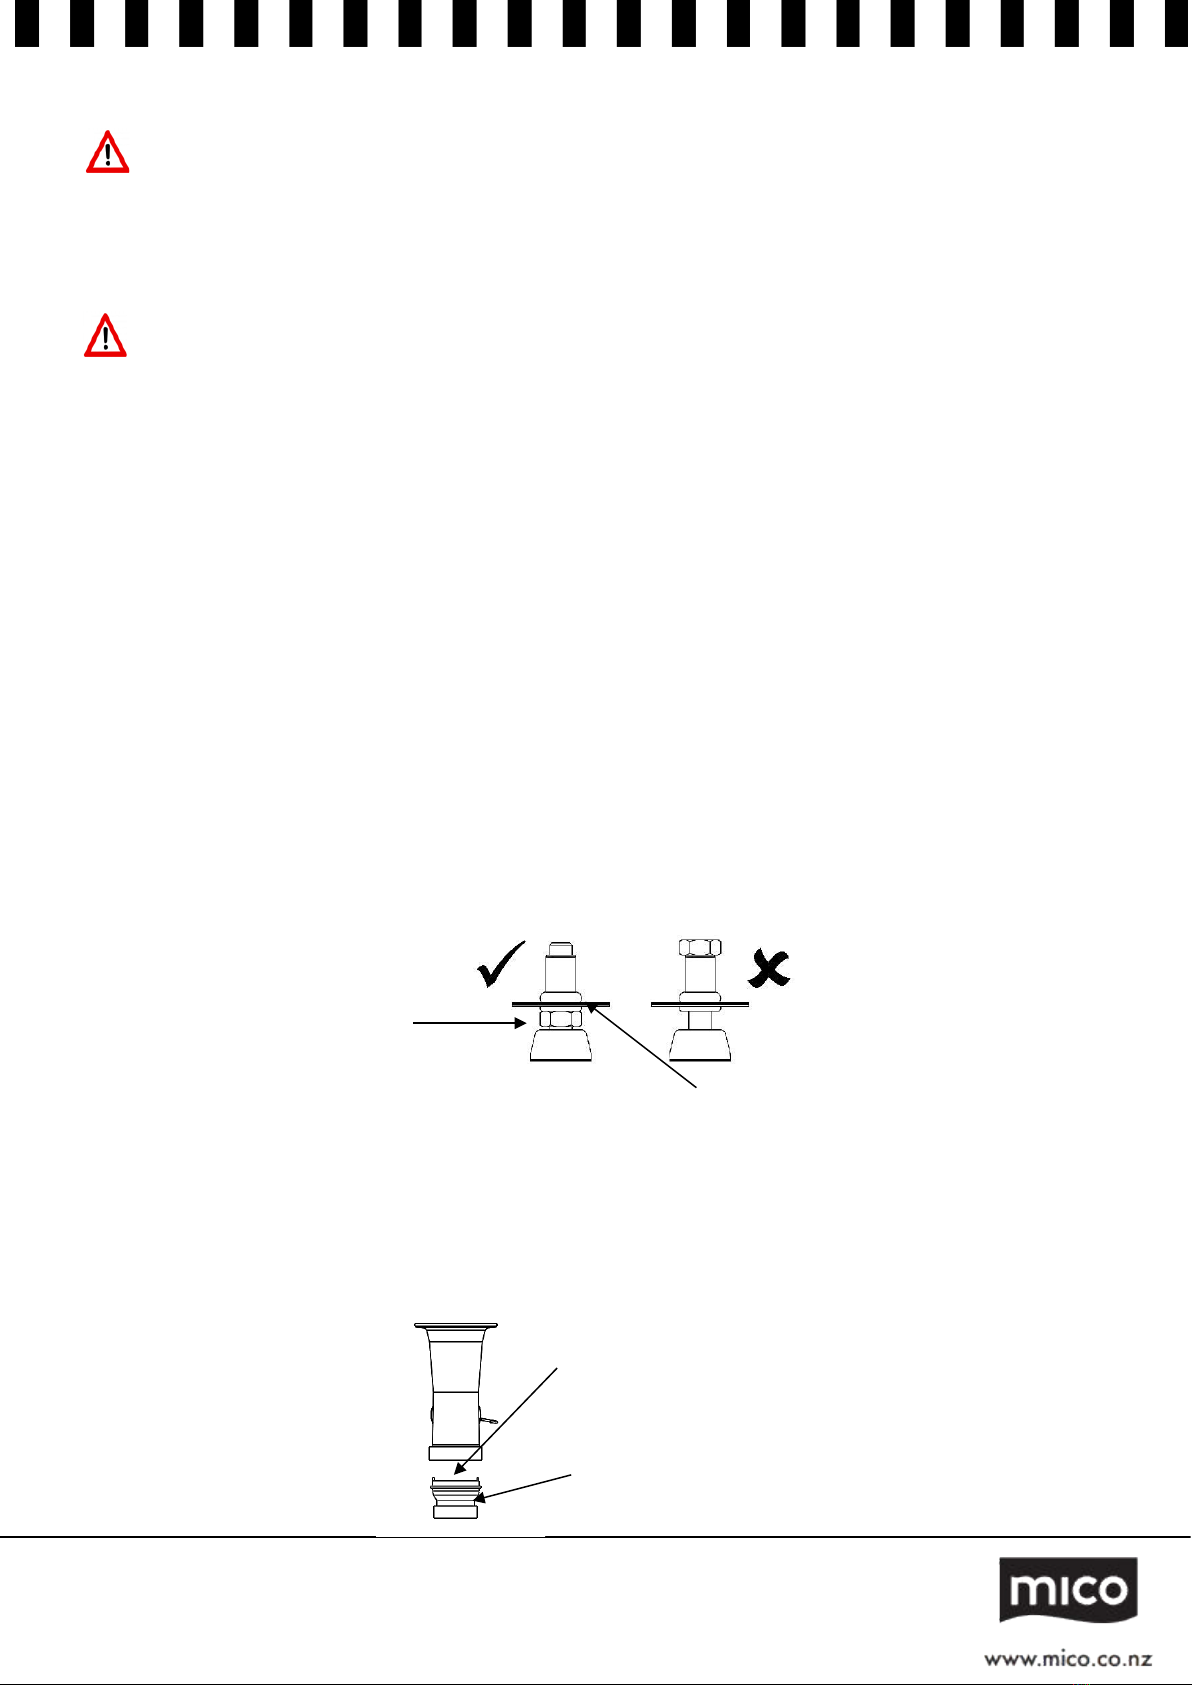
3. Fit the waste adapter from the installation kit this must be glued in place, allow
plenty of time for glue to completely dry before proceeding.
Lock nut
Bottom of the unit
Apply plumbing PVC glue
Waste adapter

4
4. Position the laundry tub and cut the house waste pipe (which should already
be installed) to the exact height. The final height will depend on the waste trap
dimensions.
5. Fasten the laundry tub to the wall through any of the holes in the rear flanges.
Alternative fastening can be achieved through the floor. Confirm that the door
operates correctly.
6. Connect the hot and cold from the tap ware to the 3 way ball valves (not
supplied); connect the waste system and the trap to the laundry tub.
7. Test the laundry tub for leaks. Check the washing machine and the waste
system.
8. Seal the laundry tub to the wall using suitable approved sealant. (Check with
your local council for building regulations).
Installing Washing Machine Waste Outlet
Before securing the unit to the wall, please check if the door or washing machine
waste inlet needs to be changed from right to left. If so, please refer to information on
page 6 of this manual.
Washing machine waste hose connection through the white plastic washing machine
waste inlet and make sure that the hose is as far down the hose as possible and
then to prevent the washing machine waste hose from coming loose use the cable
tie from the installation kit to fasten the hose firmly to the white plastic washing
machine waste connector (shown as below).
Important
Ensure the washing machine outlet hose is correctly fitted at both ends and that the
spring clips are firmly in place to prevent leaks.
Cable tie
Washing Machine Hose

5
Changing Door Opening
Rotating the Cabinet Door
1. Open the door to its most open position. Unscrew the two screws in the
bottom left hand corner. From inside the unit pull the hinge pin downwards to
release the door.
2. Manoeuvre the door to allow removal from the Laundry tub.
3. Unscrew the two screws in the top left hand corner. Pull the hinge pin
upwards from the inside of the unit.
4. Insert the hinge pin in the bottom right hand location and secure with two
screws.
5. Turn door around. Locate the door on the bottom right pin. Sing the door fully
open and insert the hinge pin in the top right location and push down to locate
in the door.
6. Secure with two screws. Check operation of the door.
Troubleshooting – Ensure hinge pin is inserted into pilot hole on the door.

6
Changing Washing Machine Inlet from Right to Left
The washing machine outlet waste hose can be connected to either side of the
laundry tub.
1. On the outside of the laundry tub remove the screws from the white plastic
washing machine waste inlet and the white plastic blanking plate.
2. On the inside of the laundry tub remove the clip from the white plastic washing
machine waste inlet and black flexible hose, move the white plastic part to the
other side of the laundry tub.
3. Reconnect the washing machine flexible hose to the left hand side replace the
clip and ensure good seal.
4. On the outside of the laundry tub secure the white plastic washing machine
waste inlet with six screws.
5. On the opposite side of the laundry tub secure the white plastic blanking plate
with six screws
Safety Latch (NOT SUPPLIED)
The magnetic catch comes as a standard fitting on the laundry tub.
In the interests of child protection against dangerous chemicals and cleaning fluids
we recommend a suitable AS/NZS approved safety latch should be fitted and used
correctly.
Cleaning & Maintenance
Powder coated surfaces must not be cleaned with abrasive or chemical cleaners. To
keep the laundry tub looking its best, wipe regularly with a damp soft cloth. A mild
soap and water solution may be used to remove stubborn dirt.
Under no circumstances should harsh detergents (including chemical cleaners) such
as bleach, scourers or any abrasive cleaner be used as these products may
irreparably damage the surfaces of the unit.
NB. Inappropriate cleaning will render the warranty void.

7
Warranty Certificate (New Zealand)
Terms and Conditions
The following conditions apply in respect of the warranty given in this certificate:
Laundry Tub: 5 years on Stainless Steel bowl, 2 years on cabinet and other
components from the date of original purchase for domestic use.
Warranty exclusions
1. The warranty does not apply where, in the opinion of the Manufacturer:
The defect is caused by misuse, wear and tear, dirt, fire or accidental damage.
The product has been repaired or serviced by an unauthorised person.
The product was not installed in accordance with our instructions.
The product was purchased overseas or was not designed for use in New Zealand.
The product was not used, cleaned or cared for in accordance with our instructions.
The product was used outdoors.
2. In addition, this warranty does not extend to damage or defects which in our
opinion, directly or indirectly arise from or are due to:
Exposing the product to acidic or corrosive materials or chemicals such as dyes,
solvents, denture cleaner or acetone;
Using inappropriate household cleaning products such as abrasive cream or powder
cleansers, furniture polish, bleach, mentholated spirits, drain cleaners, sugar soap,
metal pads and strongly alkaline or acidic cleaners;
Heat damage, including from washing the product at high temperatures;
Impact or mishandling the product, including the impact caused by objects scraped
along, thrown or dropped on the product surface or excessive weight being placed
on the product;
Structural or support changes in or affecting the building or the application where the
product has been installed;
Failure to clean or maintain the product as recommended; or
Any other causes specified in the product information as being excluded from this
warranty.
3. Variations with the colour or gloss within the product or any ageing or fading
of colour, shine or gloss level over time are not covered by this warranty. The
warranty does not cover visual imperfections or blemishes in the surface and
edges of the product that were not brought to your supplier’s attention at the
time you inspected the product.
4. Costs incurred on installation or removal of a product, or any reinstallation of a
product, or any associated costs, are not covered by this warranty.
5. The manufacturer will not be liable for consequential or indirect loss or
damage whatsoever and however arising out of or in connection with the
supply, performance or removal of the product, including (but not limited to)
loss of profit, loss of revenue, loss of contract, loss of goodwill or increased
cost of workings, even if due to the negligence of the Manufacturer or any of
its approved suppliers, employees or agents.
6. This warranty and the statements contained in this certificate or other
documents given to you do not exclude, restrict or modify the application of
any term implied into this warranty by statute, provided that (to the extent any

8
statutory provision permits the Manufacturer to limit its liability for a breach of
an implied condition or warranty) the Manufacturer’s liability for such breach is
limited to the payment of the cost of replacing the product, repairing the
product or acquiring an equivalent product.
7. Subject to clause 5, our obligations under this warranty are limited to those
set out in this certificate, and this warranty is expressly instead of all other
warranties, express or implied, including any implied warranty of
merchantability or fitness for a particular purpose and notwithstanding any
course of dealing between the parties or custom and usage in trade to the
contrary.
Should warranty service be required, please contact us:
Monaco Corporation Ltd.
Phone: (09) 415 6000
Fax: (09) 415 7400
Email: customercare@monacocorp.co.nz
Terms and conditions are subject to change without notice.
This manual suits for next models
1
Table of contents
Popular Indoor Furnishing manuals by other brands


Steelcase
Steelcase Flex Collection Board manual

BROSA
BROSA Ethan 4 Drawer Tall Chest Assembly guide

Canadel
Canadel QUI2SACZ081 Assembly instructions

Kenroy Home
Kenroy Home 60211 Use and care guide

Furinno
Furinno FB3003T Assembly instruction

Dorel Home Products
Dorel Home Products 2235679 Instruction booklet