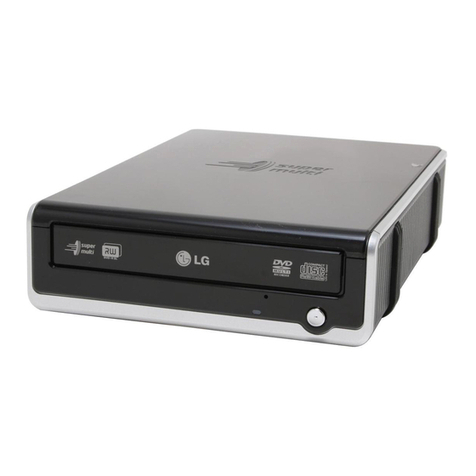
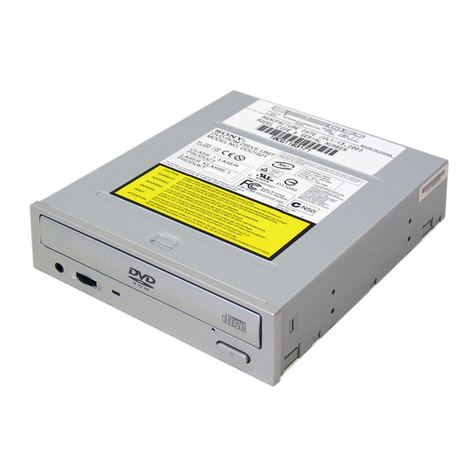
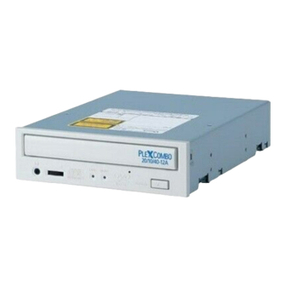
Microgem MG8EDVDRWA User manual

EXTERNAL DVD+/-R
MODEL: MG8EDVDRWA
DVD
WRITE
Maximum
DVD
REWRITE
Maximum
CD
WRITE
Maximum
8x 4x 24x

1
SAFETY INSTRUCTIONS
1. Please read these safety instructions carefully.
2. Please keep this User’s Manual for your reference.
3. Please disconnect the equipment from your AC outlet before cleaning.
Do not use liquid or sprayed detergent for cleaning.
Use moist sheet or cloth for cleaning.
4. For pluggable equipment, the socket-outlet shall be installed near the equipment and
shall be easily accessible.
5. Please keep this equipment away from humid areas.
6. Install this equipment on a reliable surface. If the equipment is not on a reliable surface,
it may drop and cause injury.
7. The openings on the enclosure are for air convection. Please protect the equipment from
overheating . DO NOT COVER THE OPENINGS.
8. Make sure the voltage of the power source is appropriate when connecting the
equipment to the power outlet.
9. Place the power cord where people will not step or trip on it. Do not place objects over
the power cord.
10. All Cautions and Warnings on the equipment should be noted.
11. If the equipment is not in use for several days, disconnect the equipment from the power
outlets to avoid damage by transient power surges.
12. Never pour any liquids into the openings, this could cause fire or electrical shock.
13. Never open the equipment. For safety reasons, the equipment should only be opened by
qualified service personnel.
14. If one of the following situations arises, get the equipment checked by a service
personnel:
(a) The power cord or plug is damaged.
(b) Liquid has penetrated into the equipment.
(c) The equipment has been exposed to moisture.
(d) The equipment has not worked well or you can not get it to work according to the
user’s manual.
(e) The equipment was dropped and damaged.
(f) If the equipment has obvious signs of damage.
15. DO NOT LEAVE THIS EQUIPMENT IN AN ENVIRONMENT UNCONDITIONED;
STORAGE TEMPERATURE ABOVE 60℃(140℉), IT MAY DAMAGE THE
EQUIPMENT. The sound pressure level at the operators position according to IEC704-
1:1982 is equal or less than 70dB(A)
16. DANGER: Invisible laser radiation when opened. Avoid direct exposure to beam.
Complies with FDA radiation performance standards,21 CFR, subchapter J.
Laser power: Wave Length:783±3nm (CD); 658±3nm (DVD)
Emission power:0.7mW
Laser diode: class 3b
17. The power adapters (L.P.S.) can be used for the product are as listing:
(a) Asian Power Devices Inc. Type WA-10E05U-AD-S10.
(b) Asian Power Devices Inc. Type WA-10E05G-AC-EX0.

2
PRECAUTIONS
!! Do not attempt to open the drive and
service it. Removing the cover may
cause exposure to harmful laser beams
and electrical voltage. User is
recommended to get service by
returning the defective drive back to
the original vendor where the drive was
purchased.
•Use the original package for transporting the drive or sending back for service. The
original packing was designed and tested to protect your drive under rough conditions.
•Do not put this drive in direct sunlight, on heating units, or near electrical appliances
which draw large amounts of current.
•Use a soft, dust-free cloth for cleaning your drive. Keep your drive away from moisture or
liquids including water, cleaning-fluids, or solvents.
•Keep your disc clean. Using a soft, dust-free cloth to clean the surface of the disc before
recording will improve the burning data integrity.
•Do not drop or jolt the drive.
•Keep the area around the drive clean from dust, smoke, and other contaminants.
•The copyright law of each country governs the reproduction of copyrighted works. The
person using the drives may be liable for its use to make unauthorized copies of
copyrighted works.
•It will increase the success rate for copying the data from HDD, instead of copying the
data by "copy on the fly mode". Therefore we recommend the user reserving sufficient
buffer space for creating an image file (at least 650MB for CD; 5GB for DVD; and if your
drive support Double Layer DVD+R writing, then at least 9GB space is needed).

3
TABLE OF CONTENTS
INTRODUCTION
What the DVD Writer Does…………………………………………4
Format Compatibility…………………………………………………4
Recording Modes………………………………………………………5
What You Can Do with the DVD Writer……………………………5
System Configuration
System Requirements for USB 1.1……………………………………6
Additional Requirements for USB 2.0…………………………………6
Features and Controls
Front View……………………………………………………………7
Rear View…………………………………………………………7
INSTALLATION
USB 2.0 Users
Installing USB Driver for Windows 98SE………………………………8
Connection…………………………………………………………………….9
Installing the Drive……………………………………………………....10
OPERATION
Tray Loading and Operation
To Insert a Disc into the Drive…………………………………………11
To Remove a Disc from the Drive………………………...……………………11
Recording CDs & DVDs
About Software & Manuals……………………………………12
Playing CDs & DVDs
Playback Software……………………………………………………13
The First Time to Play DVDs………………………………………13
TROUBLESHOOTING
Read Problems……………………...…………………………………14
Write Problems……………………………….…………………………15

4
INTRODUCTION
Thank you for purchasing this DVD Writer, a reliable, high-performance recordable DVD and
CD writer, rewriter and player. Please read this manual carefully and keep it handy for easy
reference. Use the manual for installation, operation and troubleshooting for this drive.
What the DVD Writer Does
The DVD Writer is a recordable DVD/CD-ReWritable drive that provides professional quality
DVD and CD performance for writing, rewriting and reading. It also reads Digital Versatile
Discs (DVDs) formatted for movies and data. This versatile and remarkable drive can:
For DVDs
zWrite DVD+R (recordable DVD) media.
z* Write Double Layer DVD+R (recordable DVD+R9) media.
zWrite DVD+RW (re-writable DVD) media.
zWrite DVD-R (recordable DVD) media.
zWrite DVD-RW (re-writable DVD) media.
zRead DVD (DVD+R, DVD+RW, DVD-R, DVD-RW, and DVD+R9) discs.
For CDs
zWrite to CD-R (recordable CD) media.
zWrite to ultra-speed CD-RW (rewritable CD) media.
zRead all CD-ROM and CD-R data media.
zRead CD-RW and CD-DA (audio) media.
(NOTE: The drive’s maximum Writing, ReWriting & Reading speeds are printed on the
original box. *Only when your drive supports Double Layer DVD+R writing, it can
write DVD+R9 media.)
The drive supports Running OPC (ROPC) and is compatible with Windows Plug & Play.
Flash memory allows upgrading the drive to the latest firmware revision (available from the
web site) without opening the drive. Buffer Underrun Proof technology eliminates buffer
underrun errors, therefore you can safely use your computer for other things while you’re
writing to a recordable DVD and CD media.
Format Compatibility
This DVD Writer is a versatile optical disk drive. For CD write function, it is capable to write
data, which conforms to Orange Book: Part 2 CD-R Volume 1 / Part 2 CD-R Volume 2 Multi
Speed / Part 3 CD-RW Volume 1 (known as Low Speed) / Part 3 CD-RW Volume2: High
Speed / Part3 CD-RW Volume 3: Ultra Speed, into CD-R/RW disk in combination with write
application software. For DVD write function, this drive confirms to DVD+R Version 1.2 /
DVD+R9 Version 1.0 (only for a Double Layer DVD+R writing support drive) / DVD+RW
Version 1.11 / DVD-R Recordable Disc Part1 Ver2.0 / and DVD-RW Re-recordable Disc
Part1 Ver.1.0. For read function, it is capable to read all of the following media: DVD
single/dual layer (PTP, OPT), DVD-R, DVD+R, DVD-RW, DVD+RW. Besides, it reads all
of CD formats and media: CD-DA, CD-ROM, CD-ROM/XA, Photo-CD, Multi-session,
Karaoke-CD, Video CD, CD-I FMV, CD Extra, CD Plus, CD-R, and CD-RW.

5
Recording Modes
Track at Once
Data can be recorded to a disc, one track at a time. New tracks can be added later. Music CDs
can not be played in a CD player or CD-ROM until the disc is closed.
Disc at Once
Data can be recorded to an entire disc in one pass. In this mode, new data added later is not
allowed.
Session at Once
Data can be recorded to disc one session at a time. New sessions can be written later in this
mode. More disc space can be used because there is no gap between tracks.
Multi session
Data can be recorded to disc in one session. New sessions can be written later in this mode.
Less disc space can be used because a gap is created between sessions.
Packet Writing
This is useful for data back up. Data can be added directly to tracks on media or can be deleted
directly from tracks only on media. To use this mode, your software must support Packet
writing function.
What You Can Do with the DVD Writer
zRecord digital video or slide shows onto DVD+R, DVD+RW, DVD-R, and DVD-
RW discs.
z*A Double Layer DVD+R writing support drive will be able to write DVD+R9 disc.
zPlay DVD+R, DVD+RW, DVD-R, and DVD-RW discs.
zRecord data or audio onto recordable or rewritable CD media.
zPlay music CDs.
zPlay VCD & DVD movies.
zAccess interactive reference materials stored on DVD.
zSave photos and other images on recordable or rewritable CDs.
zArchive images and video to DVD or CD.
zMaster new software programs on DVD or CD.

6
SYSTEM CONFIGURATION
System Requirements for USB 1.1
This drive has a high-speed Universal Serial Bus (USB) 2.0 interface. You can also use it with
USB version 1.1. To ensure stable read/write/rewrite performance, an IBM compatible PC
system with the following features is recommended.
CPU Pentium III 450 or faster with built-in USB 1.1 controller
(some USB controllers or motherboards may not support all types of
USB devices.)
OS Microsoft Windows 98SE/ME/2000/XP
Memory Must meet recommended RAM requirements for your operating
system. (minimum 128MB is recommended)
CD-ROM Drive For software installation
Hard Drive Minimum 650MB available capacity for creating a CD image file;
5GB free HDD space for creating a DVD image file to a Single Layer
DVD disc (4.7GB); *and 9GB or above free HDD space for creating a
DVD image file to a Double Layer DVD+R disc (8.5GB).
(Do not enable HDD thermal calibration during operation)
Interface USB interface connector
NOTE:
(1) Connecting USB 1.1 interface the drive’s top performance is 4X for CD-R, 4X for CD-RW
and 6X for reading a CD-ROM. In addition, DVD speed is limited to 0.7X. Therefore, we
strongly suggest you NOT to apply any DVD function when connected with USB 1.1
interface.
(2) Some high-speed hard drives are equipped with an "Auto Thermal Re-calibration"
function. Please disable it in the BIOS setup to avoid writing errors (Buffer Under-run).
Additional Requirements for USB 2.0
Interface High Speed USB 2.0 interface required to achieve maximum speeds
NOTE:
(1) High Speed USB 2.0 adapter card is sold separately and will not be bundled in this
package.
(2) To achieve maximum record/write speed your system may require data to be copied first
to the computer's hard drive rather than directly from another source disc or drive.
*Check the original box to see if your drive supports writing to a
Double Layer DVD+R disc.

7
FEATURES AND CONTROLS
Front View
Figure: Front view of slot-in type drive
A Busy / Write LED Indication of drive's operation status. The light lit stands for
Busy; the light blinking stands for Write/Rewrite.
B Eject Button Push button to eject the disc.
C Disc Slot The slot to insert the disc in.
Rear View
Figure: Rear view of the Drive
A Power Connector For DC power input.
B USB Connector Mini type USB B type jack.
Note: Because the bundled USB cable and Power adapter are designed for this drive, please
connect ONLY using those accessories bundled in this package. Accessories other
than those bundled may cause fatal damage to this drive.

8
INSTALLATION
USB2.0 Users
USB 2.0 is a very new technology. Therefore, most computers do not have native support for
USB 2.0. You must install a USB 2.0 adapter card for your External drive to run at USB 2.0
speeds. If you do not have a USB 2.0 card installed, this drive will still work connected to a
standard USB 1.1 connection, but the speed will be limited to USB 1.1 speed. After installing
a USB 2.0 adapter card, follow the steps below for your operating system to verify the USB
2.0 card is installed properly.
Windows® 98SE/ME users:
Right click My Computer and select Properties.
Select the Device Manager tab.
If there is a yellow exclamation point next to Universal Serial Bus Controllers, contact the
card’s manufacturer for help.
Windows® 2000/XP users:
Right click My Computer and select Properties.
Select the hardware tab.
Click the Device Manager button.
If there is a yellow exclamation point next to Universal Serial Bus Controllers, contact the
card’s manufacturer for help.
Instructions on Installing the USB Driver for Windows 98SE:
This USB drive is a Plug&Play USB storage device. If you are using any of the following
Operating Systems: such as Windows ME, Windows 2000, and Windows XP, all you need to
do is plug it to your computer properly. Then the drive is ready to use.
Whereas, a PC using the Windows 98SE OS will not recognize this USB drive if you are
installing this drive for the first time. Therefore, you will need to install a driver into your
computer for this USB drive to properly install to your computer.
You can find the USB driver for Windows 98SE OS either in the included Floppy Disc or in
the USB driver for Windows 98 OS directory of the Burning Software kit. Please follow your
OS instructions to install the driver for this USB drive, then restart your computer.
CAUTION:
Please limit your CD recording speed to 4X or 8X if your computer is only equipped with a
slower speed USB1.1 interface or if your PCMCIA port does NOT support Card Bus interface.
Attempting high speed writing with a slow interface can cause frequent buffer overloading
and writing pauses (when the Busy LED is blinking) that could adversely affect recording
quality.

9
CONNECTION

10
INSTALLING THE DRIVE
Before you start, please make sure you have installed the proper
software for Recording CDs, DVDs and Playing DVDs. The Recording
software and the DVD Playback software are in different CD kits
included in the package.
1. Start your computer. Wait for the operating system to load, then insert the CD kit.
Follow the instructions on the screen to install the software for Recording CDs,
DVDs or Playing DVDs you wish to install from the CD kit.
2. Connect the power supply to the drive.
(To prevent damage to the power plug, connect carefully to avoid bending the power
plug.)
3. Attach the included Hi-Speed USB cable mini B type plug to the drive.
(Examine the connection carefully for the correct orientation.)
4. Connect the A type plug end of the Hi-Speed USB cable to the USB 2.0 adapter card
connection on your computer. The drive is ready to use.
(NOTE: The green power light on top of the drive will come on only when both of the
power supply and USB cable are connected properly.)
(NOTE: If you cannot identify the USB 2.0 connection, refer to the documentation of
your USB 2.0 card. If you do not have a USB 2.0 adapter card installed, you can still
connect the drive to a standard USB 1.1 connection.)
5. Special notes for Windows 98SE user.
If this is the first time you are installing this USB drive to your Windows 98SE (Second
Edition) Operating System, you will have to install a USB driver for your Windows
98SE. Follow the instructions on the screen to install the USB driver properly, then
restart your computer. (For more details, please refer to the USB 2.0 Users page.)

11
OPERATION
Operate your drive only in a horizontal position. If you operate it in a vertical orientation,
you may damage the disc or the drive if the drive falls over.
To Insert a Disc into the Drive
1. While the external drive is powered, push the eject button on the front panel to check
whether a disc is inside the drive or not. The disc slides out in a few seconds if it is
inside the drive.
2. Hold the disc by the center hole and the disc edge with your fingers (the disc label side is
facing up.) Properly insert the disc edge into the disc slot on the front panel, push the
disc into the drive with your thumb, then the disc will automatically slide into the drive
and get ready.
Note: Do not attach paper labels to the disc. Attaching a label to the disc may create an
imbalance. This will result in reading or writing errors. And the disc with paper
labels may easily be stuck in the drive.
To Remove a Disc from the Drive
1. Push the eject button on the front panel, and the disc will slide out from the disc slot in a
few seconds.
2. Hold the disc by the center hole and the disc edge with your fingers, and then draw out
the disc from the disc slot.

12
RECORDING CDS &DVDS
Before you start, please make sure you have installed the proper software for
Recording CDs, DVDs and Playing DVDs. The Recording software and the DVD
Playback software are in different CD kits included in the package.
About Software & Manuals
The included software is to give you the best result with ease of use. The detailed user’s
manual for the recording and playback software will be automatically installed into your
computer when you install the recording software. For details on other software packages
that are available for writing DVDs or CDs, please visit the web sites of the companies whose
software you are interested in, refer to their user’s manual, or look at the help option within
the software. Please refer to the user’s manual for the detailed operation procedures.

13
PLAYING CDS &DVDS
This drive will not work alone while applying CDs & DVDs Playback!!
The Playback function can only work when the USB Cable between the
drive and your PC is well connected.
Playback Software
You must install the DVD playback software to your computer first. If you do not have any
DVD playback software installed in your computer, the included DVD playback software in
the CD kit will bring you the best playback result.
You can immediately play Audio CDs and pre-recorded DVD discs, including movies and
other DVDs. To play a CD or a Digital Video Disc (DVD), insert the disc with the label up
(for CDs). This drive plays both single-layer and dual-layer DVDs.
The First Time to Play DVDs
A code on some DVDs allows them to be played only in a certain regional area, such as North
America, Europe, etc. When the drive ships, there is no region code set. The first time a
DVD that has a region setting is inserted into the drive, the act of inserting the DVD sets the
drive to that region code.
If you later insert a DVD with a different region code, you are prompted to either accept
changing the region code or not. If you do not accept the change, then that DVD will not play.
If you do accept the change, then the drive’s region code setting is changed. But remember:
you may change the drive’s region code only 5 times. After that, you will not be able to
change your drive’s code setting.

14
TROUBLESHOOTING
If you meet any trouble during installation or normal use of your drive, please refer to the
following information.
Read Problems
Symptom Possible Causes Solutions
No power. yCheck if the power cord is connected
securely to the connector.
No operation.
USB cable isn't connected
properly.
yEnsure that the USB cable and connectors
are not damaged, bent or dented. Check
especially the pins.
Power is not switched on. yCheck if LED of your drive is lit. If not,
there is no power.
USB cable is not connected
properly between the
computer USB port and the
drive.
yEnsure that both connectors of the USB
cable is properly connected to the USB
ports on the computer and the drive.
No drive recognition.
USB drive is not recognized
by the Windows Operating
System.
yPlease refer to the USB 2.0 Users chapter
and check if the USB driver is installed
properly.
Eccentric disc loaded. yReplace it with another one.Excessive noise when
reading. Seal attached on the surface yDetach the seal very carefully. Don't
make any scratches.
Eject locked by software. yStop the applying software and try the
eject button to open the tray.
Cannot open the tray
(Eject).
CD set incorrectly. yInsert a small stick or paper clip into this
hole to eject the tray.
"Load Contents" or "Import
Session" was NOT clicked
on the Software.
yIf recorded without checked "Load
Contents" or "Import Session", it is
impossible to read. But when using
utility software such as "Session
Selection" from Adaptec, the former
session can be read.
Defective disc. yDeep scratches, fingerprints or other
contaminants on the discs surface can
disable the drive from reading data.
Always keep it clean.
Music CD inserted. yBecause audio compact discs do not have
computer data, typing computer
commands while an audio CD is in your
drive will result in an error message.
yCannot read the
former session of
the CD-RW disc
which has been
written at least
twice.
yRead error
occurs.
Disc inserted upside down. yRemove the disc from tray and reinsert it
with the label side up.

15
Write Problems
Symptom Possible Causes Solutions
Using other authoring
software which does not
support your drive.
yUse the authoring software provided with
the drive. When using other software,
ensure your drive is supported by
contacting the software supplier.
Disc inserted upside down. yReinsert the disc with label side up.
Short of Hard Disk capacity. yGenerally 1.2 to 2 times the size of the
write data is required. This may vary
according to the write method.
No power. yCheck if the power cord is securely
connected to the connector.
Cannot write.
USB cable isn't connected
properly.
yEnsure that the USB cable and connectors
are not damaged, bent or dented. Check
especially the pins.
yNetwork used.
yWindow screen saver
activated while
writing.
yOther application
running.
yWhen running saver or other applications
or writing in a network environment,
errors may occur due to lack of CPU
resources in PC.
yRewrite after log-off from the network.
yDeactivate the screen saver or power
saving mode.
yQuit other applications other than the
authoring software.
Short of PC memory. yDue to shortage of main memory in PC,
swapping of hard disc space may have
occurred. If swapped, data from the hard
disc may cut off causing buffer under-
runs.
yIncrease main memory capacity.
"Auto thermal re-
calibration" triggered.
yDisable "Auto thermal re-calibration" in
the BIOS setup.
yUse another Hard Disk if can not disable
it.
Defective DVD/CD media. yDVD/CD media may be dirty, scratched
or damaged. Rewrite on another
DVD/CD media.
Writing errors occur
(Buffer under-runs).
Short of Hard Disk capacity. yGenerally 1.2 to 2 times the size of the
write data is required. This may vary
according to the write method.
No drive recognition. USB cable is not connected
properly between the
computer USB port and the
drive.
yEnsure that both connectors of the USB
cable is properly connected to the USB
ports on the computer and the drive.

16
Symptom Possible Causes Solutions
USB drive is not recognized
by the Windows Operating
System.
yPlease refer to the USB 2.0 Users chapter
and check if the USB driver is installed
properly.
Using other authoring
software which does not
support your drive.
yUse the authoring software provided with
your drive. When using other software,
ensure your drive is supported by
contacting the software supplier.
DVD/CD media not
compatible with highest
speed.
yUse the highest speed compatible discs or
write with lower speed.
Buffer under-run occurs. yRefer to the "Buffer under-run" item.
Defective DVD/CD media. yDVD/CD media may be dirty, scratched
or damaged. Rewrite on another
DVD/CD media.
Can not write at highest
speed.
Using other authoring
software not bundled with
your drive.
yUse the authoring software provided with
your drive. When using other software,
ensure your drive is supported by
contacting the software supplier.
Table of contents