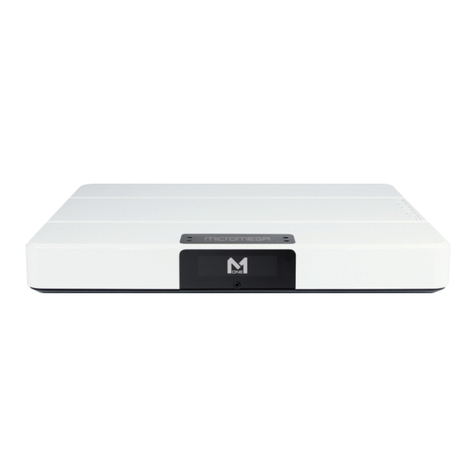
Micromega Tempo 1 User manual

"
ru
-n
i.i.
U
-,
:,\c,
"""
-~ >-----
'~,i'f .~.~ 'i~;'" ',",'~.~#~;<
wnerwner's manu a 1
"
TEMPO
~
,r...;-

~-- -- -_.-_. ~"
Thank yeu for purchasing a Micromega TEMPO.Yeu are now the owner of one
of the most advanced and adaptable amplifiers ever produced.
Dear Customer,
Thank
yeu for purchasing a TEMPO amplification product. Yeu n<::J.Npossess a product of great evolution. The application of
advanced technology and thinking will give yeu much pleasure as yeu sit and enjoy yeur purchase.
Please pay close attention to this instruction manual and read it fully before attempting to operate TEMPO. It is designed to
ensure that yeu maximise your pleasure of TEMPOand familiarise you with its many unique functions.
INSTRUCTIONS
UNPACKING
Check that the carton has no damage. Should yeu have MTYdoubts about its condition pl~ do net hesitate to contact your dealer. Upon opening the carton yeu
should find: AC mains cable, rvnote control handset and batteries.
Very carefully ref1'1Olle the unit from the box, taking <:are to preserve ail the packing- It is good practice to put the carton and ail the contents into an outer plastic bas and
deposit it somewhere safe and dry. (When yeu upgrade your pl~r to a higher model it will protect the casing from the possibility of damage if yeu take it back to)'OU'
dealer in the full packing.) ln the \.l'Ilikely event that your pl~ needs to be sent back by carrier to the distributor,
it MUST
be sent in the original rnaterials. Failure to
observe this will invalidate)'OU'
warranty.
INSTRUCTIONS
FOR USE
Check that the mains lIOItage indicllted on both the carton and the reM of TEMPO correspond to the local poYJer supply (If yeu are in arTf doubt consult your dealer).
Connect the AC mains cable supplied to the rear IEC socket of TEMPO. Insert the mains plUS into the wall socket and switch on lit the soclœt. Switch on TEMPO by the
rock~ switch Iocated on its reM panel by the AC input. Your TEMPO is roN in 'Standby' mode.
Your TEMPO is prcNided with 6 inputs- A phono option, by means of an internally fitted card, is available and takes the place of input no.1. Should yeu possess TEMPO
P, this Pre-amplifier possesses an addition of an extra fully balanced set of inputs in order to make best use of a device with fully balanced outputs (such as Micromega's
OM"IDAC, T-Dac, Duo Pro.2 or Trio CD
\.l'lits).
Connection to this input is made by XI.RcomectOlS -ail other inputs are by RCA phono plugs.
TEMPO provides the opportU'Iity to 'personalise' these inputs by assigning and input name (eg. CD, CD2, DCC etc.). For this sœ the section 'Personalising)'OU' TEMPO.
Before switching on your TEMPO 1 or TEMPO 2 ,comect)'OU' Ioudspeaker cabIes via the 4mm sockets on the rear of the \.l'IÎt. The quality of )'OU' cables and COI 1ectorS1ectorS
are extrernely important to the performance of)'OU' system. TEMPO 1 and TEMPO 2 provide the ability to 'bi-wire' )'OU' system by prcNiding l'No sets of speaker outputs.
Consuit )'OU' dealer to ensLre that yeu make full use of these facilities. (NOTE. Under NO circlXllStanCes should TEMPO should net be used to ~ l'No seperate sets of
10 Idspeakers).
Shoutd yeu possess TEMPO P, comect its outputs mar1œd 'MAIN' to)'OU' poYJer amplifier inputs. TEMPO P provides double outputs to enable yeu to passive 'Si-amplify'
)'OU' system. Consult )'OU' dealer before using this facility. The outputs marIœd 'REM', 'CENT' and 'SUS' are used in conjl.l1Ction with 'MAIN' when ')'OUI' TEMPO P is
~pped with the optional Dolby Pro Logic TMmodule.
TEMPO is al5O prcNided with advanc:ed protection. TEMPO 1 or 2 will be tImed off shouId they detect probIematic operating conditions. Ensu'e that adequate
ventilation is prcNided in its installation. Ventilation shouId be prcNided both to the top and rear of TEMPO. We do net recommend the stacking of TEMPO with other
components, or the use of a closed cupbœrd with insufficient ventilation. If at ail possible a dedicated shelf type audio radt should be used.
Before switch on, check again ail connections thiIt yeu have made. If yeu have MTYdoo.bts lit this poirt, cortact yeu dealer who will futher expIain acheck them
personaIly.
ControI of TEMPO is either by the front panellœybœld, or the ampIpre-amp section on the remote control handset. Use of MTYfront panellcey, or the 'STBY (standby)
Icey of the rvnote handset will roN put TEMPO do operational mode. Upon switch on the \'OIline indicator will automatically set itseIf ta zero '0', and will select 'A l'
(Analogue 1) input You are roN ready to personaIise TEMPO, and the foIkNving sections of this nwnJal will expIain its full functionality.
PROTECTION
TEMPO is provided with a runber of secuity systems designed for operationaI protection. TEMPO 1 and TEMPO 2 have 3 types of protection controlled by a centRll
microprocessor. The poHer amplification section is protected al5O by fast bION fuses -2A for TEMPO 1 and 2.5A for TEMPO 2. The fuses pIOIIided are specifically of
the fast bION type and it is imperative that, should they need to be replaced, that it is done 50 with identiCêll fuses. ln the case of a bIOM"I fuse the display screen will
indicate 'FUSE'. Should it do 50 yeu MUST consuIt )'OU' dealer. Under NO circunstanc:es should yeu attempt to replace these fuses youself. TEMPO contains lethal
YOItages and yeu will invaiidate)'OU' warranty.
The screen indication 'TEMP' will be indicated shouId the amplifier sIù dOM"I dJe ta excessive temperëlt\K. ln this instance switch off the amplifier and allow it to cool
dOM"I in 0Ider that the protection circuits m/IY reset. Before yeu switch it back on ensLre again that the installation prcNides adequate ventilation. TEMPO 1 and TEMPO 2
aIso prcNide protection against the presence of excessive DC offset. a condition indicated by the screen display of 'DCO'. Consult)'OU' dealer to rectify this probIem.
TEMPO P is protected against reaxring or contil'Ull DC and again indicates 'DCO' if such a consition is detected. ShouId this happen have )'OU' dealer check )'OU' poHer
amplifier before attempting to switch the system on again.

:r-
,
PERSONALISING YOUR TEMPO
..J
By use of the LlBRARY
system
yeu have access to many different modes to enable yeu to personalise four TEMPO. Please spend seme time
studying this section of the manual in order to ensure that yeu obtain the best possible set-up.
To personalise four TEMPO yeu will make use of its comprehensive library system. This operates on four levels, which are called
consecutively with the LlBRARY key in the order as explained below. If at any time yeu wish to readjust any settings, yeu will need to scroll
through the LlBRARY system to reach the desired option. Study this section of the manual thourough~1 and then make four adjustments in
order that yeu may successful/y personalise four TEMPO to four individual requirements.
ln order to make four adjustments, connect ail of fOur input sources and set the volume to a suitable level before proceeding. A reasonable
listening level is required in order to accurately adjust the input sensitivity.
REGULATION OF SYSTEM BALANCE
Yeu can regulate the system balance in order to compensate for an input channel imbalance and to centralise the sound image. T0 adjust the
balance follow this procedure.
Press once the LlBRARY key. The display window will indicate
'bA'
(balance) on the left of the screen and '0 0' on the right. Use the volume
keys to alter the system balance. The volume keys will adjust system balance by attenuating one channel, rather than by increasing volume on
the other channel. This is displayed bya minus digit on the screen.
ASSIGNING A l'lAME TO THE
SOURCE INPUTS
Now that yeu have adjusted the system balance depress the LlBRARY key once more to enter the name assignment mode. The display will
show 'A l' on the left and 'A l' to the right. Use the volume keys to view the established name options. The name options will blink. When
yeu have located a suitable name (eg. CD, CD2,DCC etc.) press and hold the LOCK key to make fOur selection and store this in memory.
When this has been stored the display will cease to blink. Press the SELEG key to move to the next input and repeat the process. Continue
until yeu have assigned names to ail desired inputs.
When a Phono card is fitted, input A 1 will automatically be selected, and 'Pho' will automatically be selected for its name assignment.
It is net possible to choose the same name for more than one input. Should yeu do this the preference will be for the last input that was
assigned this name and the other input will revert to its original original source number (such as A3).
ADJUSTMENT
OF INPUT SENSITIVITY
"
Now that yeu have assigned four input names yeu may decrease
the
sensitivity of each input of TEMPO in 1dB steps. Depress the LlBRARY
key once more to activate this mode. This allows yeu to adjust each input so that when yeu move between them they operate at the same
volume level. The display screen will display
'-O'
on the left and the input name on the right. Depression of the volume keys will cause the left
screen value to change and blink. Adjust the sensitivity between the available 0 to -9 db level and store four selection by a continued
depression of the LOCK key.
When in this mode the MUTE and SELEG keys are used to move up and down through the different inputs in order to compare between
inputs the sensitivity adjustments that yeu have made.
NOTE. Sensitivity can only be adjusted to a lower level. Therefore in order to match levels between inputs yeu must choose four least
sensitive input as four reference and adjust the other inputs down until they match this unit.
.'.
fLOOP MODE
When yeu have finalised the sensitivity set up depress the LlBRARY key once more to activate the LOOP MODE option. The LOOP MODE of
TEMPO allows yeu to limit the selection that may be made by the SELEG key to on/y those inputs that have been assigned a name, thereby
avoiding the unecesary action of rotating through inputs that are net attached in order to go to fOur required input selection. For instance if
yeu have only three inputs connected (say cd, dAc and Pho) and Loop mode is activated, then on/y these inputs will be active when yeu
scroll through the input selection.
To activate Loop mode depress the SELEG key to choose between 'no LooP' (inactive) and 'YE LooP' (active).
l\.
;;
"
"
"You have now completed the personalisation of TEMPO. Press the lIBRARY key to exit the library options.
;i
)~
,'!;.
~
~~ MAXIMUM VOLUME LOCK
'.'
One of many unique
functions
of TEMPO is the ability
to 'Iock'
a maximum volume
position.
When this command is
activated
it acts as a
safety feature against tuming the volume unintentional/y toc high and incurring the subsequent damage that may occur. When it is activated it
is
functional
on bath the keyboard and the remote control handset.
T0 engage the Jock, move the system volume to the desired maximum then hold the LOCK key down until the on screen volume setting
blinks. It is then not possible to pass this setting unless fOU disable the function. To disable the volume Jock move the volume up to the
maximum setting until the screen blinks and hold down the LOCK key until the blinking desists.
(
,.!
j
""

0 mlOomEGa
Q~
0
0
0
0
[!]
0
[!]
DESCRIPTION OF FACILITIES
1- LlBRARY
This key is used to select the library options used to personalise TEMPO. This command is duplicated on the remote control handset by the control
marked MODE.
2- LOCK
This key is used to rock and store personalised information. Such settings are memorised bya sophisticated EEPROM (Electrically, Erasable,
Programmable, Read Only Memory) that has the ability to memorise the settings that yeu choose, even if yeu disconnect TEMPO from the mains
supply. It aise allo'NS them to be modified at any time. This key is duplicated on the remote control handset by the key marked SET.
3-
BRIGHTNESS
Yeu have the choice of three levels of brightness, high, lowand off. When in high or low settings, the TEMPO logo and model number will be
displayed. When in off mode, a small red horizontal bar is present to show that the player is in "display off" net "auto off" position. ln 'display off'
mode the screen will be reactivated by use of any key on either the keyboard or remote con trol handset, but will again fade after a period of
approximately 20 seconds after your final commando This facility is net available from the remote control handset.
HEADPHONES WhWhnheadphones are plugged into the jack socket an appropriate logo is displayed. Each depression of the volume key steps the
volume up, to a maximum level of 99. Unless the player is unplugged from the mains or there is a power failure, your player will remember the last
headphone volume setting and automatically retum to it when yeu next pluS in your headset. The outputs of the amplifier are muted when
headphones are in operation.
4- MONITOR
One press of this switch puts TEMPO into Monitor mode. Ifyeu have connected a unit to the monitor in and monitor out sockets and select monitor
mode, yeu may now listen to the signal that is soins through the unit. This is of particular help when yeu have connected a processor (such as an
extemal Dolby Pro Logic device) or a tapins system. Thiskey is duplicated on the remote control handset by the key marked MON.
5- VOLUME +
As weil as increasing output volume this key is used to access the alternatives within the library system. When used for volume, single depressions
will increase volume by single increments. Keep the key depressed for fast volume adjustment. This key is duplicated on the remote control handset.
6- VOLUME -
As for Volume + but will adjust the volume downward. This key is duplicated on the remote control handset.
7- MUTE.
A single depression puts TEMPO into MUTE mode, when 'M' will appear on the display screen. To disengage press again. For operational safety
TEMPO will automatically go into mute mode when the amplifier is brought out of standby, though the previous volume setting is retained. Yeu may
adjust volume, but TEMPO will remain in MUTE mode until it is disengaged. Muting is immediate when the key is depressed, but is progressive when
coming out of mute. ln the section 'Adjustment of input sensitivity' it is explained how yeu can individually adjust the input sensitivity of each input.
When in this mode the MUTE key is used to move up through the library of inputs in order to compare between inputs the sensitivity adjustments
that yeu have made. This key is duplicated on the remote control handset.
8- SELECT
Single depressions of the SELEG key change the source (input) selection. Prolonged depression of this key will move TEMPO into standby mode.
Depression of any key on either the front keyboard or remote handset will reactivate TEMPO from standby. ln the section 'Adjustment of input
sensitivity' it is explained how yeu can individually adjust the input sensitivity of each input. When in this mode the SELEG key is used to move
down through the library of inputs in order to compare between inputs the sensitivity adjustments that yeu have made. This key is duplicated on the
remote control handset by the key marked INPUT.A prolonged depression of the SELEG key will put TEMPO into standby mode, keeping the audio
circuits at optimum operating temperature, but switching off the audio outputs. Any keyboard command will reactivate the unit, when it will then be
working under optimum conditions. This key is duplicated on the remote control handset by the key rnarked STBY.
"_""_"
""

CARE OF TEMPO
TEMPO is, as by now yeu are certainly aware, is a very sophisticated piece of modem engineering,;ret it is robustly built to operate in the real
world. A few minutes perusing these common sense points will ensure that your player will continue to give yeu satisfaction for years to corne.
*Do net clean the casework with anything remotely abrasive. Polishes containing silicone should be avoided, as the cil they contain will
adverselyeffect electrical contacts. It is permissible to use proprietary foam cleaners sparingly, but breathing on the machine and then gently
rnachine wiping with a soft, lint-tree cloth should be ail that is needed. Solvents must NEVER be used.
*Please do net open the casing. Whilst we are very proud of the quality of our internai construction, net only could yeu cause expensive
darnage to your purchase, but the darnage to yeurself could be irreparable. Electricity can be lethal. If anything should need to be done, see
yeur authorised Micromega dealer.
*AIl upgrades MUST be carried out by your dealer, who will also issue you with the requisite paperwork authenticating and registering your
upgrade guarantee.
U PG RAD ES
With your Micromega TEMPO this is easy. Each machine is designed to be upgradablei what is more, wherever possible, it will be upgradable
at NO COST PENALTY.
Just think of it. No huge lasses in value at trade-in - ne second-hand unit of which to dispose.
By designing the internai architecture in a modular form, it is possible to place critical circuits on a separate boards. Upgrading your Tempo is
therefore devastatingly simple.
ln order to progress trom one model in the range to anether, simply rnake an appointment to retum your tempo to your Micromega dealer
who will convert it for yeu to any higher level or, if necesary arrange for its retum to the appointed Micromega agent for modification.
AIl yeu will need to do is book an appointment and retum your Tempo
As soon as the new circuit board is plugged in, and yeu have rushed home to re-install it in your system, your Tempo will even proclaim its
new identity in the display window.
Micromega are committed to ensuring that thei~ advanced research and development facilities and unique approach will continue to make
upgrades available whenever and wherever possible.
ASSOCIATED PRODUCT
TEMPO is one in a range of unique Micromega product in the STAGE series. Others include:-
STAGE - integrated CD players. (upgradable)
DRIVE dedicated CD transports (upgradable)
DAC digital to analogue converter
TEMPO -amplification (upgradable)
TUNER FMtuner
DIVA loudspeaker
Please consult your dealer for further details and product information. Alternatively contact the local distributor who will, where possible, add
you to a mailing list in order to keep yeu continually informed.
1""'"

TECHNICAL CHARAGERISTICS TEMPO 1 TEMPO 2 TEMPO P
PHONO INPUT: SENSITMTY / IMPEDANCE SOOrnv / 5OKoIvns SOOrnv / 5OKoIvns 1V / 5OKoIvns
XLR INPUT: SENSITIVITY / IMPEDANCE 1V /1 00Kchms
MONITOR OUT: IMPEDANCE / GAIN 600 ohms / OdB 600 ohms / OdB 600 ohms / 0dB
POWER OUTPUT / Bohms, INTERNAL IMPEDANCE 'fiNI/ <O.1ohms 7SW / <O.1ohms
OUTPUT LEVEL / 600 ohms, INTERNAL IMPEDANCE 10Vrms Z<O.1ohms
BANDWIDTH -3db, PHASE SHIFT AT 20Khz De -0.5oW1z, Ph<1° De -0.5oIoIhz, Ph<1° De -2Mhz, PIKO.1°
DISTORTION / 20Hz, RJSE TIME <0.1%, 0.5uS <0.1%, 0.5uS <0.01%, 0.15uS
PHONO OPTION MM / MC YES YES YES
OPTIONAL DOLBY PRO LOGIC CARD NO NO YES
POWER CONSUMPTION SOW SOw SOW
DIMENSIONS (w-d-h) 430-300-88 mm 430-300-88 mm 430- 300-88 mm
WEIGHT 7.5 kg 7.5 kg 7.5 kg
MANUFACTURERS WARRANTY
Micromega SA warrant the product contained herein to be guaranteed against
manufacturing faults and defects for a period of 1 year.
Forwarranty work the unit must be retumed to the vendor with a copyof the
original sales receipt.
The warranty will be invalid should the unit be:-
Damaged by accident.
Damaged by negligence.
Damaged by miss-use.
Damaged by mis-installation.
Damaged by tempering by a non-appointed agent.
Damaged by transit
You should contact your vendor in your country of purchase with regards to
specifie local warranty details.
This is an addition to, and does not affect, your statutory rights.
TEMPO 1
EVOLUTION TEMPO 2
1 to 2 TEMPO pX
1 to P 2 to P SER. NO. <:J~J ~
SER. NO.
@mlCrOmEGa 1, rue Leonardo da Vinci, ZA des Boutries
78700 Conflans Ste.
Honorine TEL:
(1) 34 90 2S 00
FAX:(1) 391983 23
lN THE INTERESTS OF CONTINUING TECHNICAl
DEVELOPMENT,
WE RESERVE THE RlGHT TO MODIFY DESIGNS AND EQUIPMENT.
E & CE.
This manual suits for next models
2
Table of contents
Other Micromega Amplifier manuals

Micromega
Micromega IA-400 User manual

Micromega
Micromega PRE User manual

Micromega
Micromega Myzic User manual

Micromega
Micromega M.ONE M-150 User manual

Micromega
Micromega AVP User manual

Micromega
Micromega PW-250 User manual

Micromega
Micromega PA-20 User manual

Micromega
Micromega MyAMP User manual

Micromega
Micromega M One M150 ROOM EQ User manual

Micromega
Micromega M-100 User manual