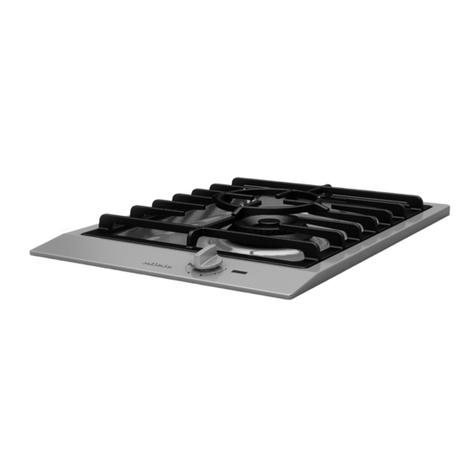
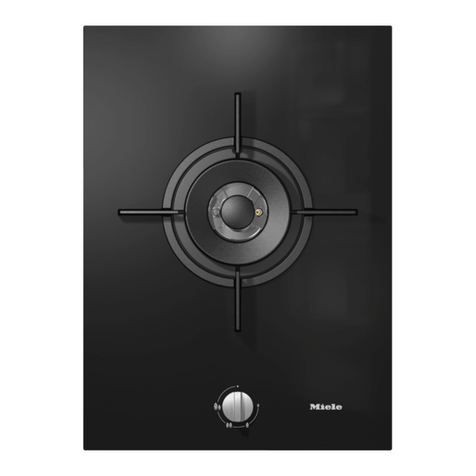
Miele KM 405 User manual

Operating instructions
Gas hob
KM 405
To avoid the risk of accidents or
damage to the appliance it is
essential to read these operating instructions
before it is installed or used for the
first time.
WO
M.-Nr. 05 725 350

Description of the appliance. . . . . . . . . . . . . . . . . . . . . . . . . . . . . . . . . . . . . . . . . 3
Warning and Safety instructions . . . . . . . . . . . . . . . . . . . . . . . . . . . . . . . . . . . . . 4
Before using for the first time. . . . . . . . . . . . . . . . . . . . . . . . . . . . . . . . . . . . . . . 10
General notes . . . . . . . . . . . . . . . . . . . . . . . . . . . . . . . . . . . . . . . . . . . . . . . . . . . . 10
Disposal of the packing
material . . . . . . . . . . . . . . . . . . . . . . . . . . . . . . . . . . . . . . . . . . . . . . . . . . . . . . . . . 11
Disposal of your old appliance . . . . . . . . . . . . . . . . . . . . . . . . . . . . . . . . . . . . . . . 11
Cleaning and heating up for the first time . . . . . . . . . . . . . . . . . . . . . . . . . . . . . . . 12
Using the gas hob . . . . . . . . . . . . . . . . . . . . . . . . . . . . . . . . . . . . . . . . . . . . . . . . 13
Switching on, Switching off, Controls . . . . . . . . . . . . . . . . . . . . . . . . . . . . . . . . . . 13
Pans . . . . . . . . . . . . . . . . . . . . . . . . . . . . . . . . . . . . . . . . . . . . . . . . . . . . . . . . . . . . 14
Safety cut-out. . . . . . . . . . . . . . . . . . . . . . . . . . . . . . . . . . . . . . . . . . . . . . . . . . . . . 15
Use during a power cut . . . . . . . . . . . . . . . . . . . . . . . . . . . . . . . . . . . . . . . . . . . . . 15
Cleaning and care . . . . . . . . . . . . . . . . . . . . . . . . . . . . . . . . . . . . . . . . . . . . . . . . 16
Ceramic hob surface . . . . . . . . . . . . . . . . . . . . . . . . . . . . . . . . . . . . . . . . . . . . . . . 16
Burners . . . . . . . . . . . . . . . . . . . . . . . . . . . . . . . . . . . . . . . . . . . . . . . . . . . . . . . . . 17
Problem solving guide . . . . . . . . . . . . . . . . . . . . . . . . . . . . . . . . . . . . . . . . . . . . 19
Gas connection . . . . . . . . . . . . . . . . . . . . . . . . . . . . . . . . . . . . . . . . . . . . . . . . . . 20
Electrical connection . . . . . . . . . . . . . . . . . . . . . . . . . . . . . . . . . . . . . . . . . . . . . 21
After sales service . . . . . . . . . . . . . . . . . . . . . . . . . . . . . . . . . . . . . . . . . . . . . . . 22
Data plate . . . . . . . . . . . . . . . . . . . . . . . . . . . . . . . . . . . . . . . . . . . . . . . . . . . . . . . 22
Contents
2

aPan support
bBurner cap
cBurner head
dIgnition safety device
eIgnitor
fBurner base
gControl knob for the
front burner
hSymbols to indicate which
cooking zone the control is for
iControl knob for the
back burner
jMains connection cable
kPlug*
* Depending on country of destination,
the appliance may be supplied with or
without a plug. The plug shown is for
illustration only.
Description of the appliance
3

This appliance complies with all rele-
vant legal safety requirements. Im-
proper use of the appliance can,
however, present a risk of both per-
sonal injury and material damage.
Before installing and using the appli-
ance for the first time, read the oper-
ating and installation instructions
carefully. They give information on
safety, on the operation and care of
the appliance. This way you will
avoid the risk of accident and dam-
age to the appliance.
Do not let children access the appli-
ance or its controls. Supervise its
use by the elderly or infirm.
Keep these instructions in a safe
place for reference and pass them
on to any future user.
Building in and connection
The connection to the gas supply
must be carried out by a suitably
qualified and competent person in ac-
cordance with local and national safety
regulations, e.g. a registered gas fitter.
If the appliance is supplied without a
plug, or if the plug is removed the ap-
pliance must additionally be installed
and connected by a suitably qualified
and competent electrician in strict ac-
cordance with national and local regu-
lations. The manufacturer cannot be
held responsible for damage caused
by incorrect installation or connection.
The electrical safety of this appli-
ance can only be guaranteed when
continuity is complete between the ap-
pliance and an effective earthing sys-
tem.
It is imperative that this basic safety re-
quirement be tested and where there is
any doubt, the electrical system of the
house should be checked out by a
qualified electrician. The manufacturer
cannot be held responsible for damage
such as electric shock caused by the
lack or inadequacy of an effective
earthing system.
Ensure that the gas pipe and elec-
trical cable are installed in such a
way that they do not touch any parts of
the appliance which become hot. This
could cause damage.
Do not connect the appliance to
the mains electricity supply by an
extension lead. Extension leads do not
guarantee the required safety of the ap-
pliance.
This equipment is not designed for
maritime use or for use in mobile
installations such as caravans, aircraft
etc. However it may be suitable for
such usage subject to a risk assess-
ment of the installation being carried
out by a suitably qualified engineer.
Warning and Safety instructions
4
Correct usage
For safety reasons the appliance
must only be operated after it has
been built in. This is necessary to en-
sure that all electric components are
shielded.
This appliance is for domestic use
only, and is not intended for com-
mercial use.
Use this appliance for the prepara-
tion of meals only. Any other usage
is at the owner’s risk and could be dan-
gerous. The manufacturer can not be
held liable for damage caused by im-
proper use or misuse of the appliance.
Do not use the appliance to heat
up the room. The high temperature
could cause inflammable objects
nearby to catch fire.
Ensure the room in which the gas
hob is installed has sufficient venti-
lation. In a small kitchen it may be ad-
visable to keep the door open if using
the hob for extended periods.
This appliance must not be set up
or operated in the open air.
Make sure all the components of
the gas burners have been cor-
rectly assembled before switching on.
When using a cooker hood over
the gas hob, ensure that any burn-
ers in use are always covered with a
pan. Otherwise flames could be drawn
up by the suction of the cooker hood,
parts of which could then be damaged
or even set on fire.
Only use pans with a base diame-
ter of maximum 22 cm (front
burner) and 24 cm (rear burner) on this
hob. Using larger pans may cause the
flames to spread out to the sides and
damage or burn the worktop, wall clad-
dings or surrounding units.
For safety and stability use only
pans with a minimum base diame-
ter of 12 cm (front burner) and 14 cm
(rear burner).
Do not store any inflammable ob-
jects near the gas hob.
Warning and Safety instructions
5

Protecting the appliance from
damage
Do not drop anything on the ce-
ramic surface of the hob. Even a
light object such as a salt cellar could
cause damage in certain circum-
stances.
Unless the pan manufacturer
states that you can do so, you
should never use pans with thin bases
on this hob and you should never heat
up an empty pan. Otherwise the hob
could get damaged.
Under no circumstances use a
steam cleaning appliance to clean
the gas hob. Pressurised steam could
cause permanent damage to the sur-
face and to components, for which the
manufacturer cannot accept responsi-
bility.
In countries which may be subject
to infestation by cockroaches or
other vermin, pay particular attention to
keeping the appliance and its sur-
roundings in a clean condition at all
times. Any damage which might be
caused by cockroaches or other vermin
will not be covered by the appliance
guarantee.
Protection from burning
Do not let small children use the
appliance or touch it during opera-
tion. The burner support, trivet, burners
and also the ceramic surfaces around
the burners heat up and remain hot for
quite a while after the appliance has
been switched off. Danger of burning.
Do not touch them until they have
cooled down. The use of oven gloves is
recommended.
Do not store anything which might
arouse a child’s interest in storage
areas above or next to the hob. Other-
wise they could be tempted into climb-
ing onto the appliance with the risk of
burning themselves.
Use heat-resistant pot holders or
gloves when handling hot pots and
pans. Ensure that the pot holders do
not come into contact with the flames.
Do not use large cloths, tea towels or
similar as the ends could touch the
flames and catch fire. Take care not to
let pot holders or gloves get damp or
wet, as this causes heat to transfer
through the material quicker with the
risk of burning yourself.
To prevent the risk of children
reaching pan handles and pulling
pans over with the danger of burning or
scalding themselves be sure to turn
pan handles inwards and out of their
reach.
Do not heat up unopened tins of
food on the hob as pressure will
build up in the tin and it can explode.
This could result in injury or damage.
Warning and Safety instructions
6

Do not use the hob as a resting
place for anything else. If the hob
was switched on inadvertently, or if it
was still hot the article could begin to
melt or catch fire.
Remove splashes of fat and other
food debris from the surface as
soon as possible. These are a fire haz-
ard.
Do not cover the hob with a cloth,
household foils or other similar ob-
jects. This could lead to danger of the
article catching fire, if the hob were to
be switched on inadvertently.
Never leave the hob unattended
when cooking with oil or fats as
these are fire hazards if overheated.
Overheated fat could catch fire and
even set the cooker hood on fire.
If oil or fat does catch fire despite
this do not attempt to put out the
flames with water. Use a suitable fire
blanket or fire extinguisher.
Do not flambé under a cooker
hood. Otherwise flames could be
drawn up by the suction of the cooker
hood, parts of which could then be
damaged or even set on fire.
Ensure that the flames from the
burner do not spread out beyond
the base and up the sides of the pan.
Do not spray areosols in the vicinity
of this appliance while it is in oper-
ation.
Spray canisters, aerosols and other
inflammable substances should not
be stored in a drawer under the hob if
there is no shelf separating the drawer
from the hob. If cutlery inserts are to be
placed in the drawer these must be
made of a suitable heat-resistant mate-
rial.
Warning and Safety instructions
7

With a damaged appliance
In the event of damage or a defect,
switch off the appliance immedi-
ately. Turn off the gas supply tap, and
disconnect completely from the elec-
tricity supply. Contact the Service de-
partment.
Ensure that the appliance is discon-
nected from the electricity supply be-
fore any servicing or repair work.
Any breakages or cracks in the ce-
ramic surface of the hob are de-
fects and must be treated as such.
Repairs to the gas and electrical
components of this appliance must
only be carried out by a suitably quali-
fied person. Repairs by unauthorised
personnel could be dangerous. On no
account open the outer casing of the
appliance.
While the appliance is under guar-
antee repairs should only be un-
dertaken by a service engineer author-
ised by the manufacturer. Otherwise the
guarantee is invalidated.
Warning and Safety instructions
8

urther safety notes
When using an electric socket near
the hob, care should be taken that
the cable of the electrical appliance
does not come into contact with the gas
flames or the hot parts of the hob. The
insulation on the cable could become
damaged, giving rise to an electric
shock hazard.
Always ensure that food is suffi-
ciently cooked or reheated. Some
foods may contain micro organisms
which are only destroyed by thorough
cooking, therefore when cooking or re-
heating foods, e.g. poultry, select a lon-
ger cooking or reheating time.
Do not use plastic or aluminium foil
containers. These melt at higher
temperatures and could damage the
ceramic surface. Fire hazard.
Before disposing of an old appli-
ance, ensure that disconnection
from the gas supply is made by a suit-
ably competent person. Switch off at
the mains electricity supply. Cut off and
render any plug useless. Cut off the ca-
ble directly behind the appliance to
prevent misuse. Ensure that the appli-
ance presents no danger to children
while being stored for disposal.
Warning and Safety instructions
9

Disposal of the packing
material
The transport and protective packing
has been selected from materials which
are environmentally friendly for disposal
and can normally be recycled.
Ensure that any plastic wrappings,
bags etc. are disposed of safely and
kept out of the reach of babies and
young children. Danger of suffocation!
Rather than just throwing these materi-
als away, please ensure that they are
offered for recycling.
Disposal of your old appliance
Old appliances contain materials which
can be reclaimed or recycled. Please
contact your dealer, your local waste
collection centre or scrap merchant
about potential recycling schemes.
Before disposing of an old appli-
ance, ensure that disconnection
from the gas supply is made by a
suitably qualified and competent
person. Switch off at the mains elec-
tricity supply. Cut off and render any
plug useless. Cut off the cable di-
rectly behind the appliance to pre-
vent misuse. This should be done by
a competent person. Ensure that the
appliance presents no danger to
children while being stored for dis-
posal.
Caring for the environment
10

General notes
A data plate for your appliance is sup-
plied with this documentation. It should
be stuck into the space provided at the
end of the instruction book. The ad-
dress of the nearest Service Depart-
ment is given on the back page.
Before using for the first time
11

Cleaning and heating up for
the first time
Before using for the first time clean the
hob and all removable parts as follows:
^The removable parts of the gas
burner assembly can be washed in a
mild solution of water and wash-
ing-up liquid. Wipe dry and reassem-
ble in the correct order (see
"Cleaning and care").
^Clean the ceramic surface with a
damp cloth only, and then wipe dry.
Do not use washing up liquid on the
ceramic surface as it can leave a
blue sheen on the surface which
may be difficult to remove.
Metal components have a protective
coating which may give off a slight
smell when the hob is heated up for the
first time. The smell and any vapours
will dissipate after a short time and do
not indicate a faulty connection or ap-
pliance.
Before using for the first time
12

Switching on, Switching off,
Controls
The control knobs are used to switch on
the burner and regulate the strength of
the flame.
ßthe gas supply is turned off
&strong flame
/weak flame
Switching on:
^The control knob for the burner re-
quired must be pressed in and
turned anti-clockwise to the large
flame symbol to switch on.
^When the flame ignites, keep the
control pressed in for 8-10 seconds,
and then let it go.
If the flame goes out, repeat the proce-
dure, keeping the control knob pressed
in for a few extra seconds.
^With the knob no longer pressed in
you can continue turning it towards
the small flame symbol.
Control the flame so that it does not
spread out beyond the sides of the
pan. As the outer part of the flame is
much hotter than the centre, the tips of
the flames should stay beneath the pan
base. Flame tips which extend beyond
the sides of the pan merely warm up
the air in the room and can also dam-
age pan handles and increase the dan-
ger of burning.
Switching off:
^Turn the knob clockwise until the ß
position is reached.
This stops the flow of gas and the flame
goes out.
Remember: Turn anti-clockwise to
switch on, turn clockwise to switch
off. The control knob cannot be
turned anti-clockwise from the small
flame symbol to the ßposition.
Using the gas hob
13

Pans
Pan size
–The simple rule: a large pan for the
large flame, a small pan for the small
flame.
–Wide, shallow pans are preferable to
narrow, tall ones. They heat up more
quickly as there is room for more
flame under the base.
– The base diameter of the pan should
not exceed 22 cm for the front burner
and 24 cm for the rear burner.
Using larger pans may cause the
flames to spread out to the sides and
damage or burn the worktop, wall
claddings or surrounding units.
–For safety and stability, please use
pans with a minimum base diameter
of 12 cm for the front burner and 14
cm for the rear burner.
Suitable pans
Any heat-resistant pans can be used on
a gas burner.
Pan bases do not need to be even for
cooking, (in contrast with those used on
an electric hob). Through the spreading
action of the flame, heat reaches all
parts of the base.
Thick pan bases reduce the risk of food
overheating in places, as heat is better
distributed.
Thin pan bases conduct heat to the
food inside more quickly than thicker
ones. However as the heat is not evenly
distributed over the pan base there is a
danger that food may heat up unevenly.
Stir the food frequently.
Using the gas hob
14

Safety cut-out
This appliance is fitted with an electric
ignition safety device which cuts off the
supply of gas to a burner if the flame
goes out, for example if food has boiled
over, or if there was a sudden draught.
^To use the hob again, turn the knob
clockwise until the "ß" position is
reached and switch on as normal.
The safety cut-out operates independ-
ently from the electricity supply. This
means that it is still active when the hob
is used during a power cut (see "Use
during a power cut").
Use during a power cut
If there is an interruption to the electric-
ity supply the gas can be ignited with a
match:
^Press in the relevant control knob and
turn it anti-clockwise to the large gas
symbol.
^Hold the control pressed in and light
the gas at the burner with a match.
^Keep the control knob pressed in for
a further 8-10 seconds and then re-
lease it.
Using the gas hob
15

Under no circumstances use a
steam cleaner to clean this appli-
ance. Pressurised steam could
cause permanent damage to the
surface and to components for
which the manufacturer cannot ac-
cept liability.
Do not use any sharp objects which
could damage the seal between the
ceramic surface and the surround-
ing frame and between the frame
and the worktop.
Never use aggressive or abrasive
cleaning agents, e.g. grill and oven
sprays, stain or rust removers,
scouring agents or abrasive
sponges.
Do not use washing up liquid on the
ceramic surface as it can leave a
blue sheen on the surface which
may be difficult to remove.
The ceramic surface can be cleaned
using a proprietary cleaner for ce-
ramic surfaces. Follow the manufac-
turer’s instructions on the packag-
ing.
Do not let the ignitor in the burner
get wet. It it gets wet it will not spark.
After cleaning the ceramic surface it
must be thoroughly dried with a soft
cloth to prevent a build up of
limescale deposits.
Ceramic hob surface
The ceramic surface should be cleaned
regularly, preferably after each use.
Before cleaning, allow the hob to cool
down. Once it has cooled down, wipe
soiling off using a damp cloth. Stubborn
soiling is best removed with a shielded
scraper blade.
Then apply a proprietary cleaning
agent for ceramic surfaces using a soft
cloth or kitchen paper towel. This way
any limescale deposits, caused for ex-
ample by water boiling over, are re-
moved.
Finally wipe the hob surface with a
damp cloth and then dry it with a clean
soft cloth.
Note that some cleaning agents contain
a protective additive designed to pre-
vent water marks and smears adhering
to the surface.
Cleaning and care
16

Burners
The burners can be dismantled for
cleaning once they have cooled down.
Proceed as follows:
^Take off all the removable parts of the
burner and wash in a solution of hot
water and washing-up liquid. Then
dry them all thoroughly. Make sure
that the flame holes are clean and
completely dry.
The surface of the burner cover will
gradually become more matt with time.
This is quite normal and will not affect
the operation of the hob.
^Wipe the fixed parts of the burner
base with a damp cloth and dry after-
wards.
^Gently wipe the ignitor and the igni-
tion safety device with a well
wrung-out cloth and wipe dry with a
clean cloth.
Cleaning and care
17

Re-assemble the burner as follows
(see illustration):
^Make sure that all the locating tabs
and notches line up exactly. Place
the burner head con to the burner
base fso that the ignitor and the ig-
nition safety control extend through
their respective holes in the burner
head. The burner head must click
into place correctly.
^Replace the burner cap bensuring
that the locating tabs fit into the
notches in the burner head.
Important: replace parts in the correct
order after cleaning.
1. Do not mix up the top and bottom.
2. The locating lugs must fit exactly
into the notches.
Cleaning and care
18

Repairs to the gas and electrical
components of this appliance must
only be carried out by a suitably
qualified and competent person to
ensure safety. Unauthorised repairs
could be dangerous.
However, some minor problems can be
resolved as follows:
What to do if ...
... the burner does not ignite after
several attempts
Check whether
– the burner is correctly assembled.
– the gas supply tap is turned on.
– the burner is dry and clean.
– the flame slits are clean and un-
blocked.
–The mains fuse has blown. If this is
the case, call an electrician or the
Service Department. (The gas can
be lit with a match). (See "Use during
a power cut").
... the gas flame goes out after being
lit
Check whether the burner cover is cor-
rectly assembled.
... the ignitor on the burner does not
spark?
Check whether food deposits have
lodged themselves between the ignitor
and the burner cover.
Carefully remove any soiling. Do not let
the ignitor get wet.
... the flame suddenly looks different
Check whether the burner is correctly
assembled.
Problem solving guide
19

Connection to the gas supply, or
conversion from use of one type of
gas to another should only be un-
dertaken by an approved fitter, who
is responsible for the correct func-
tioning of the appliance when in-
stalled. Every appliance should have
its own isolating valve.
Check with your local gas supplier
about the type of gas and its calo-
rific value and compare this informa-
tion with the type of gas quoted on
the data plate.
The gas installation must be made in
such a way that the isolating valve is
visible and easily accessible.
The gas hob is normally suitable for
connection to either natural or liquid
gas. Check suitability in your country
with your dealer or agent.
The hob is supplied ready for connec-
tion to natural gas.
Depending on country, a set of jets for
conversion to liquid gas is included
with the hob.
Conversion to another type of gas is
described in the separate Installation
Instructions.
Gas connection
20
Other manuals for KM 405
1
Other Miele Hob manuals

Miele
Miele KM 553 User manual

Miele
Miele KM 6322 User manual

Miele
Miele KM 6520 FR User manual

Miele
Miele CS 1212-1 User manual

Miele
Miele KM 251 User manual

Miele
Miele KM 7404 FX User manual

Miele
Miele KM 6639-1 User manual

Miele
Miele KM 3014 User manual

Miele
Miele KM 2335 User manual

Miele
Miele CS 1326 Specification sheet

Miele
Miele KM 3014 User manual

Miele
Miele CS 1223 Assembly instructions

Miele
Miele KM 2357 User manual

Miele
Miele KM 6328-1 User manual

Miele
Miele KMDA 7272 FR-A User manual

Miele
Miele CS 1112 User manual

Miele
Miele KM 360 G User manual

Miele
Miele KM 360 G User manual

Miele
Miele KM 5775 Assembly instructions

Miele
Miele CS 1134 User manual