4
Installing Your Freezer
Before using your freezer, remove the exterior and
interior packing.
• Keep 50 mm of space between the back of the
freezer and the wall and 100 mm between the
side of the freezer and the wall.
• Do not shorten the power cord or fold into coil
during operation. It is not recommended that
the cord is kept close to the compressor at the
back of the freezer, as the surface temperature
is quite high when operating. Making contact
with the two would de-activate the insulation or
cause electricity leakage.
• Avoid locating the appliance in moist areas. Too
much moisture in the air will cause its metal
parts to become rusty. Do not spray water at
the freezer as this may cause a short circuit,
rust metal parts or weaken the insulation.
• Locate the freezer away from direct sunlight and
sources of heat (stove, heater, radiator, etc.).
Direct sunlight may affect the acrylic coating
and heat sources may increase electrical
consumption.
• Place your freezer on a floor that is strong
enough to support the weight of the freezer
when it is fully loaded. Do not place the freezer
on any soft material such as foam, plastic, etc.
Do not place anything that may echo near the
freezer. To level your freezer, adjust the legs at
the front of the freezer.
• Keep your freezer away from any volatile or
combustibles substances such as gas, petrol,
alcohol, lacquer and banana oil, etc. The above-
mentioned objects, or similar, can not be stored
in the freezer.
• Be sure the freezer stays in the upright position
during transportation.
• This freezer should only be used with a power
supply of single phase alternating current of
220-240V~ 50Hz.
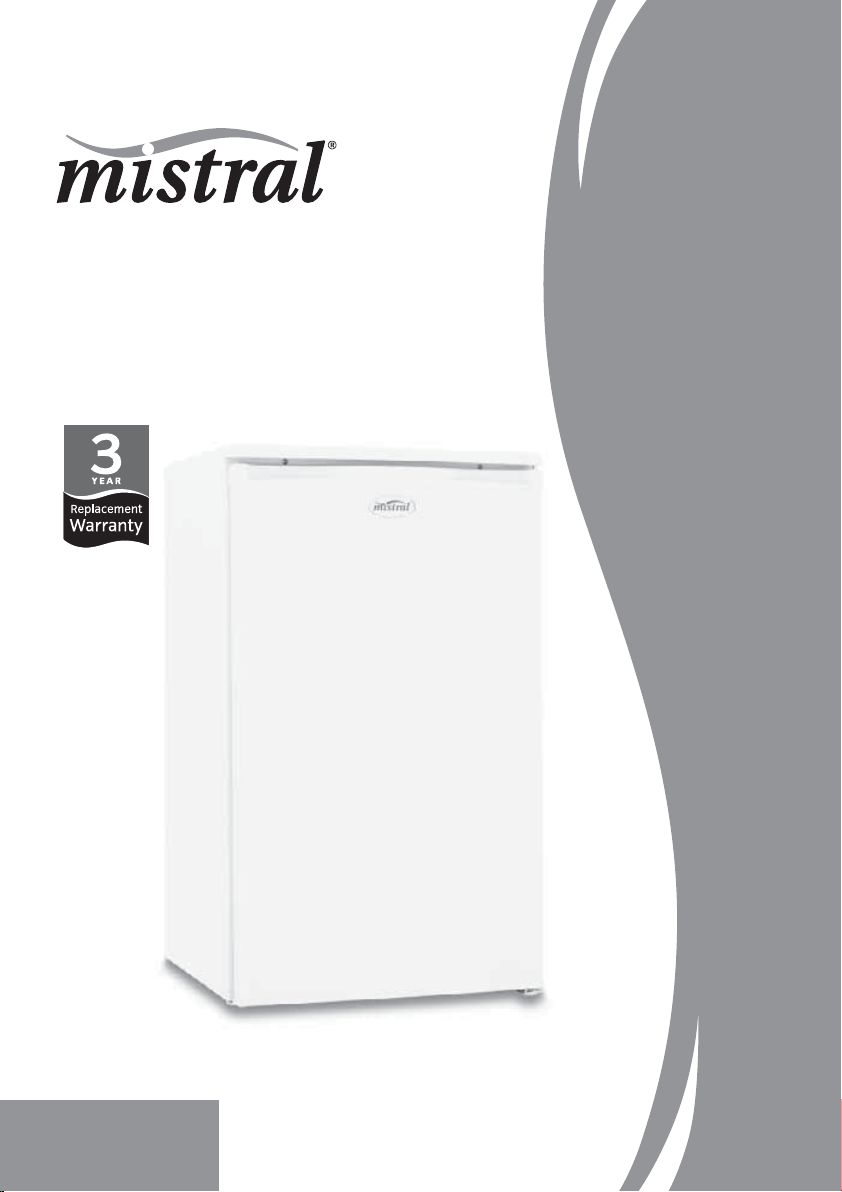
Reversing the Door Swing
of Your Freezer
This freezer has the capability of either opening the
door from the left or right side. The unit is delivered
to you with the door opening from the left side.
Should you desire to reverse the opening direction,
please follow these instructions.
NOTE: All parts removed must be saved to do
the reinstallation of the door.
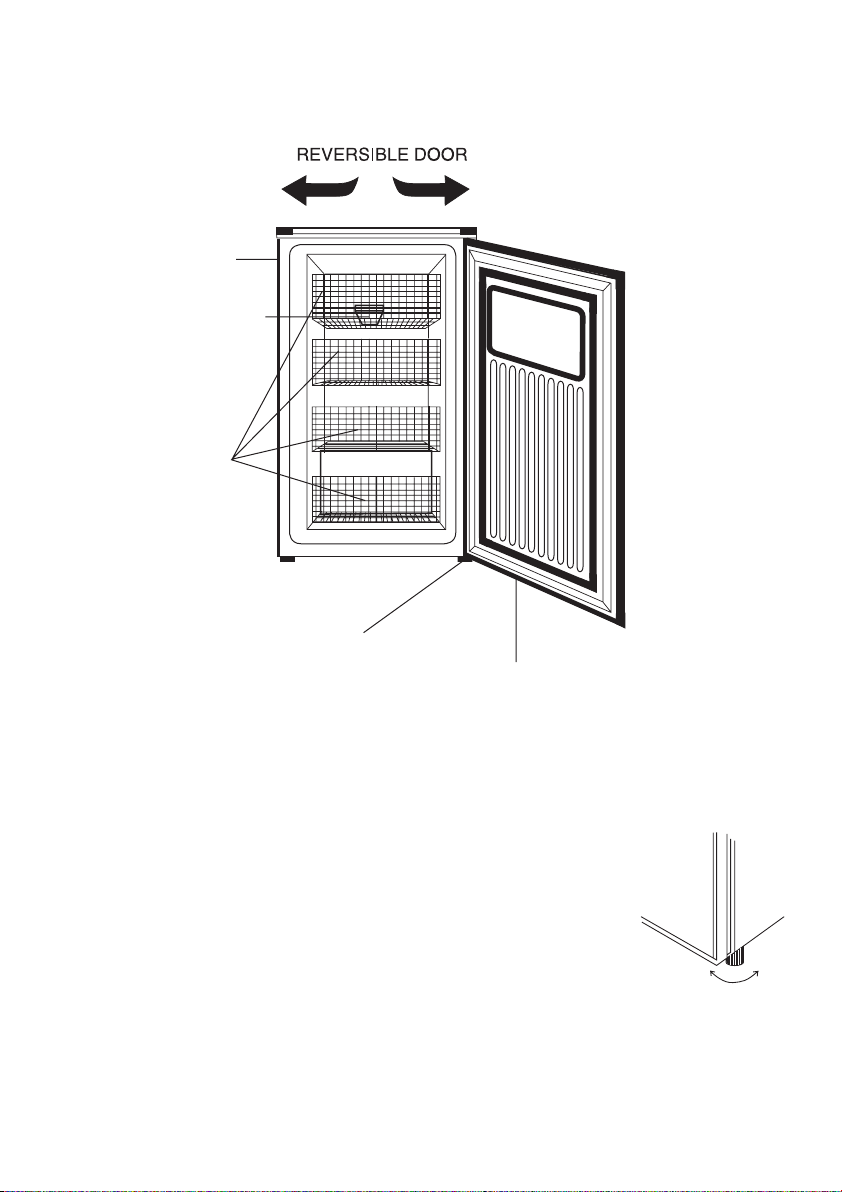
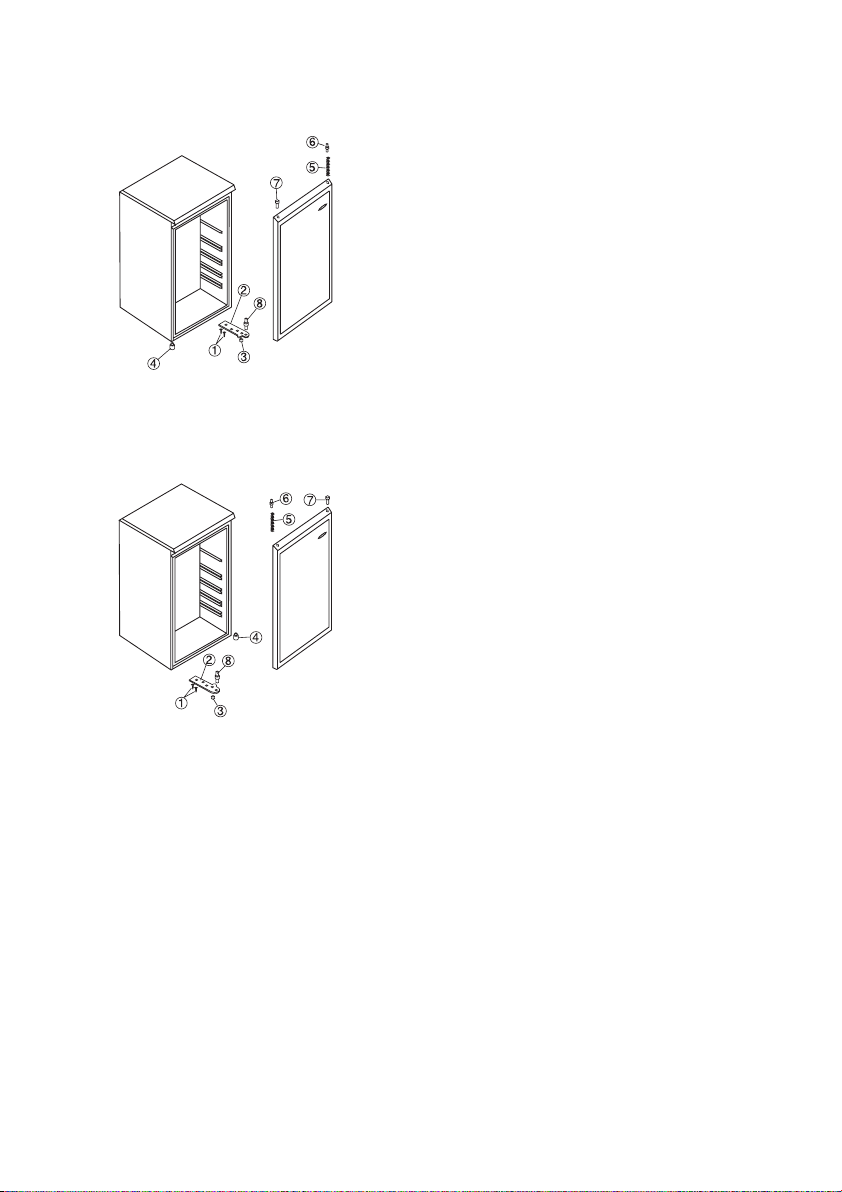
• Remove the two screws (1) that hold the lower
hinge (2) (right side) to the frame. Also remove
the screw-type levelling front leg (3).
• Remove the left front leg (4) and transfer it to
the right side.
• Lift the door and place it on a padded surface to
prevent scratching it. Make sure to remove the
spring (5) located inside the upper right hole of
the door and the upper right side pin (6).
• Remove the plug button (7) from the upper left
hole of the door and transfer it to the uncovered
hole at the right side. Be sure to press the
button firmly into the hole.
• Insert the upper pin (6) previously removed
from the right side (step 3) and transfer it to the
other hole at the left side of the top frame.
• Insert the spring (5) previously removed (step 3)
inside the upper left side hole of the door.
• Set the door in its place making sure the pin (6)
enters the bushing at the lower upper frame
section (hole).
• While holding the door in the closed position,
secure the lower left hinge (2) previously
removed (step 1). Before placing this lower
hinge, remove the upper bolt-pin (8) and reverse
the direction of the hinge.
• Insert the bolt-pin (8) and do not tighten until the
top of the door is levelled with the counter top.
• Insert the two screws (1) previously removed
(step 1) and tighten them.
Note: Ensure all parts are kept in a safe place
whilst reversing the freezer door.