manuals.online logo
Brands
  1. Home
  2. •
  3. Brands
  4. •
  5. Mitsubishi
  6. •
  7. Sewing Machine
  8. •
  9. Mitsubishi PLY-E7203 User manual

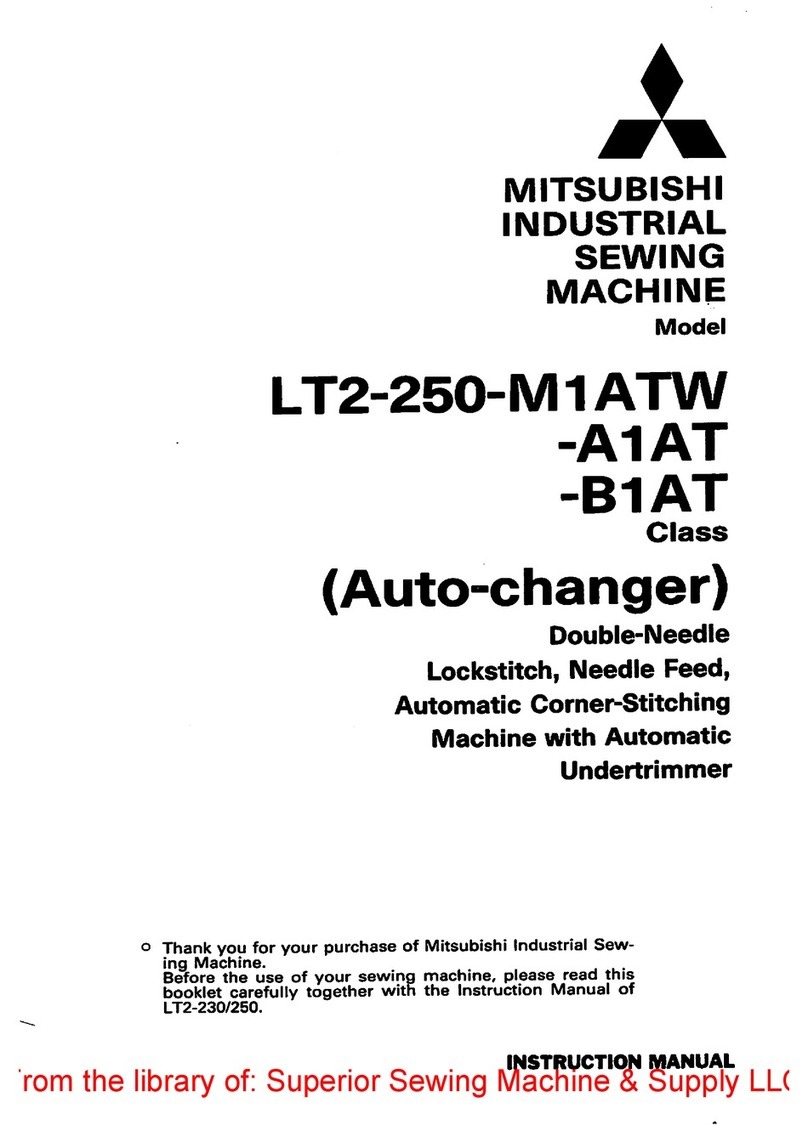
Mitsubishi PLY-E7203 User manual

AUTOMAT
IC
POCKTT\l/E
LTING
MACH
INE
PLY-E72OO
SERIES
PLY_E71OO
SERIES
(rXS
TRTJCTIoN
MANU,qr
))
No.
303036
Wewishto express
youoursincerethanlsforyourpurchaseof ourMITSUBISFtr
AUTOMATICPOCKET
WELTINGMACHINE. Weshouldbethanktul
if youwould
readthisinstruction
manual
carefully
beforestarting
theoperationand
wedohopethat
thismachine
will begeat potentialfactorin yourproduction.
CONTENTS
1. CONSTRUCTION
2. SPECIFICATION
3. PREPARATION
AND INSTRUCTION
BEFORE
OPERATION
OFTHEMACHINE
4. OPERATIONPANEL
5. OPERATION
BEF'ORE
STARTING
MACHINE
6. OPERATION
7
" SELECTION
AND MEMORYFOREACHFUNCTION
(SEr UP)
7-1 SET
I.'P FOROPERATION
7-2 SET
I.'PIN DIP SWITCH
7-3 ADruSTMENTOFTIMER
8. COTJNTER
9. ADruSTMENTOFTAB KNIFE
IO. PROCESS
LISTOFOPERATION
11. ADruSTMENT
OFDOUBLEAND SINGLE
WELT
12. INSTRUCTION
FORMACHINEHEAD
13. EXCHANGE
OFGAUGEPARTS
T4. CONNECTION
TOAIR
15. MARKING LAMP
16. INDICATIONFORTROUBLE
IGI)TNDICATION
FOR
TROUBLEPOINTS
I6.2)INDICATION
FOROPERATIONPOINTS
16-3)CONFIRMATION
OFSWITCHCONDMON
(l)
1 ) COhISTR.IJCTIOI\I
This
mainconstruction
of thisAutomatic
Pocket
WeltingMachine
are
asfollows:
(
Ufilw
( -*g,
\ \h(h
O MachineHead : This machine
head
of PLY-E series
is specially
instaliatedas
Automatic Pocket
Welting Machineuse.
@ operationPanel : Liquid crysral
displayis adopted
onrhe
operarion
panel
and
operating
is shown
by illustration
onthescreen,
andalso,trouble
examination
monitoris installated.
@ clottr Feeding
Device : Ir is conrrolled
in 0.1 mm unirby S-phasestepping
motor.
@ MachineMotor : MITSUBISHI ){J--554-20 )CL-FMF-2G5
@ ControlUnit : MITSUBISHI FX2NC
@ operation swirch Pedal: Two (2) Pedals
of theright andleft separared
from the
machine.
@ SfeCfgn : Take-offandstacks
rhesewnproducts.
Q)
6
lt
2 I seeCIFI<]ATIohTS
RPLY-E
7203 PLY-E
7194 PLY_E
7r91
MACHINE HEAD TWO NEEDLESTRAIGIITSEWER
WTIH ONE STDE
NEEDLE STOPMECHAMSM AUTOMATIC POCKET
WELTING SEWING
MCHINE I{EAD
TWO NEEDLE STRAIGHT SEWER
AUTOMATIC POCKET WELTING SEWING
MACHINE HEAD
SEWING
SPEED rffi-z4m spm.
(WHEN
SEWING
BY
ONE
SIDE
NEEDLE:800som) 1600-2400
spm.
NEEDLE
GAUGE STANDARD: 1 0/1 2(mm)
SEMI-STANDARD: 14lr 617812
O
(mm) STANDARD: 9/1O11 2(mm)
SEMI-STNDARD
: I 4
| t 6
118
12O(mm)
SPECIAL: 2 5. 4 . 3 1 . 8 (mm)
NEEDLE DPx17 #1 6(#14,/#tB)
l35xr7#l 0 0(#90
/#t 1o) MTxl9O #16(#14,/#18)
190 #r00ft90,/#1 l0)
BACK.TUCKING SELECTmOM CONDENSEDSTITCH
(l-2mm)ORBACK STITCH(l-2.5mm)
SEWINGLENGTH 2. 5mm (1 5-3 mm)
SEWINGLENGTH 20mm-2O 0mm (CENTERKNIFE.
30mm-2 00mm)
MEMORY FOR
SEWINGLENGTH 6-KINDS (CAN BE SETIJPBY lmm UMT)
FLAP SEWING ACCEPTABLE UNACCEPTABLE
CYCLE SEWING SET UP WITHIN IO.KINDS FOLDING SYSTEM : DOUBLE
WELT . SINGLEWELT . MODIFIM SINGL
SHAPEOF WELT E WELT
IN CASEOF FLAP SEWING.DOUBLE WELT . SINGLE WELT ONLY
THREADS EXCLUSTVE
USETIIREAD FOR AI.ITOMATTCMACHINE. HIGH SPUN#50
CENTER KNIFE UPPER
KNIFE DRIVING SYSTEM
TAB KNIFE CERAMICS- I PAIR
STACKER STANDARD : YS-2(PICK-UPSYSTEM)
OPTION:
YS-l (BAR SYSTEM) OPTION
CI.OTTI
FEEDING SYSI-EM s-PHASE.STEPPTNGMOTORDRIVING SYSTEM
CONTROLL SYSTEM MITSUBISHI SHEEKENCER
MOTOR 3-PHASE:200-240V:XL5
54-20lXC-FNf'-20-05
SINGLE
PHASE
:
100-120V
:
XC-FMF-
1
0-05/XL554-
1
0
ELEC1RICITY 3-PHASE
: 2 OOV-24 0V . SINGLEPHASE
: I 0 0V- 1 2 0 V
EI-ECTRIC CONST'IVIPI]ON 0. 75VA
AIR PRESSIIRE 0. 5-0. 6MPa
AIR CONSUMPTION 1ONL/min
DIMENSION (mm) W7
10xl-l32OxHl22O
WEIGHT 195KG
PRODI'CTION CAPACTTY
(pieace/8hours) WITHOLIT
FLAPSEWING
: 1,950.WTIH FLAP SEWNG : 1,5OO.
SLANTSEWING
WTIH FLAP:1,560
SI,A.NTSEWING
WTIHOLIT
FLAP:1.200
(3)
3I PREPARATIOI\T AI\ID AT:TENT:rIOI\T
(1)
3-1
a)
b)
c,l
STACKER
FOOTPEDAL
. INSTALLATION OF MACHINE, FOOTPEDAL AND STACKER
FIX TT{E
MACHINE-BODY
Thecastershasbeen
equipped
with machine-body
for easy-transportation,
sotransport
themachine
to theinstallingplace,
thentakedownthe lock-lever
@ of thecaster
O andlock it. .
INSTALLATION OFFOOT PEDAL
Connect
with 2 pcs.
connector
of machine
sideconnector
(6). This pedal
is canbe installed
aryour
convenient
working
position.
INSTALLATION OF STACKER
Remove
left sidecover. Remove
rwo hexagonal
bolts(M8) locatedatdown of left sideof machine
@ (from operator
side)andfit thestacker
with machine
bodyby theabove
rwo hexagon
al bolts.
Then,connect
theah hosewith the manifold @ . ena connect
with electromagnetic
vaiveto the
connector
No. (30)(31)(32)(not
use
(32)by
stacker)
fromwiringduct
@ of main
body's
lef side.
Then,make sure
thatthe armof stackershould
not betouchedwith anyother whenif you operated
andfixit goodposition.
CONNECTION OF ELECTRICPOWERSOI.'RSE
Connect
the electricwire from thepowerstitchbox of machinefront sideto the
electricpowersource.
Fourcorewire for threephase, and three
corewire for singlephase.
Note : Boththreephase
andsinglephase
, green
wire is for earth,which shouldbeconnected
to rhe
$ound.
AIR CONNECTING
Connect
to air valve@ those
joint lt4).
Supplypressure
morerhan
0.6 Mpa (6 kgs/cm2)all thetimes.
This machinewasalreadyadjusted
at 5 Mpa (5 kgs/cm2)
by thepressure
adjusting valve.
(4\
d)
(2)13y
e)
3 _ 2. LUBRICATION
a)Lubricationto thesewingmachine
(Spintle Oil)
Lubricate few dropsof oil to upper part of
the arm andthe lubrication hole.
Lub,ricationto the hook part, openthe rigttt
andIeft lower plateof main clamp, andpull
out the right andleft oil gaugepins, andthen
lubricate through the oil gaugepin hole. :
To be lubricate up to markedline of the
gaugepin"
b)LUBRTCATION TO MACHINE MAIN BODY
Lubricate few dropsof oil to the tab knife bar,
main clamp driving rail andthe circumference
of the stacker. Wipe off extraoil becauseof
geningmanydust.
Note : Lubricate
TurbingOil #32to cylinders
onthe
machine.
4I
4- OPER.ATIOhI ETO><
| ) E7200
series
control
panel
4 - 2 ) 87100
series
control
panel
Halfway stop switch
Turn-over indication portion in touch panel becomesswitch.
c
\t
@
tll;ll c)
g00006
a30000
]nr'--;=;F
_c 00008 m
o30000
I
5
lD-+ I
L-------J
8l
0_l.-
I
3I
0I
0I
0
(e)
a)O Hafway stopswitch
This is the switch when a trouble occurs
during operation.
When this swirchis pushed,
sewing
machinestops
upmost
point and'
centerknife stopsat the rising position
at the condition in the a Automatic
operation.
(Halfway stopswitchwaspushed
in, it is
locked .)
How to cancel
halfivaystopswitch?
When it is tumed in the arrow
directionof the switch,a lock is cancelled,
and they come direction- indication before
operationby hand/backward.
When pushforward/backwardswitch
@ [ool , main
clamp
stops
at original point (end of forward)
with descenton low speed and
main clamp is released Then, remove the
material.
b)@ by hand,forward/backward
swirch Iool
ln case
mainclampis setposition,
when
pushed,
it movesto original position
(end
of forward).
ln caseoriginal position, when pushed,
it moves
backwardandstops
at setposition
!
I
/61
@
F\
\?/
(z)
5 I OPER-A:TTOI\T
BEFOR.E DR.I\ T TG
a)Indication
of power
on
Whenpushed
@ tool , main
clamp
moves
with low speed
andit stops
original point (endof front).
b) Indicationof Testerfunction
(A)Breakingthread
Sensor
(option)
(B)Confirm of rising CenterKnife
(C)Confirmof rising TabKnife
(D)Confirmof descending
TabKnife
(E) [1o] un-use
(F) tqll confirmof mainclamp's
original
position
(G) [rtJ confirmof needle
original
position
(H) [r) conhrmof refum
under
thread
trimming
O) tOl un-use
It isindicated
turn
"on"condition. over only sensor
of
Status
of Power"on"
(c) (D) (E) (F) (c) (H)
Name of Sensor normal (Power on) abnormal(Poweron)
rndicate function indicate check point reason
(A) [u Jcut uppe
rThread (option) off
standard find out snap ol
thread on
turn-over soonafterdriving
halfway stop
status
sensitivity adjustment's
defect
detector's
defect
(B) [r-] confirm of
rising Center Knife on
turn-over confirm (rising)
ol
Center
Knife off off
standard Centerknife is
not rised mechanism, electro
valve,controller's
defect
(C) ['1f
] confirm of
risinqTab Knife off
standard confirm of rising
Tab Knife on
turn-over Tab knife
risins oosi
5
IOn mechanism, electro
valve.controller's defect
(D) [1]J confirm
or
descending
TabKnitc on
turn-over c
o
nfir
m of
descendingTab Knife off
standard Tabknifeis
not
descendins. mechanism, electro
valve,contro
ll
er'sdefect
(e) [1o] un-use off
standard
/-\ r--t
tl.i LeJj conllrmof
main clamp's
original
potnt
off
standard comfirm
of main
clamp's
original
position
on
turn-oYer sensor
installpositionis
no
good ' sensor
is
defect
(G) [$] confirm of
top needle
position off
standard confirm of
machine's stop
oosition
off
standard machine
stops
position
isdefect decectorinstall
position
isnotgood ' detectoris
defect
(H) [tsJ confirm of
return down thread
nr rt
on
turn-over confirm of retum
moving
knifeon
down
thread
cut
off
standard returnposrtlon
of moving knife
on down thread
cutis defect
choke with cutof ' sensor
is defect
(l) tOl
un-use off
standard standard
(8)
b) Upper threadtrimmer switch@ t X I
This switchis used
whenchanging
upper
threadsor breaking
thread.
Moving knife is comingdown during
touchingit. Releaseit, comingup, cutting
threadandkeepingupperthread.
Take out threadfrom needle,take out
about 20cm forward in parallel from
needlethen pushmain switch. After
checkto hangthread
on both sideof
moving knife, release
the switch. The
moving knife will riseandcut upper
threadandkeeping.
Down threadtrimming switch
@ tJ.l
This switch is usedwhenchanging
bobbin.
After changebobbin,takedown thread
about 5 cm from cap and settingto
bobbin. Make onerevolutionMachine
Pully , takedown thread
on needdle
plate.
Takeout about 1 0 c m foward
in parallel,push
downthread
trimming
switch"
Thread
is cut andkeepingit under
needle
plate.
Total
counter@ [= O L 2 3 4l
Countthe quantityof sewing
afterre-set.
Touch
@ [= O I 2 3 4 I, then
screen
will
re-setas@
[=0 OO
0 OI .
Subtractioncounter
O@ tO 3 3 0 0 o mml
ln advance,setup thetotal sewing
length
fo material
sewfor thelengthof down
threads
(UoUUln).
Everytime sewing,
the sewinglengthis subtractredfrom
pre-set
total sewing
finished
thetotal
sewing
lengthfor production
quantity
themainclampreturns
andstops
atthe
originalposition,
screenchange
to
subtraction
finishedpicture.
c)
d)
e)
A
LS/
@
@
@
\q/
O
o
(e)
Setup of subtraction
counter
If touch
@ t g 3 0 0 0 I, screen
indicateTen-key. Touch
to Ten-key,
and
setup.
After finished
setup,
touch
@ [1 I
Example: Revisesetup30000
in designed
count
1) Touch@ I g 3 0 0 0 l .Ten-key
will beindicate
z) touch
[31
:) rouch
[01
+) touch
[ol
s) Touch
lol
6) Touch
[01
2) Touch
lgNrl
Ten-key
will bedisappered
and
indicationwill
be
IgOOO0l and
setup rn30000mm.
o
@IersCD
o
(
ro)
f ) INDICATION
of subtraction
counterclose
Touch@ (01 , counter
indicate
original
setcount.
ln case
changetheset
count, touch
O t g 3 o 0 o I, itwillbeappeared
set
picture
in screen.
Touchrevised
number
andtouch
@ Ie NT E RL
touch
@ [0] ,ttten
the
number
will be
revised.
* Whendelivered
themachine,it is already
setup 33000mm.
In case
not usingsubtractioncounter,
pleasesetup[999991.
e ) Setup of main clampprecede
work side
@ [:l @ (ql
Left, in case
of setupfor procede
work,
Touch
@ [:l .
Right, incase
of setup for procede
work,
Touch @ Isl
* [n caseof sewingin flap at sametime,
sewing
side
isprecede
work.
h) Key
ofTab
kniferarsing @ t00t
Thisis confirmfor sharp
of theknife
Touch
@ tfifll ,tabknifewill raising.
i ) Indicationof TabKnife'sraising
@ tml
Touch
@ [nfrl , it will befalling.
@@
fol
.9
@
\0/
/ih
\atl
I
4N
(n)
6 f OPER.ATIO5I
6 - f ) Designated
sewing
of sewing
length
a ) seLgCT TFm SEwING LENGTH
Six (6) kind of sewing
length
are
alreadysetup in advance.
Whenpushon eitherfrom 6-kindsof
which indicated
downof the screen,
it will be indicated
widely in thecenter
of screen,machine
will sew
the
requested
length.
b ) HOW TO change
thesewing
length
?
Whentouchindication
key @ of
drivingsewing
length
whichindicated
wrdely
in thecenter
of screen.it
will be
indicated
setup picture
of sewing
length.
Touchyour required
sewing
length,
it will beindicated
in thecenrer
of screen..
When touch
@ [ toOI , hundred
place
will
be changed. 2, L . D . 1...
When
touch
@ ItOI , tenplace
will be
changed.
0 l.).*.9.'.
Whentouch@
ttl ,on"placewill
be
changed.0
1.2.-.9 1...
In case you wantto change
other
sewing
length,
touch
thesewing
length
whichyou
want to change
sarne
asabove, let to be
indicated
in center
of screen,please
change. After setup,touch @ t $ I .
It returns
thepicture
for whichis sewen
rn
designated
sewing length.
Ol.5 ,f3.0 ,ttl5
Oo.s Or.s tz.s
@
6]
a 2 3
I
RI
@
@@
ujE[qiu
ll^2.s fls 430
Ot.s .l,o.s {z.o ,lrz.s
ffi
c
/F\
a,
@
Ol.4 ,106 41.4
9oa {t.+ .l,t.s
@
l- 2 3
+2.2 lo.Z '13.0
,lrt.Z Ot.g 'l'O.Z ,lrZ.S
Q2)
c) ADruSTMENT of Tab knife in sewingof
designated
sewing
length
It canbe memorizein 6 kinds of stitch
length,
andcanbeadjustseparetbly.
ln sceenof designatedoperationin sewing
lengttr, touch @ of the indic*ion key of
operationin sewing.
It will be setup screen
of sewinglength.
Touchthekey of sewinglengthto make
adjust,
it will be sewinglengthin the
centerof screeqcanadjust
of positionin
cutTab Knife of sewinglength.
F original pointside . R operation
side
ln caseslash
position
of F original
point sideis shallow:
Every push @ tOI , it will deepslash
in 0.5mm unit.
cutTab Knife of sewinglength.
F original point side . R operationside
In caseslash
position
of F original
pointsideis shallow:
Every push @ trt l , it will deep
slash
in 0.5mm unit.
@@
Ol.4 ltt0.6 ,t 1.4
go.s Or.+ Or.e
@
f-23
@
@@
@tr8
+2.2 +0.2 ,13.0
{t.z gr.s {oz {z.s
(t:)
In case
slash
of F origuralside
is deep
:
Every
push
@ I*l , it witt
shallow
slashin0.5
mmunit.
In case
slash
position
of R operation
side
isshallow
:
Every
push@ I9l , it will deep
slash
in0.5
mm
unit.
In case
slash
position
of R operation
side
is deep:
Everypush
@ (rt l , it will shallow
slash
in0.5mm
unit.
After finishing
set
up, touch
@ [s I
it will bereturned
to operation
screen.
6-2) FLAP SEWINGAT ONETIME
Photo
sensor
checks
theposition
of
start
flap sewing,
andit sewing
much
. l-] ,
rn (_J r
C When
touch , screen
will be
flap sewing picture.
@ When
touch ( I L screen
will be
sew
in designated
sewing
length
picture.
A) SELECTION
OFFLAP SETSIDE
In case
of sewleftcorsage,
Touch
@ t t- I , screen
wrll beindicated
leftflap.
In case
of sewrightcorsage,
Touch
@ t n I, t..".n will beindicated
rightflap.
In case
sew interchange
with rightand
left :
In case left forward sewing,
Touch@ (el , flap canbe sew
interchange as left * right- left
ln case
right forward sewing,
Touch @ [+l ,flup canbe sew
interchange asright- left- riglrt .
A
\g/
(
\!/
f 1.4 ,f0.6 ,tt.+
Oo.e Or.+
12
3
@
@@
[00J
[gJu
+2.2 10.2 13.0
Or.s {oz gz.s
23 53333;
a)
!Y!
F
tn.t
tl
(
l4)
6-3) CycresEwrNG
lt cansewin goodorder
with 6 kinds
sewingof designated
sewrng
length
andatwithiinabout
10lines
from
left . rightof flapsewing.
a
) uernvc cYcLEsEwrNG
C tsl
Sew
in designatedsewinglength Flap
atonetime
Touch
C I5l of screen.
CYCLE SEWING
Whentouch@
tS @l .screenwillbe
designated
screenof cyclesewing.
b)
c
1_ 2 3
(
rs)
C
) SET
UP
FOR
CYCLE
SEWING
It can
besetupCycle
Sewingfor
3-kinds-
(al .te) .(CI .
Select
from 6-kinds
of sewinglength
which
weresetup designated
sewinglength
in
about
l0 lines
and
fromleft - rightof
Flapsewing
for each
Cycle
sewing.
c-l) MAKTNG
sETup oF cycl,E sEwrNG
I A I
(l)Touch
@ tAl
Indication
of @ will be A O
- A 4
(2)
Selectlst process
of Cycle
Sewine
I A I
Touch IAo)
(3)Select
sewingform
@ tl I I touch.
Every
touch
d ll Parallel
sew
tl ll slantsew
I
[l ll slantsew
tl ll bo*r"*
il 'l bo*
r"*
the sewing form will be indicatedin order.
Be indicate the sewing form of the sewing
and then make setup.
(4) Selectionof @ nlap sewing . @ Sewing
of designated
sewrnglenght
In case
of Flap sewing,every touch@,
ILl FlapI-eft
[RI Plaprignt
It will be
indicated
alternately.
Be
set
up
corsage
side
which
issewing.
In case
of making
setup sewing
of
designated
sewinglength.
Every
touch
@, O-kinds
of sewing
length
whichsewing
of designated
sewing
length
will beindicated.
(5)
Selection
of @ Main
clamp
sending
mode
It can
beslowspeed
of sending
until
starting
of sewing.
If touch @, ( * I StOw START will
beindicated
and
SlowStart
wilt beset
up.
In case
of cancellation,
touch
@ again.
[ * I will bedisappeared
andSlow
Start
will be
cancelled.
@
@
@
@
6l
@
,/a\
\,@
@
@
@@
fo\
v@
@
to_/
(r6)
(o)SelPCuoN OF @ Starting
position
Make stopthemainclampin rear
position, andtransportto normal set
positionwith foot pedal
right on.
If touch
@, [ ./ I ReatStopwill be
indicatedandrearstopwill be setup.
In caseofcancellation,
touch
@ again,
[ / I will bedisappeard
andSlow Start
is cancelled.
(7)SELECTTON
OF
@ Ie I SreCrrn.
[:cl uerN cLAMp
FALL/BAcKwARD
Every
touch
@,
(
4I srecrun
[::cl Mnnl cLAMP FALLTBACKwARD
will be indicated.Be indicated
mode
of using.Thenit will beselected.
(s)
seruP
oF
@ te I cycle sEwrNG
ITEM AND CLOSING,
Setup of Cycleseu'ing,
in Set
up item of
last
sewing,doindicate
I e I CLOSINC
touch
@
It will cyclesewing
untilclosing
setup
section
A 0 -An (E I CLOSTNG.
(9)SET
UPoF CYCLE
SEWING
KB)) ./ C>,
Make set
up same
asabove
Cycle
Sewing ( A) .
@
@
@
@
@
@@
@
ll
'r
rrl e)
r_ 2 3
(rz)
(IO)
OPERATING CYCLE SEMNG
Select
of Qcle address
Every
touch
@, [aol . In OI .
I C 0 I will beindicated.
Adress
which
is indicated
will beselected.
In next,
select
thenumber
in address
whichstarts
in sewrng.
Everytouch@
t+| ,@ [eCOI
willbeindicated
[eC t I . [nC ZI
Thesewingformwhichis indicated
will beappear
in the
center
of screen
and
then
it can
operate.
In caseto make
sewing
of previous
number
again
by cutthread
etc.,
touch
@ t - I . It retums
thesewing
of the
previous
number.
(l I)To makefromCyclesewing
to
sewing
of designated
sewing
length
or
flap sewing.
Touch
@ tSI, th"n
itretums
to
sewingpattern
before
Cycle
sewing.
tl rrl <)
@
IX12
3
ll rrl e)
E
IX
g
(
l8)
6 - 4 ) SETUP OF OPERATION
Sewing
of designatedsewing
length
Flap
sewing.
When
touch
O [*l of operating
picture,
operatingset
uppicuture
will
beindicated.
(I
)THE OPERATING
OFMAIN CLAMP
SENDING
ONLY
When
touch
@ tll, the
indication
of
thecenter
will bedisappeared
andonly
operation
of sending
of marnclamp.
(2)OPERATING
OF SEWING
Whentouch
@ t | |
I, r".""nwrll
be
appearedsewingindication.
Theoperatingis onlysewing
tl
"
rrl C)
---
lL 2 3l;333tr;
@
@
\e/
@
@
@)
(le)

This manual suits for next models

4

Other Mitsubishi Sewing Machine manuals
Mitsubishi PLK-E0504 User manual

Mitsubishi

Mitsubishi PLK-E0504 User manual

Mitsubishi PLK-E5050 User manual

Mitsubishi

Mitsubishi PLK-E5050 User manual

Mitsubishi LS2-1180 Manual

Mitsubishi

Mitsubishi LS2-1180 Manual

Mitsubishi LT2-250-M1ATW User manual

Mitsubishi

Mitsubishi LT2-250-M1ATW User manual

Mitsubishi PLK-G6030 User manual

Mitsubishi

Mitsubishi PLK-G6030 User manual

Mitsubishi lu2-4710 User manual

Mitsubishi

Mitsubishi lu2-4710 User manual

Mitsubishi PLK-E03BT User manual

Mitsubishi

Mitsubishi PLK-E03BT User manual

Mitsubishi LU2-410 Manual

Mitsubishi

Mitsubishi LU2-410 Manual

Mitsubishi PLK-E03BT User manual

Mitsubishi

Mitsubishi PLK-E03BT User manual

Mitsubishi DN-260 Operation and maintenance manual

Mitsubishi

Mitsubishi DN-260 Operation and maintenance manual

Mitsubishi LT2-230 User manual

Mitsubishi

Mitsubishi LT2-230 User manual

Mitsubishi PLK-A2016FL User manual

Mitsubishi

Mitsubishi PLK-A2016FL User manual

Mitsubishi LU2-4410 User manual

Mitsubishi

Mitsubishi LU2-4410 User manual

Mitsubishi LT2-250 Manual

Mitsubishi

Mitsubishi LT2-250 Manual

Mitsubishi PLK-E1008H User manual

Mitsubishi

Mitsubishi PLK-E1008H User manual

Mitsubishi PLK-E Series User manual

Mitsubishi

Mitsubishi PLK-E Series User manual

Mitsubishi LS2-190 Manual

Mitsubishi

Mitsubishi LS2-190 Manual

Mitsubishi PLK-B03BT User manual

Mitsubishi

Mitsubishi PLK-B03BT User manual

Mitsubishi PLK-E2010R User manual

Mitsubishi

Mitsubishi PLK-E2010R User manual

Mitsubishi DB-189 Operation and maintenance manual

Mitsubishi

Mitsubishi DB-189 Operation and maintenance manual

Mitsubishi PLK-E1010 User manual

Mitsubishi

Mitsubishi PLK-E1010 User manual

Mitsubishi CB-610 User manual

Mitsubishi

Mitsubishi CB-610 User manual

Mitsubishi LS2-210 Manual

Mitsubishi

Mitsubishi LS2-210 Manual

Mitsubishi LT2-2230 User manual

Mitsubishi

Mitsubishi LT2-2230 User manual
Popular Sewing Machine manuals by other brands

Bernina classic 1008 manual

Bernina

Bernina classic 1008 manual

Singer 66-16 parts list

Singer

Singer 66-16 parts list

Vi.Be.Mac 3022LV MAINTENANCE INSTRUCTIONS MANUAL

Vi.Be.Mac

Vi.Be.Mac 3022LV MAINTENANCE INSTRUCTIONS MANUAL

Yamato CZ8000 instruction manual

Yamato

Yamato CZ8000 instruction manual

JUKI LU-2828NV instruction manual

JUKI

JUKI LU-2828NV instruction manual

Brother Simplicity SB7050E Operation manual

Brother

Brother Simplicity SB7050E Operation manual

White 1010 instruction manual

White

White 1010 instruction manual

JUKI L-1 Series instruction manual

JUKI

JUKI L-1 Series instruction manual

Riccar 9800 instruction manual

Riccar

Riccar 9800 instruction manual

Brother Serger 1034D manual

Brother

Brother Serger 1034D manual

Brother CS9100 Operation manual

Brother

Brother CS9100 Operation manual

ZOJE ZJ1900DSS-3-04-V4-TP Operation manual

ZOJE

ZOJE ZJ1900DSS-3-04-V4-TP Operation manual

Janome S521 brochure

Janome

Janome S521 brochure

JUKI AC-172N-1790 Setup manual

JUKI

JUKI AC-172N-1790 Setup manual

SOLAC SW8220 Instructions for use

SOLAC

SOLAC SW8220 Instructions for use

IMB MB9018B instruction manual

IMB

IMB MB9018B instruction manual

KANSAI SPECIAL DFB MR-S Series Parts List, Instructions

KANSAI SPECIAL

KANSAI SPECIAL DFB MR-S Series Parts List, Instructions

Singer QUANTUM L-500 instruction manual

Singer

Singer QUANTUM L-500 instruction manual

manuals.online logo
manuals.online logoBrands
  • About & Mission
  • Contact us
  • Privacy Policy
  • Terms and Conditions

Copyright 2025 Manuals.Online. All Rights Reserved.