®
Cadre LCD
pour photos numériques
Veuillez lire la présente notice avec attention avant le
fonctionnement et conservez-la pour pouvoir vous y
reporter ultérieurement.
1 Possibilités dʼutilisation
Le DPF-170 peut afficher sur son écran TFT LCD des
photos et les changer automatiquement après une
durée réglable. Les photos doivent être au format PEG
sur une carte mémoire (SD, SDHC, MMC ou MS).
2 Conseils dʼutilisation et de sécurité
Les appareils (cadre, bloc secteur et télécommande)
répondent à toutes les directives nécessaires de
lʼUnion Européenne et portent donc le symbole .
GLes appareils ne sont conçus que pour une utilisa-
tion en intérieur. Protégez-les des éclaboussures,
de tout type de projections dʼeau, dʼune humidité
élevée de lʼair et de la chaleur (plage de tempéra-
ture de fonctionnement admissible 0 – 40 °C).
GNe faites pas fonctionner le cadre et débranchez le
bloc secteur immédiatement dans les cas suivants :
1. le cadre ou le bloc secteur présentent des dom-
mages visibles.
2. après une chute ou accident similaire, vous avez
un doute sur lʼétat de lʼappareil.
3. des dysfonctionnements apparaissent.
Dans tous les cas, les dommages doivent être répa-
rés par un technicien spécialisé.
G
Pour le nettoyage, utilisez uniquement un chiffon sec
et doux, en aucun cas de produits chimiques ou dʼeau.
GNous déclinons toute responsabilité en cas de dom-
mages corporels ou matériels résultants si les appa-
reils sont utilisés dans un but autre que celui pour
lequel ils ont été conçus, sʼils ne sont pas correcte-
ment utilisés ou sʼils ne sont pas réparés par une
personne habilitée ; en outre, la garantie deviendrait
caduque.
Lorsque les appareils sont définitivement reti-
rés du service, vous devez les déposer dans
une usine de recyclage de proximité pour
contribuer à leur élimination non polluante.
AVERTISSEMENT Le bloc secteur est alimenté par une
tension dangereuse. Ne touchez ja-
mais lʼintérieur de lʼappareil car, en
cas de mauvaise manipulation,
vous pouvez subir une décharge
électrique.
3 Fonctionnement
1) Le DPF-170 est livré avec deux caches de re-
change (argenté et noir), si besoin, remplacez le
cache.
2) Vissez lʼétrier de positionnement (8) pour le cadre
avec la vis de réglage (1) sur la face arrière et
orientez-le de telle sorte que le cadre soit un peu
incliné.
3) Reliez la fiche du bloc secteur à la prise DC 5 V (6)
et le bloc secteur à une prise secteur 100 – 240 V~/
50 – 60 Hz.
4) Avec la touche (9) sur la télécommande ou la
touche (5) sur le cadre, allumez lʼécran. Une
image test sʼaffiche si aucune carte mémoire nʼest
insérée.
5) Insérez une carte mémoire avec images numé-
riques au format PEG dans la fente SD/MMC/MS
(7), contacts vers le bas et en direction de la fente.
La carte est immédiatement reconnue, une photo
apparaît sur lʼécran.
3.1 Télécommande
Tenez toujours la télécommande en direction du cadre
lorsque vous activez une touche. Il faut quʼil nʼy ait pas
dʼobstacle entre la télécommande et la fenêtre rouge
du capteur sur la face avant du cadre.
Si la portée de la télécommande diminue, rempla-
cez la batterie : Sur la face arrière, appuyez le ver-
rouillage vers la droite et simultanément tirez vers le
bas le support de batterie.
Placez la batterie (pile bouton Lithium 3 V de type
CR 2032), pôle plus vers le haut, dans le support,
replacez le support dans la télécommande jusquʼà ce
quʼil sʼenclenche.
En cas de non utilisation prolongée, il convient de
retirer la batterie car elle pourrait couler et endomma-
ger la télécommande.
Ne jetez pas les batteries usagées dans la
poubelle domestique, rapportez-les à votre
distributeur ou déposez-les dans un container
pour contribuer à leur élimination non pol-
luante.
3.2 Utilisation
Lorsque vous activez une touche, une barre dʼoutils
est visible brièvement en haut sur lʼécran, elle indique
la touche activée ou le réglage sélectionné.
1) Lorsque la photo dans le cadre est tête à lʼenvers
ou de côté, faites tourner la photo par une ou plu-
sieurs pressions sur la touche (3).
2) Réglez le format dʼimage par une ou plusieurs
pressions sur la touche MODE (2).
3) Réglez la durée de commutation dʼaffichage pour la
photo suivante par une ou plusieurs pressions sur
la touche TIME (10) :
5/15/30/60 secondes
5/15/30/45 minutes
1heure
◼= aucune commutation automatique
La durée peut également être sélectionnée lorsque
vous maintenez enfoncée la touche (3) sur le
cadre.
4) Avec la touche (5), on peut interrompre la com-
mutation automatique et la poursuivre.
5) Pour revenir à la photo précédente, appuyez sur la
touche (4). On peut passer à la photo suivante
avec la touche .
6) Pour éteindre, appuyez sur la touche de la télé-
commande ou maintenez la touche enfoncée
sur le cadre jusquʼà ce que le DPF-170 sʼéteigne.
En cas de non utilisation prolongée du cadre,
débranchez le bloc secteur car il a une faible
consommation même lorsque le cadre est éteint.
4 Caractéristiques techniques
Ecran : . . . . . . . . . . . . . . LCD 17,5 cm (7″)
Résolution : . . . . . . . . . . 480 × 234 points
Format de fichier
photo nécessaire : . . . . . PEG, 16 megapixels max.
Cartes mémoire
utilisables : . . . . . . . . . . SD à 2 GO
SDHC à 8 GO
MMC à 2 GO
MS à 8 GO
Alimentation : . . . . . . . . 5V /1 A max. par bloc sec-
teur livré relié à
100 – 240 V~/50 – 60 Hz
10 VA max.
Dimensions, poids : . . . . 230 × 164 × 33 mm, 460 g
Tout droit de modification réservé.
DPF-170 Réf. num. 03.0740
Copyr ght©by MONACOR INTERNATIONAL GmbH & Co. KG, Bremen, Germany. All r ghts reserved. A-1019.99.01.07.2009
®
SD / MMC / MS
DC 5V
TIME
MODE
MODE
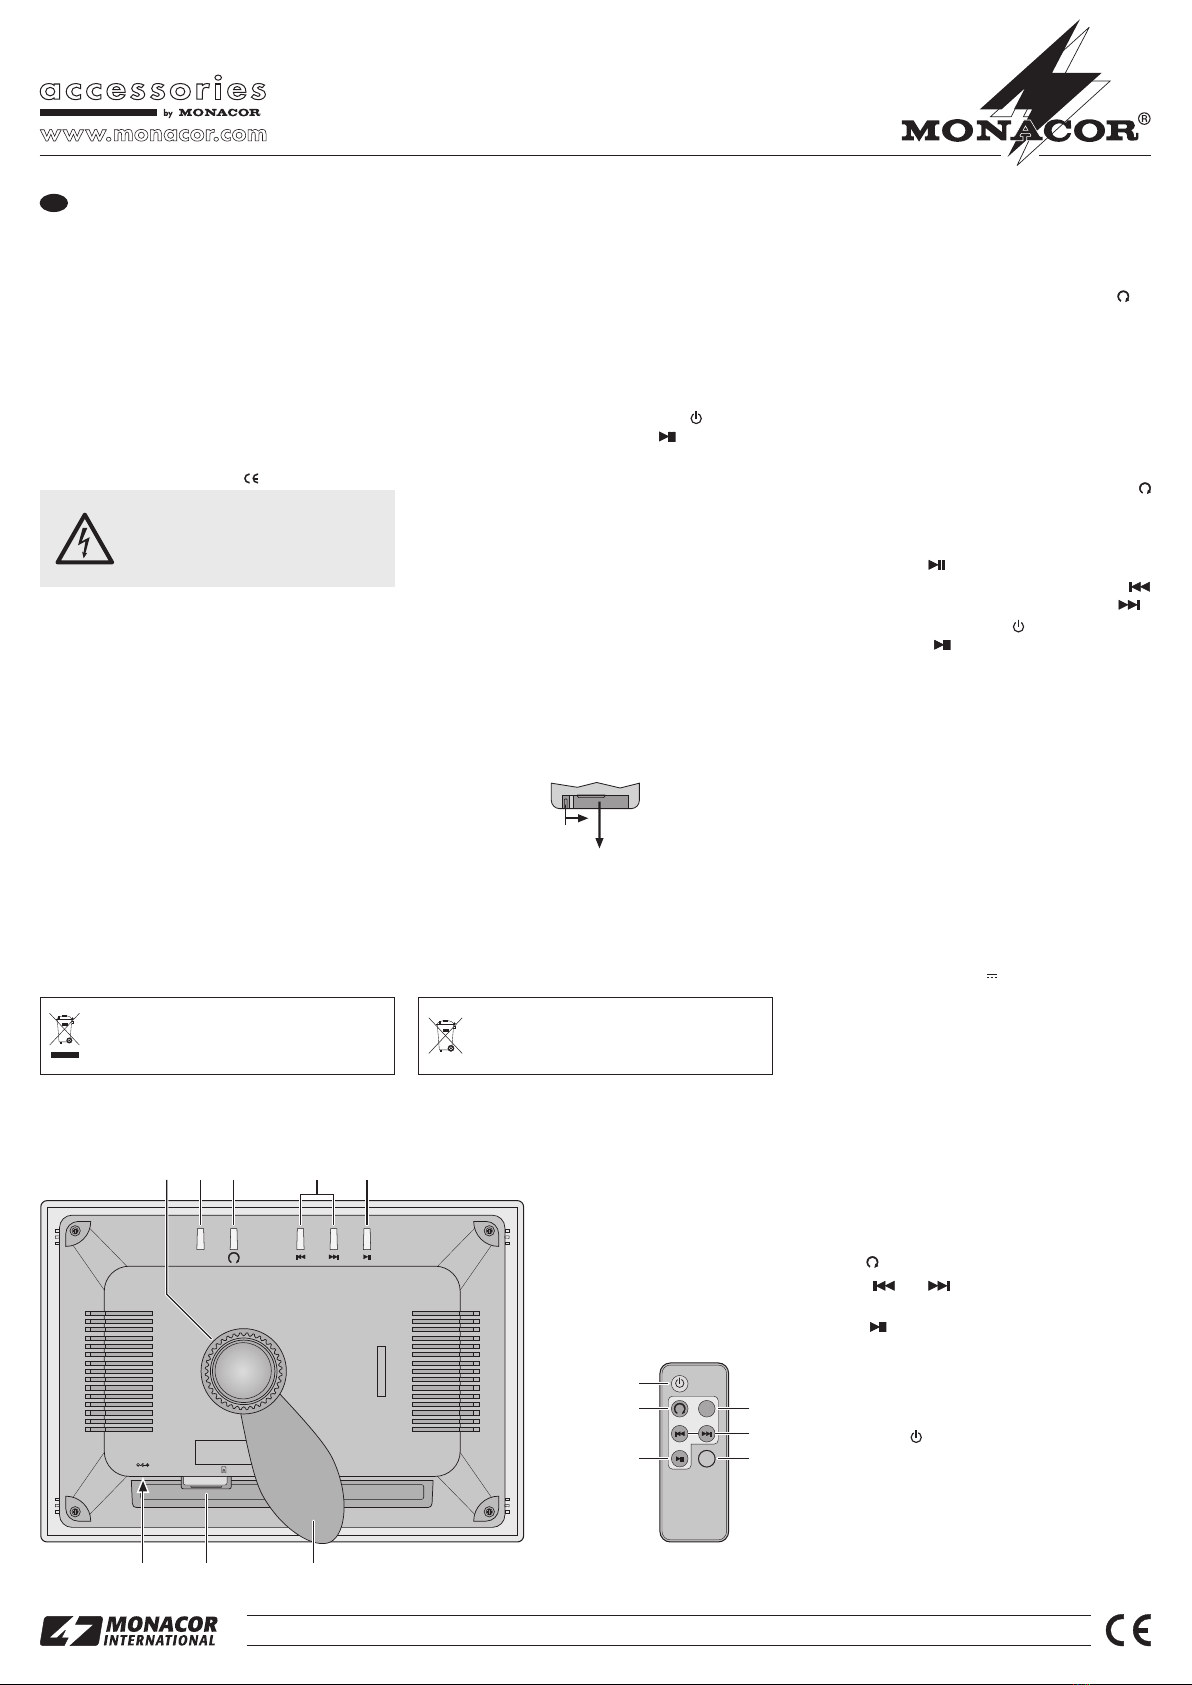
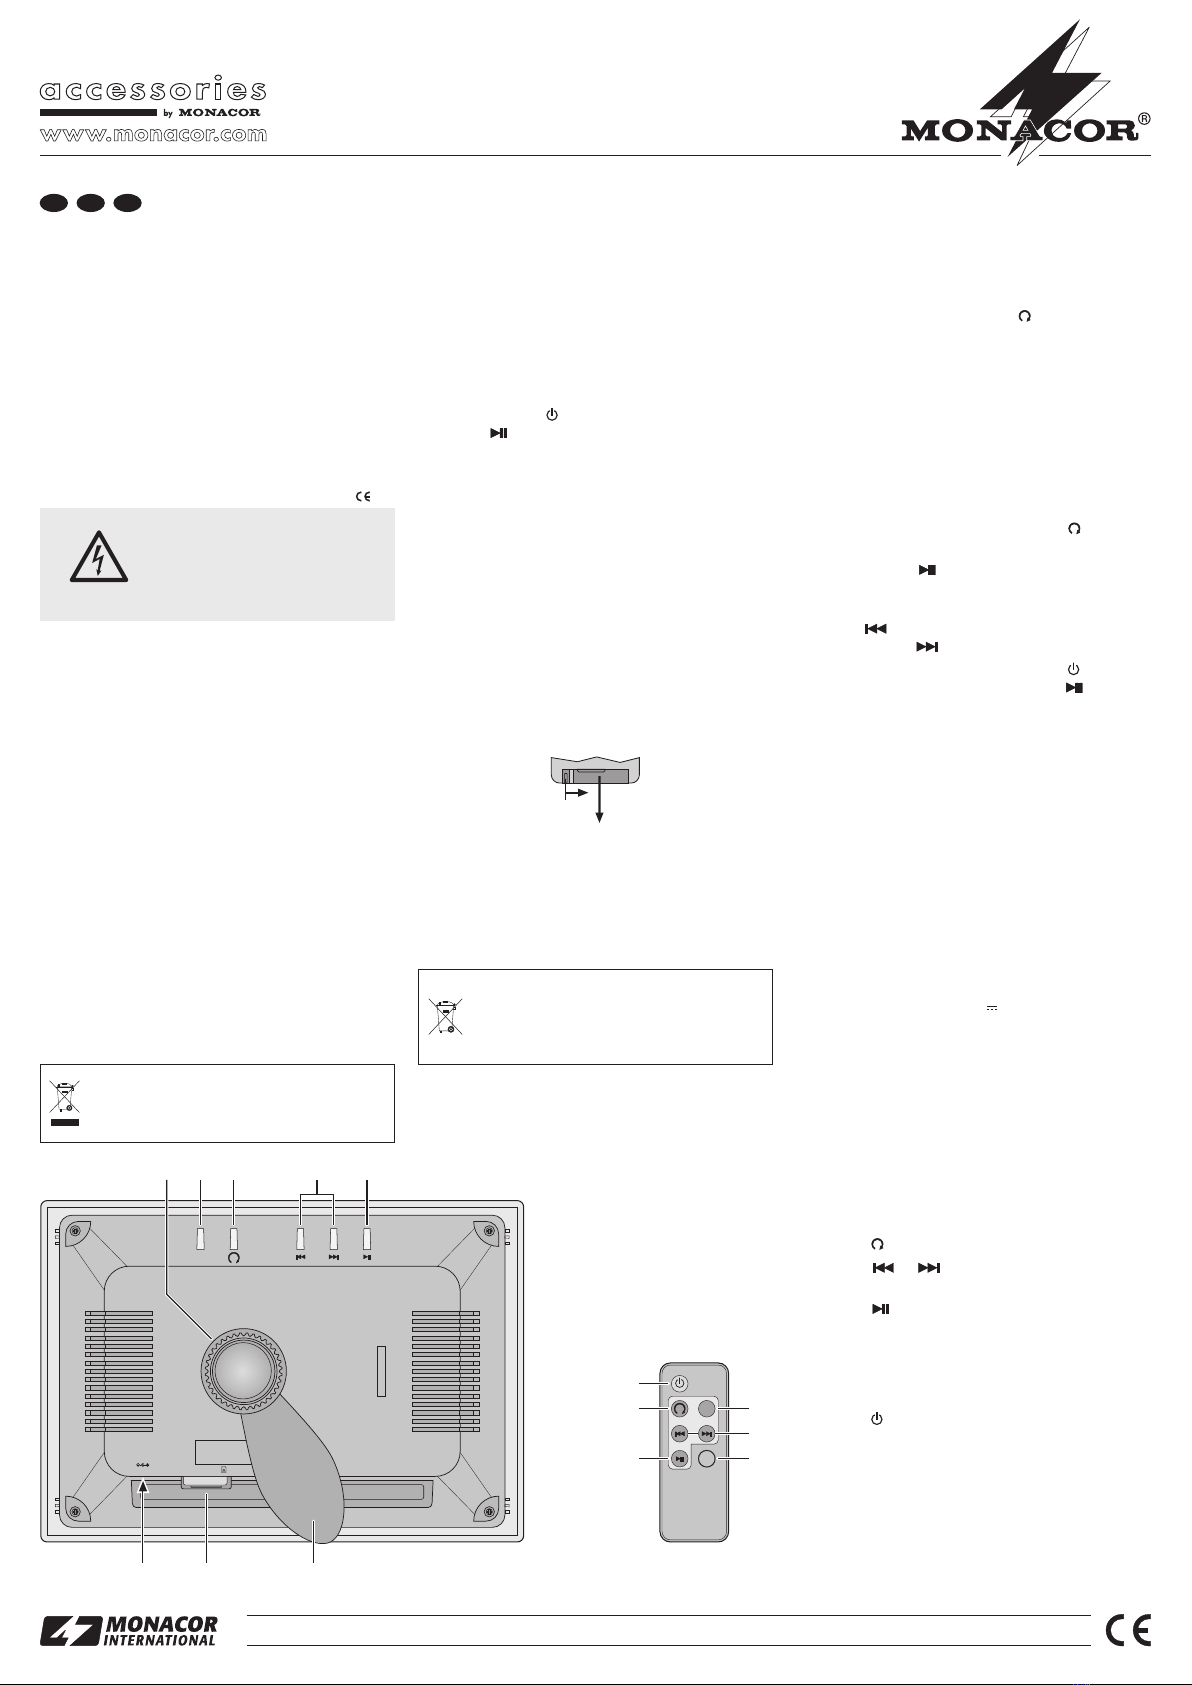
123 4 5
1Vis de réglage pour lʼétrier de positionnement (8)
2Touche MODE pour commuter le format dʼimage
3Touche pour tourner lʼimage de 90°
4Touche et pour reculer ou avancer dʼune
image
5Touche pour interrompre et poursuivre la com-
mutation automatique dʼimages
6Prise DC 9 V pour brancher le bloc secteur
7Fente pour une carte mémoire
8Etrier de positionnement pour le cadre
9Touche pour allumer et éteindre
10 Touche TIME pour sélectionner la durée après la-
quelle on doit commuter sur lʼimage suivante :
5/15/30/60 secondes
5/15/30/45 minutes
1 heure
◼= aucune commutation automatique
2
67 8
4
105
3
9
F B CH