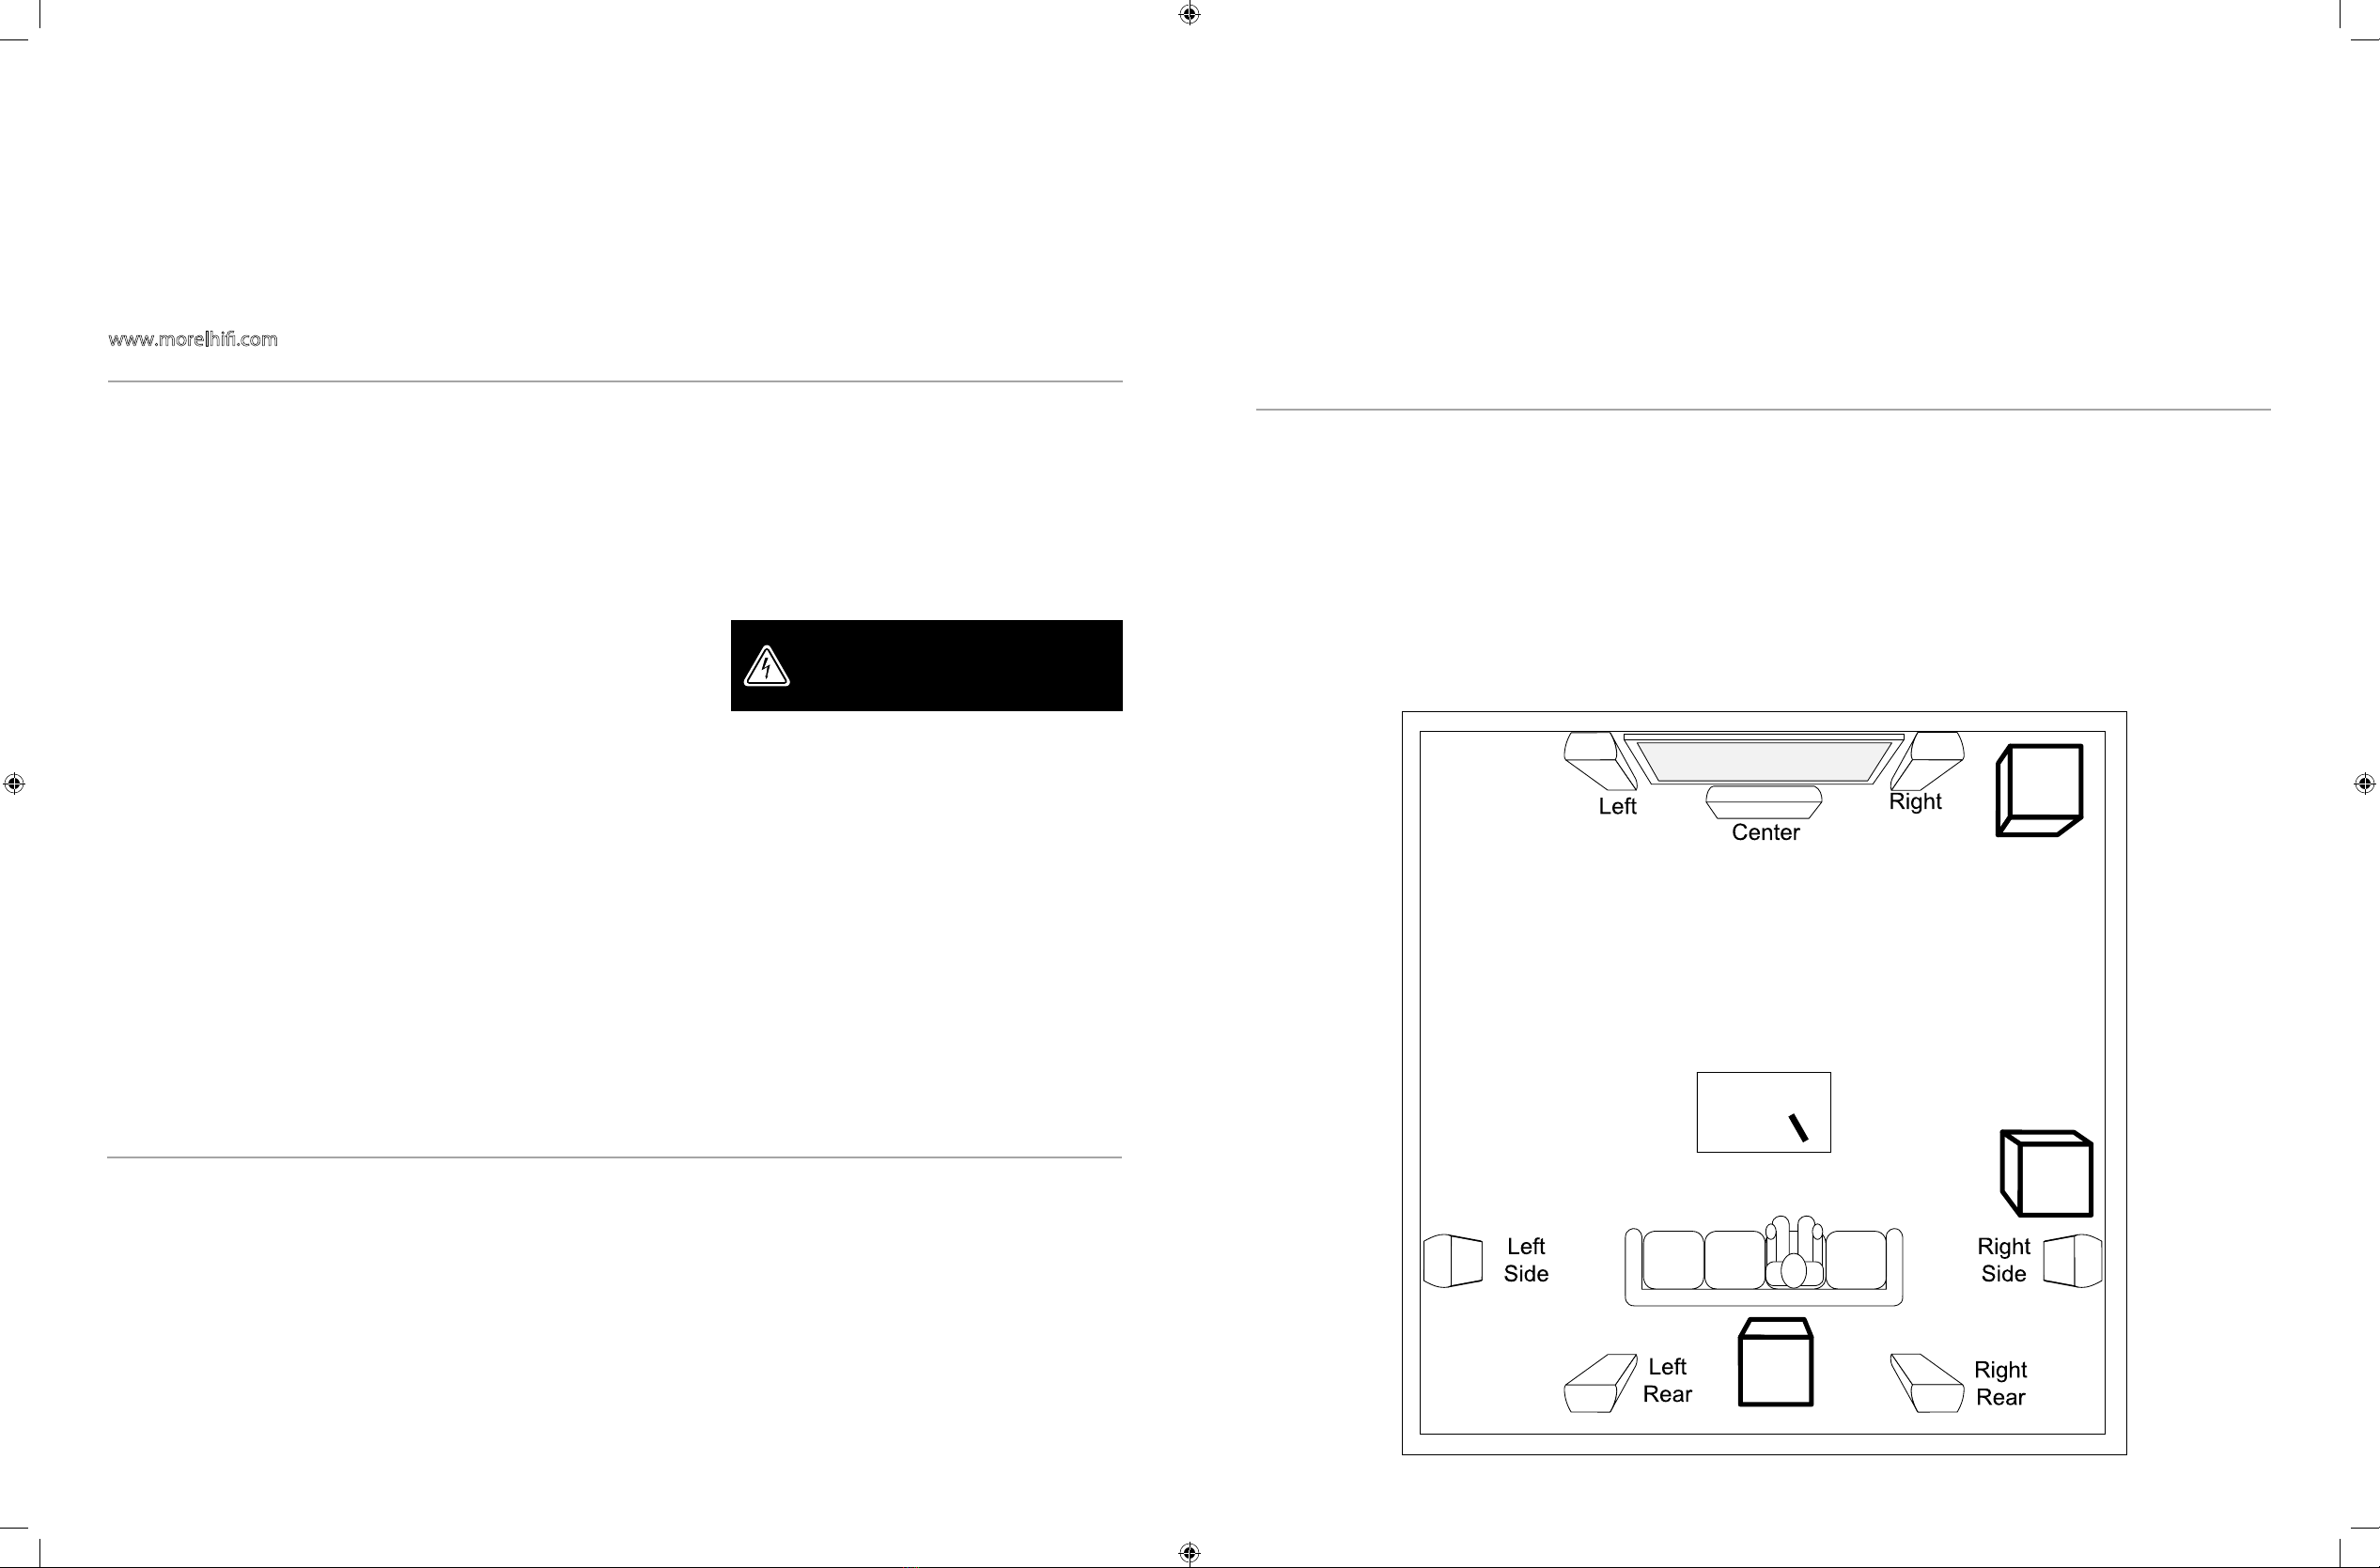
Setting & Controls
Setting the Power Mode
ON Mode:
If the subwoofer is set to ON mode, it will always be ready to play. However, undesired noise from interference or
connections changing may be heard. Use the standard ON mode only if needed, set the power switch to OFF when not in
use.
AUTO Mode:
Setting the switch to AUTO enables AUTO Sense. The subwoofer turns ON and OFF automatically in response to signal
input. The subwoofer will enter standby mode if no signal is sensed for longer than 15 minutes.
Set the MODE switch to the ON position for setup.
After making all the connections, setup your subwoofer using the following steps:
1. Plug the subwoofer into an electrical outlet using the included power cord. The status LED will illuminate solid blue
when power is present and the subwoofer is ON.
2. Set the controls and switches to their initial setup positions:
VOLUME set the dial to 50% or 12 o’clock
CROSSOVER adjust the upper frequency limit. The purpose is to control the overlap the upper frequencies of the
subwoofer and the main speakers lower frequencies. Check your main speakers specs to determine their low-end
limit.
PHASE set to 0°
3. Play a movie scene or soundtrack and set the system volume to an average level. Listen to the bass level from your
favorite listening position and adjust the volume accordingly.
4.
for you. Depending on the location of the subwoofer the bass may sound louder and deeper when the phase has been
optimized. In some cases adjusting the phase will have no audible difference.
5. Setup is now complete.
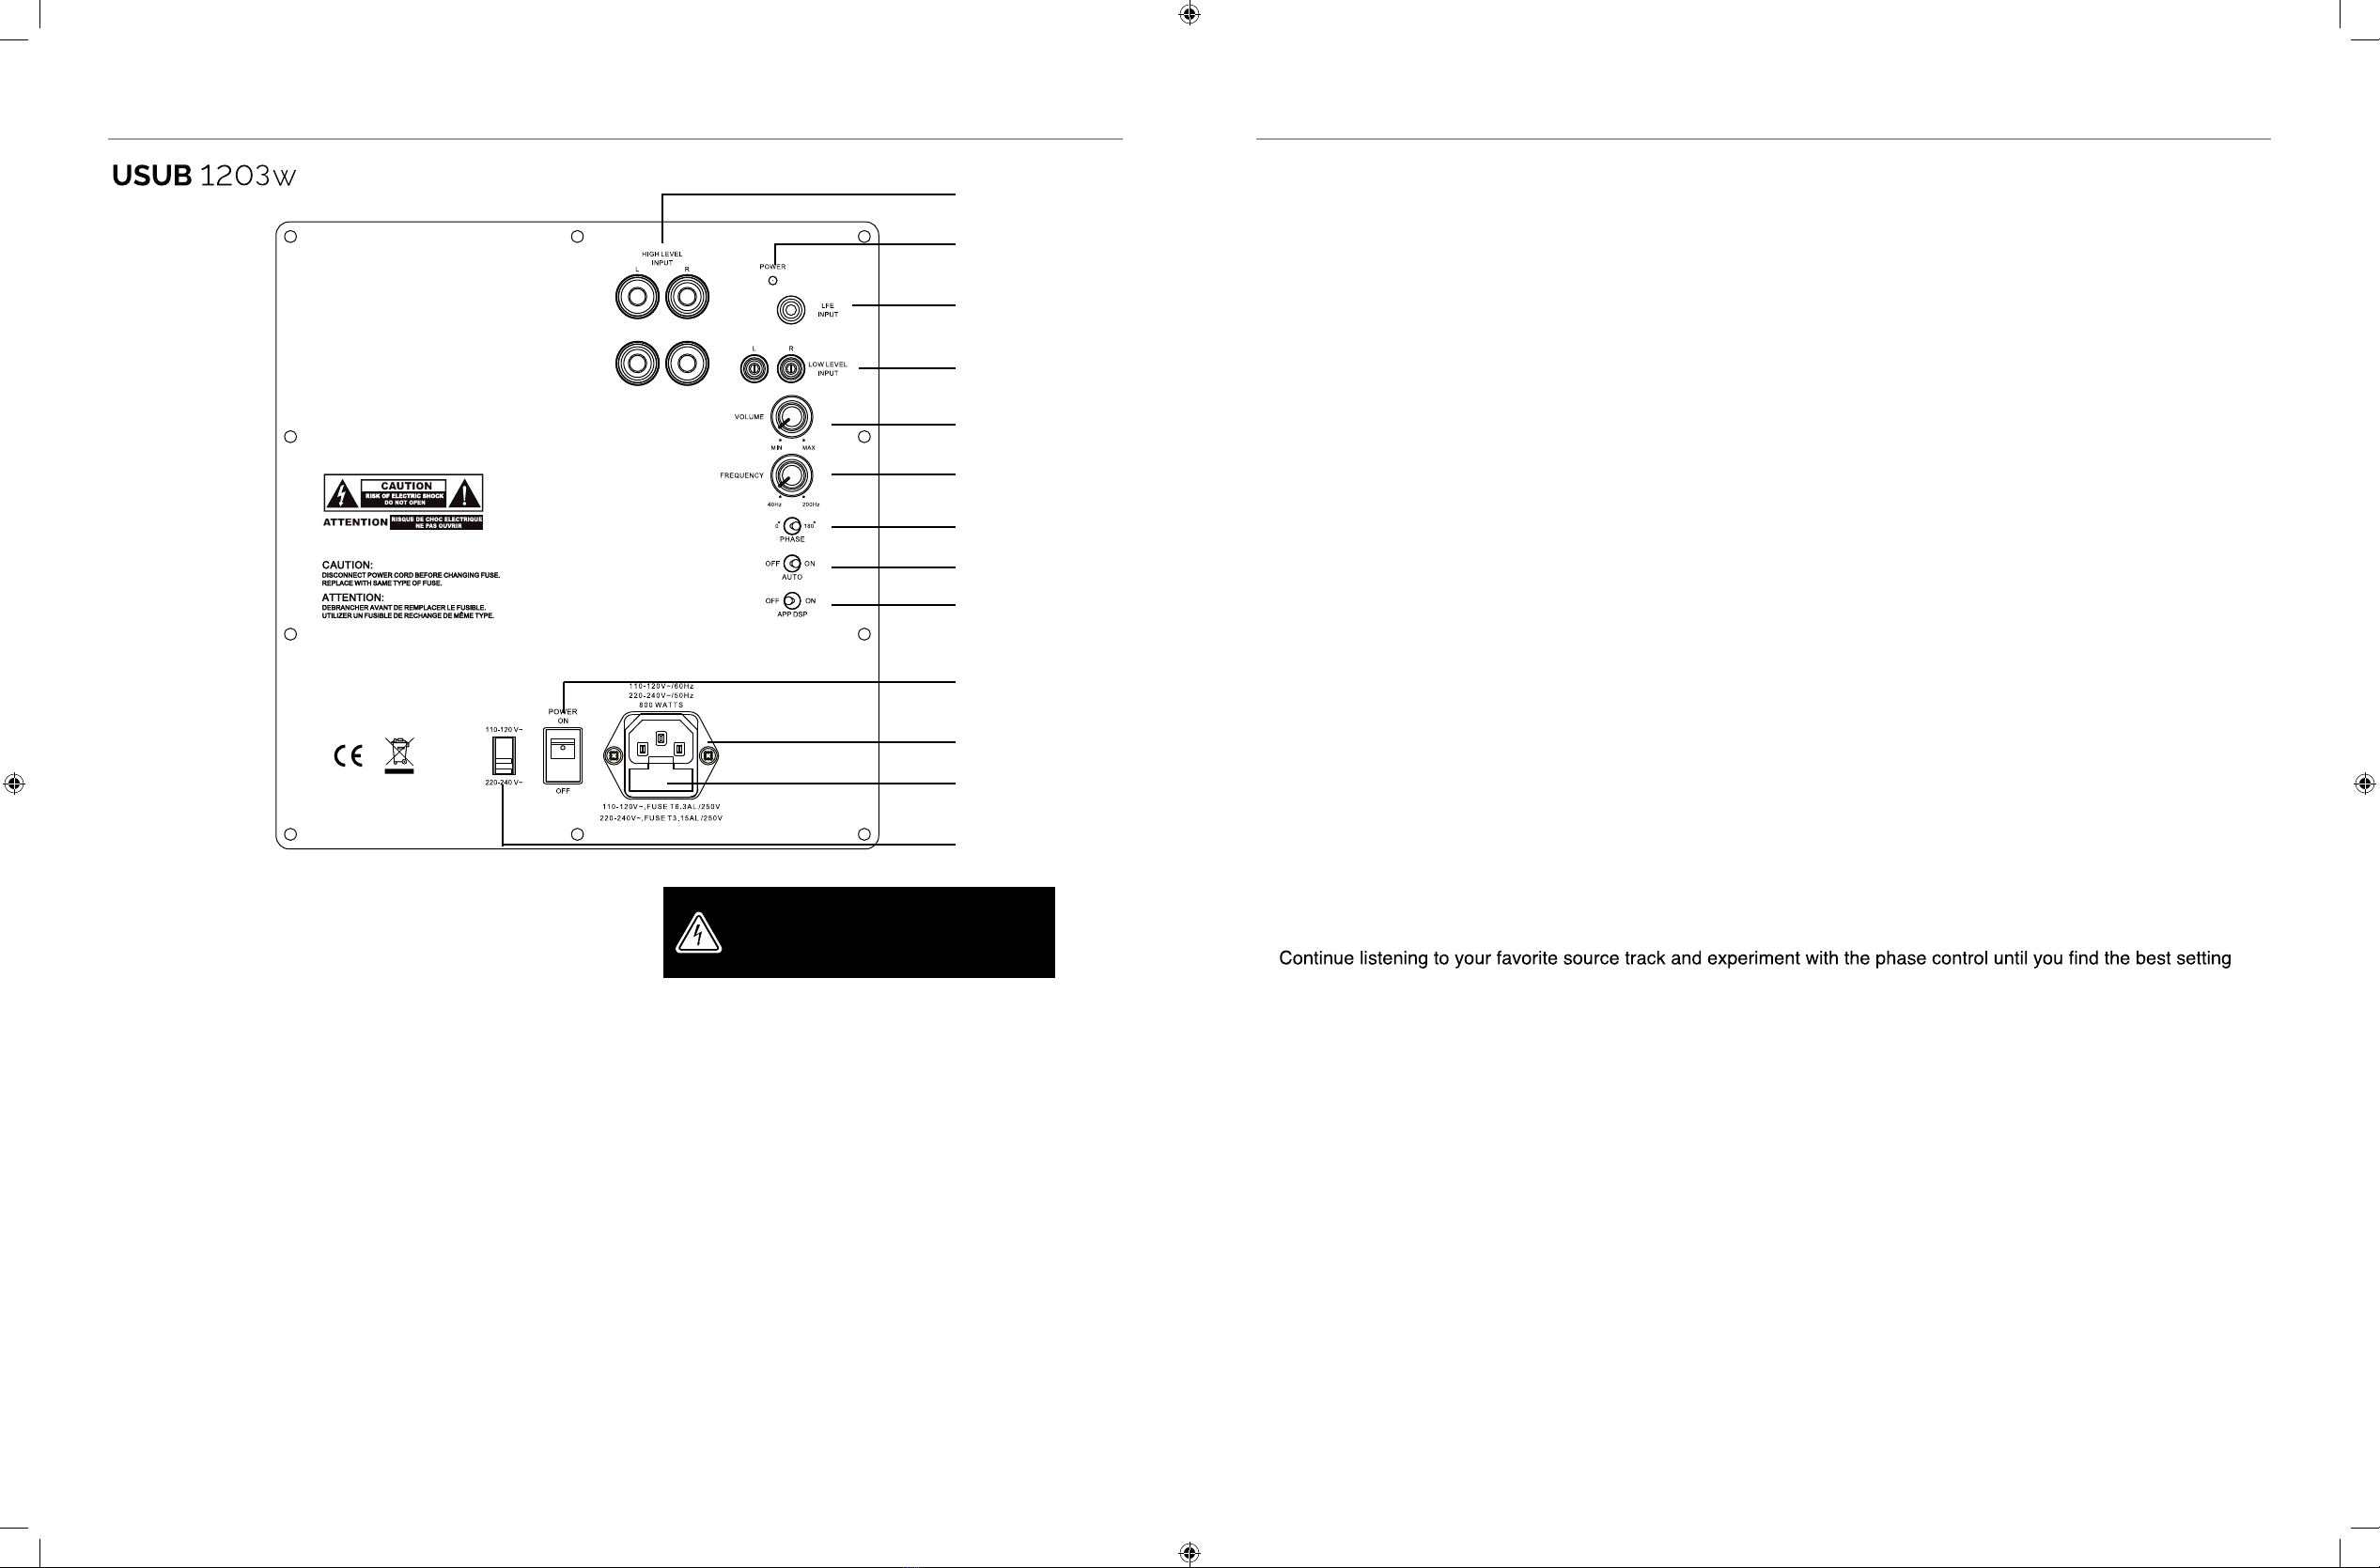
Connection & Controls
1. High Level Inputs (10-12 inch Models Only)
Use for Left/Right connection from audio source.
2. Power LED
(Red) Standby Mode - (Blue) Power Mode ON
3. LFE Input (12 inch Model Only)
Connect to the LFE output on the Receiver/Processor.
4. Low Level Input
Use for Left/Right connection from audio source.
5. Volume Control
Adjusts subwoofer volume level.
6. Crossover Control
Adjusts the subwoofers frequency output
7. Phase Switch
Allows you to set the phase of the woofer 0-180°
8. Power Mode Switch
Set the power mode ( OFF, AUTO, or ON )
9. DSP Mode Switch
Set the DSP ( OFF or ON )
10. Master Power Switch
Controls the main power to the subwoofer
11. AC Power Cord
Connect the included AC power cord.
12. Fuse Holder
Master Power Fuse. Includes spare fuse inside holder.
13. Voltage Switch
Select input voltage. Default: 110-120V or 220-240V
3.
2.
1.
4.
5.
6.
7.
8.
9.
10.
11.
12.
13.
WARNING
make sure the power switch selector is set to correct
current BEFORE connecting to power grid - 110v or
220v - if incorrect it may damage the subwoofer !!!