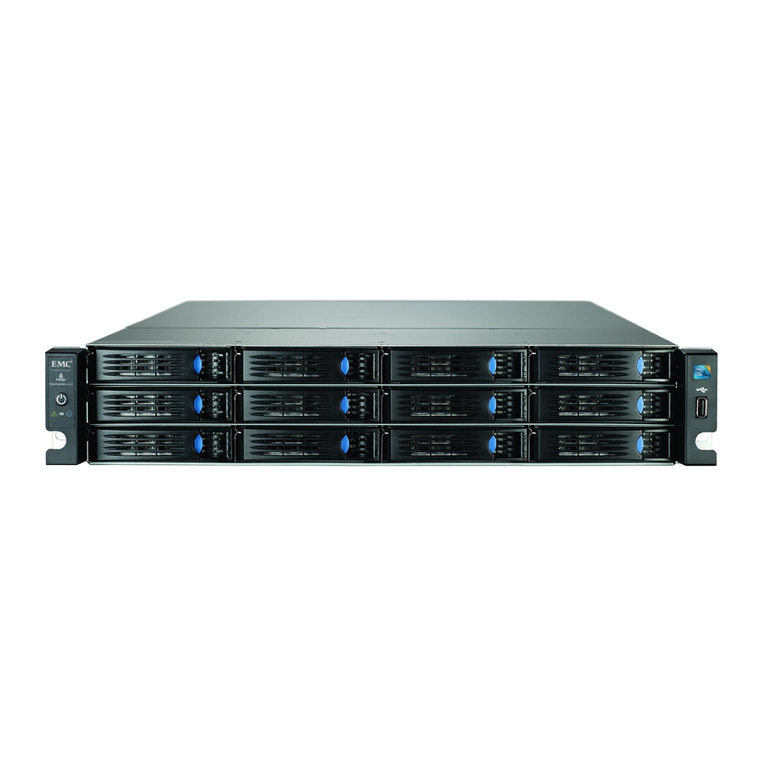
National Instruments RMX-8268 User manual

INSTALLATION GUIDE
RMX-8268
This guide describes the RMX-8268, lists what you need to get started, and explains how to set
up and get started with your hardware.
Contents
Safety Information.................................................................................................................... 1
Rack Mount Safety Information....................................................................................... 2
Electromagnetic Compatibility Guidelines .............................................................................. 3
Sicherheitshinweise .................................................................................................................. 3
Sicherheitshinweise zum Einbau in einen Gestellrahmen................................................ 4
Introduction .............................................................................................................................. 5
RMX-8268 Gen3 x8 System .................................................................................... 5
What You Need to Get Started ......................................................................................... 5
Unpacking......................................................................................................................... 5
Hardware Installation and Use ................................................................................................. 6
Hardware Installation for Gen3 x8 PXI Express Solution ............................................... 6
Installing a PXIe-8394.............................................................................................. 6
Cabling...................................................................................................................... 7
Powering Up the RMX-8268 for PXI Express System ............................................ 7
Powering Down the RMX-8268 for PXI Express System ....................................... 7
Driver Installation.............................................................................................................7
Partitioning and Formatting.............................................................................................. 8
Instructions for Formatting the RAID Volume ........................................................ 8
Virtual Disk Configuration............................................................................................... 8
Reconfiguring the RMX-8268 Virtual Disk for PXI Express Systems.................... 8
Rackmount Installation..................................................................................................... 19
Hardware Overview.................................................................................................................. 23
LED Indicators ................................................................................................................. 23
RAID Card Manufacturer................................................................................................. 23
Cable Options ...................................................................................................................23
Worldwide Support and Services ............................................................................................. 24
Safety Information
The following section contains important safety information that you must follow when
installing and using the hardware.
Caution When this symbol is marked on a product, refer to the hardware
documentation for information about precautions to take.

2|ni.com |RMX-8268 Installation Guide
Electric Shock When this symbol is marked on a product, it denotes a warning
advising you to take precautions to avoid electrical shock.
Hot Surface When this symbol is marked on a product, it denotes a component that
may be hot. Touching this component may result in bodily injury.
Do not operate the hardware in a manner not specified in this document and in the user
documentation. Misuse of the hardware can result in a hazard. You can compromise the safety
protection if the hardware is damaged in any way. If the hardware is damaged, return it to
National Instruments for repair.
Caution Multiple power sources. To completely remove power, disconnect all
power cords.
Clean the hardware with a soft, nonmetallic brush. Make sure that the hardware is completely
dry and free from contaminants before returning it to service.
Do not substitute parts or modify the hardware except as described in this document. Use the
hardware only with the chassis, modules, accessories, and cables specified in the installation
instructions or specifications. You must have all covers and filler panels installed during
operation of the hardware.
This equipment is for use in Restricted Access Locations only.
To obtain the safety certification(s) for this product, visit ni.com/certification, search by
model number or product line, and click the appropriate link in the Certification column.
Rack Mount Safety Information
Caution Due to the device weight, two people should work together to mount the
device in a rack.
Caution When installing modules in a rack, install the heaviest modules at the
bottom and progressively lighter modules toward the top. This keeps the rack’s center
of gravity as low as possible and helps prevent tipping when moving the rack.
Follow these safety guidelines when installing the device in a rack:
•Elevated Operating Ambient—If installed in a closed or multi-unit rack assembly, the
operating ambient temperature of the rack environment may be greater than room ambient
temperature. Therefore, you should install the equipment in an environment compatible
with the maximum ambient temperature (Tma) of 45 °C.
•Reduced Air Flow—When installing the equipment in a rack or cabinet, do not
compromise the amount of airflow required for safe operation of the equipment.
•Mechanical Loading—When mounting the equipment in the rack or cabinet, avoid uneven
mechanical loading that could create a hazardous condition.

RMX-8268 Installation Guide |© National Instruments |3
•Circuit Overloading—When connecting the equipment to the supply circuit, avoid
overloading the circuits. Refer to equipment nameplate ratings to avoid damaging over
current protection and supply wiring.
•Protective Earthing—Maintain protective earthing of rack-mounted equipment,
especially when using supply connections other than direct connections to the branch
circuit (for example, power strips).
•Redundant Power Supplies—Where redundant power supplies are provided with the
equipment, connect each power supply to a separate circuit to optimize the equipment
redundancy.
•Servicing—Prior to servicing the equipment, disconnect all power supplies.
Electromagnetic Compatibility Guidelines
This product was tested and complies with the regulatory requirements and limits for
electromagnetic compatibility (EMC) stated in the product specifications. These requirements
and limits provide reasonable protection against harmful interference when the product is
operated in the intended operational electromagnetic environment.
This product is not intended for use in industrial locations.
Any modifications to the product not expressly approved by National Instruments could void
your authority to operate it under your local regulatory rules.
Notice To ensure the specified EMC performance, operate this product only with
shielded cables and accessories.
Sicherheitshinweise
Im folgenden Abschnitt finden Sie wichtige Sicherheitshinweise, die bei der Inbetriebnahme
und der Verwendung des Geräts unbedingt zu beachten sind.
Vorsicht! Welche Vorsichtsmaßnahmen bei Produkten mit diesem Symbol zu
treffen sind, wird in der Dokumentation zu Ihrem Gerät erläutert.
Elektrischer Schock Wenn ein Produkt mit diesem Symbol gekennzeichnet ist,
besteht die Gefahr eines elektrischen Schlags.
Heiße Oberfläche Bei Produkten mit diesem Symbol kann eines der Bauteile heiß
werden. Bei Berührung besteht Verletzungsgefahr.
Verwenden Sie das Gerät nicht anders als in diesem Dokument und der Benutzerdokumentation
angegeben. Beim unsachgemäßen Umgang mit dem Gerät kann es zu Schäden kommen.
Beispielsweise können bei falscher Handhabung des Geräts die eingebauten
Sicherheitsvorrichtungen versagen. Alle defekten Geräte sollten daher an National Instruments
zurückgesendet und umgetauscht werden.

4|ni.com |RMX-8268 Installation Guide
Vorsicht! Mehrere Stromquellen. Ziehen Sie alle Netzkabel ab, um die
Stromversorgung vollständig zu unterbrechen.
Das Gerät sollte mit einer weichen, nicht metallischen Bürste gereinigt werden. Bevor es nach
der Reinigung wieder genutzt wird, muss es vollständig trocken und frei von Verschmutzungen
sein.
Soweit nicht anders beschrieben, dürfen keine Änderungen an dem Gerät vorgenommen werden.
Das Gerät darf nur zusammen mit den in der Installationsanleitung oder in den Spezifikationen
aufgeführten Chassis, Modulen, Kabeln und Zubehörteilen genutzt werden. Beim Betrieb des
Geräts müssen alle Blenden und Abdeckungen angebracht sein.
Dieses Gerät darf nur an Standorten mit eingeschränktem Zugriff verwendet werden.
Für die Suche nach Sicherheitszertifikaten besuchen Sie ni.com/certification, geben Sie
die Nummer des betreffenden Modells oder die Produktlinie ein und klicken Sie in der Spalte
“Certification” auf den gewünschten Link.
Sicherheitshinweise zum Einbau in einen
Gestellrahmen
Vorsicht! Wegen seines Gewichts sollte das Gerät immer zu zweit in einen
Gestellrahmen eingebaut werden.
Vorsicht! Wenn Sie Module in einem Gestellrahmen installieren, installieren Sie
die schwersten Module unten und die leichteren Module mit abnehmendem Gewicht
weiter oben. Dies hält den Schwerpunkt des Gestellrahmens möglichst tief und
verhindert ein Umkippen beim Anstoßen.
Beim Einbau in einen Gestellrahmen sind folgende Sicherheitsrichtlinien zu befolgen:
•Betriebstemperatur—In einem geschlossenen Gestell oder einem Gestell für mehrere
Geräte kann die Betriebstemperatur des Geräts höher als die Umgebungstemperatur sein.
Daher sollte das Gerät nur dort eingebaut werden, wo die maximale Umgebungstemperatur
(Tma) 45 °C nicht übersteigt.
•Belüftung—Sorgen Sie beim Einbau in ein Gestell oder Gehäuse für genügend Belüftung,
um den sicheren Betrieb des Geräts zu gewährleisten.
•Lastverteilung—Sorgen Sie beim Einbau in ein Gehäuse oder Gestell für gleichmäßige
Lastverteilung.
•Überlast—Achten Sie beim Anschließen des Geräts an die Stromversorgung darauf, dass
die maximal zulässigen Werte für Strom und Spannung nicht überschritten werden. Die
technischen Daten finden Sie auf dem Etikett des Geräts. Bei Überlastung können die
Überstromschaltung und die Kabel beschädigt werden.
•Erdung—Achten Sie darauf, dass alle in Gestelle eingebauten Geräte ordnungsgemäß
geerdet sind. Das gilt insbesondere, wenn die Geräte nicht direkt an die Stromversorgung
angeschlossen sind, sondern beispielsweise über Mehrfachsteckdosen.
RMX-8268 Installation Guide |© National Instruments |5
•Redundante Stromversorgung—Wenn es für das Gerät mehrere Netzteile gibt, schließen
Sie jedes Netzteil zur Steigerung der Ausfallsicherheit an einen separaten Stromkreis an.
•Instandhaltung—Alle Geräte sind vor der Instandhaltung von der Stromversorgung zu
trennen.
Introduction
The RMX-8268 is a 2U RAID array specifically designed for record/playback applications. It
leverages a commercially available enterprise class RAID controller and solid state hard drives.
It connects to the host using a Gen3 x8 Cabled PCI Express link.
This chassis supports up to 24 enterprise class SATA or solid-state drives. The system is
preconfigured as RAID 0. The RAID card also supports additional modes such as RAID 1,
RAID 5, RAID 6, RAID 10, RAID 50, RAID 60, and JBOD, but NI has not specifically
validated these RAID modes for performance. Refer to the LSI RAID controller user manual on
ni.com for more information about these modes.
The RAID array is typically connected to the host using a PXIe-8394, PXIe-8399, or PCI-8398.
Note The remainder of the manual describes systems connecting the RMX-8268 to
the PXIe-8394, but the information is also applicable to systems using the PXIe-8399
and PCIe-8398.
RMX-8268 Gen3 x8 System
The RAID system consists of a PXIe-8394 in a PXI Express or CompactPCI Express chassis,
connected to the RMX-8268. This system can use the full bandwidth of Gen3 x8 MXI
(Generation 3) technology. To achieve maximum throughput, the PXI Express host controller
and the PXI Express chassis must support Gen3 x8 PXI Express devices. The RMX-8268 works
with non-Gen3 PXI Express controllers and chassis, but at a reduced speed.
What You Need to Get Started
To set up and use your RMX-8268 for PXI Express, you need the following hardware and
software to use with your PXI Express chassis and controller:
• Host: PXI Express controller and chassis
• RAID array: RMX-8268
• Host connection: PXIe-8394, PXIe-8399, or PCIe-8398
• Cable: Gen3 x8 MXI
Unpacking
Your RMX-8268 system is preassembled and preconfigured for maximum bandwidth (RAID 0).
You need only to remove the RMX-8268 RAID storage chassis from the shipping box and
assemble your system. There is no need to open your RMX-8268 chassis. The system is
preconfigured and sealed.

6|ni.com |RMX-8268 Installation Guide
Notice Your RMX-8268 system is sensitive to electrostatic damage (ESD).
ESD can damage several components on the system.
Notice Never touch the exposed pins of connectors. Doing so may damage the
device.
To avoid such damage in handling the device, take the following precautions:
• Ground yourself using a grounding strap or by holding a grounded object.
• Touch any antistatic packaging to a metal part of the chassis before removing the device
from the package.
Hardware Installation and Use
This section explains how to install and use the RMX-8268 for PXI Express.
Hardware Installation for Gen3 x8 PXI Express Solution
The following are general instructions for installing the RMX-8268 for PXI Express system.
Consult your computer user manual or technical reference manual for specific instructions and
warnings.
Installing a PXIe-8394
Complete the following steps to install the PXIe-8394 in your PXI Express or
CompactPCI Express chassis:
1. Power off your PXI Express or CompactPCI Express chassis, but leave it plugged in while
installing the PXIe-8394. The power cord grounds the chassis and protects it from electrical
damage while you install the module.
2. Locate an available PXI Express or CompactPCI Express slot in the chassis. The
PXIe-8394 must not be installed in the controller slot (slot 1 in a PXI Express chassis).
Caution To protect both yourself and the chassis from electrical hazards, leave the
chassis off until you finish installing the PXIe-8394.
3. Remove or open any doors or covers blocking access to the slot where you intend to install
the PXIe-8394.
4. Touch the metal part of the case to discharge any static electricity that might be on your
clothes or body.
5. Make sure the injector/ejector handle is in its downward position. Be sure to remove all
connector packaging and protective caps from retaining screws on the module. Align the
PXIe-8394 with the card guides on the top and bottom of the system controller slot.
Caution Do not raise the injector/ejector handle as you insert the PXIe-8394. It will
not insert properly unless the handle is in its downward position so that it does not
interfere with the injector/ejector rail on the chassis.

RMX-8268 Installation Guide |© National Instruments |7
6. Hold the handle as you slowly slide the module into the chassis until the handle catches on
the injector/ejector rail.
7. Raise the injector/ejector handle until the module firmly seats into the backplane receptacle
connectors. The front panel of the PXIe-8394 should be even with the front panel of the
chassis.
8. Tighten the bracket-retaining screws on the top and bottom of the front panel to secure the
PXIe-8394 to the chassis.
9. Replace or close any doors or covers to the chassis.
Cabling
Connect the Gen3 x8 MXI cable to both the PXIe-8394 and the RMX-8268 chassis. The cables
have no polarity, so you can connect either end to either the card or chassis.
Caution Do not remove the cable after the system is powered on. Doing so can
hang or cause errors in applications communicating with devices. If a cable becomes
unplugged, plug it back into the system. (You may need to restart your computer.)
Note Refer to the Cable Options section for cable specifications.
Powering Up the RMX-8268 for PXI Express System
To power up the RMX-8268 for PXI Express system, power-on the host. The RMX-8268 chassis
now should turn on.
Powering Down the RMX-8268 for PXI Express System
Because operating systems and drivers commonly make the assumption that PCI devices are
present in the system from power-up to power-down, it is important not to power off the
RMX-8268 chassis independently. Powering off the RMX-8268 chassis while the host is still on
can cause data loss, crashes, or hangs. When you shut down the host controller, the RMX-8268
is sent a signal over the cabled PCI Express link to shut down.
Driver Installation
When installing RAID drivers, make sure your host system is connected to the internet, which
allows the OS to download the RAID driver automatically. If that does not work, go to ni.com
and search for Drivers for RAID.
For more information about driver installation, consult the driver installation chapter of the
RAID controller user manual on ni.com.
Note The RMX-8268 is supported on Windows 10 only.

8|ni.com |RMX-8268 Installation Guide
Partitioning and Formatting
Instructions for Formatting the RAID Volume
Complete the following steps to format the RAID volume:
1. Open your disk management console by pressing <Windows-R>.
2. Enter diskmgmt.msc and press <Enter>. The Initialize Disk window opens.
3. Choose GPT and click OK. Your disk now shows up as unallocated in the Disk
Management utility with a black bar across the top.
4. Right-click on the unallocated disk.
5. Select New Simple Volume to launch the New Simple Volume Wizard.
6. In Specify Volume Size, the maximum volume size is chosen by default. Click Next.
7. In Assign Drive Letter or Path, you may assign a drive letter to your new volume. Choose
a drive letter and click Next.
8. In Format Partition, change the Allocation Unit size to 64 KB, which improves
performance in sequential read and write applications.
9. Ensure that Perform a quick format is selected and click Next.
10. Click Finish to exit the New Simple Volume Wizard.
Note Powering off the RMX-8268 chassis while the host still is on can cause data
loss, crashes, or hangs. When you shut down your host computer, your RMX-8268
turns off.
Virtual Disk Configuration
Reconfiguring the RMX-8268 Virtual Disk for PXI Express
Systems
The RMX-8268 systems are preconfigured and validated using RAID0. The RAID card supports
additional RAID modes; however, NI has not specifically validated the sustained performance
and reliability of these additional RAID modes.
Caution Reconfiguring your RAID arrays erases all data on your system. Back up
all data before reconfiguring.
Caution If you need to reset your RMX-8268 to factory default settings, complete
the steps described in the following sections when creating your virtual disk. Unless
otherwise noted below, leave other settings at their default values.
You can reconfigure the RAID arrays using the ROM configuration menu or the RAID
management utility, as described in the following sections.

RMX-8268 Installation Guide |© National Instruments |9
Reconfiguring RAID Arrays Using the ROM Configuration Menu
Starting the Avago MegaRAID Configuration Utility
To start the Avago MegaRAID Configuration Utility, power on the system and press <Ctrl-R>
to enter the utility when the following screen displays.
The Avago MegaRAID Main Screen
As shown in the following figure, at the top of the Avago MegaRAID main screen are the
following configurable menu items:
•VD Mgmt (Virtual Drive Management)
•PD Mgmt (Physical Management)
•Ctrl Mgmt (Controller Management)
•Properties
• Foreign View
Note The Foreign View menu item displays only when a foreign configuration is
connected to the controller.
Press <Ctrl-N> or <Ctrl-P> to select the desired menu item.
Note Drive size, capacity, and manufacturer may vary from those shown in the
following images.

10 |ni.com |RMX-8268 Installation Guide
VD Mgmt (Virtual Drive Management)
When you enter the MegaRAID Configuration Utility, VD Mgmt is the first screen that
displays, as shown below. This screen provides information about the configuration of
controllers, drive groups, and virtual drives. The right panel displays information about the
selected device. To select a submenu item, use the up and down arrow keys. Use the right arrow
key to open a submenu and the left arrow key to close a submenu.

RMX-8268 Installation Guide |© National Instruments |11
Move the cursor to select the controller and press <F2>. Press <Enter> to create new virtual
drives when the following screen displays.
Note You can use the up and down arrow keys to select enabled commands,
highlighted in white, such as Create Virtual Drive or Clear Configuration.
Press <Enter> for the RAID level selection when the following screen shows. You also can use
this screen to select the new virtual drive’s parameters using the up or down arrow keys or
<Tab>.

12 |ni.com |RMX-8268 Installation Guide
Use the up or down arrow keys to select the RAID level, as shown below, and press
<Enter>.
Note The corresponding RAID level(s) displayed are based on the number of hard
drives connected to the selected controller, as shown in Table 1.
Table 1. Minimum Number of Hard Drives Required for RAID Levels
RAID Minimum Number of Hard Drives
RAID 0 2
RAID 1 2
RAID 5 3
RAID 6 3
RAID 10 4 (2 RAID 1 Arrays)
RAID 50 6 (2 RAID 5 Arrays)
RAID 60 6 (2 RAID 6 Arrays)

RMX-8268 Installation Guide |© National Instruments |13
Press Enter to select all drives. Tab to the Advanced menu, as shown below.
In the Advanced menu, set Strip Size to 512 KB and Write Policy to Write Through, as shown
below. Leave all other settings at default.

14 |ni.com |RMX-8268 Installation Guide
Click OK to skip initialization, as shown below.
You now have created the virtual drive. Refer to Partitioning and Formatting for the next step.
PD Mgmt (Physical Drive Management)
Press <Ctrl-N> or <Ctrl-P> to select the PD Mgmt menu item, as shown below. The PD Mgmt
screen provides information about hard drives connected to the selected controller. The right
panel shows information about the selected device.

RMX-8268 Installation Guide |© National Instruments |15
To select a device, use the up or down arrow keys or <Tab> and press <F2>.
Press <Enter> to perform a command such as rebuilding a failed drive, locating a drive, or
making a drive offline, as shown below.
Ctrl Mgmt (Control Management)
Press <Ctrl-N> or <Ctrl-P> to select the Ctrl Mgmt menu item, as shown below. The Ctrl
Mgmt screen provides information about the selected controller’s settings. On this screen, use
the up or down arrow or <Tab> to move the cursor. To apply changes, navigate to APPLY and
press <Enter>.

16 |ni.com |RMX-8268 Installation Guide
Navigate to Next and press <Enter> to open the second screen, as shown below. Use the
following screen to view and change settings such as the link speed or power save.
Properties
Press <Ctrl-N> or <Ctrl-P> to select the Properties menu item, as shown below. The Properties
screen provides read-only information about the selected controller’s properties.

RMX-8268 Installation Guide |© National Instruments |17
Navigate to Next and press <Enter> to open the second screen to view more properties, as shown
below. To return to the first screen, navigate to Prev (Previous) and press <Enter>.
Foreign View
Note The Foreign View menu item displays only when a foreign configuration is
connected to the controller.
Press <Ctrl-N> or <Ctrl-P> to select the Foreign View menu item, as shown below. The
Foreign View screen provides information about the foreign configurations, such as drive
groups, virtual drives, physical drives, and hot spare drives. You also can use this menu to import
or clear the foreign configurations.
Reconfiguring RAID Arrays Using the RAID Management Utility
Install the RAID management software from within Windows. The RAID management utility is
on the included CD and the RAID controller manufacturer’s website.

18 |ni.com |RMX-8268 Installation Guide
Reconfiguring the RMX-8268 to Its Default State
To reconfigure your RMX-8268 to its default state of RAID0, complete the following steps.
These instructions use the MegaRAID Storage Manager browser-based RAID management
console. Refer to the RAID controller user manual at ni.com for more information about using
this software.
1. Open the MegaRAID Storage Manager.
2. Enter the PXI Express Host User Name and Password (use your Windows username and
password).
3. Under the Logical tab, right-click Controller0 and select Create Virtual Drive.
4. Select Advance and click Next.
5. Select RAID0 from the RAID Level pull-down menu.
6. Select all drives (<CTRL-A>).
7. Click ADD and then Next.
8. Make the following changes on the Virtual Drive properties page and leave everything else
at default:
•Stripe Size (KB)—512 KB
•Write cache—Write Through
9. Select Create Virtual Drive.
10. Click OK at the warning about Write Through Mode.
11. Select Finish.
Follow the instructions in this guide under the Partitioning and Formatting section to configure
your new virtual disk for use with your Windows operating system.

RMX-8268 Installation Guide |© National Instruments |19
Rackmount Installation
Complete the following steps to install the RMX-8268 into a rack using the provided rackmount
kit:
1. Attach a rear rail to each side of the RMX-8268 using the provided #8-32 x 1/4 in. fasteners,
as shown in Figure 1.
Note Do not fully tighten the fasteners. The rails need to slide to allow for final
adjustments within the rack.
2. Attach a front rail to each side of the RMX-8268, as shown in Figure 1. These parts snap
lock into place. The parts are marked LH and RH for left hand and right hand; the
orientation is relative to the unit when you look toward the hard drive bays.
Figure 1. Attaching the Rails to the RMX-8268
1 #8-32 x 1/4 in. Fastener (x6)
1

20 |ni.com |RMX-8268 Installation Guide
3. Install a front bracket on each side of the rack using the provided #10-32 x 5/16 in.
fasteners, as shown in Figure 2. Refer to the following figure for placement of the front
brackets on the rails relative to the 2U space that the RMX-8268 will occupy. Install the
front bracket with the threaded hole oriented downward.
Figure 2. Installing the Front Brackets on the Rack
1 Threaded Hole (Oriented Downward) 2 10-32 x 5/16 in. Fastener (x4)
2U
2
1
Table of contents
Popular Disk Array System manuals by other brands

Sun Oracle
Sun Oracle Sun Storage 2500-M2 Arrays Site preparation guide

Sun Oracle
Sun Oracle StorageTek SL150 System assurance guide

easyRAID
easyRAID F8P U3TT user guide

EqualLogic
EqualLogic PS3000 Series quick start

Digital Equipment
Digital Equipment DECmpp12000 Reference manual

Promise
Promise VTrak copy VTM210 quick start guide