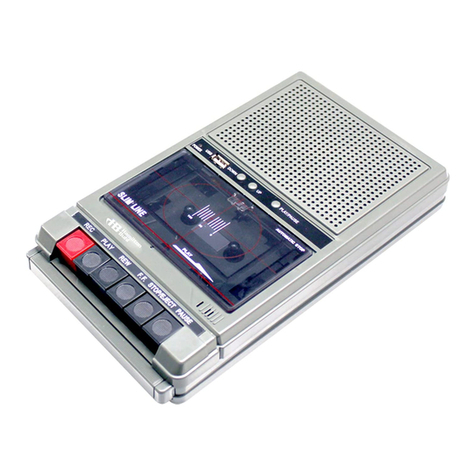
NexxTech 4300473 User manual

4300473
OWNER’S MANUAL
Please read before using this equipment.
Telephone Cassette Recorder

2
FEATURES
Your Nexxtech Telephone Cassette
Recorder is perfect for your home or
office. It records telephone calls you
make or receive and you can also
use it as a tape recorder to record
dictation or conversations during
a meeting.
It includes these features:
Voice-Actuated (VOX) Recording —
records only when it receives sound,
to save power and prevent blank sec-
tions on the tape.
Regular Recording — lets you record
dictation or conversations at the touch
of a button.
Monitor — lets you listen to a conver-
sation through the telephone cassette
recorder’s speaker as it is being re-
corded.
Automatic Stop — releases the tape-
handling parts when the tape reaches
the end while playing or recording.
Built-In Microphone — lets you
record without connecting an external
microphone.
Cue/Review Function — lets you ad-
vance or rewind the tape during play
to find a specific section on the tape.
Two Power Sources — let you power
the telephone cassette recorder from
AC power or four AA batteries.
Handset Adapter — lets you record
conversations directly from the phone
you are talking on.
Earphone Jack — lets you connect
an earphone with a 1/8-inch (3.2 mm)
plug for private listening.
You need at least one cassette tape to
use the recorder. We recommend you
use a 30-minute incoming message
leaderless tape so you do not miss the
beginning of a call. You also need ei-
ther 4 AA batteries or an AC adapter
to power the recorder.
We suggest you write your recorder’s
serial number here. The number is on
the bottom of the recorder.
Serial Number __________________
Important: It is illegal in some areas
to record a conversation without the
consent of all parties involved in the
conversation, including the phone
company. Check the laws in your area
before using the telephone cassette
recorder.

3
THE CANADIAN INDUSTRY STATEMENT
NOTICE: To ensure Industry Canada
label identifies certified equipment, this
certification means that the equipment
meets certain telecommunications net-
work protective, operational and safety
requirements. Industry Canada does
not guarantee the equipment will oper-
ate to the user's satisfaction.
Before installing this equipment, users
should ensure that it is permissible to
be connected to the facilities of the lo-
cal telecommunications company. The
equipment must also be installed using
an acceptable method of connection.
In some cases, the company's inside
wiring associated with a single line in-
dividual services may be extended by
means of certified connector assembly
(telephone extension cord). The cus-
tomer should be aware that compli-
ance with the above conditions may
not prevent degradation of service in
some situations.
Repairs to certified equipment should
be made by an authorized Canadian
maintenance facility designated by the
supplier. Any repairs or alterations
made by the user to this equipment, or
equipment malfunctions, may give the
telecommunications company cause
to request the user to disconnect the
equipment.
Users should ensure for their own pro-
tection that the electrical ground con-
nections of the power utility, telephone
lines and internal metallic water pipe
system, if present, are connected to-
gether. This precaution may be partic-
ularly important in rural areas.
Caution: Users should not attempt to
make such connections themselves,
but should contact the appropriate
electric inspection authority or electri-
cian, as appropriate.
The Load Number (LN) assigned to
each terminal device denotes the per-
centage of the total load to be connect-
ed to a telephone loop which is used
by the device, to prevent overloading.
The termination on a loop may consist
of any combination of devices subject
only to the requirement that the total of
the Load Numbers of all the devices
does not exceed 100.
The load number of this unit is
_____________.
Note: You must not connect your tele-
phone cassette recorder:
•Coin-operated systems
•Party-line systems
•Most electronic key phone sys-
tems

4
CONTENTS
Preparation ........................................................................................................... 5
Connecting Power ........................................................................................... 5
Using AC Power ........................................................................................ 5
Using Battery Power ................................................................................. 5
Installation ............................................................................................................ 6
Connecting Directly to the Phone Line ............................................................ 6
Connecting to a Phone .................................................................................... 6
Using an Earphone .......................................................................................... 7
Listening Safely ......................................................................................... 7
Traffic Safety ............................................................................................. 7
Operation .............................................................................................................. 8
Setting the Beep .............................................................................................. 8
Loading a Cassette Tape ................................................................................. 8
Recording a Phone Conversation .................................................................... 8
Setting the Record Mode .......................................................................... 9
Setting the Sensitivity Level ...................................................................... 9
Setting the Recording Speed .................................................................. 10
Listening While You Record .................................................................... 10
Regular Recording ......................................................................................... 10
Playing a Tape ............................................................................................... 11
Fast-Forward and Rewind ....................................................................... 11
Using the Tape Counter .......................................................................... 11
Care and Maintenance ....................................................................................... 12
Tape Tips and Techniques ............................................................................. 13
Erase-Protection Tabs ............................................................................. 13
Restoring Tape Tension and Sound Quality ............................................ 13
Cleaning the Tape-Handling Parts .......................................................... 14
Lightning ........................................................................................................ 14
Important Safety Instructions ............................................................................ 15

5
PREPARATION
CONNECTING POWER
Using AC Power
You can power your telephone cas-
sette recorder from AC power using
an optional AC adapter.
Caution: You must use a 120V AC/6V
DC adapter that delivers at least 300
milliamps. Its center tip must be set to
negative, and its plug must properly fit
the recorder’s DC 6V jack. The recom-
mended adapter meets these require-
ments. Using an adapter that does not
meet these requirements could dam-
age the telephone cassette recorder
or the adapter.
Follow these steps to connect your
telephone cassette recorder to AC
power.
1. Set the AC adapter’s voltage
switch to 6V.
2. Insert the 5.5 mm outer diameter/
2.1 mm inner diameter barrel plug
into the adapter’s cord to read
TIP –.
3. Insert the plug into the telephone
cassette recorder’s DC 6V jack.
4. Plug the adapter into a standard
AC outlet.
Using Battery Power
Your telephone cassette recorder can
use four AA batteries (not supplied)
for power. For the best performance
and longest life, we recommend alka-
line batteries.
Follow these steps to install batteries.
1. Press the battery compartment
cover’s tab and lift off the cover.
2. Insert the batteries into the com-
partment, as indicated by the
polarity symbols (+ and –) marked
inside the compartment.
3. Replace the cover.
Caution: Do not mix old and new bat-
teries, different types of batteries
(standard, alkaline, or rechargeable),
or rechargeable batteries of different
capacities.
Replace the batteries when the re-
cording indicator dims.

6
INSTALLATION
You can connect the telephone cas-
sette recorder directly to the phone
line or a single phone. Select a loca-
tion for your telephone cassette re-
corder that is out of the way of normal
activities.
CONNECTING DIRECTLY
TO THE PHONE LINE
When connected to the phone line,
the recorder records phone conversa-
tions on any phone on that line. Follow
these steps to connect the telephone
cassette recorder to the phone line.
Dual-Prong Cord
TEL
MIC EAR
STD EXT
OFF ON
DC 6V 300ma
VOX NORM
REC MODE
MONITOR SPEED
Dual-Prong Cord
1. Plug the supplied dual-prong cord
into the recorder’s TEL jacks.
2. Insert the dual-prong cord’s mod-
ular plug into a modular phone
line jack.
Notes:
•If the phone line jack is not a
modular jack, you must update
the wiring. You can convert the
wiring yourself, using jacks and
adapters available at your local
electronic, or you can let the
phone company update the wir-
ing for you.
•The number of the jack to be
installed is RJ11C.
CONNECTING TO
APHONE
You can use the supplied handset
adapter to connect the telephone cas-
sette recorder to the same phone you
plan to talk on. When connected this
way, the recorder only records the
phone conversations on that phone.
1. Plug the supplied dual-prong cord
into the recorder’s TEL jacks.
2. Insert the dual-prong cord’s mod-
ular plug and the phone’s handset
cord into the handset adapter.
Dual-Pron
g
Cord
Handset Adapter
Handset Cord
MIC EAR
STD EXT
OFF ON
DC 6V 300ma
VOX NORM
REC MODE
MONITOR SPEED
Handset Cord
Handset Adapter
Dual-Prong Cord
Note: Plug the dual-prong cord’s
plug into the larger modular jack
and the handset cord’s plug into
the smaller jack.

7
3. Insert the handset adapter into the
telephone’s modular handset jack.
Dual-Pron
g
Cord
Handset Adapter
Handset Cord
MIC EAR
STD EXT
OFF ON
DC 6V 300ma
VOX NORM
REC MODE
MONITOR SPEED
Handset Cord
Handset Adapter
Dual-Prong Cord
USING AN EARPHONE
To connect an earphone (not sup-
plied), insert the earphone’s 3.2 mm
(1/8-inch) plug into the EAR jack on the
back of the telephone cassette record-
er. You can find a wide selection of
earphones at your local electronic
store.
TEL
MIC EAR
STD EXT
OFF ON
DC 6V 300mA
VOX NORM
REC MODE
MONITOR SPEED
Note: The speaker automatically dis-
connects when you plug in an ear-
phone.
Listening Safely
To protect your hearing, follow these
guidelines when you use an ear-
phone.
•Do not listen at extremely high
volume levels. Extended high-
volume listening can lead to per-
manent hearing loss.
•Set the volume to its lowest level
before you begin listening. After
you put on the earphone, adjust
the volume to a comfortable listen-
ing level.
•Do not increase the volume once
you have established a comfort-
able listening level. Over time,
your ears adapt to the volume
level, so a volume level that does
not cause discomfort might still
damage your hearing.
Traffic Safety
Do not wear an earphone while oper-
ating a motor vehicle or riding a bicy-
cle. This can create a traffic hazard
and can be illegal in some areas.
Even though some earphones let you
hear some outside sounds when lis-
tening at normal volume levels, they
still can present a traffic hazard.

8
OPERATION
SETTING THE BEEP
You can set the telephone cassette
recorder to beep every 15 seconds
while recording.
Note: You might be legally required to
setBEEP TONE to ON when recording,
so all parties know the conversation is
being recorded. Check the laws in
your area.
1. Remove the battery compartment
cover and remove the batteries, if
installed.
2. Set BEEP TONE to ON. The tele-
phone cassette recorder beeps
every 15 seconds while recording.
3. Replace the batteries and the
cover.
LOADING A CASSETTE
TAPE
Follow these steps to install a cassette
tape (not supplied) in the recorder.
1. Turn the cassette’s hub with a
pencil to take up any tape slack.
2. Press STOP/EJECT to open the
cassette compartment door. Put
the cassette in the compartment
with the cassette’s open edge fac-
ing you and the full reel on the left.
3. Close the door.
Notes:
• You can buy cassettes of varying
lengths at your local electronic
store.
• Replace the tape at least once a
year, or more often if it is used
heavily.
RECORDING A PHONE
CONVERSATION
You can record both sides of a con-
versation on any phone connected to
the same phone line as the recorder.
1. Set REC MODE, the sensitivity
level,SPEED, and MONITOR to the
desired settings. (See “Setting the
Record Mode” on Page 10, “Set-
ting the Sensitivity Level” on
Page 10, “Setting the Recording
Speed” on Page 11, and “Listen-
ing While You Record”, on Page
10.)

9
2. Press RECORD. Both RECORD
and PLAY lock down. When
RECORD is pressed down, every
call made or received is recorded.
Notes:
• If you set REC MODE to VOX,
when both parties are silent for
about 5 seconds, the recorder
stops recording until someone
starts speaking again.
• The VOLUME setting does not
affect the recording level.
• VU/LEVEL flashes while
recording.
• To temporarily stop recording,
pressPAUSE. To resume
recording, press PAUSE again.
• If the tape reaches the end dur-
ing a recording, it automatically
releases RECORD and PLAY,
and stops.
3. To stop recording, press STOP/
EJECT.
Setting the Record Mode
When REC MODE is set to VOX, the re-
corder begins recording when it re-
ceives sound through the microphone
or phone line, and stops recording
when it does not receive sound for
about 5 seconds.
Set REC MODE to NORM to record
continuously until the tape reaches the
end or you press STOP/EJECT.
Setting the Sensitivity Level
When you set REC MODE to VOX, you
must set the sensitivity level located
on the bottom of the recorder. H (high)
is the most sensitive setting and re-
quires only a soft sound to begin re-
cording.L (low) is the least sensitive
setting and requires a louder sound to
begin recording. If the tape does not
stop after about 5 seconds of silence,
setSENSITIVITY to M (medium) or L
(low).

10
Setting the Recording Speed
Set SPEED to EXT (extended) to
record at a slower speed and a lower
quality than regular speed, but extend
the recording time. Tapes recorded
with SPEED set to EXT must be played
back with the recorder set to EXT.
Set SPEED to STD (standard) to record
at regular speed. When you record
with SPEED set to STD, you can play
back the tape on this recorder (with
SPEED set to STD) or any other cas-
sette tape player.
STD EXT
OFF ON
D
C 6V 300mA
VOX NORM
REC MODE
MONITOR SPEED
Listening While You Record
Set MONITOR to ON to listen to a con-
versation through the telephone cas-
sette recorder’s speaker as it is being
recorded. Slide VOLUME to a comfort-
able listening level.
STD EXT
SPEED
OFF ON
D
C 6V 300mA
VOX NORM
REC MODE
MONITOR
Note: While you record your own
phone conversation, set MONITOR to
OFF. Otherwise, it might cause a high-
pitched tone to sound through your
telephone handset or through the tele-
phone cassette recorder’s speaker.
REGULAR RECORDING
You can use your telephone cassette
recorder as a regular cassette record-
er for recording dictation or conversa-
tions. For regular recording, be sure
the dual-prong cord is not plugged in.
Set REC MODE to NORM for continu-
ous recording, then press RECORD.
Both RECORD and PLAY lock down.
Then speak into the built-in micro-
phone from a distance of about 30 cm
(12 inches).
PLAY
RECORD STOP/EJECT
CUE
REVIEW
FAST-FREWIND PAUSE
Note: To temporarily stop recording,
press PAUSE. To resume recording,
press PAUSE again.
To stop recording, press STOP/EJECT.

11
PLAYING A TAPE
1. Set SPEED to the desired tape
speed (see “Setting the Recording
Speed” on Page 11).
2. Press PLAY. Playback begins.
Note: Press PAUSE to tempo-
rarily stop the tape while you play
it. Press PAUSE again to resume
play.
3. Adjust VOLUME to a comfortable
listening level.
4. Press STOP/EJECT to stop play. If
the cassette tape plays to the end,
the cassette deck automatically
releases PLAY and stops.
Fast-Forward and Rewind
When the tape is stopped, press CUE/
FAST-F to wind the tape rapidly for-
ward or REVIEW/REWIND to wind the
tape rapidly backward. Press STOP/
EJECT to stop the tape.
During play, hold down CUE/FAST-F or
REVIEW/REWIND to hear playback as
the tape fast-forwards or rewinds to
find desired locations on a tape quick-
ly. When you release the button, the
telephone cassette recorder returns to
normal speed.
Note: The recorder automatically
stops when it reaches the end of the
tape.
Using the Tape Counter
You can use the tape counter to mark
positions on a cassette tape during re-
cording or playback. Before you play a
cassette tape, rewind the cassette
tape and press the button to the right
of the tape counter to set it to 000. As
the cassette tape moves, the counter
advances. Note the tape counter read-
ing at the position you want to return
to later.

Your Telephone Cassette Recorder is
an example of superior design and
craftsmanship. The following suggestions
will help you care for your telephone
cassette recorder so you can enjoy it for
years.
Modifying or tampering with the tele-
phone cassette recorder’s internal com-
ponents can cause a malfunction and
might invalidate its warranty. If your tele-
phone cassette recorder is not perform-
ing as it should, take it to your local elec-
tronic store for assistance.
12
CARE AND MAINTENANCE

13
TAPE TIPS AND
TECHNIQUES
The following tips can help you get the
best performance and the longest life
from your telephone cassette record-
er.
Note: Do not use endless or C-120
cassette tapes. C-120 tape is very thin
and can tangle easily.
Erase-Protection Tabs
Most cassette tapes have two erase-
protection tapes — one for each side
of the tape. When a tab is in place,
you can erase or record on that tape
side. When the tab is not in place, you
cannot erase or record on that side.
To prevent your recordings from being
accidentally erased or recorded over,
carefully break off the erase-
protection tabs using a screwdriver or
similar tool.
Side A
Side B Tab
Side A Ta
b
A
Side B Tab
Side A
Side A Tab
If you later decide to erase or record
over the tape, you can place a piece
of tape over the holes.
Side A Ta
b
Tape Over Side A Tab
Note: When covering the holes, cover
only the portions that were originally
protected by the plastic tabs.
Restoring Tape Tension and
Sound Quality
After you play a cassette tape several
times, the tape might become tightly
wound on the cassette reels. This can
cause playback sound quality to dete-
riorate.
To restore the sound quality, fast-for-
ward the tape from the beginning to
the end of one side, then completely
rewind it. Then loosen the tape reels
by gently tapping each side of the cas-
sette’s outer shell on a flat surface.
Caution: Be careful not to damage
the cassette when tapping it. Do not
touch the exposed tape or allow any
sharp objects near the cassette.

14
Cleaning the Tape-Handling
Parts
Dirt, dust, or particles of the tape’s
coating can accumulate on the tape
heads and other parts that the tape
touches. This can greatly reduce the
telephone cassette recorder’s perfor-
mance. Use the following cleaning
procedure after about every 20 hours
of operation.
1. Remove the batteries and discon-
nect the AC adapter.
2. Open the cassette compartment
door.
3. Hold down the protection tab sen-
sor in the tape compartment while
you press RECORD to expose the
tape-handling parts.
4. Use a swab dipped in tape head
cleaning solution or denatured
alcohol to gently clean the record/
play head, pinch roller, capstan,
erase head, and tape guides.
Cotton Swab
Capstan
Rubber
Pinch Roller
Record and
Erase Heads
Rubber
Pinch Roller
Capstan
Cotton Swab Record and
Erase Heads
Tape Guides
5. When you finish cleaning, press
STOP/EJECT and close the com-
partment.
Your local electronic store
carries a complete line of tape head-
cleaning accessories.
LIGHTNING
Your telephone cassette recorder has
built-in protection circuits to reduce
the risk of damage from surges in
phone and power line current. Howev-
er, lightning striking the phone line or
power lines can damage your tele-
phone cassette recorder.
Lightning damage is not common.
Nevertheless, if you live in an area
that has frequent electrical storms, we
suggest that you unplug your tele-
phone cassette recorder during
storms to reduce the possibility of
damage.

15
IMPORTANT SAFETY INSTRUCTIONS
When using your telephone equipment, ba-
sic safety precautions should always be fol-
lowed to reducer the risk of fire, electric
shock and injury to persons, including the fol-
lowing:
1. Read and understand all instructions.
2. Follow all warnings and instructions
marked on the product.
3. Never install telephone wiring during a
lightning storm.
4. Never install telephone jacks in wet
locations unless the jack is specifically
designed for wet locations.
5. Never touch uninsulated telephone
wires or terminals unless the telephone
line has been disconnected at the net-
work interface.
6. Use caution when installing or modify-
ing telephone lines.
7. Do not fix the AC power supply cord to
building surfaces with metal fittings (if
the product has an AC power cord).
8. Unplug this product from the wall outlet
before cleaning. Do not use liquid
cleaners or aerosol cleaners. Use a
damp cloth for cleaning.
9. Do not use this product near water, for
example, near a bath tub, wash bowl,
kitchen sink, or laundry tub, in a wet
basement, or near a swimming pool.
10. Do not place this product on an unsta-
ble cart, stand, or table. The product
may fall, causing serious damage to the
product.
11. Slots and openings in the cabinet and
the back or bottom are provided for
ventilation. To protect it from overheat-
ing, these openings must not be
blocked or covered. The openings
should never be blocked by placing the
product on a bed, sofa, rug, or other
similar surface. This product should
never be placed near or over a radiator
or near register. This product should not
be placed in a built-in installation unless
proper ventilation is provided.
12. This product should be operated only
from the type of power source indicated
on the marking label. If you are not sure
of the type of power supply to your
home, consult your local power com-
pany.
13. Do not allow anything to rest on the
power cord. Do not locate this product
where the cord will be stepped on.
14. Do not overload wall outlets and exten-
sion cords as this can result in a risk of
fire or electrical shock.
15. Never push objects of any kind into this
product through cabinet slots as they
may touch dangerous voltage points or
short out parts that could result in a risk
of fire or electric shock. Never spill liq-
uid of any kind of product.

LIMITED WARRANTY
Who is Providing This Warranty?
• Orbyx Electronics, LLC (“Orbyx"), as the distributor of
this Nexxtech™ product (your “Product”).
What Does This Warranty Cover?
• This warranty covers defects in materials or
workmanship in your Product under normal use and
conditions.
What is the Period of Coverage?
• This warranty covers your Product for 12 months from
the original purchase date.
Who Is Covered?
• This warranty covers the original consumer purchaser.
Coverage terminates if you sell or otherwise transfer
your Product.
What Will We Do To Correct Problems?
• We will repair your Product or replace your Product with
a new or reconditioned equivalent product, at our
option.
How Do You Get Service?
• Call Orbyx TOLL FREE at 1-866-363-3059 for
instructions for obtaining warranty service from Orbyx’s
authorized service providers.
• Or, return your Product directly to the retail store from
which you purchased the Product.
• When you obtain service for your Product, you must
provide a purchase receipt (or other proof of the original
purchase date) and a description of the defect(s).
What Does This Warranty Not Cover?
• This warranty DOES NOT COVER:
• damage due to misuse, abuse, alteration, unauthorized
repair, or accident (such as improper electrical current);
• damage due to “acts of God” (such as lightning) or other
contingencies beyond our control;
• cosmetic damage;
• externally generated static, signal reception or antenna
problems not caused by your Product; or batteries.
• This warranty also DOES NOT COVER, and in no case
will we be liable for, any incidental damages (such as
transportation costs to and from an authorized service
provider, or loss of time) or consequential damages
(such as costs of repairing or replacing other property
which is damaged, including tapes, discs, speakers not
included with your Product or other accessories, or
external electrical systems) resulting from the use of
your Product. Some states do not allow the exclusion or
limitation of incidental or consequential damages, so the
above limitation or exclusion may not apply to you.
• Defacing the serial number, or using your Product for
commercial or institutional purposes, voids this
warranty.
Are There Other Warranties?
• There are no express warranties other than those
expressed herein. Neither the sales personnel nor any
other person is authorized to make any other warranties
or to extend the duration of any warranties.
• ANY IMPLIED WARRANTIES, INCLUDING ANY
IMPLIED WARRANTY OF MERCHANTABILITY (AN
UNWRITTEN WARRANTY THAT A PRODUCT IS FIT
FOR ORDINARY USE), ARE LIMITED TO 90 DAYS.
Some states do not allow limitations on how long an
implied warranty lasts, so the above limitation may not
apply to you.
How Does State Law Apply?
• This warranty gives you specific legal rights, and you
may also have other rights which vary from state to
state.
ORBYX ELECTRONICS WARRANTY
ORBYX Electronics warrants that this product will be free
from defects in materials and workmanship for a period of
one (1) year from the date of purchase. Within this period,
simply take the product and your proof of purchase to any
ORBYX Electronics store or dealer and the product will be
repaired without charge for parts and labour. ORBYX
Electronics reserves the right to charge for transportation.
Any product which has been subject to misuse or
accidental damage is excluded from this warranty.
This warranty is only applicable to a product purchased
through ORBYX Electronics' company owned stores and
dealers and to a product that is presented for repair in a
country where ORBYX Electronics offers the product for
sale. While this warranty does not confer any legal rights
other than those set out above, you may have additional
statutory rights which will vary under the laws of the
various countries, states, province and other governmental
entities in which ORBYX Electronics operates. This
warranty is subject to all statutory rights you may have in
the country of purchase.
LIMITED WARRANTY
Limited Warranty/Garantie Limitée
U.S.A & Canada
© 2005 ORBYX Electronics. All Rights Reserved.
Distributed exclusively in the U.S. by
Orbyx Electronics, LLC
501 South Cheryl Lane,
Walnut, CA 91789
Imported in Canada for/Importé au Canada pour
Orbyx Electronics,
Concord, Canada, L4K 4M3
Manufactured in China
For product support please contact www.orbyxelectronics.com
or 1-866-363-3059
Table of contents
