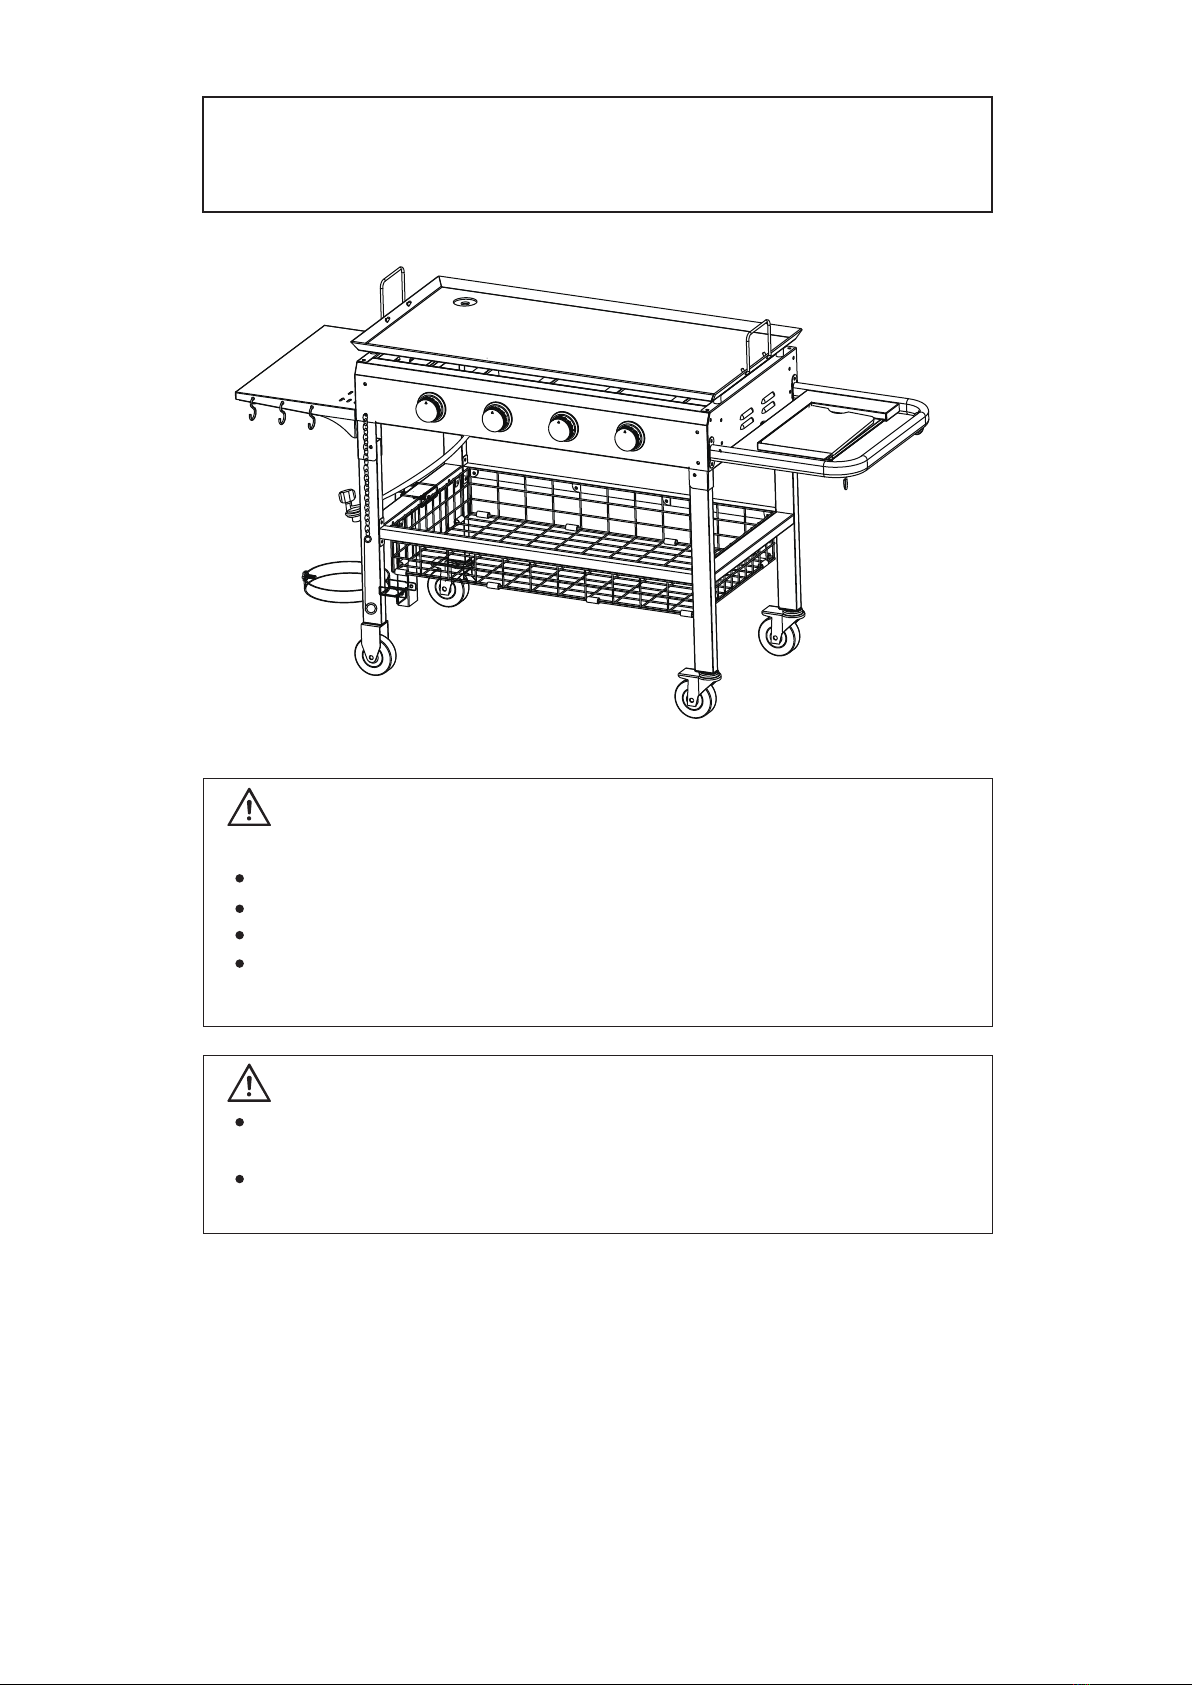
Ningbo 16016 User manual
If you smell gas:
Shut off gas to the appliance.
Extinguish any open flame.
Open lid.
If odor continues, keep away from the appliance and
immediately call your gas supplier or your fire department.
Owner’s Manual
DANGER:
Do not store or use gasoline or other flammable liquids or
vapors in the vicinity of this or any other appliance.
An LP cylinder not connected for use shall not be stored in the
vicinity of this or any other appliance.
Read the instructions before assembling and using the appliance.
DO NOT use the grill unless it is completely assembled and all the parts are securely fastened.
This grill will become very hot, do not move it during operation. Keep children and pets away.
WARNING:
FOR YOUR SAFETY!
This grill has been made to high quality standards. If you have any questions that are not
addressed in this manual, or you need parts, please call our customer service hotline or
send an email to us.
CONTACT US FIRST!

CATALOGUE
1
4
6
15
15
17
17
19
20
22
25
29
32
For Your Safety
Parts & Hardware List
Assembly Instructions
General Information and Instructions
LP Gas and Cylinder Information
LP Cylinder Leak Test
Regulator and LP Cylinder Connections
Operating Instructions
Lighting The Main Burners
Maintenance Instructions
Trouble Shooting Guide
Grilling Recipes
Warranty and Customer Service

For your safety
DO NOT store or use gasoline, or any flammable vapors and liquids within 25ft(8m)
of the grill.
When cooking with oil/grease, do not allow the oil/grease to exceed 350°F(177°C),
DO NOT store extra cooking oil in the vicinity of the grill.
A liquid propane (LP) tank (cylinder) not connected for use should be stored at a
minimum distance of 10ft(3m) away from grill or any appliance. Never fill the gas
cylinder beyond 80 percent full. If the above information is not followed exactly, a fire
causing death or serious injury may occur.
The minimum distances around the grill that must be kept free of combustible materials
is 90 cm (36 inches), which includes the walls of buildings or building features.
Keep either back or side of the grill at least 36 inch from any wall or surface. Maintain
10 ft clearance to objects that can catch fire or sources of ignition such as pilot lights
on water heaters, live electrical appliances, etc.
1.
2.
NOTE:
The assembly and use of this grill must conform with local codes or, in the absence
of local codes, with either the National Fuel Gas Code, ANSI Z223.1/NFPA 54, or the
Natural Gas and Propane Installation Code, CSA B149.1, or the Propane Storage
and Handling Code, CSA B149.2.
CAUTION:
This grill is for use with propane gas only (propane gas cylinder not included).
Never attempt to attach this grill to the self-contained propane system of a camper
trailer, motor home or house.
Never use charcoal or lighter fluid with gas grills.
1.
2.
3.
3.
4.
5.
- 1 -
36"
36"
WARNING:
DO NOT use gasoline, kerosene, or alcohol for lighting. The LP gas cylinder must be
constructed and marked in accordance with the specifications for propane gas cylin-
ders of National Standard of America CAN/CSA-B339, Cylinder Spheres, and Tubes
for Transportation of Dangerous Goods. This grill is not intended to be used in or on
recreational vehicles or boats.
DO NOT attempt to move the grill while it is lit or hot.
DO NOT use grill unless it is completely assembled and all parts are securely
fastened and tightened.
4.
5.
6.
- 2 -
DO NOT use grill or any gas products near unprotected combustible buildings and
materials.
DO NOT use in the presence of gases or vapors. Keep grill area clear and free from
combustible materials, gasoline, and other flammable vapors and liquids.
DO NOT touch metal parts of the grill until it has completely cooled (about 45
minutes) to avoid burns, unless you are wearing protective gear (oven mitts, pot
holders, and etc.).
DO NOT alter grill in any manner.
Keep all combustible items and surfaces at least 36 inches (90cm) away from the grill
at all times, which includes the walls of buildings or building features. The grill shall
not be placed under overhead combustible construction.
Clean and inspect the hose before each use. If there is evidence of abrasion, wear,
cuts, or leaks, the hose must be replaced before operating the grill. The replacement
hose assembly must be as specified by the manufacturer.The replacement must be
that specified in the manual.
Move gas hose as far away as possible from hot surfaces and dripping hot grease.
Never keep a filled gas cylinder in a hot car or truck. Heat will cause the gas
pressure to increase, which may open the relief valve and allow the gas to escape,
Keep the grill's valve compartment, burners and circulating air passages clean.
This grill is for outdoor use only, and should not be used in a building, garage, or any
other enclosed areas.
The use of alcohol, prescription, or non-prescription drugs may impair the operator’s
ability to properly assemble or safely operate the grill.
Always place your grill on a hard, and leveled surface far away from combustibles.
Do not leave a lit grill unattended. Keep children and pets away from the grill AT ALL TIMES.
Do not place grill on any type of tabletop surface.
Do not use grill in strong winds.
7.
8.
9.
10.
11.
12.
13.
14.
15.
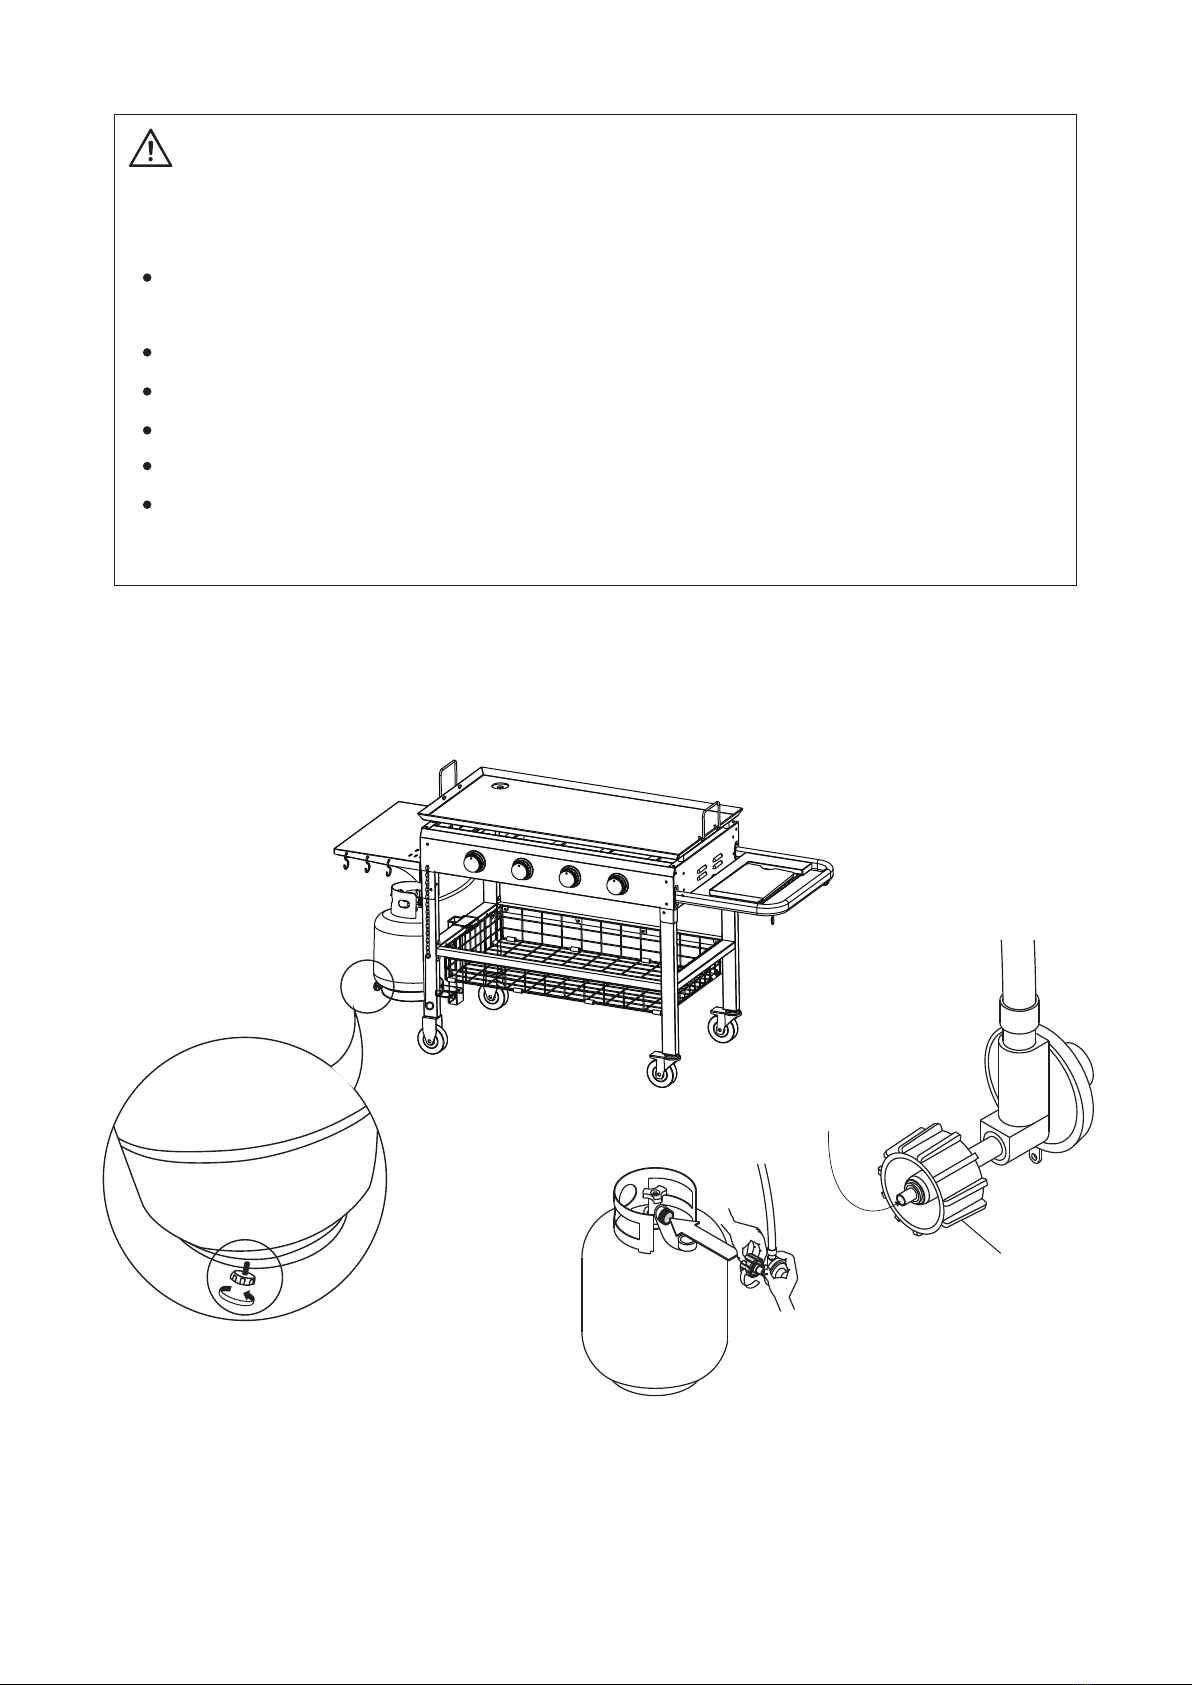
NOTE:
PLACE the LP gas cylinder up-straight on the holder base and fix with screw to make
sure the cylinder is placed in right position to avoid unexpected danger.
LEAK TEST: Apply the solution to the LP gas delivery system at points. Grill valve
coupling; gas hose regulator & cylinder coupling.
- 3 -
DANGER:
Propane characteristics: Flammable, explosive under pressure, heavier than air,
settles in pools, and low areas.
In its natural state, propane has no odor. For your safety an odorant has been added.
Contact with propane can cause freeze burns to skin.
This grill is shipped from the factory for propane gas use only.
Never use a propane cylinder with a damaged body, valve, collar, or footing.
Dentedor rusted propane cylinders may be hazardous and should be checked by
your propane gas supplier.
Liquid propane gas is flammable and hazardous if handled improperly. Know its
characteristics before using any propane product.
Straight
Coupling nut
Nipple has to be
centered into the LP
cylinder valve.

Parts & Hardware List
A.
B.
C.
D.
E.
F.
G.
H.
I.
J.
U.
1PC
2PCS
2PCS
2PCS
1PC
1PC
13PCS
1PC
1PC
1PC
Grill body
(Included burner)
Caster
(With brake)
Caster
(No brake)
Support beam
Side table(L)
Side table(R)
Cylinder holder
Holder base
Metal basket
“S”hook
Grip pan
Handle
Oil cup hook
Waste oil cup
Heat deflector
Barbecue grill
Oil guide pipe Griddle’s handle
Fixing knob
Additional choice for griddle
Griddle
K.
L.
M.
N.
O.
P.
T.
X.
1PC
1PC
1PC
1PC
4PCS
3PCS
1PC
M6X12 30PCS
1PC
1PC 1PC
1PC 1PC
V.
M6X65 1PC
W.
M6 1PC
- 4 -
M6X20 3PCS
Y.
2PCS
R.Q. S.

Preparation
Before beginning assembly, make sure all parts are present. Compare parts with
packaged contents list and diagram above. If any parts are missing or damaged, do
not attempt to assemble the products. Contact customer service UNION GRAND for
Estimated assembly time: 40 minutes.
Tools required for assembly: Phillips Screwdriver & Wrench.
Note: The right and left sides of the grill are designed as if you are facing the front of
the grill.
1.
2.
3.
- 5 -
Phillips Screwdriver Wrench
- 6 -
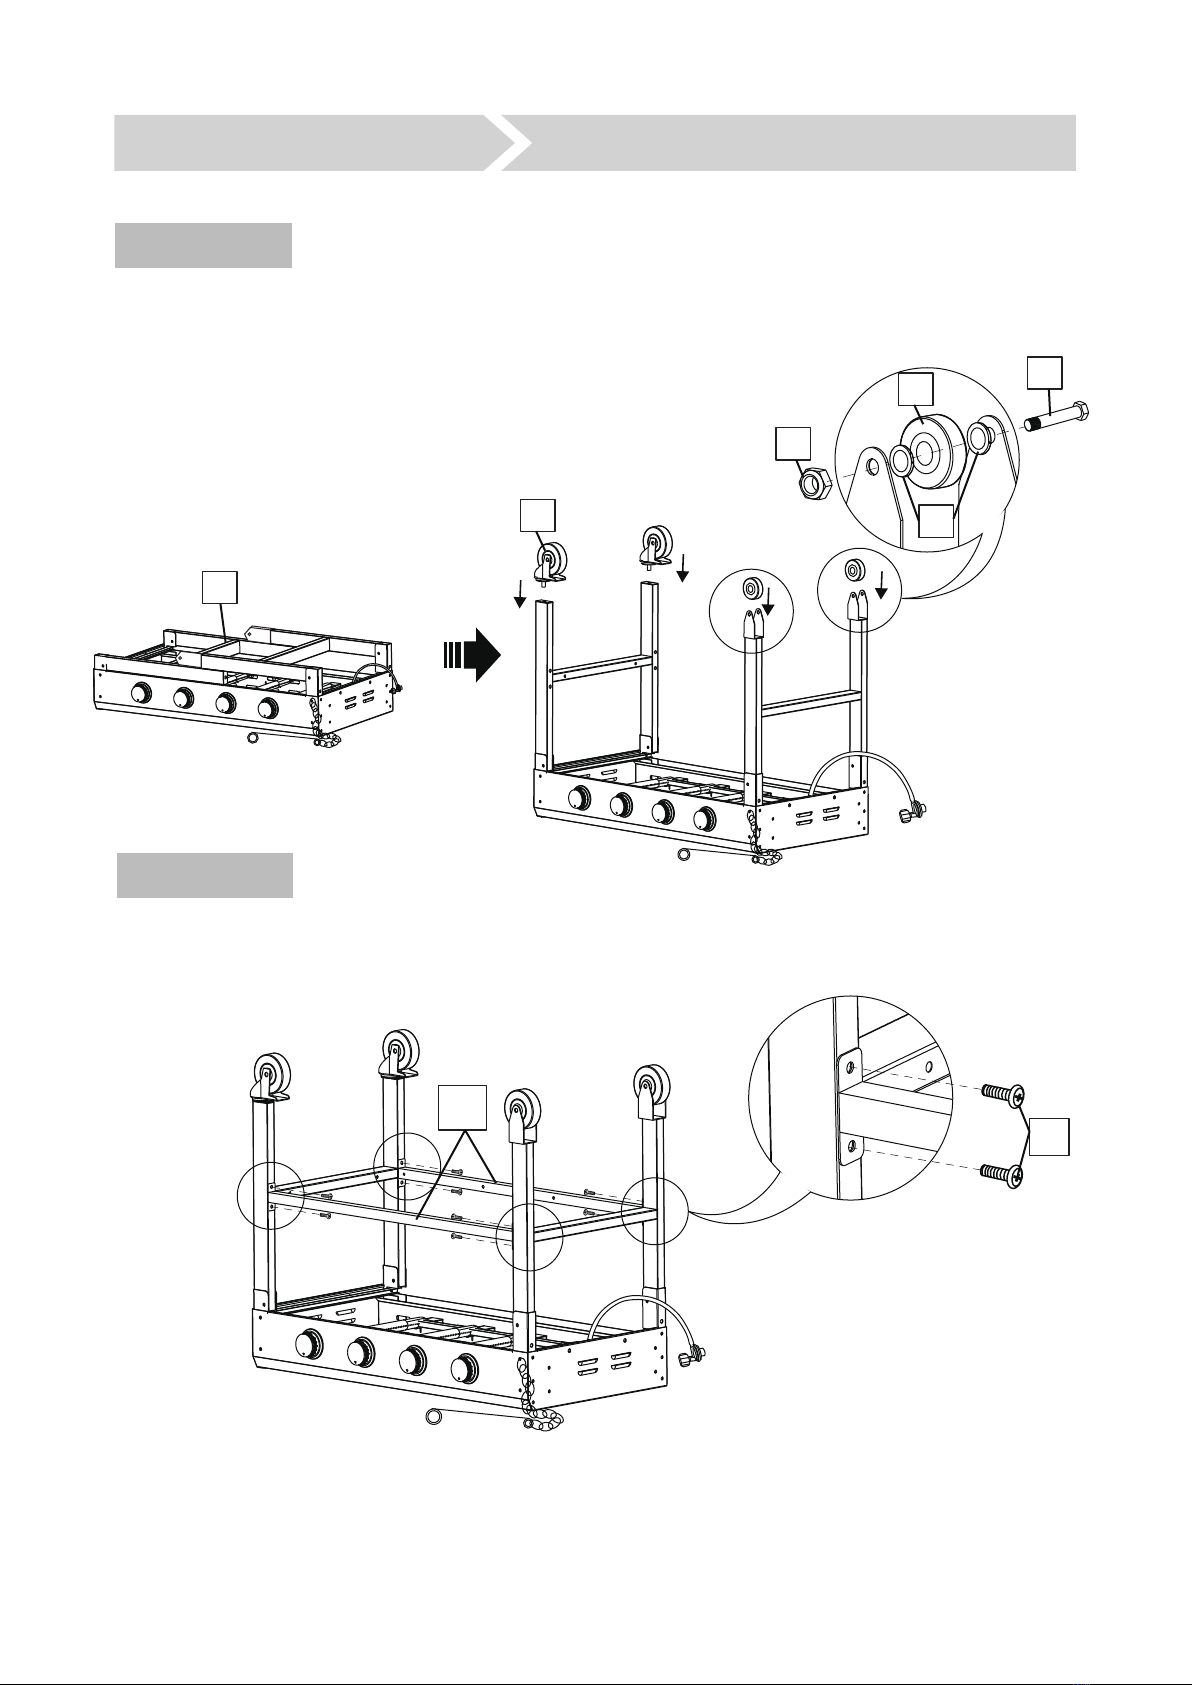
Assembly Instructions
STEP1
A
1
3
2
C
STEP2
DU
Turn over the Grill body(#A) and assemble the 4 Casters(#B&#C) to the leg of grill,
the 2 Casters with brake(#B) should be in RH legs (longer ones).
Assemble the 2 Support beams(#D) to the legs of grill with Screws(#U).
B
- 7 -
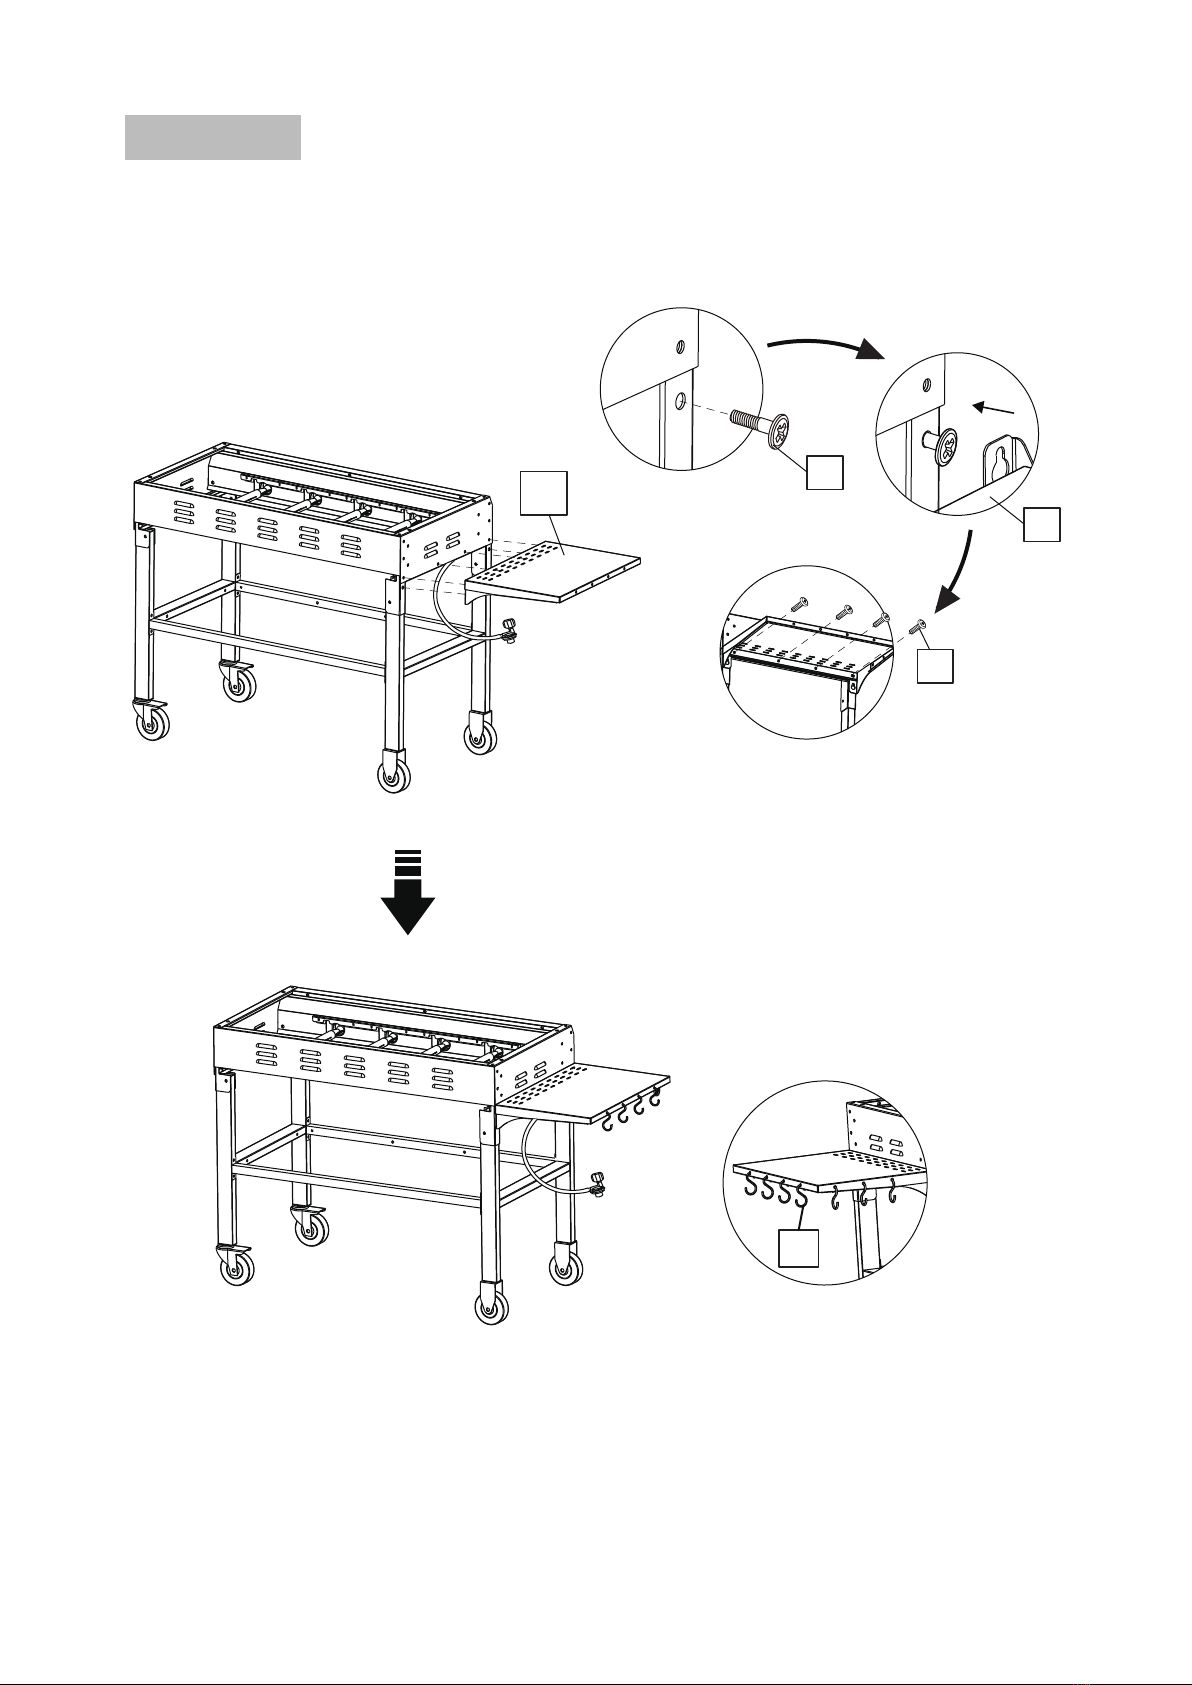
STEP3
Screw 2 "Y" on the grill legs, and place the side table "E" on screws "Y".
Then fix the side table with "U".
You can choose the holes to place the “S”Hooks(#G) as you need .
G
E
U
E
Y
1.
2.
3.
- 8 -
G
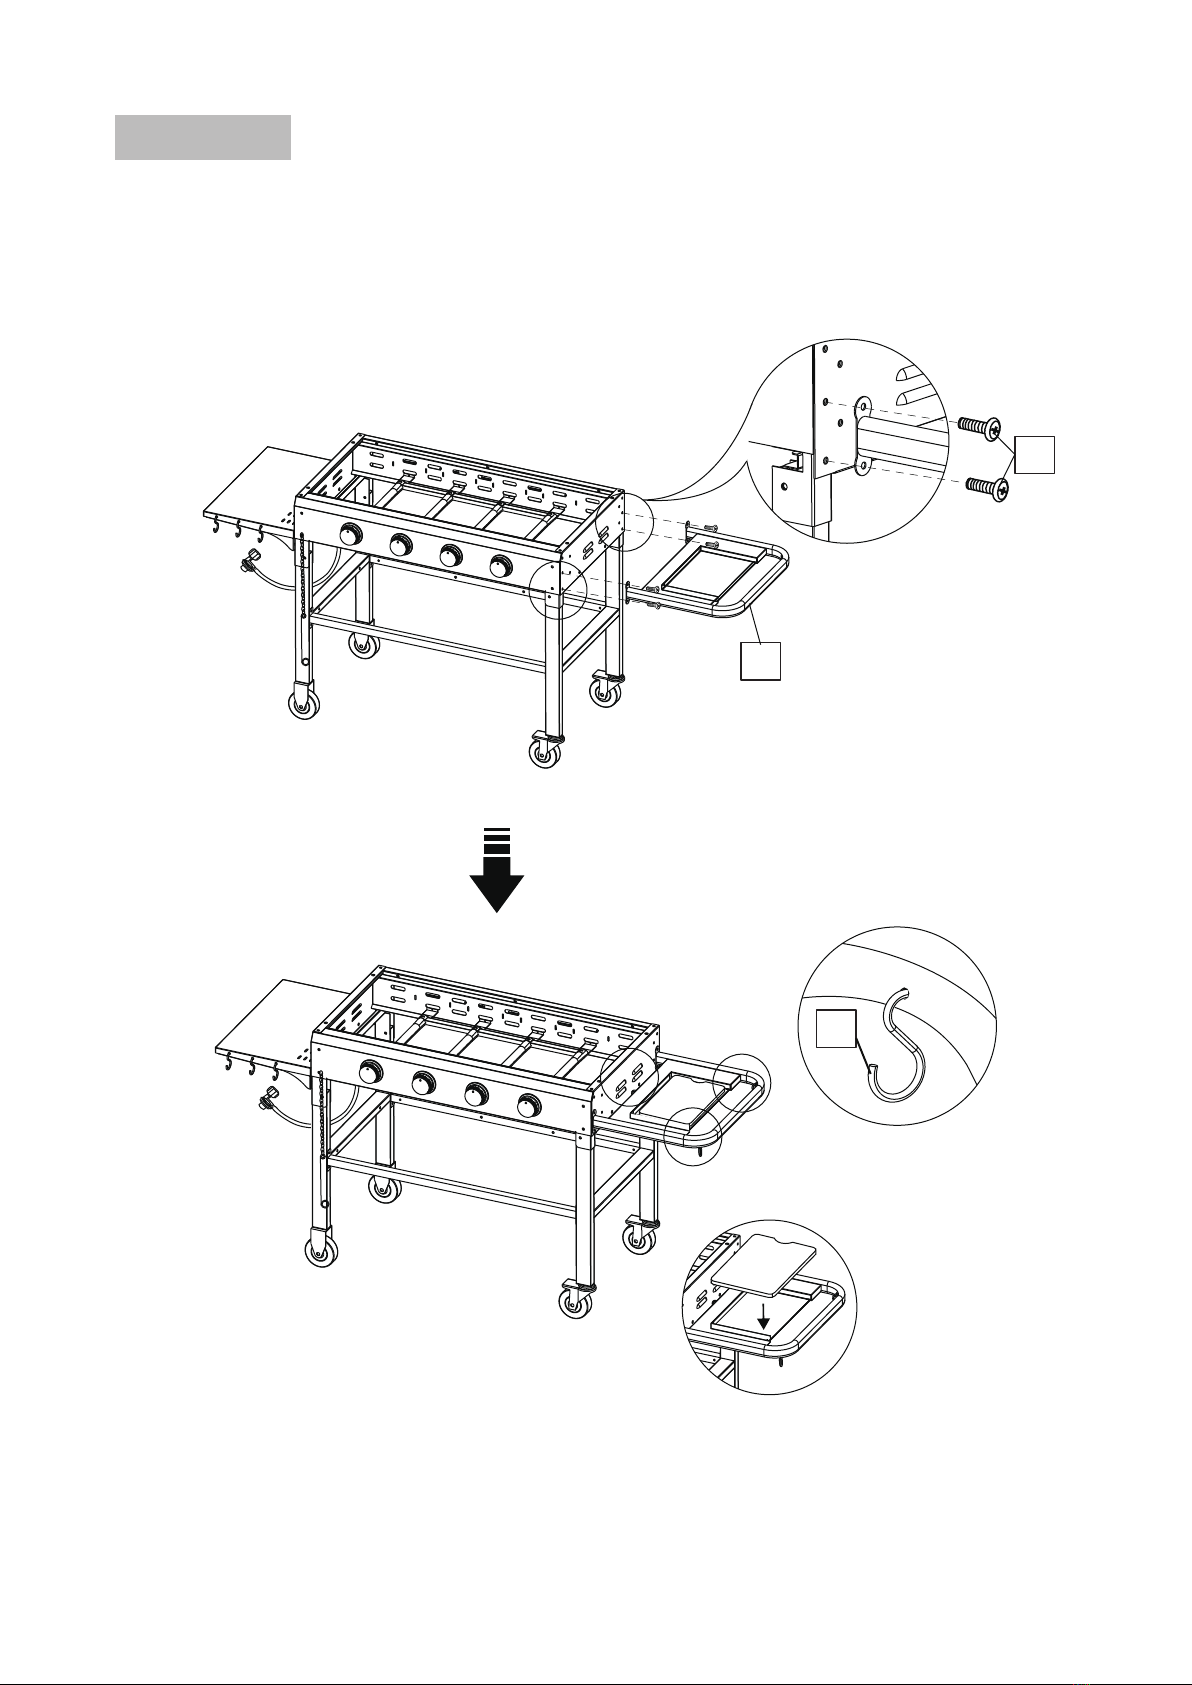
STEP4
Attach the Right side table(#F) on another side of grill with 4 Screws(#U),
then place the "S" Hooks as the diagram shows.
U
F
Table of contents
Popular Griddle manuals by other brands


Keating Of Chicago
Keating Of Chicago MIRACLEAN PRE-2000 manual

Nexgrill
Nexgrill 720-0786A owner's guide

Outwell
Outwell FH-3047C instruction manual

Rankam
Rankam Member's Mark GR2298901-MM-02 Assembly & operating instructions

Black Stone
Black Stone 1972 owner's manual

Star
Star Ultra Max 760TA Installation and operation instructions