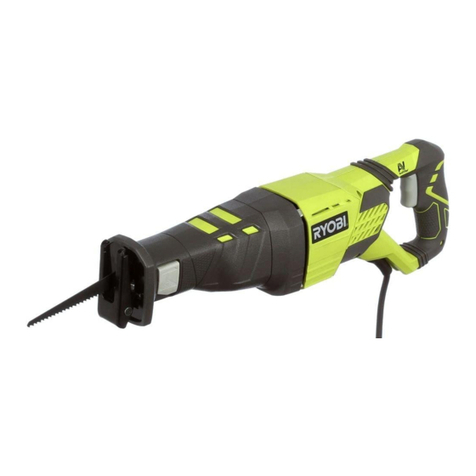
Nitto SSW-110 User manual

lJrF」
rrraJttИ
‖
働
IE
IR SAW
ALLINSTRUCT10NS BEFORE OPERAT:NG THIS T00L
PER SAW Mode:SSW‐ 110
OFESS10NAL T00L
Specifications
These speclicallons anO the plollo may be changeO io「
mprovementi″thout plor n。
lce
ONWm Manulaclured by:
NITTO KOHK:CO,LTD
3缶鵠
旨
鵠
習累l,
砲
路:チ:総
スイ7pan
Fax(03)3753‑8791
AVE THESE INSTRUCT10NS

CONTEい
IMPORTANT SAFETY INSTRuCT10NS FOR AL AIR T00LS
l USAGE… …
: …
…
………
……
……… 3
2 AIR SUPPLY… …
…
…
…
… 3
3 MOUNTING SAW BLADE ……
……
……
3
4 START AND STOP …
…
……
…
……
3
5 AD」uST VALVE ¨
……
……
……
……
……
3
6 0PERATING TIPS ¨¨¨ ¨¨
…
…………
……
…… 4
7 0PT10NAL ACCESSORIES ¨¨¨ ¨¨¨ ¨ ¨¨
4
8 0RDERINe SERV CE PARTS ‐ ¨
…
…
………4
9 SUPER SAW SS″ ‐
110 ASSEMBLY AND PARTS LIST… …
5
HmOGRAM
VVarnin9‐
lt m191t be dan9o7ous t4 operate the powertool
lf the inetruction3 3uppl ed are not lolowod
Before operating the tool‐read and undorstand a‖ instruc‐
l one supp‖ed lくoop ror future refolence
Personal pЮ toctvo oquipment a3 0yO,衝 p70teCt on
and protective llovo3 muSt alway3 bO u30d When o●
era口
on the tool
△ ◎ ③
一 ■111 1 1 ⁚ ︱ ︐︱︱

△ WARNING
When using a r tools, basic safety precautions
should always be fo‖ ovved to reduce risk of pe「
sonal iniury, including the fo‖
owings
Operators assigned to use the t001s should de instructed in the
sare use Of the toOl
No persOn shOuld use this tOOl w thout f′ st having read and
understand this inst子 uct on manual
(1)Or● 33 prOperiソ Do not wearloo8e Clothing 。子ornaments
They can be caughtin moving parts Non― sk,d fOOt、vear is ie‐
commended VVear prOtectve ha i cOver n9 to contain lon9
ha r
(2)Alway8 Wear eyo protect on everyday eye91asses only
hals impactresistantlenses They do NOT piotect eyes Also
use face or dust mask, li operat ons create dust
(3)A!wav3 Wear protectlvo o8i equlpinont
(4,Do not overreach Keep pro,o子 footng and balance at
a‖ tines
(5)Stay alert watch what you aie do ng use cOmmon
sense
Oo not operate tool、 ″hen you are tred
(6)Some t。 。18 90nerato 8ubBtantial vlbratio■ 8 1i discom
Fori or pain is encOuntered dur ng use you should cea8e Op‐
erat Ons and check、 ″th your physiclan pr or to further use
(7)Be sure to koop handB c1087 0f mOV ng pa713
(1)Koo,wo「 k area clean cluttered 、″
。
「k areas and benches
invte accidents and in,υ r es
(2)Consider wo「 k area onvittonment Do not expOse tools to
rain Do not use tOols in damp or wet locatons Keep、 vork
area、 ve‖ it
(3)Do not operate near ilammable lquidB o子 in gaSeou8 0r
explosive atmospheres
(4)Keep chndren away AIso al vistors shou10 be kept a、 ″ay
from、vork area Do not let visitors contactthe tool cOmpressOi
or connect ng hoses
(5)SometOO:3 9enerate high noise levels check tO be sure
thatthe use ofthis tool conforms to al local noise reOulations
(1)Be Sure al extemai screws, nuts and b01ts are light[y
secured pror i0 0ach use
(2)Do not use d8maged frayed or deteriorated hos3S and
fittings
(3)Remove adlusting keys and wrenches Form habt of ch‐
ecking to see that ad,ust no keys and wrenches are iemOved
from ool before tuining it on
(4)uSo right tool Do not force a smal too1 0r attachment
to do the,oo Of a heavyduty toOI Do not use toolわ r a purpOse
not intended
(5)Do not forco lool "w‖
do the,ob better and sarer at the
rate for which it was designed
(6)Secure work use camp8 or a vse to hod worК
when
pract c81 t is saFer than using your hand and t frees bOth
hands to operate tool
(7)A"pr● 38ure at the inlot must not exceed 0 50 MPa(6
k9,′cm2,65p31g,5 9 bar,
(1)StOre dlo toO18 When not n use too s shOu d be stored
in dry,and locked‐ up places out of reach of chldren
(2)Avold unlntentiOna1 3tarting Do not cairy connected tool
w th fin9er on throttle VVhen carryin9 tOO be sure the conoec‐
t ng hose to the compressor is di8connected
(3)Reduce the ri3k Of unintentiona1 8terting iИ ake sure throttle
is in opOs tion before conneci ng a i hOse to too「
(4)Oo not abu30 hC180 Never car子 y tool、
vth a rsupply hOse
connected or yank oo hose to discOnnect
(5)Never loavo lool runnlng unattended A、 vays turn off the
a r supply and disconnect the a r supply h。 8e Do not leave
tool unattended untl it comes tO a complete sbp
(1)●O nOt recon3truCt or modliソ
(2,Check● amaged part3 88fOre further use of the toOt an
accesso″ or Other part that is damaged shoulo be carefuly
checked tO determine that t、″ll operate proper y and pe■
orm
ts intended funct ons Check fOr a10nmeni Of moving parts,
binding of moving parts,breakage Or paits mOuni ng, and any
other cond tions that may afFect ts operat on An accessOry
or other part that is danaged OrinOperable shOuld be propery
repa red Or replaced

(3)Repatrs by autho■ 2ed personnel Any repa rs on the tool
or installation of replacemeni parts should be perfOrmed only
by the sales agent rrom whOm yOu purchased the tool or the
manufacturer use Only oenuine replacement parts Falure
to ut ize the expertise of an authorzed sales agent fttom
whom you purchased the tool orthe manu● cturer or ● ure to
use genuine replacement palts may resut in an increased
r sk of in,ury tO the user and may invaldate your、 ″arianty
(41 use recOmmended acce3sories Consu t this manual or
the sales agentirom whom yOu purchased the tool orthe ma―
nuFacturer ror recOmmended acceSSOr es The use ofimproper
accessor es may cause risk of inJury tO persons
15)AIways turn o● the air supply and disconneci the alr supply
h030 befOre insta[[ing,removing or edJusting any accessory On
the tool o子 befOre performing any maintenance on the loo[
〈
6)Do not remove any lalol placed on the too r the la
bels become damaged Or be9in to peelaway contactthe sales
agentirOm whom you purchased the tool oi the manuracturer
for the r immediate replacement
△ WARNiNG
A ways turn offthe a r supply and disconnect the
air supplソhose
use saw Blades、 vth leSS than 90 mm Blade length Longer
Blades may possibly cause personal inlu″ due to ineVtable
unOalanced mouni ng
Loosen Hex Socket Set Scre、 v6× 6 wth Hex VVrench Key 3
1nsertthe gr p Of a ne、 v Blade into the OrOOve on Guide Shaft as
far as it stops, and retighten the Screw with Hex Wrench Key
3 ontlthe Blade is frmly fixed
This tool is foi sawin9、 ″orkpieceS using a savv Blade
Hex sockot
Set Scew 6× 6
ヽγrench Key 3
Fi0 2
lock lever and graSp the ThrOtt e Lever
Thrott e Lever
To start release
To stoo ielease
2‑l Alr Pre38ure
Alr pressure largely detemines tool performance This tool '3
designed to be operated at a r pressur8 0f 0 59 1・ 4Pa(6 kgf′ cml
05o89)maX mum
2‑2 Air Llne
use a95 mm(3′ 8)a r hoSe bet、
″een the compressor and the
tool Compressed a r is cooled and its drain separated,as soon
as the a rleaves the compressor The drain ho、 ″ever is con‐
densed in the piping and can enter the tool mechanism and
may cause irouble So, instal an a rflter and an oler betvveen
the compressor and the toOl
95mm(3′ 8,HOSe
F91
2‑3 Lubrication
lnstal an o er bel″
een the compressor anO the tool Use ■10
machine ol NeOlect ng the ol supply、 vil cause damaOe The
use ofthick ol.・
1l eadto poor performance Always use 110
machine ol
ノ
△WARNiNG
Be sure to keep hands clear of moving parts
The desleO numberof speed between max mum and m nimum
speed is Obtained by turning the groove of ValVe clock、 vise o子
counterclockAiseヽ ″th screwdr ver
Max mum speed
Postion the 9roove Of Adiust Valve ho120ntalto main bOdy
Minimum speed
Pos tion the gioove of Adiust Valve vert cal to main body
Fi9 4

6‐
1 0opress the too1 9enty onto the workpiece when cuning
Do not depre88 the tool onto the workploce too hard,because
the stroke is shonened,the number of stroke3 18 reduCed and
the cutting capacity s lowered as a resu t
O‐2 Turn the Adiust Valve wth screwdiver when doinO m
nute woR or when the poworis excessive
in orderng pa18 800 COmponenls Olve each par number,part
name and quantty requlred
The following saw Blades avalablo ex‐ 3tOCk
Saw Blade 32 Ass y o pCS)
SaW B18de 24 Ao3 y(lo pCS)
Saw Blade 18 A33'y lop。 3)
Saw口 lade 14 Ass y(10 pc3)
[

△ CAUT:ON
The i‖ustration is for information onlェ
users should never disassemble parts
Contactthe sales agentfrom whom you purchased the tool o「
our company should the tool need servioe,
repair or replacement of parts
│
り││
リ
レ
イ
'
│
立
9
ol
い
The parts numOers、 v th( )are cOn3iSted by the Ass y parts written above tい om
臨1燿 輌 ‐
│
│ │ │ │
‐ │ │ │ │ │ IL囃
―
0‐ Pre
1TQ01986 Cover 1
2TP16a38 Suppo腱 or
Colar 13
Hex Socket Set Scre、 ″6× 6
C・u lo
1
,
2
,
3
4
5
T002451
TP06141
T001∝ Ю
6CP20233 Hex Socket HeaO Cap
Screw 4× 6
2
7TQ01∝ B Guide Shai ,
3TB01 4 Cvinder Head Sub Ass v l set
9
10
11
(TP03970
(TA9Alol)
01 Seal G10× 14× 3
U Sealハ 6s y
Splng Pin 3× 8
2
l set
1
(TP01920'
12 (T001971) Bush 2
13 Ю 01992 SupDOrte,Plate 1
14 TP02902 Cros Recessed Countersunk
F at Head Screw 3×6
Guide Holder
1
15 TCK 1972 1
16 TP026" Cro Rece ed Pan Head
Screw 4×
12
7
17 T001986 Packlng B 1
18 TB01^民 。P,ston Ring Ass y 2 set
TQ01982
LP00310
Piston B 1
Plain tVasher M5 ,
21 TPo1934 Hex Sockd Head Cap
Screlv 5×18
,
22 TQ01987 Sprnq l× 17× 42 1
Piston A sub Ass y
Sprng Pin 3× 22
6× 12× 12
Rng O‐ 2× 26
TP02236 Bushing PTl′ 4× NP¬ ′
41
一21
・1
TPl∞ 67 Sav.B ade 32
TP∝ 696 Hex Wiench Key 3
T92483 lnstioct on Manual

rJs■
ParrraJ J‖
〃Ш [
AIR SAW
SuPER SAW Modei SSW‐ 110
READ ALLINSTRuCr10NS BEFORE OPERATING THIS TOOL
TQ02483 1 40603A

