NOVARDEN NRL630 User manual
EN
Installation manual
Robot lawnmower
NRL630

EN
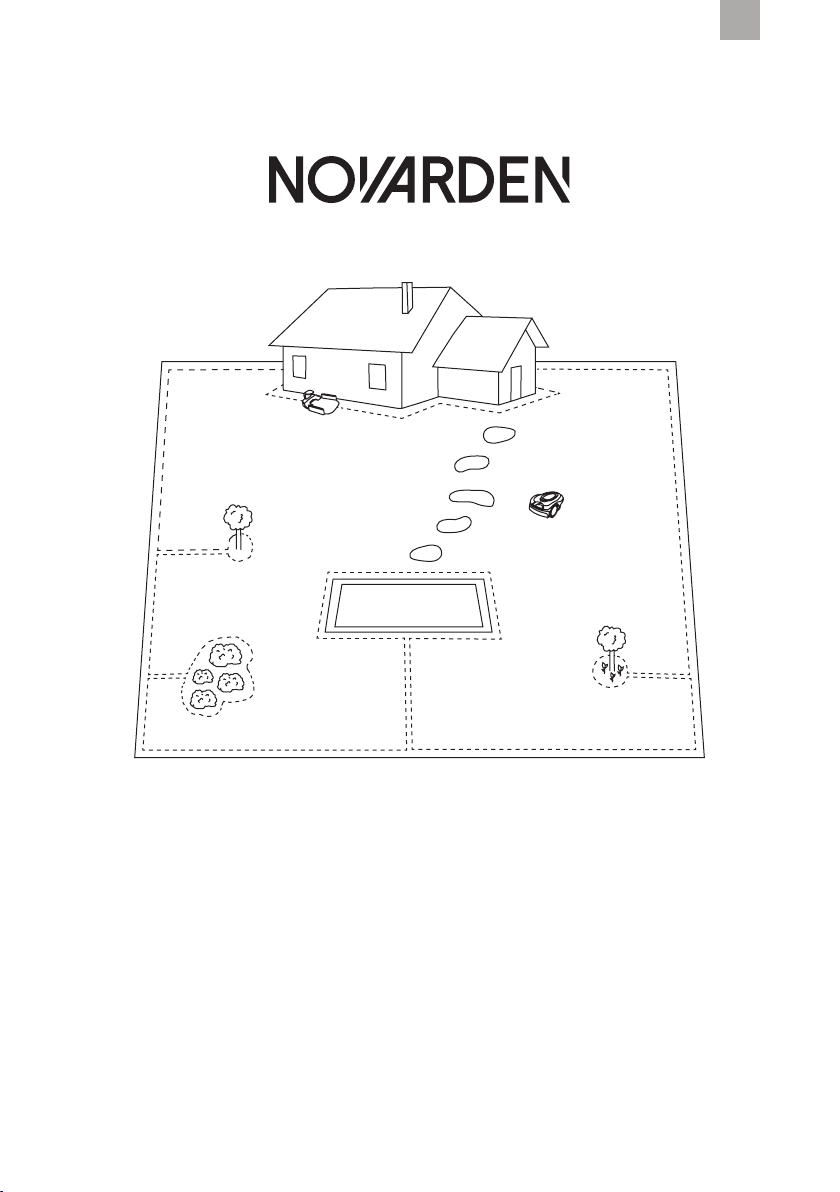
Thank you for choosing NOVARDEN! Before you use your robot
mower, you need to install several pieces of equipment. Follow this
installation manual step by step for easy installation, no matter your
lawn type.
Installation is an important step, as it ensures that the robot mower
is able to move correctly and eectively around a specic lawn area.
The perimeter cable connes the robot mower to one area, allowing
you to protect delicate objects on your lawn. Once the perimeter
cable is installed and the charging station is plugged in, the robot
mower is ready to start its rst mowing cycle.
The robot mower takes a random mowing path in the marked out
area and returns to its charging station at the end of each mowing
cycle.
3
Summary
EN
Product contents................................................... 4
Preparing the lawn................................................ 5
Preparing the lawn.............................................................. 5
What you need for installation............................ 6
Elements provided .............................................................. 6
Elements not provided ....................................................... 7
Installing the charging station............................... 8
Choosing a charging station location................................ 8
Recommendations .............................................................. 8
Installing the perimeter cable.......................10
Connecting the “Out” cable to the charging station...... 11
Marking out the mowing area ......................................... 12
Securing the cable to the ground.................................... 13
Protecting obstacles.......................................................... 14
Connecting the “In” cable to the charging station......... 16
Securing the charging station .......................................... 16
Repairing or extending the perimeter cable.................. 17
Switching on the robot mower .......................... 18
Plugging in the power cable............................................. 18
Plugging the appliance into the mains supply............... 18
Charging the robot mower................................. 19

4
Product contents
EN
1 2 3
54 6
10 11
1 NOVARDEN robot mower ✓
2 Charging station ✓
3 Perimeter cable connectors 4
4 Charging station connectors 4
5 Charging station stakes 6
6 Perimeter cable 100m
7 Perimeter cable pegs 150
8 Charging station power adapter ✓
9 Charging station extension cable ✓
10 Replacement blades 6
11 Installation and user manuals ✓
7 8 9

5
Preparing the lawn
EN
Preparing the lawn
• Level out the mowing area
Level out the ground, ll up holes, puddles, and any other
element that could make the robot mower freeze during its
mowing cycle.
• Clear the lawn of obstacles
Stones, fruit, branches, sprinkler heads, tools, etc.
Follow the following recommendations to ensure the robot mower
operates correctly and to avoid wasting time:
NOTE: If the grass on your lawn is long, the robot mower may not operate eectively
or may encounter diculties when on the move. We therefore recommend manually
mowing your lawn one last time before the robot mower’s rst mowing cycle.

6
What you need for installation
EN
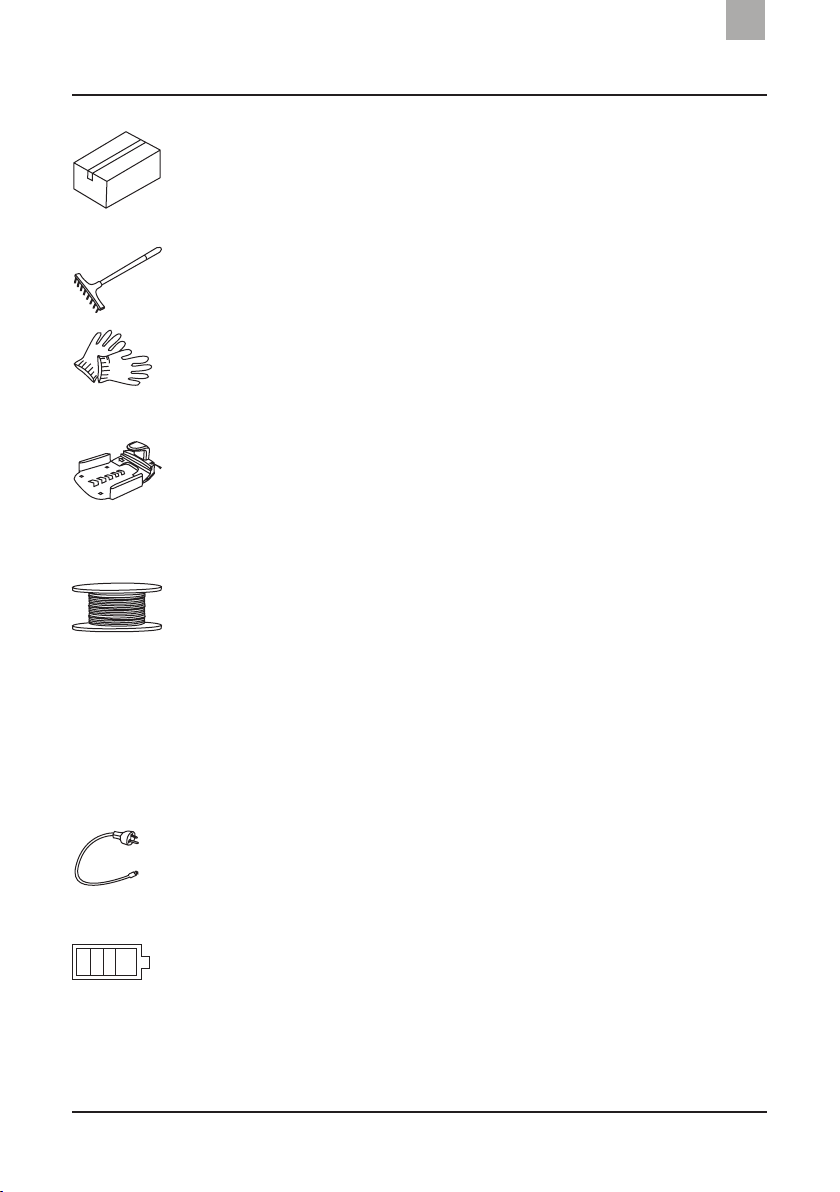
You need the following accessories to be able to start installing
your robot mower:
Elements provided
1. Charging station
2. 4 x charging station stakes
3. Charging station power
adapter
4. Perimeter cable pegs
5. Perimeter cable
6. Charging station extension
cable (if necessary)
1 2
3 4
5 6
7
What you need for installation
EN
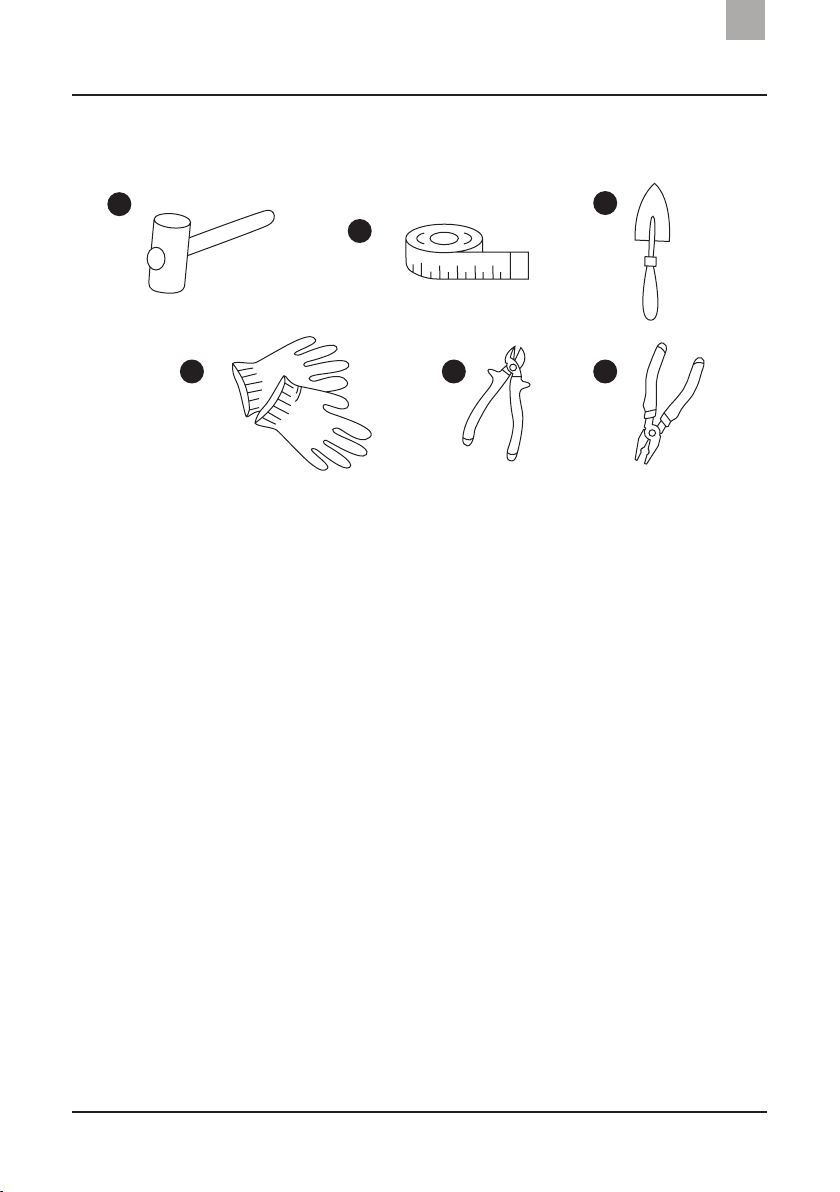
Elements not provided
1
2
3
4 5 6
1. Mallet/Hammer
2. Tape measure
3. Trowel
4. Gardening gloves
5. Cutting pliers
6. Flat blade pliers

8
Installing the charging station
EN
Where to place your charging station
Choosing where to place your charging station is important
because:
• It helps the robot mower return to its charging station.
• The perimeter cable, which marks out the robot mower’s
mowing area, starts and ends at the charging station.
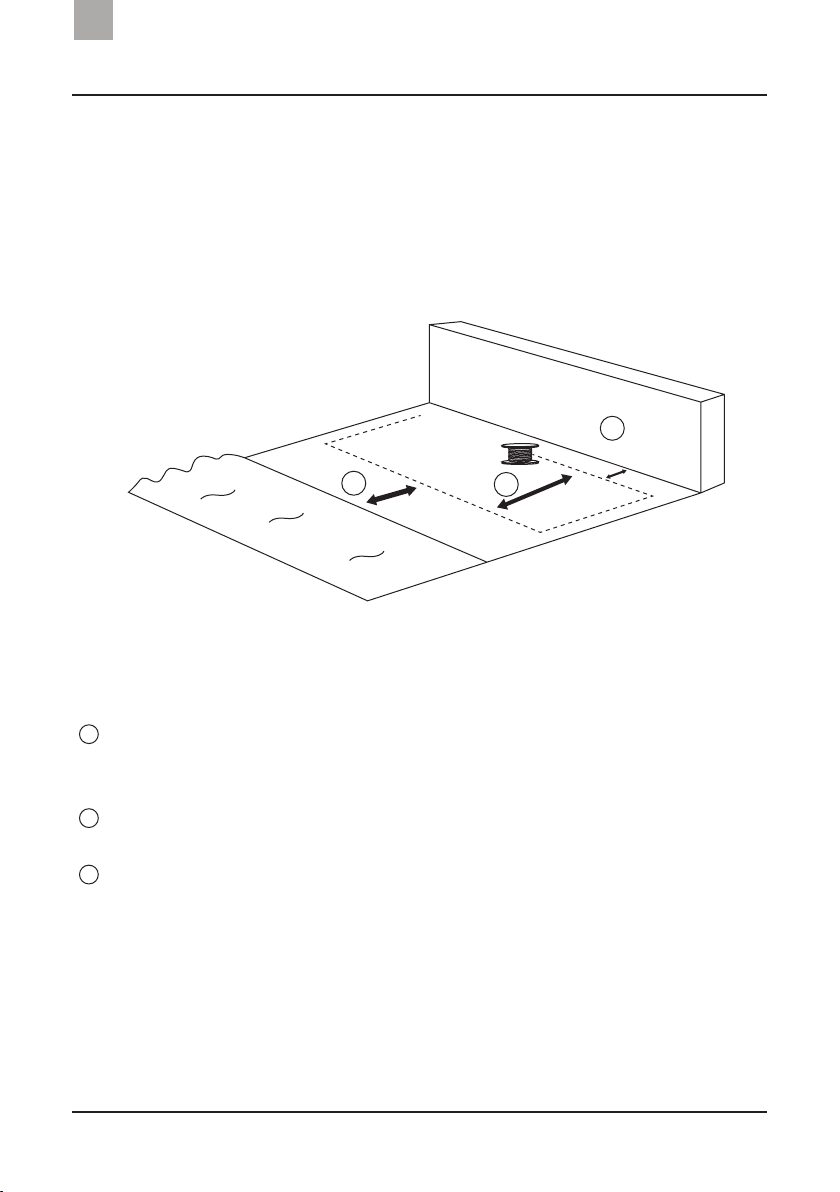
Recommendations
NOVARDEN recommends installing the charging station in a corner
so that the robot mower is able to detect it more easily.
• Charging station installation in a corner (Figure 1).
• Charging station installation along a wall (Figure 2).
• Flat ground (+/- 5% slope).
• Near an electricity supply.
• With 2m space in front of the charging station.
• With 1m space behind the charging station.
• 35cm away from the wall.
Figure 1 Figure 2

9
Installing the charging station
EN
NOTE:
• The charging station must be plugged into the mains supply after installing the
perimeter cable.
• Install the charging station away from any water points or sprinkler systems.
• The charging station must be at least 2m from any electrical equipment that
could cause possible interferences, such as routers.
• Do not place the charging station in a conned space. The robot mower may
encounter diculties nding it (Figure 1).
• An “IN” arrow is on the charging station (Figure 2). It indicates the direction the
base should be placed. The arrow must point towards the lawn.
Figure 1 Figure 2
10
Installing the perimeter cable
EN
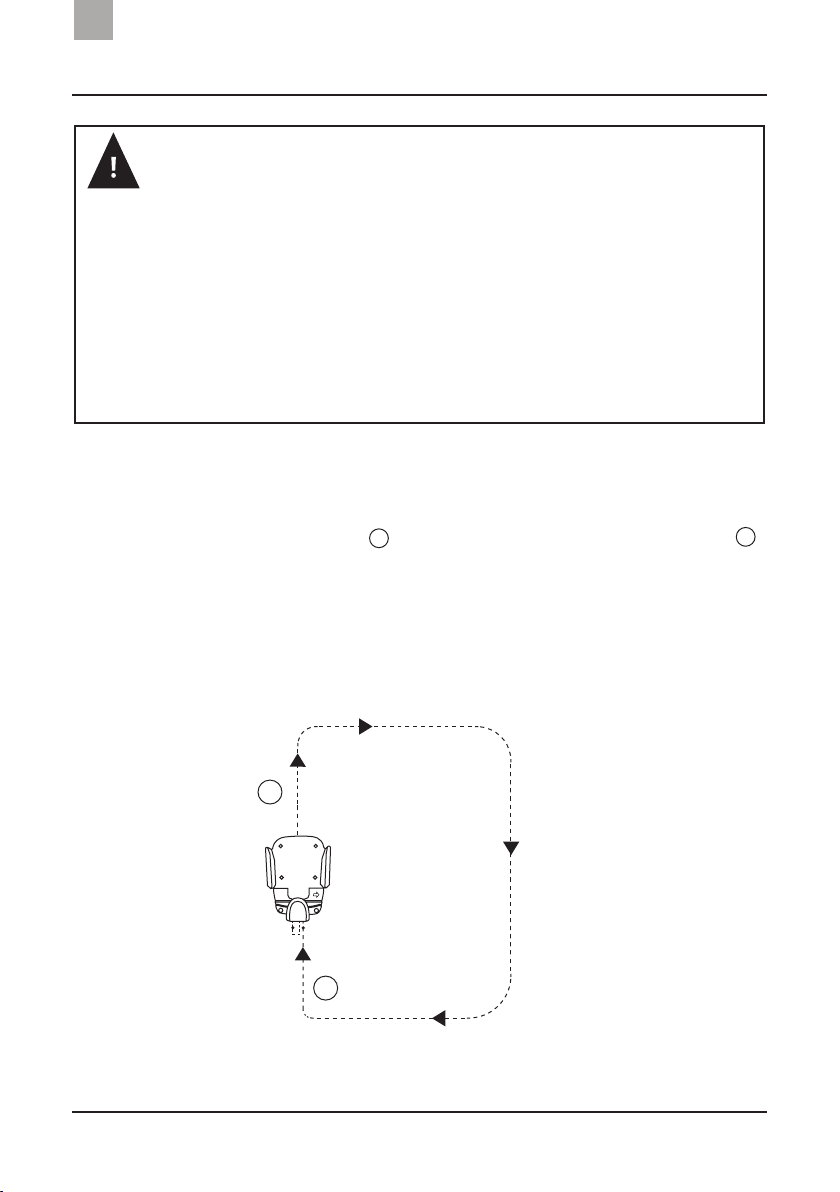
NOTE: Before connecting the perimeter cable to the right terminal, cut the end
closest to the charging station, taking care to leave a margin of 5-10cm.
Figure 1
A
B
Charging station direction
Install the perimeter cable in a clockwise direction:
connect one end of the cable to the charging station’s Left
terminal (G) and pass it underneath the charging station.
Pull the cable in a straight line at least 2m. Then mark
out the areas in your garden in a clockwise direction.
Close the loop by connecting the perimeter cable to the
Right terminal (D) maintaining a distance of at least 1m
minimum. Never cross the IN and OUT cables to avoid
cancelling out the signal.
The perimeter cable allows you to mark out on the ground the area
that must not be passed during the mowing cycle. The cable must
make a loop around the robot mower’s working area.
The loop starts with the “Out ” cable and is closed o by the “In ”
cable (Figure 1). Ensure the cable is securely underneath the charging
station and connected to the outlet so that it does not move. Only
use the perimeter cable provided.
AB
G D

11
Installing the perimeter cable
EN
When laying the cable, which marks out your lawn,
start from the place where you have chosen to
locate your charging station (Figures 1 and 2).
Figure 1 Figure 2
Figure 1 Figure 2 Figure 3
Figure 4
Connecting the “Out” cable to the charging station
Figure 5
35cm
35cm
Strip one end of the cable (Figure 1). Insert the stripped end into the
connector and clip it in (Figure 2). Attach it to the back of the charging
station left terminal (Figure 3). Pass the cable under the charging
station making sure that it is secured underneath using the notches
provided (Figure 4). You can start marking out your lawn (Figure 5).
12
Installing the perimeter cable
EN
Figure 1
1.20m
35cm
1m
C B
A
Leave a distance of at least 35cm between your lawn edge
and the perimeter cable if you go around an obstacle (house,
swimming pool, wall, edge, etc.).
Leave a distance of at least 1m between the Out cable and the
In cable.
Leave 1m 20cm distance if the lawn borders water.
A
B
C
Marking out the mowing area
You can now mark our your mowing area with the perimeter cable
(Figure 1). Bear in mind the following distances:

13
Installing the perimeter cable
EN
Securing the cable to the ground
Secure the perimeter cable around your lawn using the pegs and
your hammer (Figures 1 and 2). Use as many pegs as necessary to
ensure the cable stays in the ground. Leave a gap of at least 70cm
between the pegs.
Figure 1 Figure 2
Figure 3 Figure 4
Once you have tested your installation with your robot mower, you
can bury the perimeter cable, if you wish.
To do so, using a trowel, dig a trench at least 2cm deep in the place
where you plan to lay your cable. Place the cable in the trench and
cover back over with soil. It will not be visible to the eye but the robot
mower will be able to detect it.
NOTE: Corners must be rounded or smooth and over 90° (Figures 3 and 4). A
minimum length of 40cm is required between two pegs.
<90°
>90°
>40cm
<70cm

14
Installing the perimeter cable
EN
Protecting obstacles
To protect delicate obstacles, you must go around them using the perimeter cable.
A
C
BMax 0.5cm
Figure 1
Maintain a distance of 35cm between the perimeter cable and the
edge (Figure ) The space between the “Out” cable and the “In” cable
must be 0.5cm maximum (Figure ). Do not cross the “Out” cable
and the “In” cable. The perimeter cable’s signal will be cancelled out
and the robot mower will no longer be able to detect it (Figure ).
A
C
B
Min 35cm

15
Installing the perimeter cable
EN
If your lawn includes rigid or delicate
obstacles, take note of the following points:
Rigid obstacles: rigid obstacles, measuring over 15 cm tall, do not
need to be cordoned o by the perimeter cable. The robot mower
changes direction each time it makes contact with one of them.
You should lay the perimeter cable around rigid obstacles surrounded
by a ower bed or gravel to prevent the robot mower damaging the
ower beds or its blades on the gravel or other decorative elements.
Delicate obstacles: you must cordon o these obstacles (bushes, owers,
ponds, small decorative objects less than 15cm tall).
A
A
B
B
C
C
H>15cm

16
Installing the perimeter cable
EN
Figure 1
Figure 2
Securing the charging station
You can now secure the charging station to the ground using the 6
stakes provided (Figure 2).
Connecting the “In” cable to the charging station
After trimming the mowing area, lay down and connect the end of
the perimeter cable to the right terminal on the charging station
(Figure 1). To do so, strip the end of the cable, secure it in the
connector, then insert it in the right terminal on the base.
17
Installing the perimeter cable
EN
1 2 3
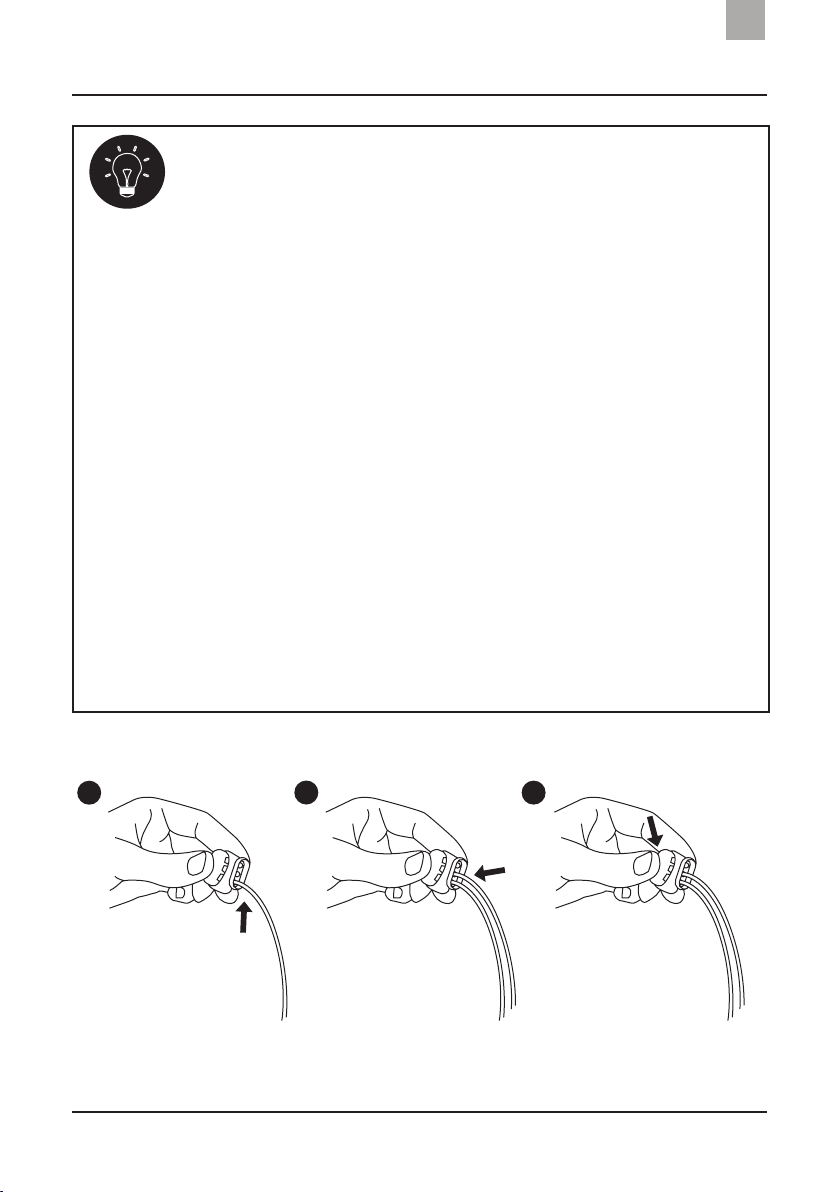
Repairing or extending the perimeter cable
The cable connectors are watertight accessories that can be
used to repair or extend the cable.
• To repair the cable: if the perimeter cable is cut, for example.
• To extend the cable: if the perimeter cable is not long enough
to mark out all of your lawn.
1. Insert the cable into one of the connector’s terminal.
2. Insert the other cable into the other connector’s terminal.
3. Press the blue button.
NOTE: gel comes out of the connector when you press the blue part. It protects
the cables and prevents rusting. The connector must only be used once.
Clip!

18
Switching on the robot mower
EN
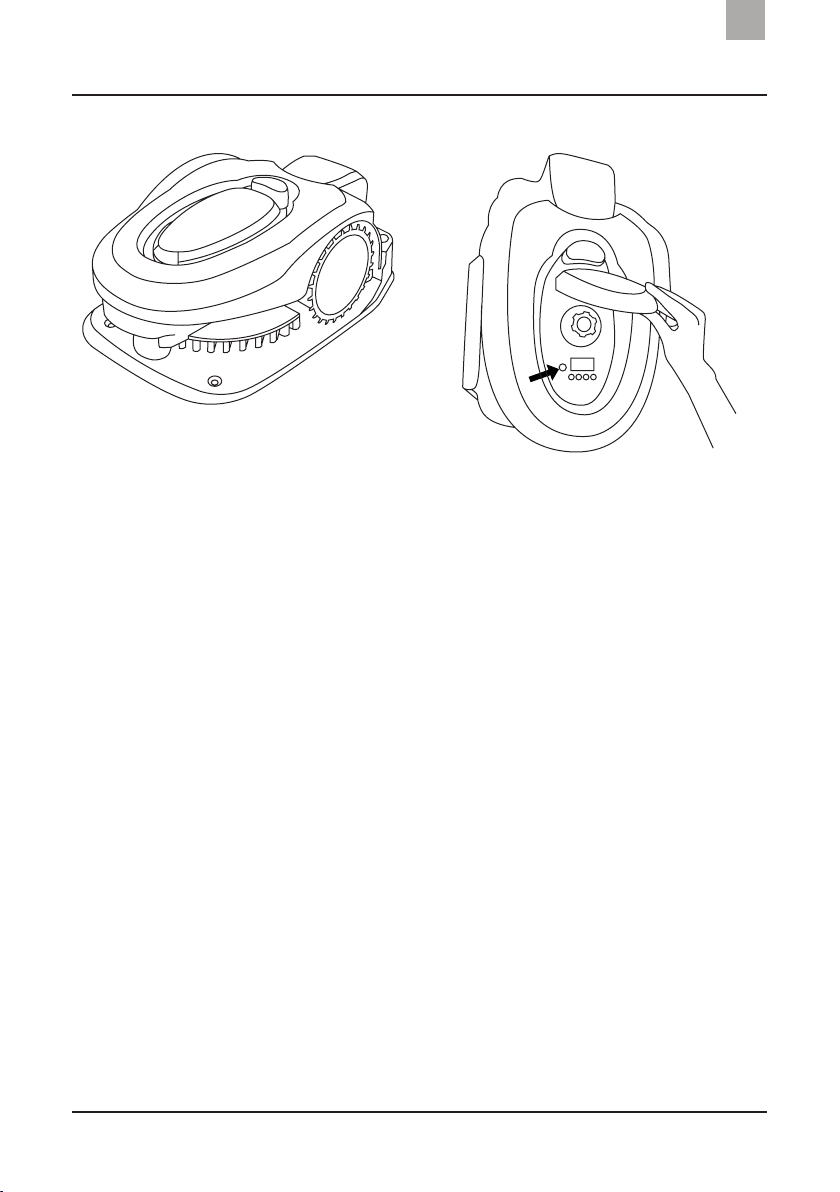
Plug the power cable into the charging station (Figures 1 and 2).
Plugging the appliance into the mains
Figure 1 Figure 2
Figure 3
Plugging in the power cable
The mains supply must be:
• Near the charging station.
• Sheltered from rain.
• Sheltered from the sun.
• If the power supply is plugged into an external outlet it must be
certied for external use.
NOTE: You can extend the power cable using the extension cable.
Plug the power cable into an
electrical outlet (Figure 3). If
it is plugged in correctly, the
indicator light is green.
NOTE: If the indicator light alternates
between red and green, please consult
the Troubleshooting table in the user
manual.
19
Charging the robot mower
EN
• Place the robot on its base (Figure 1).
• Press the On/O button on the top of the robot mower to
switch on the appliance (Figure 2).
Figure 1 Figure 2
20
Installing the perimeter cable
EN
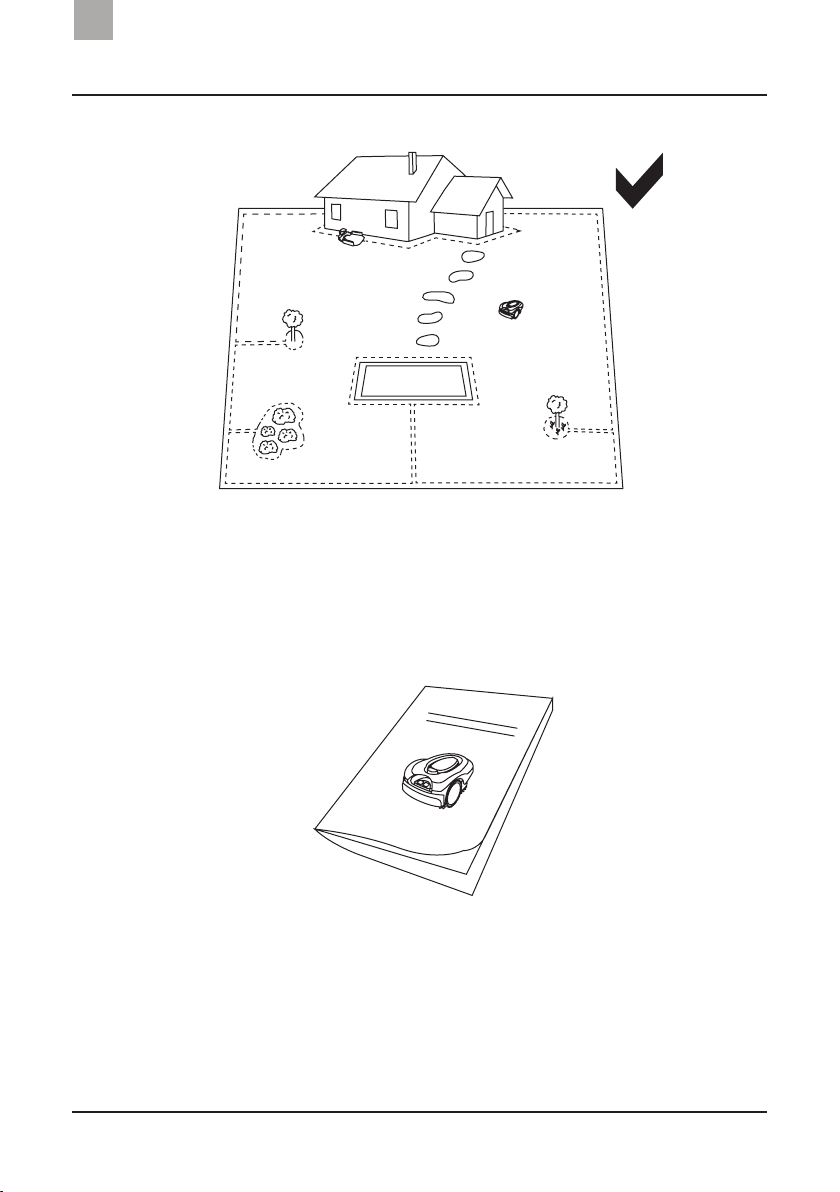
Installation is now complete. Once fully charged, your robot mower
will be ready to perform its rst mowing cycle. You can now take
a look at the user manual provided with your NOVARDEN robot
mower.
Other manuals for NRL630
1
Table of contents
Languages:
Other NOVARDEN Lawn Mower manuals

Popular Lawn Mower manuals by other brands


Husqvarna
Husqvarna P 520DX Operator's manual

Murray
Murray G4618000 Operator's manual

Gude
Gude Big Wheeler TRIKE 565M Translation of the original instructions

Gardener's Choice
Gardener's Choice GSC400 manual

Toro
Toro 04060 Greensmaster 1600 Operator's manual

Yard-Man
Yard-Man Model Series 420 Operator's manual