NOVARDEN NRL630 User manual

EN
User manual
Robot lawnmower
NRL630

EN
User Manual
Thank you for choosing NOVARDEN! We hope you are fully satised
using your appliance as part of your everyday routine.
If you should encounter situations that have not been properly
addressed in this User Manual or were to have any queries, do not
hesitate to contact us and a member of our technical customer service
department will be more than happy to answer your questions.
For more information, you can visit the ocial NOVARDEN website:
www.novarden.com
We reserve the right to make technical alterations to our products
without prior notice with the objective of continually improving our
products and customer satisfaction.
Please carefully read all instructions in this manual before using this
appliance. NOVARDEN will not be liable for damage due to incorrect
use.

1
Contents
EN
Safety instructions and precautions ................................... 2
Product diagrams................................................................... 3
Robot mower top view ........................................................................... 3
Robot mower bottom view .................................................................... 3
Charging station ...................................................................................... 4
Control panel ........................................................................................... 5
Settings ................................................................................... 7
PIN code ................................................................................................... 7
Time .......................................................................................................... 7
Area .......................................................................................................... 8
Scheduling the robot mower ................................................................. 8
Cutting height .......................................................................................... 9
Switching on the robot mower........................................... 10
Starting the robot mower .................................................................... 10
Back to charging station ....................................................................... 11
Stopping the robot mower .................................................................. 11
Technical data ...................................................................... 12
Maintenance......................................................................... 15
Troubleshooting................................................................... 16
Table: Malfunctions and possible causes .......................................... 16
Table: Error codes ................................................................................. 20
Security labels...............................................................25
Warranty and after-sales service....................................... 27
Recycling instructions ......................................................... 28

2
Safety instructions and precautions
EN
• The robot mower is designed for outdoor use only.
• The robot mower can mow passages at least 1m wide.
• The robot mower must only be used on at surfaces or slopes no
greater than 20°.
• The robot mower can work on damp ground, however, mowing
dry ground is more eective.
• Do not leave the robot mower to operate unattended if there are
pets or children in the mowing area.
• The robot mower must only be used in daylight.
• Do not operate the robot mower barefoot or wearing open
footwear.
• Switch o the robot mower before handling it (manually moving
it, maintenance, storing it away).
• This robot mower is not intended to be used by children or any
person with reduced physical, sensory or mental capabilities,
unless they have been given supervision or instruction concerning
use of the device from a person responsible for their safety.
• You are responsible for accidents or hazards occurring to other
people or their property.
• It is your responsibility to inform neighbours of the risks and
inform them that the lawn is out of bounds while the robot
mower is operating.
• If your lawn is open to the road and/or your neighbours’ property,
you must be present while the robot mower is operating to avoid
risk of theft. If not, it is your responsibility to protect/close o your
lawn to prevent others from gaining access to your robot mower.
*This data may be subject to change without notice.
3
Product diagrams
ENEN
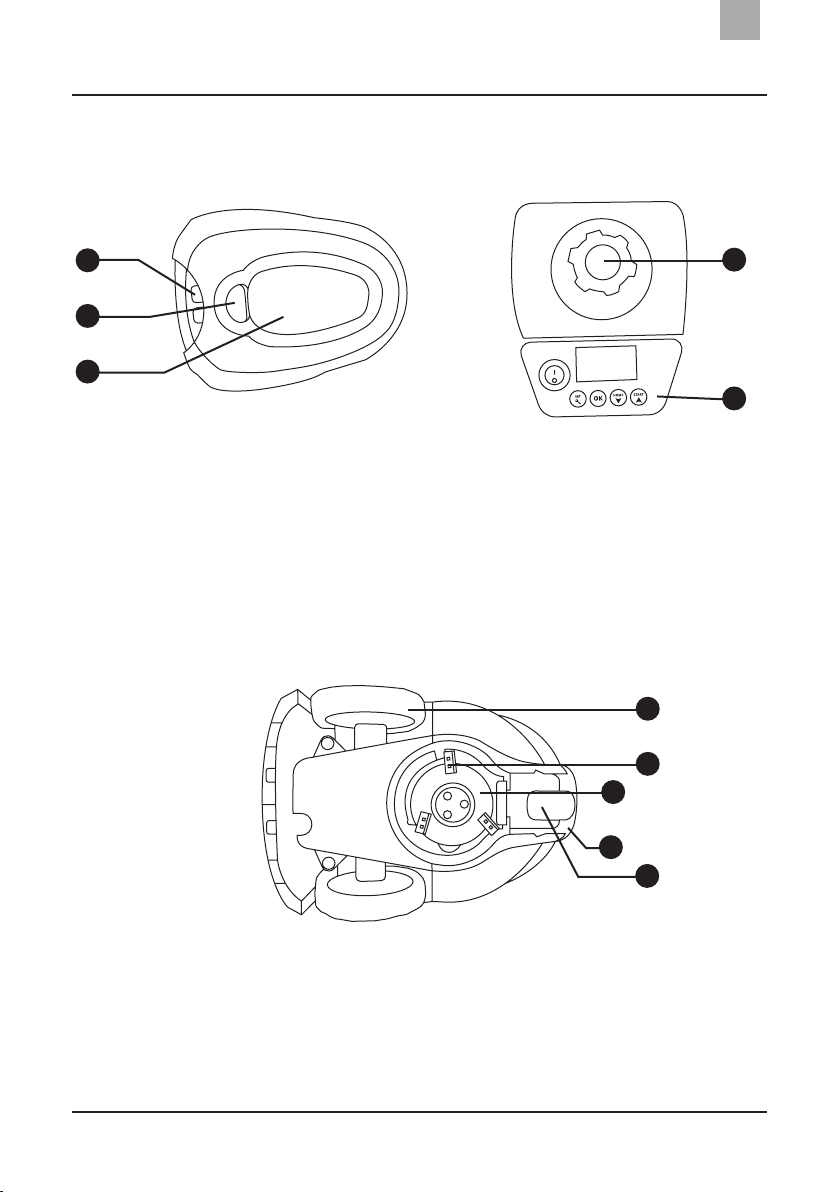
Robot mower top view
1. Charging station contacts
2. Emergency stop button
3. Hood
4. Cutting height dial
5. LCD screen (see page 5 for details)
Robot mower bottom view
1. Front wheels
2. Blades
3. Blade disc
4. Carry handle
5. Back wheel
1
2
3
4
5
4
5
1
2
3

4
Product diagrams
EN
Charging station
1. Charging pins
2. Power cable
3. Holes for fastening stakes
4. Perimeter cable indicator light
• Steady green: robot mower charged and station correctly
plugged into mains
• Flashing green: charging
• Red: perimeter cable not connected correctly or cut
• No light: charging station not plugged into mains
5. Power terminal
6. Perimeter cable terminals
• Left terminal: Cable outlet
• Right terminal: Cable inlet
1
2
3 4
5
6

5
Product diagrams
EN
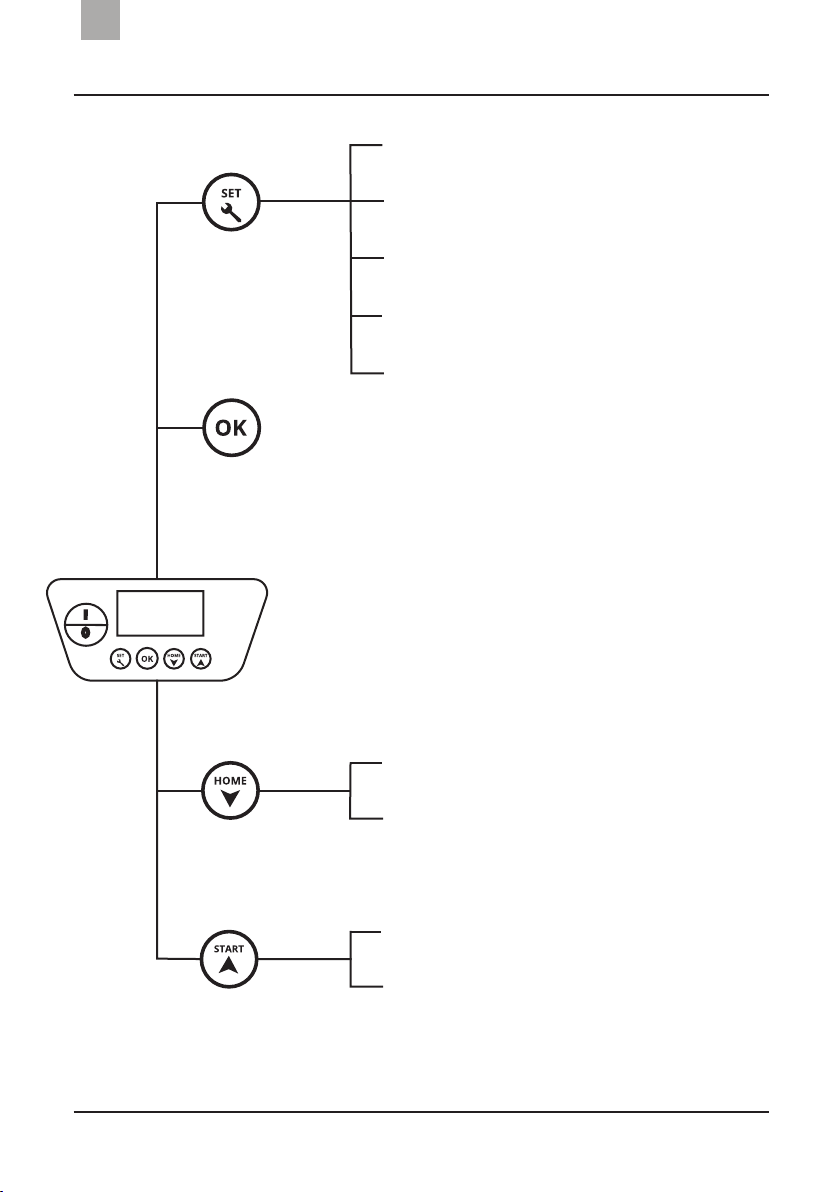
Control panel
Buttons:
1. On/O
2. Settings
3. OK
4. HOME/Down arrow
5. Start/Up arrow
Display screen / Symbols:
1. PIN code
2. Time
3. Area
4. Scheduling
5. Pairing (not available for this
model)
6. Battery level
1
3 4
1 2 3 4 5
6
52
6
Product diagrams
EN
Control panel
PIN code
Time
Area
Scheduling
Pairing (option not available for
this model)
Home
Down in settings
Start
Up in settings
Settings
OK
Areas
Report
7
Settings
EN
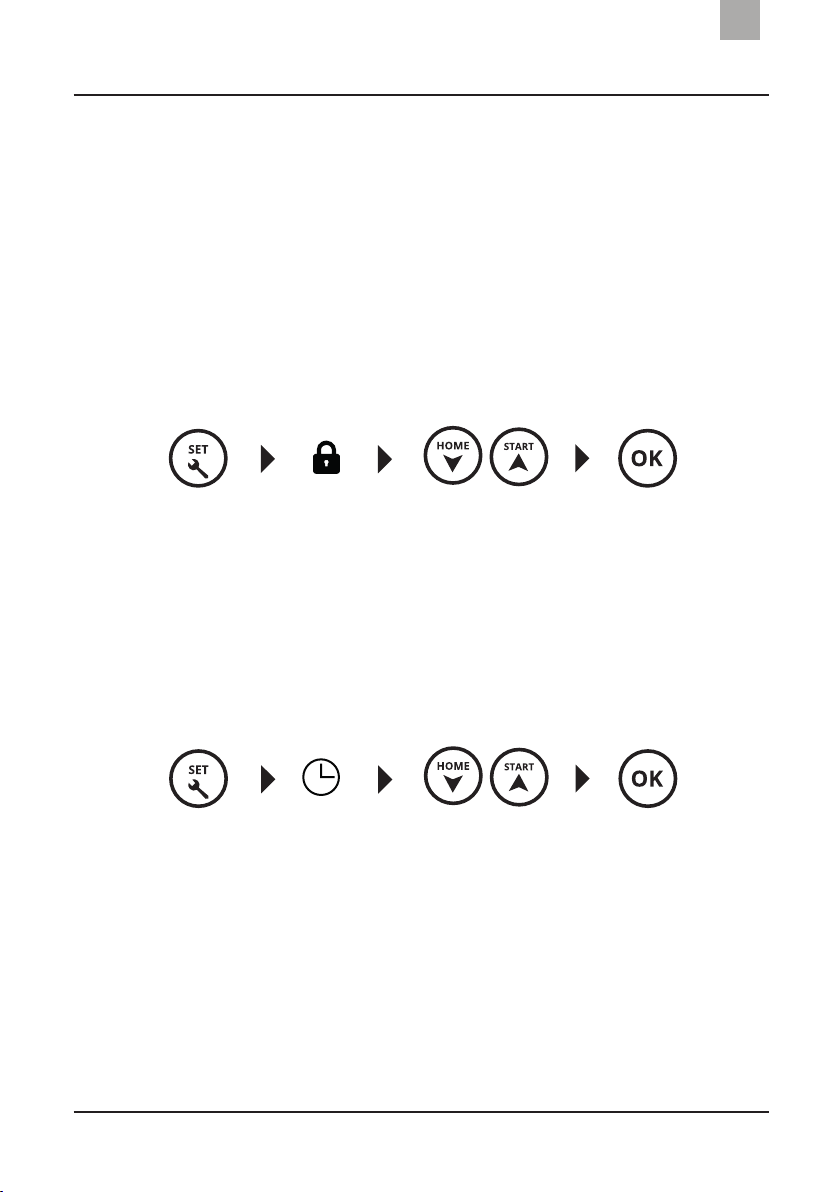
PIN code
The default PIN code is 0000.
Follow the following instructions to change it:
1. Press the SET button until the lock icon ashes.
2. Using the Up/Down buttons, you can set the PIN code.
3. To conrm each number, press the OK button. The PIN code is
saved on conrming the last digit.
Time
1. Press the SET button until the clock icon ashes.
2. Using the Up/Down buttons, you can set the time.
3. To conrm each number, press the OK button. The time is saved
on conrming the last digit.
NOTE: the time is based on the 24-hour clock.
8
Settings
EN
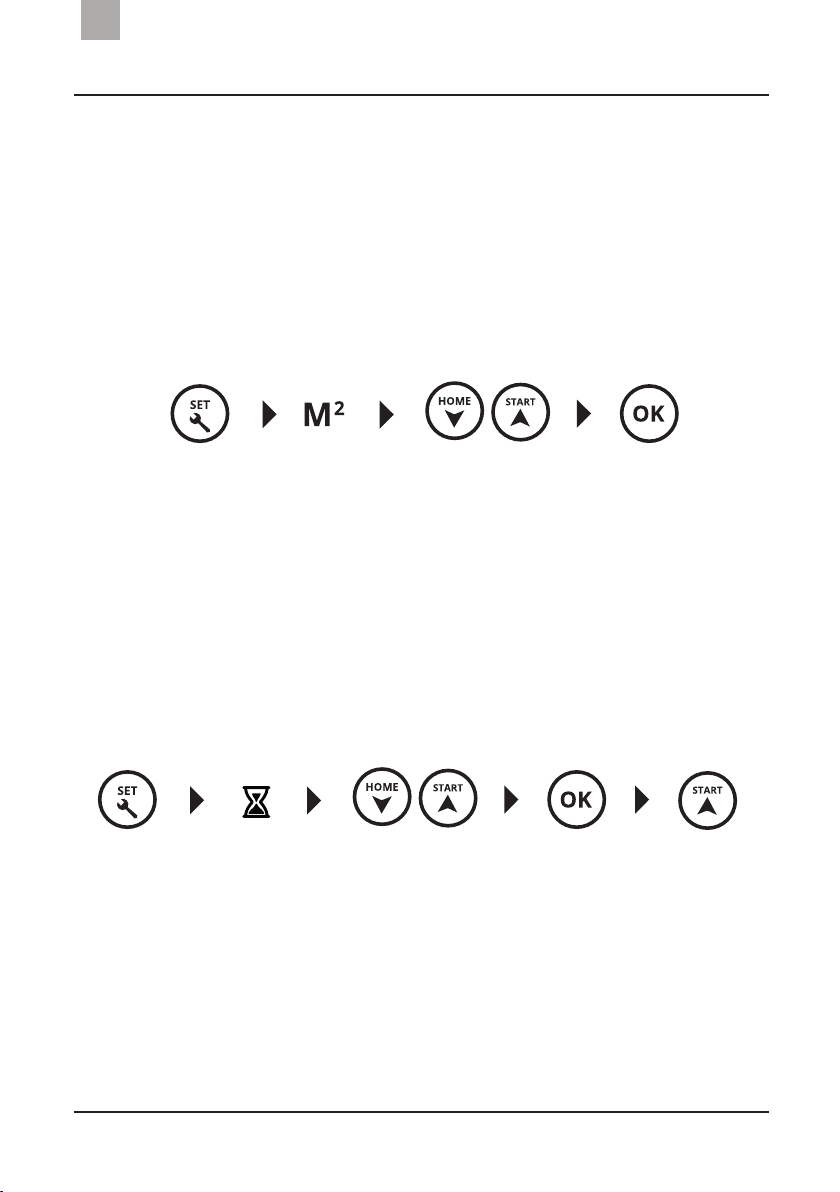
Area
1. Press the SET button until the M2 icon ashes.
2. Using the Up/Down buttons, you can set the mowing area.
3. To conrm each number, press the OK button. The mowing area
is saved on conrming the last digit.
NOTE: “A” refers to AREA. The mowing area can be set between 50m2 and 600m2.
Scheduling the robot mower
1. Press the SET until the hourglass icon ashes.
2. Using the Up/Down buttons, you can set the start time.
3. To conrm each number, press the OK button. The start time is
saved on conrming the last digit.
NOTE: the time is based on the 24-hour clock.
• After conrming the scheduled time, the robot mower starts its mowing cycle
to scan the lawn and a second cycle at the scheduled time.
• The minimum waiting time between scheduling and the robot start time is
24hours. For example, it is 08:00, you schedule your robot mower for 09:00.
The robot mower will not set o until the next day at 09:00.

9
Settings
ENEN
Cutting height
To set the cutting height, lift the robot mower’s hood and use the dial
(Figure 1). The cutting height can be from 2cm to 6cm.
Note: to prevent your lawn from drying out, do not set the cutting height too low
during very dry weather.
Figure 1

10
Switching on the appliance
EN
Starting the robot mower
Once the robot mower is fully charged, you can start its mowing
cycle from:
• Its charging station.
• The start point selected in the mowing area within the perimeter
cable. This option is only valid if the robot mower remains on
since the last use.
NOTE: If the robot mower has been switched o between uses, it must be
placed on its charging station before restarting it.
To manually start a mowing cycle:
• Switch on the robot mower. To do so, set the On/O button to “I”.
• Enter and conrm your PIN code. As a reminder, the default PIN
code is “0000”. You can change it at any time via the control panel
(see page 6).
• Press the START button. The robot will then start its mowing
cycle.
To start an automatic mowing cycle (scheduling):
• Switch on the robot mower. To do so, set the On/O button to “I”.
• Enter your PIN code. As a reminder, the default PIN code is “0000”.
You can change it at any time via the control panel (see page 7).
• Set the time (see page 7).
• Set the mowing area (see page 8).
• Set the robot mower’s start time (see page 8).
• Press the START button. The robot mower will start its mowing
cycle at the scheduled time.

11
Switching on the appliance
EN
NOTE: When the robot mower is not on its charging station, it will only restart if it
remains switched on.
Back to charging station
You can interrupt the robot mower’s mowing cycle and send it back
to its charging station automatically. To do so, press the emergency
stop button on the top of the robot. Then enter your PIN code and
press the HOME button.
Stopping the robot mower
You can stop the robot mower at any time by:
• Pressing the emergency stop button on the top of the robot.
• Setting the On/o button to “O” to switch o the robot mower.

12
Appliance characteristics
EN
Model NRL630
Surface covered with full charge 600m²
Charge time 45min
Average work time 45min
Gross weight 15.5kg
Net weight 13.4kg
Robot mower dimensions 58*39.5*21cm (LWH)
Rated power 56Wh
Noise level 60db
Number of blades 3pcs
Cutting height 20-60mm
Cutting width 18cm
Cutting speed 20m/min
Blade rotation speed 2900rpm
Slope 20° maximum
Maximum operating temperature 45°C
Charging station dimensions 62*46.8*20cm (LWH)
Maximum perimeter cable dimensions 300m
Standard perimeter cable dimensions 100m
Battery type Lithium-ion
Battery capacity 2Ah
13
Appliance characteristics
EN
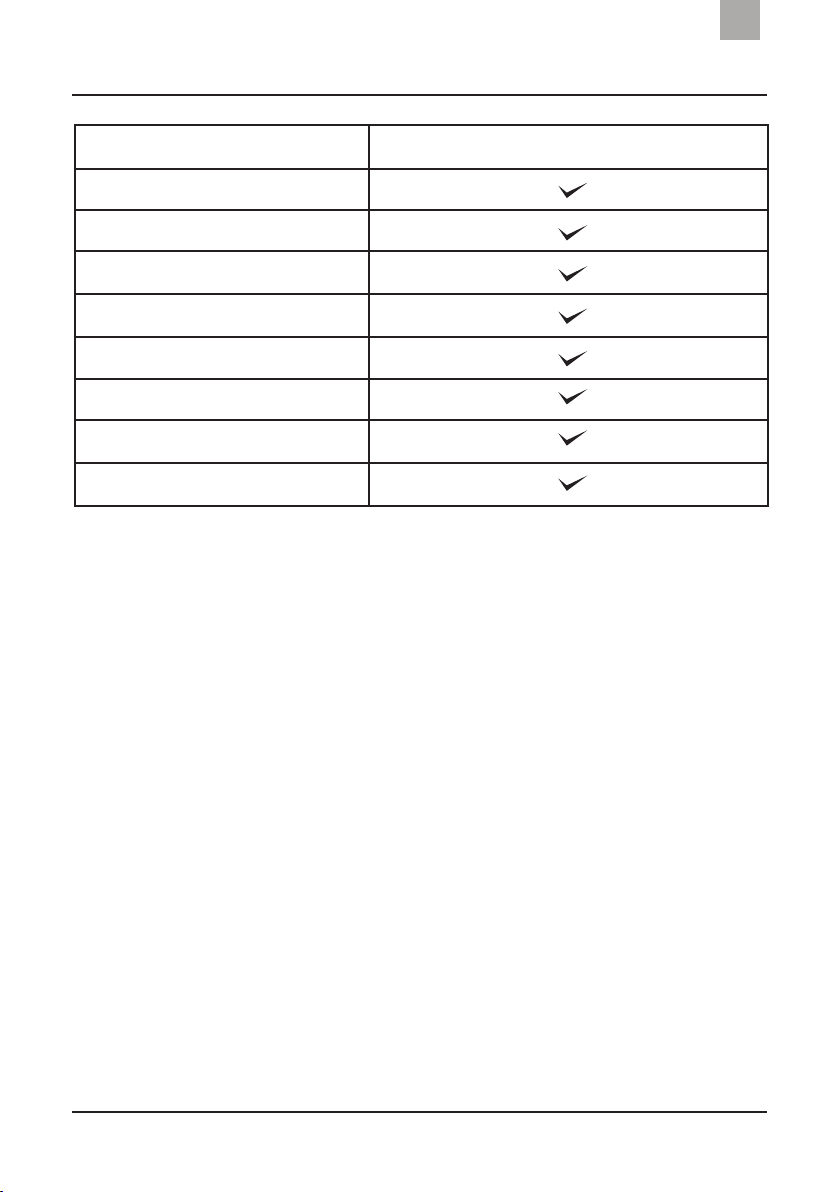
Functions
Lift sensor
Tilt sensor
Bump sensor
LCD screen
Waterproof hood
Scheduling
Emergency stop button
PIN code
14
Appliance characteristics
EN
Warning: Always ensure the power is OFF before handling the
robot mower. Always wear protective gloves while handling
the robot mower and its blades, as they are very sharp.
Daily maintenance
• Check the 3 blades and clean them with a metal bristled brush,
when necessary. Replace them if they are damaged (see the
“Replacing blades” section on page 15).
Monthly maintenance
• Inspect the underside of the robot mower. Carefully remove any
built-up grass from under the mowing deck.
• Inspect the charging station, clean the charging pins if you notice
built-up debris.
Warning: Never wash the robot mower with a pressure
washer or water jet. Any type of liquid could damage its
components. Only use a damp cloth to clean the robot
mower.
Winter storage
• Fully charge the robot mower.
• Switch o the robot mower.
• Cover the robot mower and store it in a dry place at a temperature
above -5°C and below 50°C.
• During winter, the charging station must remain where it is
installed. However, it must be unplugged from the mains.
• The power cable must be stored away in the same conditions as
the robot mower.

15
Maintenance
EN
Before storing the robot mower away for winter, you must clean its
accessories and hood. Check parts for wear, such as the blades and
wheels, and replace them if necessary.
Replacing the blades
Wearing protective gloves:
• Switch o the robot mower.
• Turn over the robot mower to access the blades.
• Using a cross-head screwdriver, unscrew the blades that need
replacing.
• Replace the worn blades with new ones.
Lithium battery
The robot mower’s usable life depends on how often it is used and
the usage conditions (lawn condition, weather conditions,etc.).
• Fully charge the robot mower’s battery if you need to store it for
a prolonged period of time.
• To ensure that the battery operates correctly, it should be charged
once every three (3) months.
16
Troubleshooting
EN
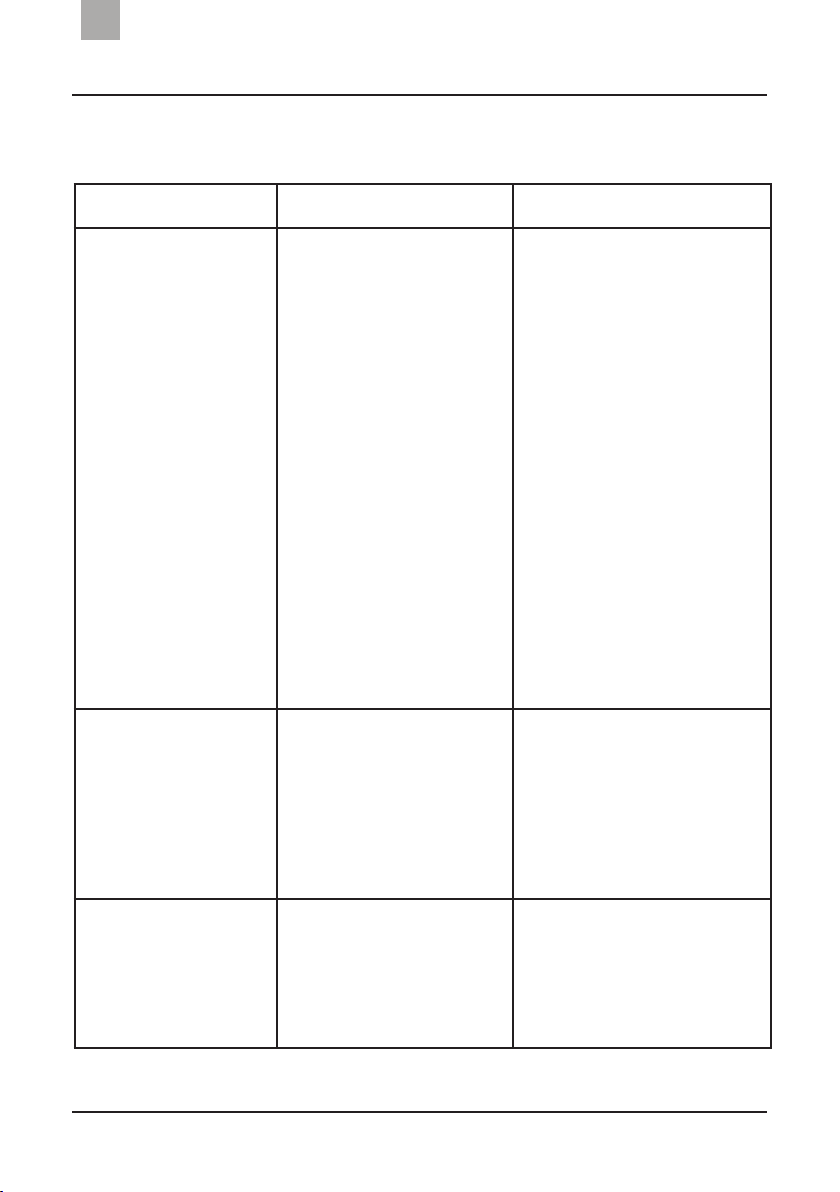
Table: Malfunctions and possible causes
Problems Possible causes Solutions
You have entered the
correct PIN code but
the robot mower will
not start.
1. The perimeter cable
is not correctly
connected to the
charging station
2. The perimeter cable
has been cut.
3. There is no power.
Poor communication
between the charging
station and the robot
mower.
4. The robot mower
is away from its
charging station and
is o.
1. Check that the indicator
light is green and that
the perimeter cable is
connected.
2. Connect the perimeter
cable to the charging
station’s left and right
terminals.
3. Check the mains supply
and make sure the
cable is connected to
the charging station
correctly.
4. Put the robot back on its
charging station and try
again.
The battery does not
charge
1. The charging station
is not switched on.
2. The battery life is
reduced.
1. Check that the power
cable is plugged in
correctly.
2. If the problem persists,
contact the NOVARDEN
after-sales service.
The robot mower
does not reach the
edge
There is an obstacle along
the edge.
Check the perimeter cable’s
positioning and make sure
there are no obstacles.

17
Troubleshooting
EN
The robot mower
cannot detect its
charging station.
1. The charging station
is not on a at
surface.
2. The charging station
is not powered
correctly.
1. Reboot the charging
station on a at surface.
2. Check the charging
station is plugged in.
The robot mower
does not reach the
charging pins
1. There is a dierence
in level between the
entrance and back of
the charging station.
2. The perimeter cable
is not correctly
installed under the
charging station.
1. Make sure the charging
station is not too
high o the ground.
If necessary, level the
ground with soil.
2. Check and readjust
the perimeter cable
installation under the
charging station.
The robot mower
behaves abnormally
around ower beds
The perimeter cable is not
installed correctly
Check the perimeter cable
is installed correctly and the
“Out” wire does not cross
the “In” wire.
The robot mower
goes outside the
perimeter cable.
The wire is not connected
correctly or has been cut.
Check the perimeter cable’s
condition and that it is
connected correctly.

18
Troubleshooting
EN
The robot mower is
very noisy
1. The blade disc is
damaged.
2. The disc and its blade
are full of debris
(pieces of plastic,
clumps of dry grass,
etc.).
3. The robot mower
start point is
obstructed by
obstacles that are
too close (less than a
metre) or there are
obstacles present
(fallen branches, etc.).
4. Damage to the
running motor or
cutting motor.
5. The grass is too long.
1. Replace the blades.
2. Stop the robot mower
in a safe place, use
protective gloves and
remove any debris.
3. Restart the robot
mower somewhere else.
4. Contact the NOVARDEN
customer services
department.
5. Increase the cutting
height or rst use a
regular lawnmower to
cut the lawn.
Other manuals for NRL630
1
Table of contents
Languages:
Other NOVARDEN Lawn Mower manuals

Popular Lawn Mower manuals by other brands


Husqvarna
Husqvarna LTH145 owner's manual

Stiga PARK
Stiga PARK PRO Svan Instructions for use

Stihl
Stihl MH 600 instruction manual

Craftsman
Craftsman 917.273644 owner's manual

Elem Garden Technic
Elem Garden Technic LTDE1332-20 Original instructions

Great Dane
Great Dane Chariot Brutus GBKH2752S Operator's manual