NVX B.O.O.S.T. BE-KIAOPTG3 Series User manual

PMS Version
Blue: PMS 300
Black: PMS Black
Gray: PMS Black 50%
INSTALLATION GUIDE
BE-KIAOPTG3-VSW104 B.O.O.S.T.
Series Bass Enclosure for the
2011-2015 Kia Optima
We recommend the installation of
the NVX BE-KIAOPTG3-VSW104 to
be performed by a professional
that will have the skills and tools
to ensure the job is done correctly.
Please follow the steps above to
get the best performance out of
the BE-KIAOPTG3-VSW104.
Installing and mounting NVX BE-
KIAOPTG3-VSW104 improperly
can present a serious safety
hazard in the event of a collision. If
you have any questions regarding
installation of this product or an
amplifier in this vehicle please feel
free to contact NVX directly for
further guidance and installation
techniques.
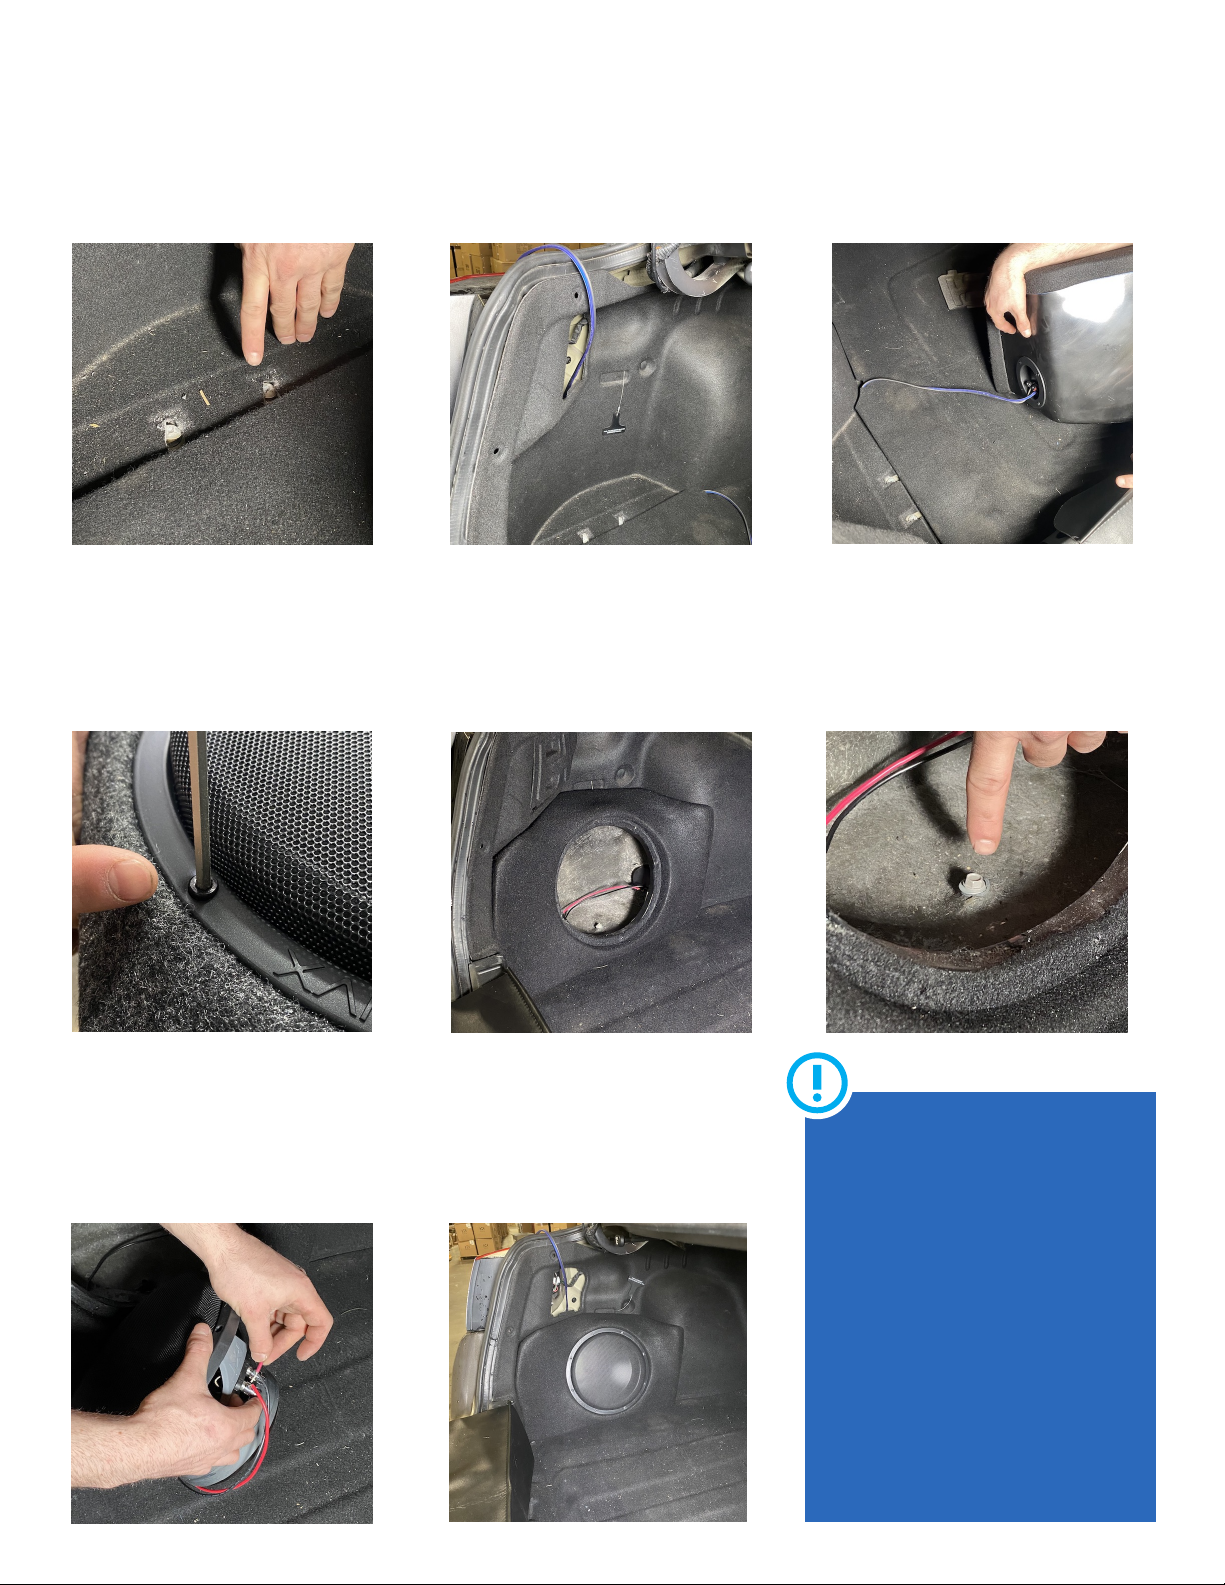
Step 1
Lift, then fold carpet to expose (2)
phillips screws on drivers side, then
remove.
Step 2
Run speaker wire to desired location. This
will connect your subwoofer to the amp.
We chose to run it behind the carpet.
Step 3
Connect subwoofer wires to the
connection terminal on your BOOST box.
We generally use blue for positive (red)
grey for negative (black).
Step 4
Remove the 8 4mm allen key screws
from the subwoofer enclosure, then
remove the subwoofer from the
enclosure.
Step 5
Place BOOST enclosure into position on
the drivers side. Make sure the bottom
holes line up with the holes in the trunk
floor.
Step 6
Take included hardware and secure the
BOOST box into the trunk using the
factory screw location as seen in step 1.
Step 7
Wire the subwoofer in parallel for a final
impedance of 2-Ohms. Red wire goes to
the red terminal and the black wire goes
to the black terminal.
Step 8
Load the subwoofer back into the
enclosure. Fasten the 8 allen bolts. Now
it’s time to enjoy you’re new BE-
KIAOPTG3-VSW104!

PMS Version
Blue: PMS 300
Black: PMS Black
Gray: PMS Black 50%
Included Hardware
(2) Teks- Self Drilling Roofing Screws, #12 2"
This manual suits for next models
1
Other NVX Enclosure manuals


 user manual")


