- 4 -
GB
TABLE OF CONTENTS
0800_GB-Inhalt_384
Recommendations
for work safety
All points refering
to safety in this
manual are
indicated by this
sign.
Table of contents
WARNING SIGNS
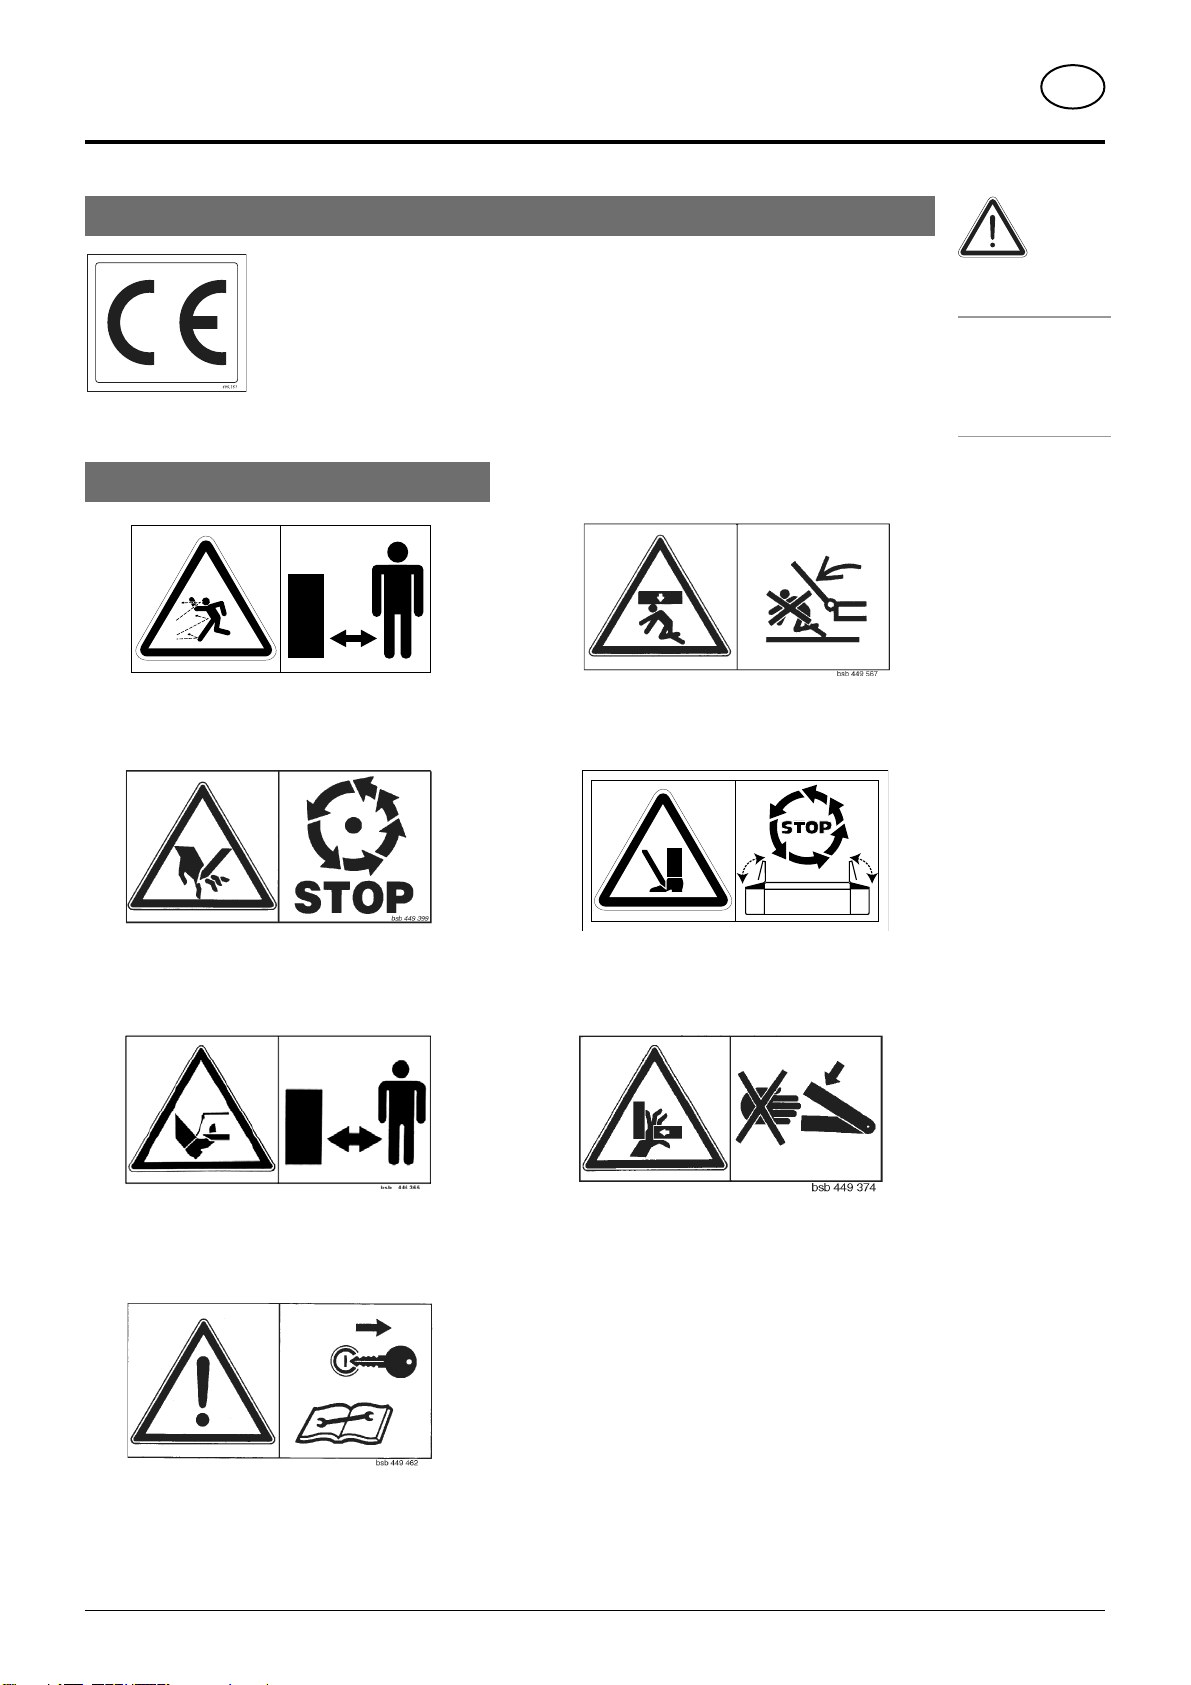
CE sign ............................................................................5
Meaning of warning signs ...............................................5
ATTACHING TO TRACTOR
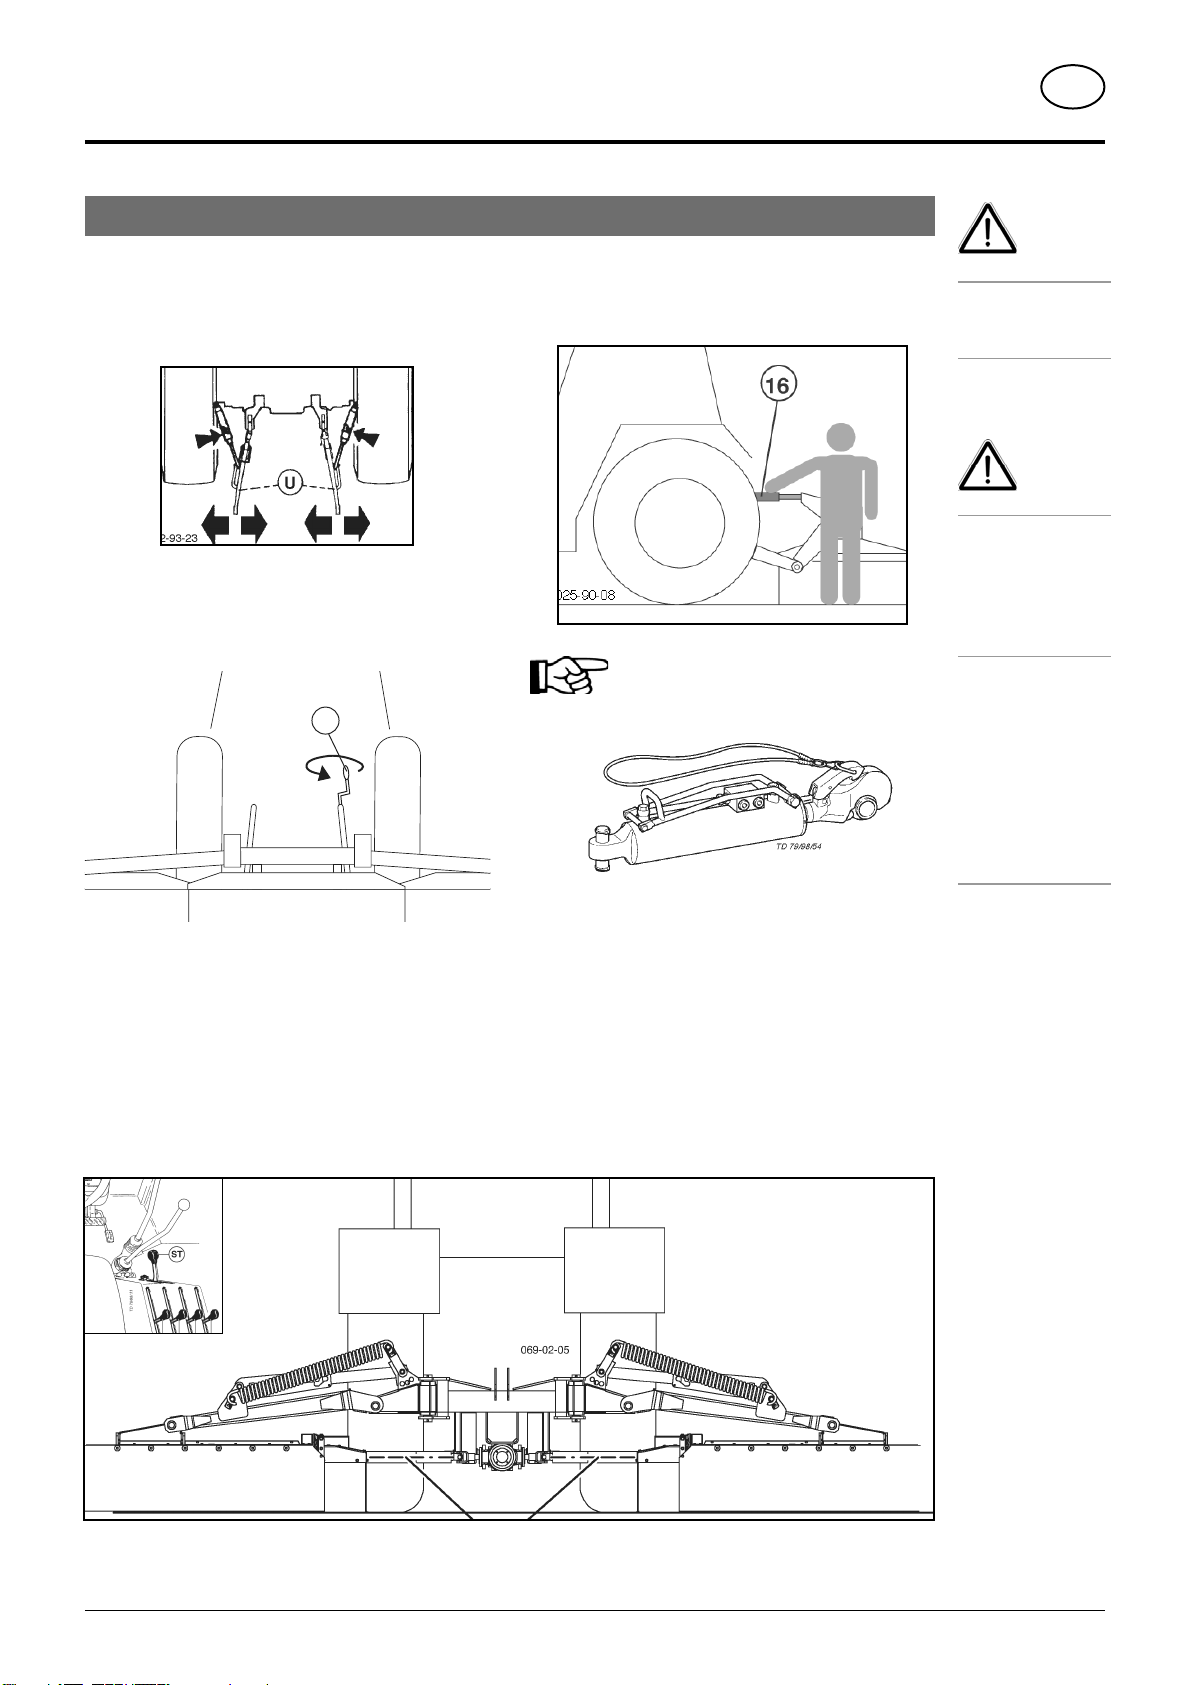
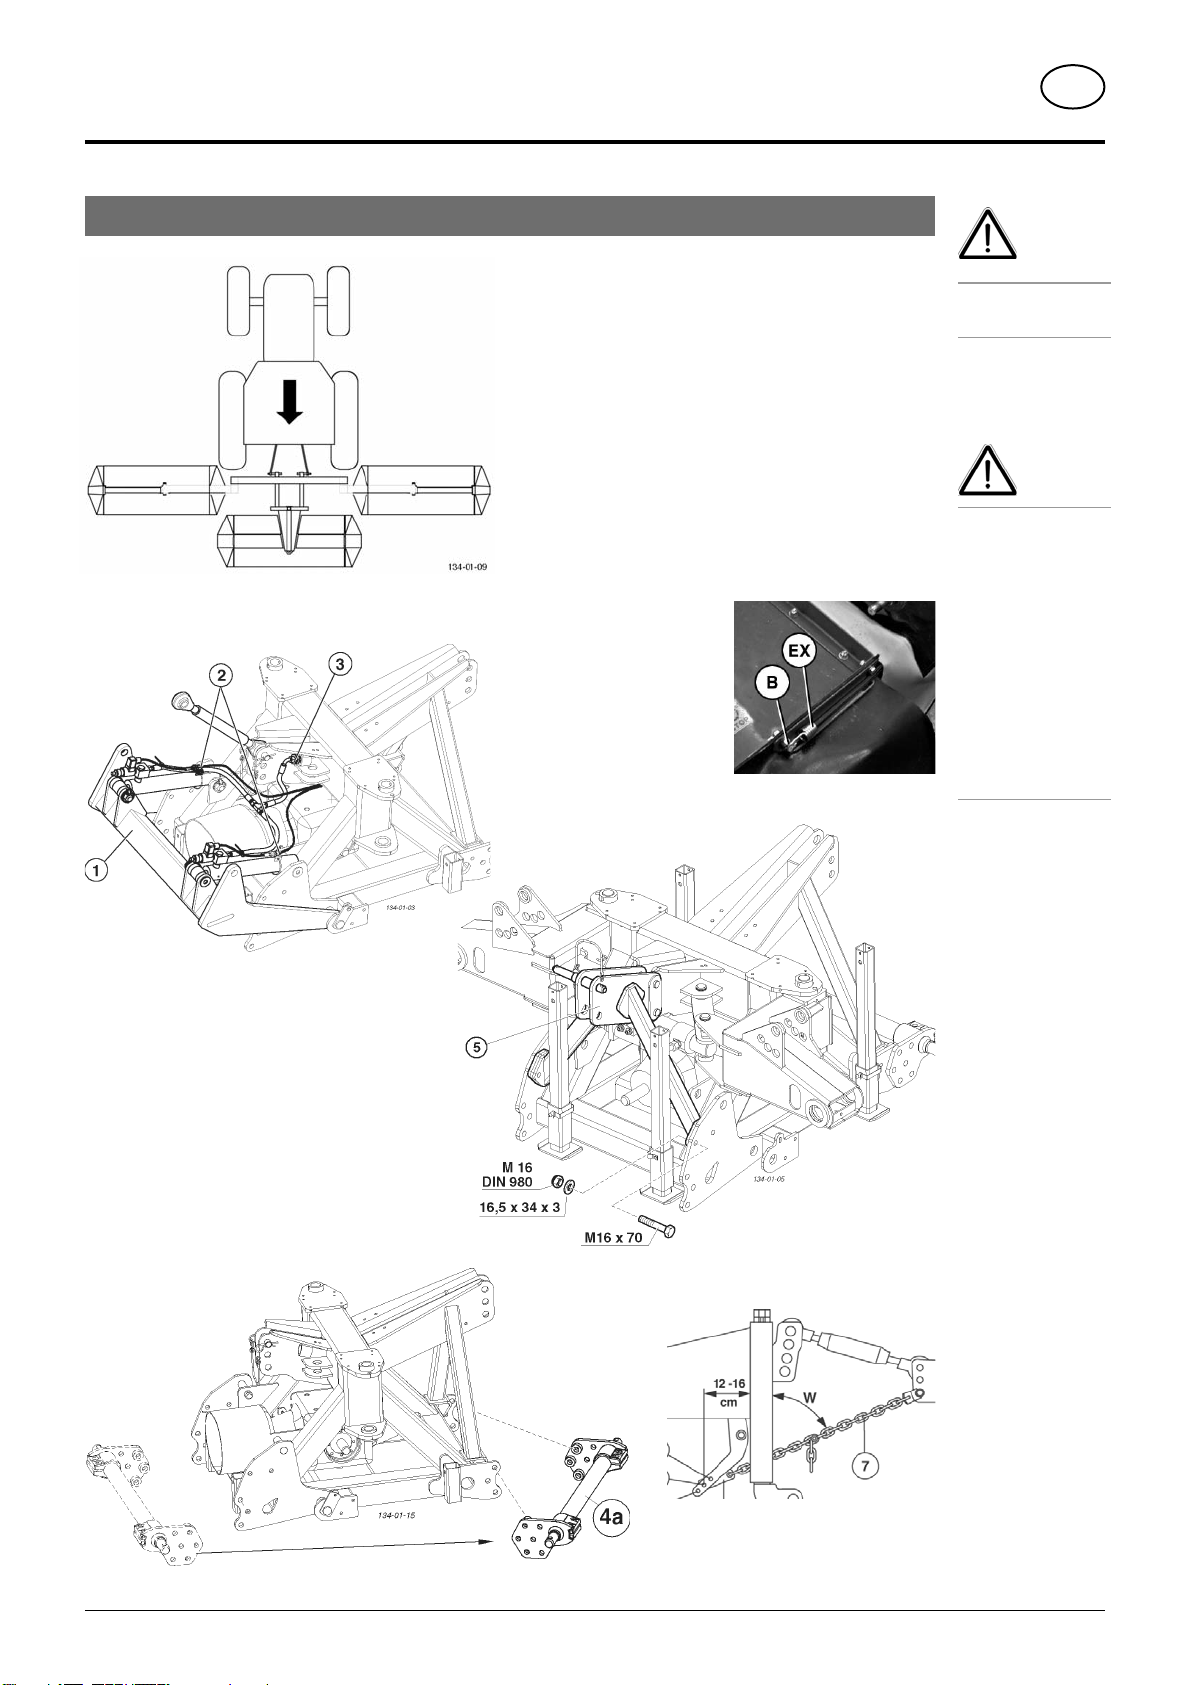
Attaching implement to tractor .......................................6
To make the connection to the tractor ............................7
Connecting the Sensor and valve cables from front
mower unit.......................................................................7
Fitting drive shaft ............................................................7
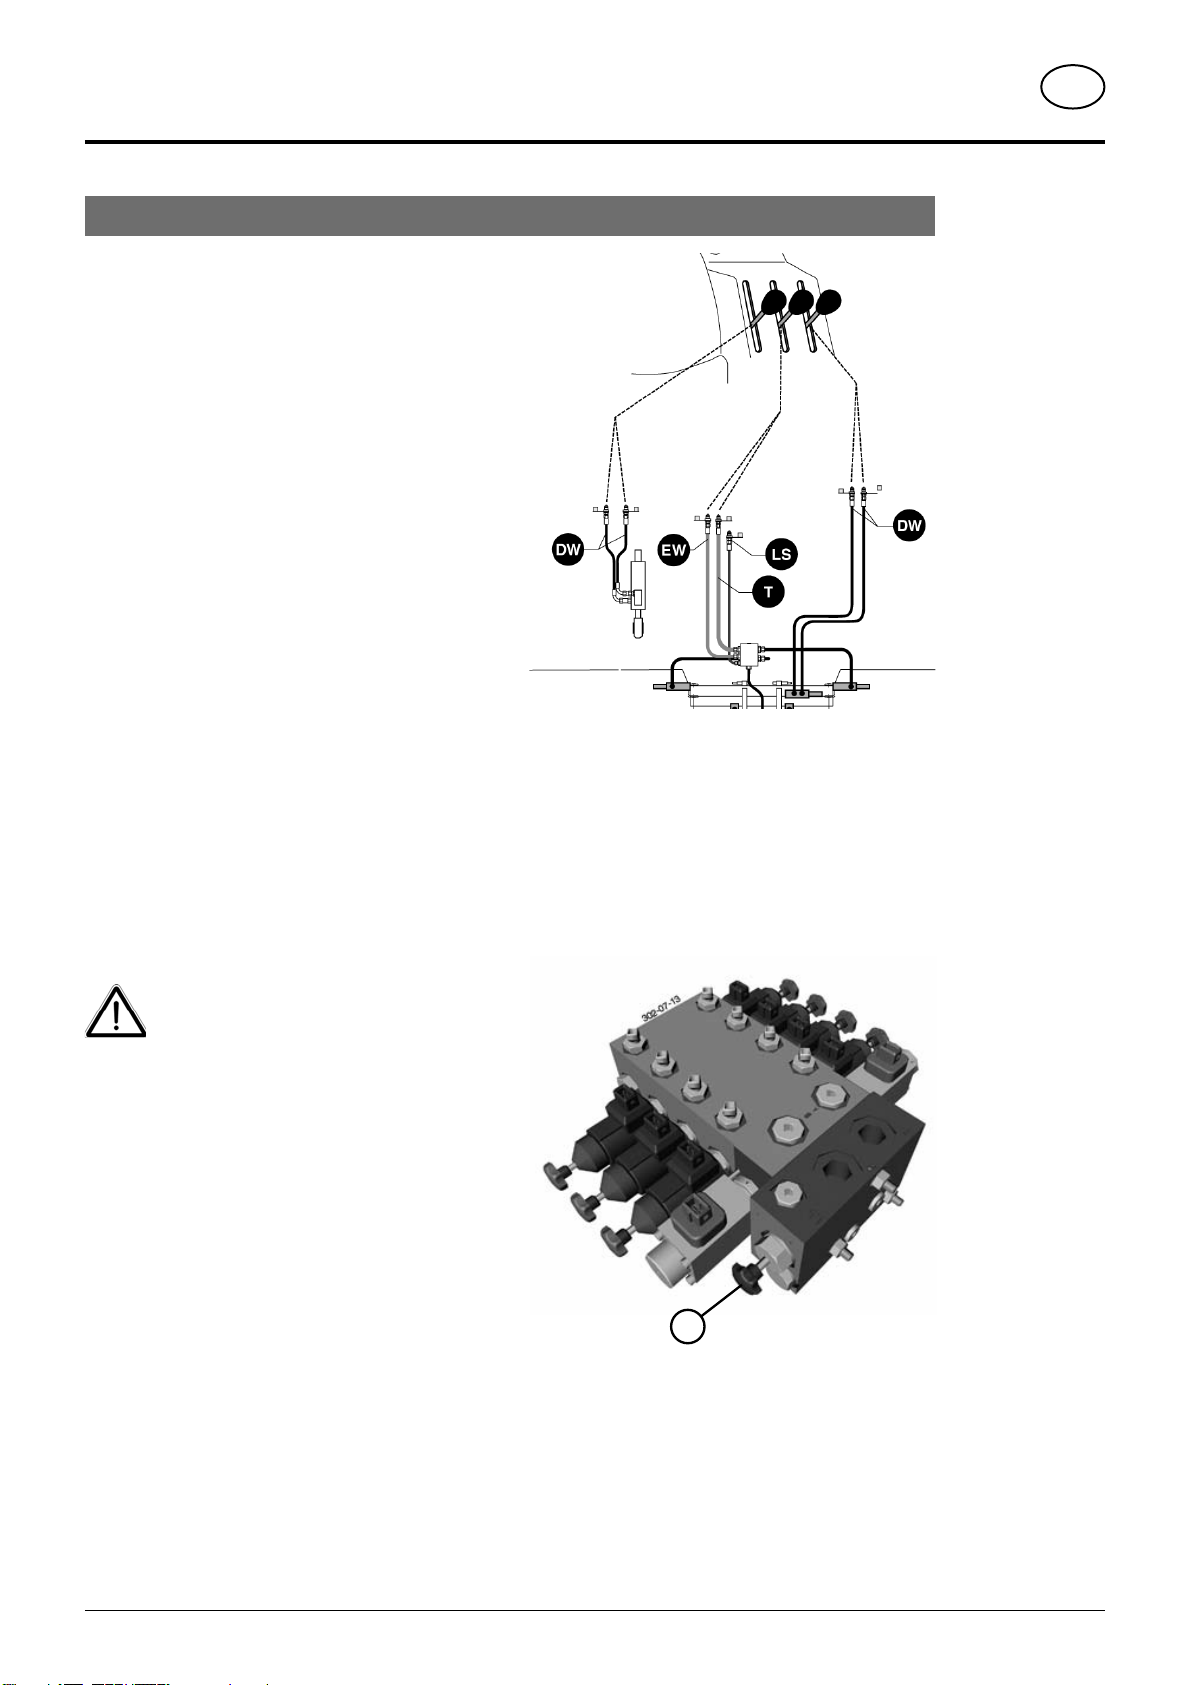
Hydraulic connection.......................................................8
Observe rotation direction of cutting discs .....................9
Combination 3...............................................................10
Combination 2...............................................................11
TRANSPORT
Conversion from working to transport position.............12
Raising for road transport..............................................12
Lowering into field transport position............................12
Driving on public roads .................................................13
Transport position..........................................................13
Unhitch device from tractor...........................................14
Working on slopes.........................................................15
”DIRECT CONTROL” DEVICE
Meaning of the buttons on the control device ..............16
How to carry out desired hydraulic function .................16
Settings before initial operation.....................................17
Other settings................................................................18
Setting time difference – Raising/lowering front mower
and side mower.............................................................19
Conversion from working to transport position.............20
ISOBUS - TERMINAL
Operation ISO-terminal .................................................22
Button indication ...........................................................23
Joystick - Mower Configuration ....................................25
Setting the Joystick.......................................................25
OPERATION
Important points before starting work...........................26
Mow...............................................................................27
Collision safety device...................................................27
CONDITIONER
Mowing with the conditioner.........................................28
Correct belt tension.......................................................28
700 r.p.m. for rotor.........................................................28
Position of the rotor prongs...........................................28
Dismounting and mounting the conditioner..................29
Mowing without Conditioner .........................................32
Optional extra................................................................32
ROLLER CONDITIONER (NOVACAT 266 F, 306
F)
Settings .........................................................................34
Cleaning and maintenance............................................34
SET THE POSITIONS OF THE GUIDING PLATES
"Extra dry" system.........................................................35
Swathes.........................................................................35
Spread width .................................................................35
Dismount guide plate ....................................................36
Mount guide plate .........................................................36
SWATH DISCS
Swath Discs...................................................................37
Flat cone conveyor (Optional extra) ..............................37
MAINTENANCE
Safety point ...................................................................38
General maintenance hints............................................38
Cleaning of machine parts ............................................38
Parking in the ope .........................................................38
Winter storage ...............................................................38
Drive shafts....................................................................38
Hydraulic unit ................................................................38
Oil change on cutter bar................................................39
Gearing maintenance ....................................................40
Installing cutter blades .................................................40
Setting the field transport position (end-of run turns) ...41
Disruptions and remedies to power failure ...................42
Checking wear on mowing blade holders.....................44
Holder for a quick change of cutter blades...................45
Checking the mowing blade suspension ......................45
Changing the Cutter Blades (up to 2003 model)...........45
Changing the Cutter Blades (from 2004 model)............46
Storing the lever ............................................................46
TECHNICAL DATA
Technical data ...............................................................47
Necessary connections.................................................47
The defined use of the mower unit................................48
Position of Vehicle Identification Plate ..........................48
SUPPLEMENT
Recommendations for work safety ..............................51
Driveshaft ......................................................................52
Lubrication chart ...........................................................54
Lubricants......................................................................57
Sensor diagnostic function............................................59
Display for Software version..........................................59
Function check for "Direct Control" operating unit and
job calculator.................................................................59
Repairs on the cutter bar...............................................63
TAPER BUSHES
Taper bushes installation instructions ...........................64
Combination of tractor and mounted implement..........65