PAMI Hemming Machine 99 Specification sheet

Instructions for use and maintenance
Produzione e Automazione di Macchine Industriali
HEMMING MACHINE 99
PAMI
INGLESE

1
Via Carlo Alberto Dalla Chiesa, 19
24020 Scanzorosciate (Bergamo) ITALY
Telefono (+39) 035 668255 - Telefax (+39) 035 669672
AUTHORIZED AREA DEALER FOR ASSISTANCE
Produzione e Automazione di Macchine Industriali
PAMI

2
EEC CONFORMITY DECLARATION
The Hemming Machine 99, as described in this manual, complies with the standards set down by
the following EEC Directives:
Manufacturer:
S.R.L.
PAMI
UNI EN 292-1 Machine safety. Essential principles
UNI EN 292-2 Machine safety. Essential principles
UNI EN 294 Machine safety.
Safety distances for arms
UNI EN 349 Machine safety.
Minimum crushing distances
UNI EN 418 Machine safety.
Emergency stop devices
pr EN 953 Machine safety.
Guard design and construction
pr EN 1088 Machine safety.
Interlocking devices with or without guard locking
EN 60204-1 Electrical devices on industrial machines.
Part 1: general standards

3
01 - GENERALITIES
CHARACTERISTICS AND APPLICATION
The Hemming Machine 99 can hem different types of fabric without having to alter the machine settings.
Hourly output is roughly 2100 items, which are them stacked tidily, ready for the next operation.
RECOMMENDATIONS FOR USE
The Hemming Machine 99 should be used for hemming fabrics only.
The manufacturer declines all liability for damage arising from incorrect use or any use differing from the
instructions in this manual.
The symbol appears when there is a risk or danger to the health of the operator; the maximum care
must be taken.
The machine has a sewing group with moving needles. We recommend extreme care when approaching
these parts.
Disconnect the power and the compressed air supplies before carrying out any adjustment, replacement or
maintenance work.
This machine must not be exposed to the weather (rain, direct sunlight, etc.).
WARNING !!!
The machine works with 220V single-phase!
Always press the emergency button if the thread breaks or the machine jams.

4
G
1650
1400
850
Leq = 79,5 db(A)
02 - HEMMING MACHINE 99 TECHNICAL DATA
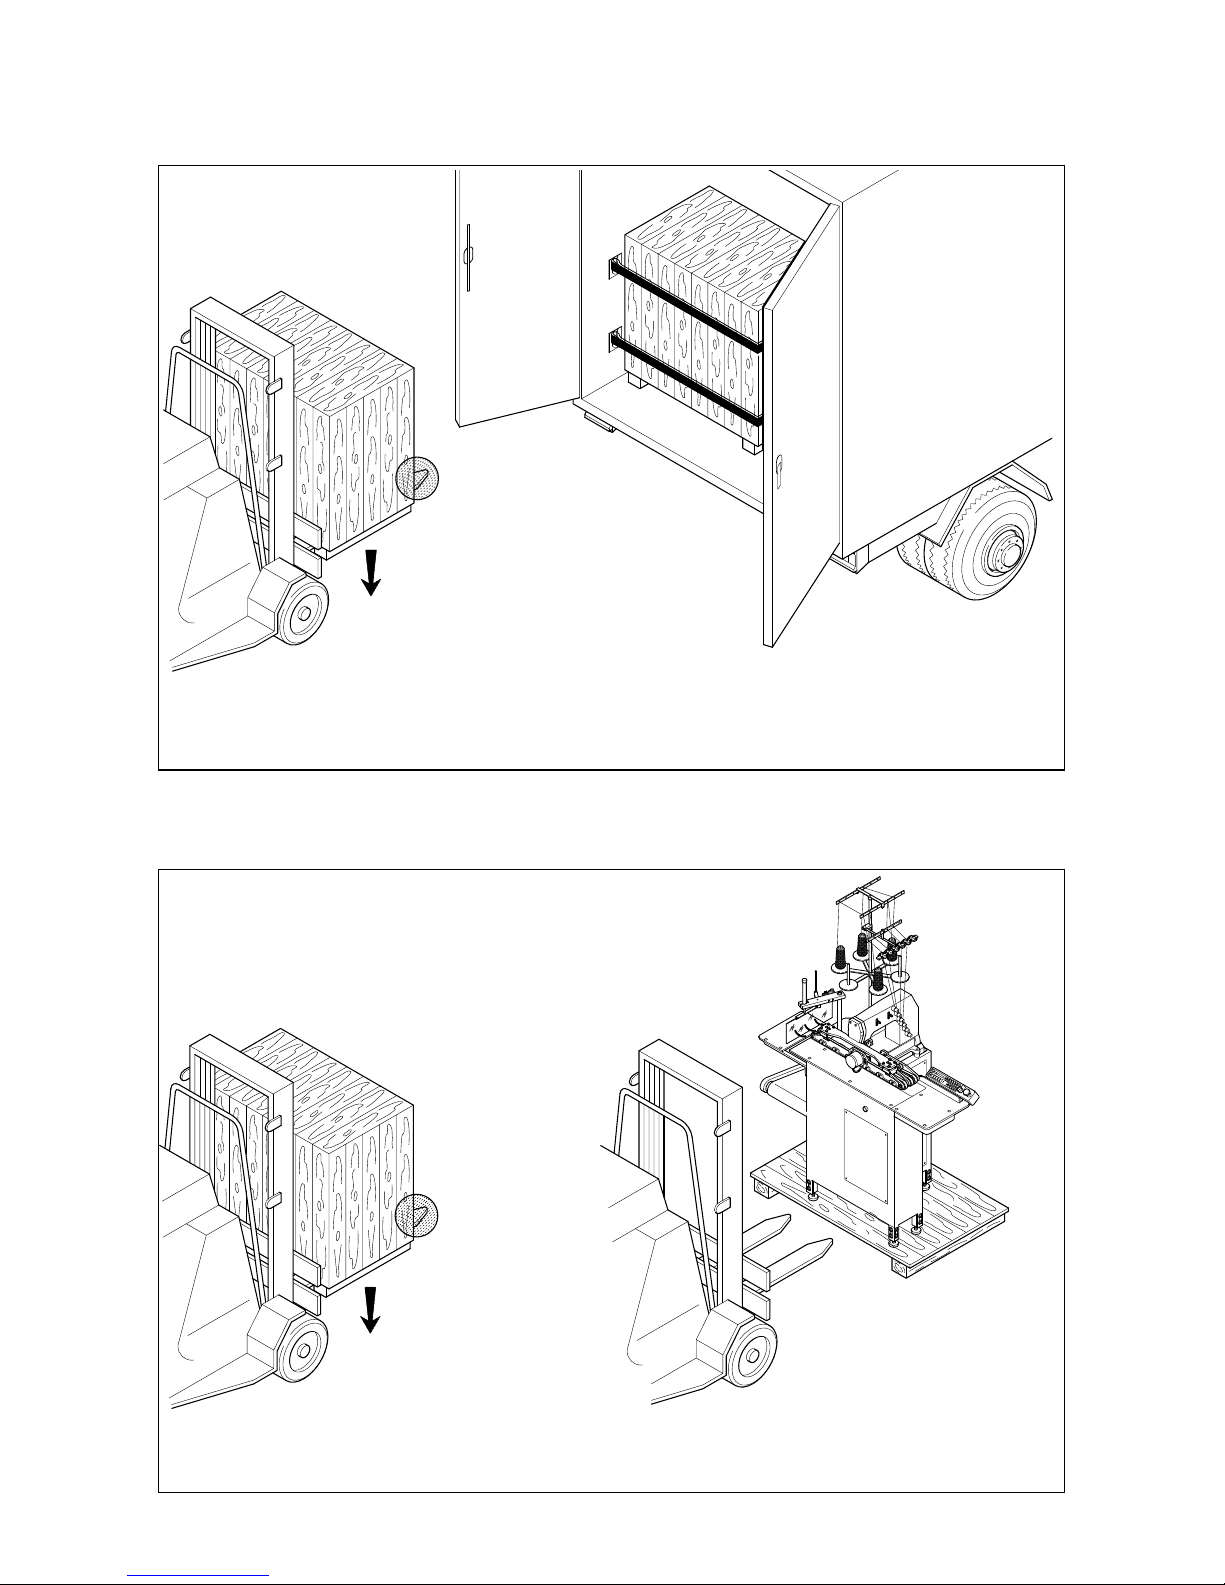
03 - LIFTING AND TRANSPORTATION
04 - LOADING AND UNLOADING
5
The machine can be transported with or without a packing case.
In both cases, check that the forks of the fork-lift truck bear the full weight of the machine. To move using
a fork-lift truck, place the forks under the machine with the front of the machine facing the fork-lift truck.
Place in the lorry or van and secure with ropes or belts.
Make sure that the forks of the fork-lift truck bear the full weight of the machine during movement.
Remove the packing case and lift the machine with the front facing the fork-lift truck, as in the figure above.
Place on a solid and even surface, not exposed to the weather.
kg …
kg …
ATTENTION: This machine must only be installed by specialized personnel.
The manufacturer cannot be held liable for any damage to persons or to property arising from incorrect
installation not in accordance with these instructions and connection to a mains supply that does not meet
the necessary requirements.
If the machine is installed on a suspended surface, check that the surface can withstand the weight of
the machine. This machine must not be installed in areas where there are explosive or inflammable
materials and substances.
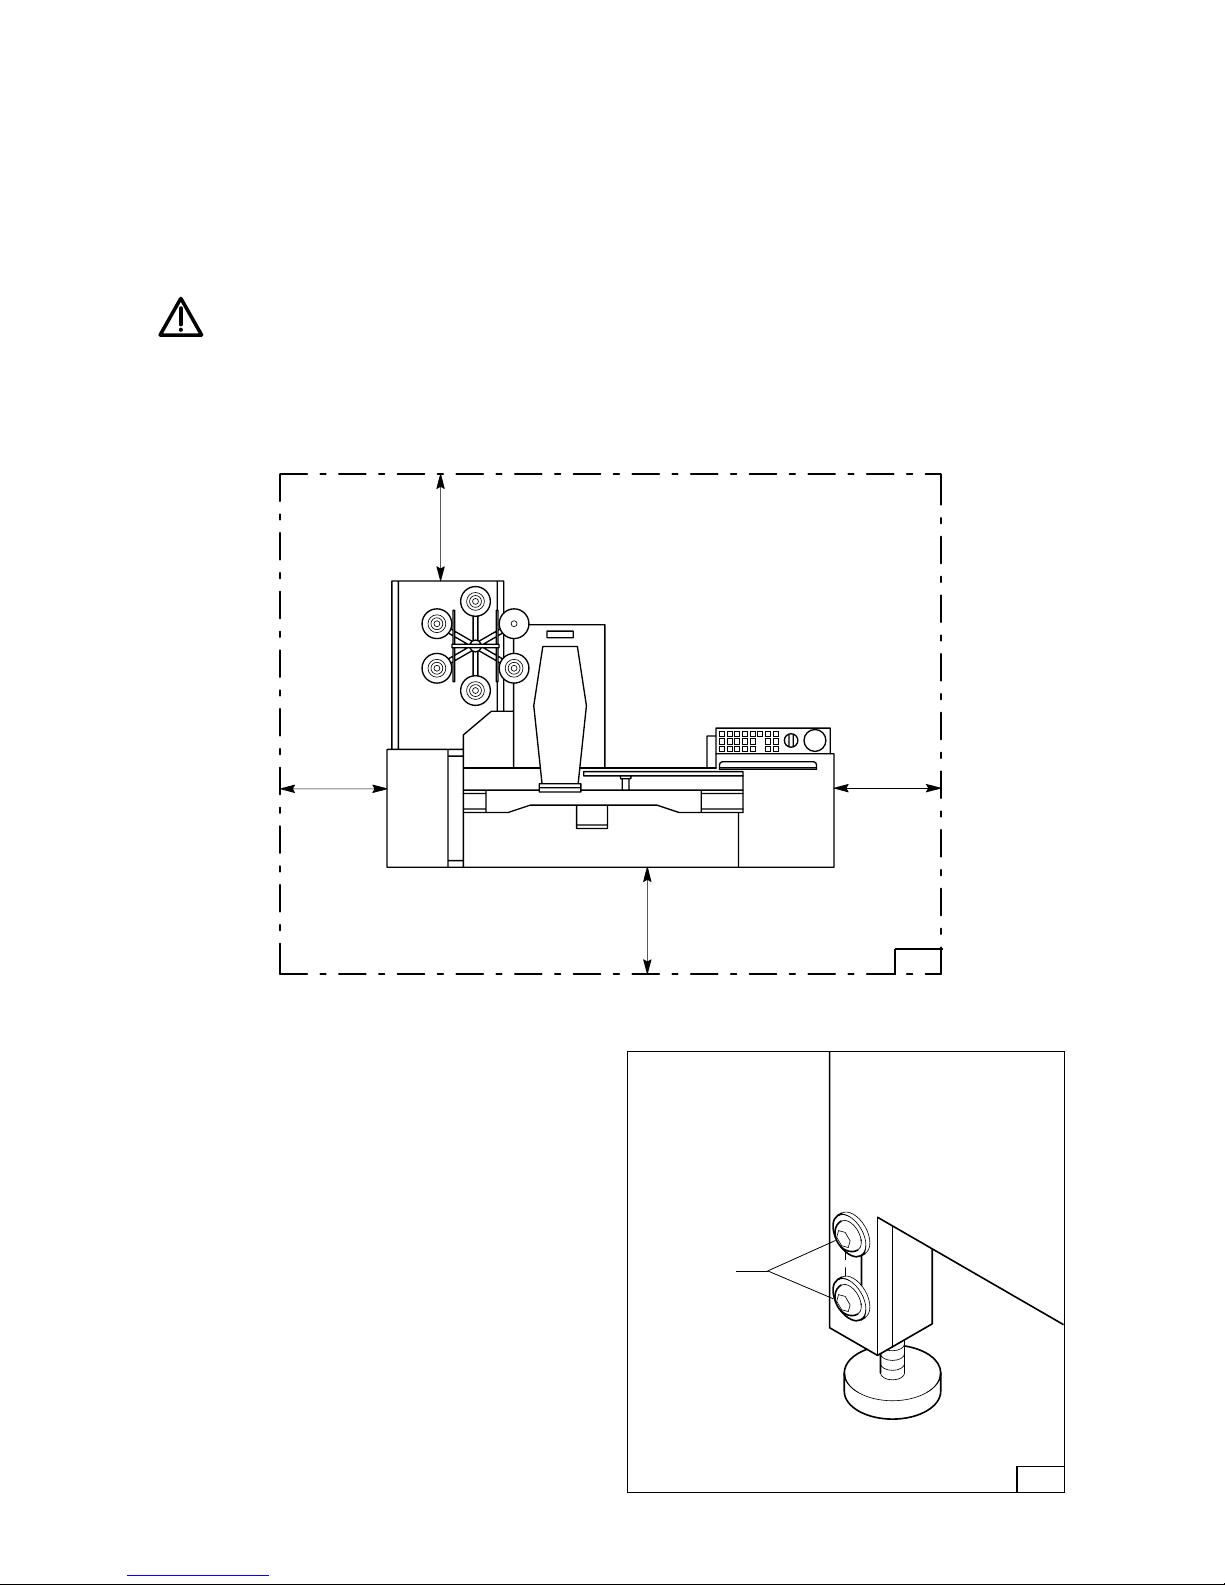
Make sure that the distances shown in figure 1 below are respected as these are necessary for the mainte-
nance and operation of the machine.
0,5 m
0,5 m
0,5 m
0,5 m
05 - INSTALLATION
6
1
The machine must be placed on a solid flat surface.
If necessary, adjust screws “A” on the levelling feet
to level the machine (fig. 2).
2
A

7
ELECTRICAL CONNECTIONS
- Remove front panel “B” (fig. 3).
- Pass the power supply cable through the holes in
the machine (fig. 4).
- Connect to the main switch (fig. 5).
-
Power up the machine (220V-50Hz single-phase)
.
- The electrical input is about 1 kW.
3
5
B
4
PNEUMATIC CONNECTION
Connect the machine to the compressed air outlet
and make sure that the air flow is sufficient to allow
for operation with a constant rate of pressure of
5 ATU (70 PSI) (fig. 6).
6
5 ATU

06 - MACHINE CONTROLS
8
Emergency
Pocket/Breast
pocket delivery
selector switch
Keyboard
Main
switch
Auxiliary
insertion
switch

9
START-UP
- On first switching on, open front panel “A” (fig. 1)
and turn main switch “B” to position I(fig. 2).
-
Turn the air inlet valve towards the right to open.
- Check that emergency button “C” is not pressed
(fig. 3).
- Press auxiliary insert button “D” (fig. 2).
- The messages on the keyboard display indicate
when the machine is ready.
Before starting hemming, check the direction of rota-
tion of the sewing machine, making sure that
it agrees with the arrow punched on flywheel “E”
(fig. 4).
If not, consult the motor keyboard instruction manual.
1
2
34
07 - OPERATION
A
D
B
C
E
Table of contents


