manuals.online logo
Brands
  1. Home
  2. •
  3. Brands
  4. •
  5. PCI
  6. •
  7. VoIP
  8. •
  9. PCI Fonemosa 4204A User manual

PCI Fonemosa 4204A User manual

-1-
FONEMOSA 4204A
Note:For more detailed hardware installation instructions, please refer to the FONEMOSA 4204/4208/4216 User’s Guide found
on the CDaccompanying the unit.
Notices for phone line connections
The phone line should be connected to the FXO port. It should not be connected to the FXS port as doing so may cause damage to
the product!
Connectthe phone or system console to perform basic configurations
With the Fonemosa (4204) unit, you can use a telephone set to perform basic configurations such as setting the region ID, IP
address and web interface password. For the Fonemosa (4208/4216) units,you can use either a telephone set or a system console
to configure the system. However, if the Fonemosa (4208/4216) units are equipped with FXO ports only, performing configurations
using a telephone set will be unavailable.
Connect a phone to the Fonemosa (4204) unit
I. BasicConfiguration:Region ID, IP address and Web passwords
-2-
Connect a phone to the Fonemosa (4208/4216) unit’s phone jack
Usethe RS-232 (DB9 DTE) port toconnect a system console to the Fonemosa (4208/4216) unit
System console settings
Before you connect the RS-232 connector to the console port, you have to configure your VT100 terminal to match the settings of
the Fonemosa unit’s console port. The console port’s terminal connection is set to 9600 baud, 8 data bits, 1 stop bitand no parity.
Turn on the Fonemosa unit’s power and wait for the terminal to display “Press Enter…” follow the directions to begin.
-3-
Skip this step if you are installing your Fonemosaunit in the defaultregion. The default Region ID is printed on the label located
outside the box. If you are installing your Fonemosaunit at any region other than that which is specified, you will need to configure
the Fonemosa unitto the correctRegion ID.
The Region ID is coded as follows:
(Note: If your Region ID is not listed on the chart above, please refer to the Fonemosa (4204/4208/4216)unit’s User’s Guide found
onthe CDaccompanying the unit)
Using a phone to configure the region ID
1. Pickup the phone and press
2. ##0000 You will hear 3 short tones.
3. 9507# Assuming you are modifying for China, the last 2 digits “07”are China’s
regional ID.
4. 971# Enable the new region ID. (This action will change all setting values to
returnto their default values)
5. Hangup the phone
Using the ConsoleConfiguration
FONEMOSA>enable
FONEMOSA#configure
Enter configuration commands, one per line. End with CNTL/Z
Country Region ID Country Region ID Country Region ID
Canada 06 Italy 22 Spain 40
China 07 Japan 23 Taiwan 43
France 12 Korea 24 Thailand 44
Germany 13 Singapore 36 United Kingdom 46
Hong Kong 15 Slovakia 38 United States 47
Region ID Label
Step 1. Configurethe Region ID
-4-
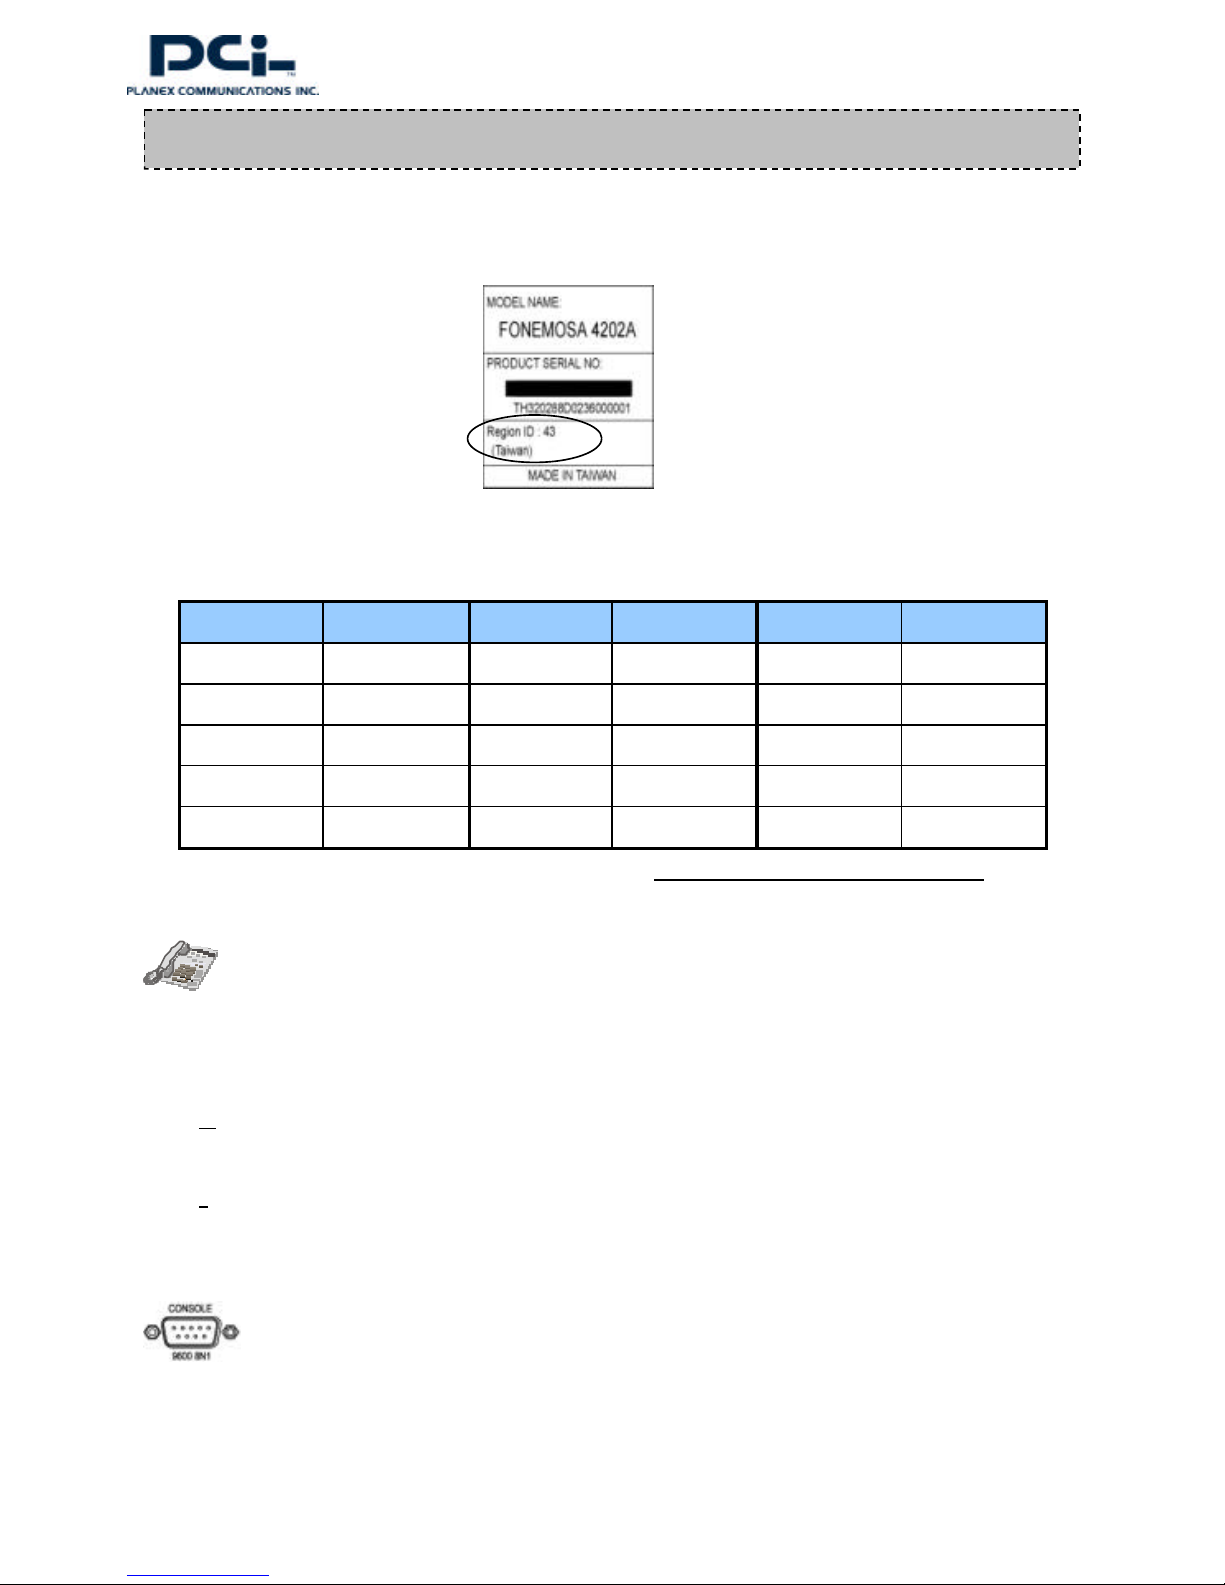
FONEMOSA(config)#regional_id 07
FONEMOSA(config)#exit
FONEMOSA#delete nvram
This command resets the system with factory defaults.
All system parameters will revert to their default factory settings. All static
and dynamic addresses will be removed.
Reset system with factory defaults, [Y]es or [N]o? Yes
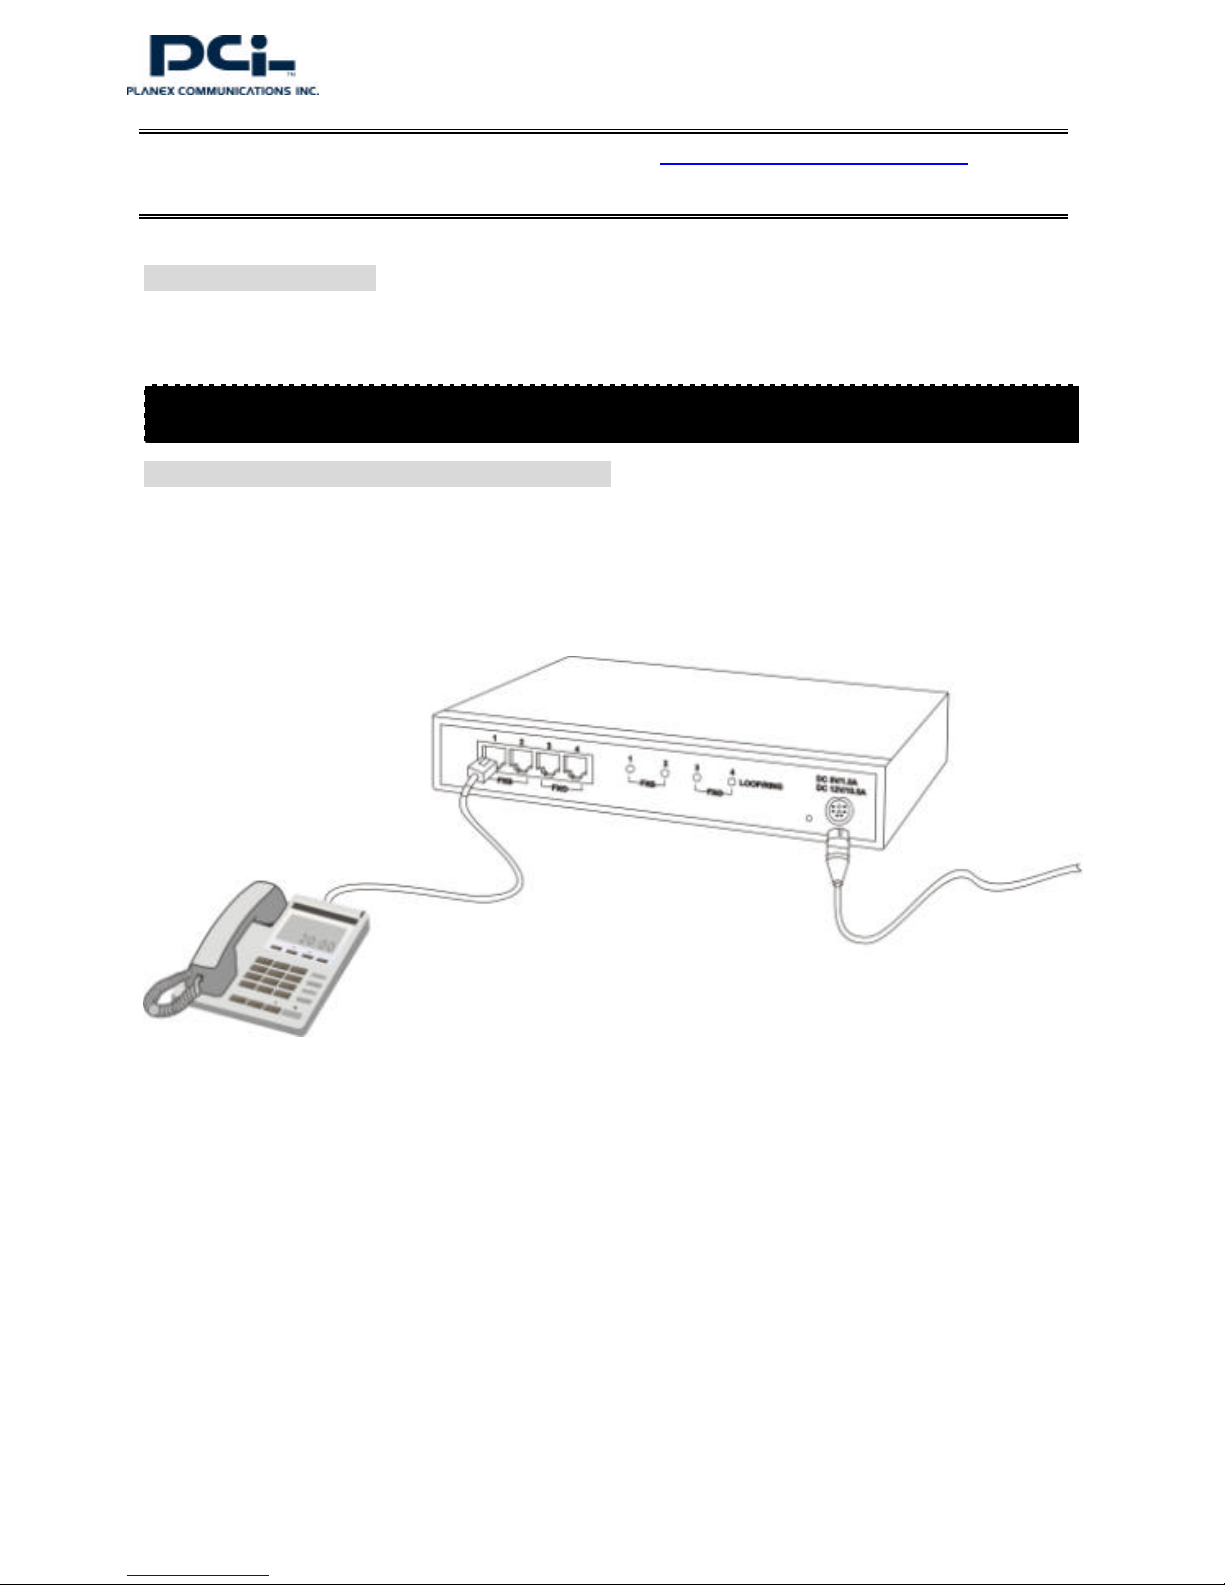
Usinga phone toconfigure the area code and phone number
1. Pickup the phone and press
2. ##0000 You will hear 3 short tones.
3. 012# Thenumber “2”represents the Taipei area code.
4. 0282261111#The phone number is 82261111
5. Hangup the phone
Note: This is the area codeof the phone number. For example, “2”for Taipei, “21”for Shunghai, “10”for Peking and “408”for San
Jose (USA).
The system console does not support area code and phone number configuration
Using the system console to configure the area code and phone number is not supported.
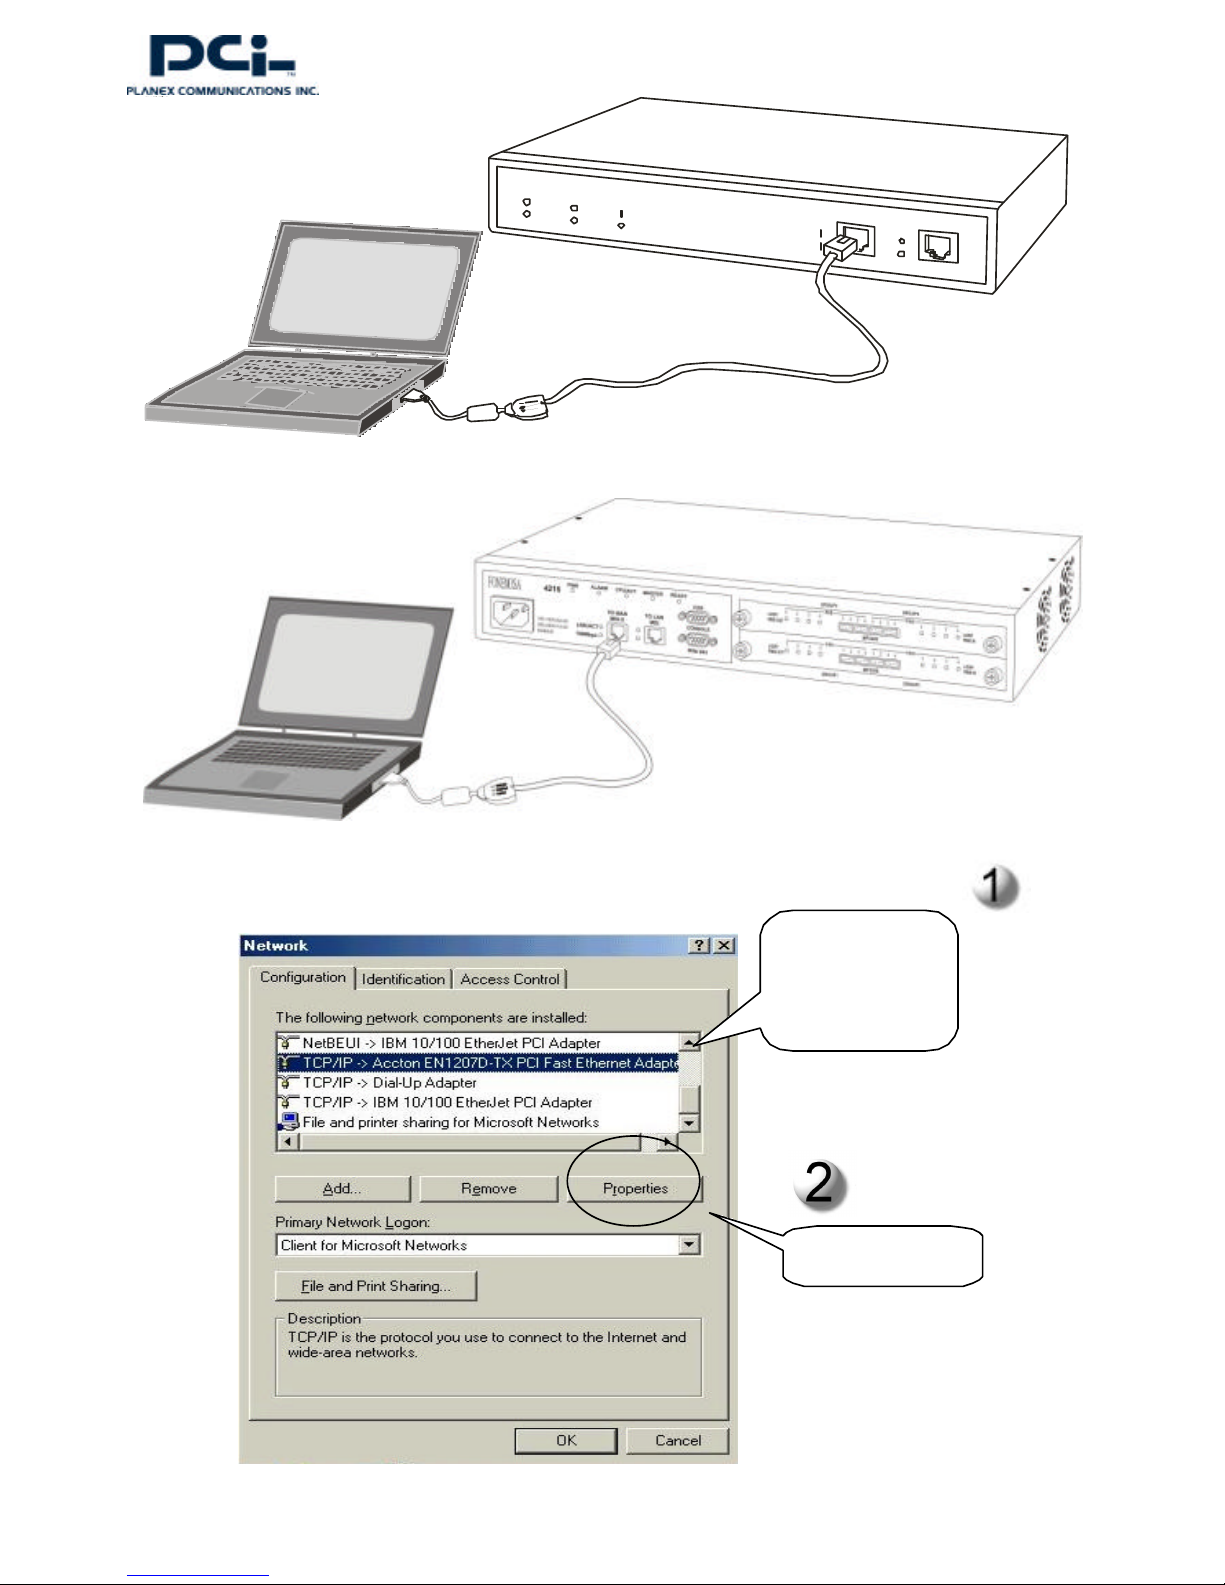
The Fonemosa unitsupports three methods to obtain an IP address: Static IP, DHCP and PPPoE.
nStatic IP
Ifyou have been assigned a public and static IP address by your ISP, you can configure it to the device.
Using a phone to configure IP address
1. Pickup the phone and press
2. ##0000 You will hear 3 short tones.
3. 030# Thenumber “0”is used to enable “static”IP mode.
4. 04210*62*149*250#Configures the IP Address “210.62.149.250”.
5. 05255*255*255*128# Configures the Subnet Mask “255.255.255.128”.
6. 06210*62*149*254#Configures the Default Gateway“210.62.149.254”.
Step 2. Configure the area code and phone number
Step 3. IP settings
-5-
7. 981# Restartsthe Fonemosa unit. (The system should be restarted immediately)
8. Hangup the phone.
Using a system consoleto configure the IP address
FONEMOSA>enable
FONEMOSA#configure
Enter configuration commands, one per line. End with CNTL/Z
FONEMOSA(config)#ip state user
FONEMOSA(config)#ip address 210.62.149.250 255.255.255.128
System need to restart
FONEMOSA(config)#ip default-gateway 210.62.149.254
FONEMOSA(config)#exit
FONEMOSA#restart
This command resets the system. System will restart operation code agent.
Reset system, [Y]es or [N]o? Yes
nDHCP and PPPoEMode
DHCP and PPPoE modes use dynamically assigned IP addresses and because of this there are difficulties with regards to Web
based management. We strongly suggest that you use a private and fixed IP address such as 192.168.0.2(default setting) so that
you can use the web based interface to configure the Fonemosa unit’s other advanced configurations. Examples of advanced
configurations include,setting the supported T.38 fax transit function or configuring the PPPoE parameters. You can skip this step if
you are not modifying the Fonemosa unit’s default IP address.
Using a phone to configure the default IP address
1. Pickup the phone and press
2. ##0000 You will hear 3 short tones.
3. 030# Thenumber “0”is used to enable “static”IP mode.
4. 04192*168*0*2#Configures the IP Address “192.168.0.2”.
5. 05255*255*255*0#Configures the Subnet Mask “255.255.255.0”.
6. 981# Restartsthe Fonemosa unit.
7. Hang up the phone.
Using a consoleto configure the default IP address
FONEMOSA>enable
FONEMOSA#configure
-6-
Enter configuration commands, one per line. End with CNTL/Z
FONEMOSA(config)#ip state user
FONEMOSA(config)#ip address 192.168.0.2 255.255.255.0
System need to restart
FONEMOSA(config)#exit
FONEMOSA#restart
This command resets the system.
System will restart operation code agent.
Reset system, [Y]es or [N]o? Yes
Usinga phone to configure a password
1. Pickup the phone and press
2. ##0000 You will hear 3 short tones.
3. 882834# The numbers ”2834” in this string are the web based management password.
4. Hang up the phone.
Using ConsoleConfiguration
FONEMOSA>enable
FONEMOSA#configure
Enter configuration commands, one per line. End with CNTL/Z
FONEMOSA(config)#password web_write password 2834
FONEMOSA(config)#exit
FONEMOSA#
You can use the web based interface using a popularbrowser such as IE or Netscape to perform further configurations. You need to
connect a PC to the Fonemosa unitand modify the PC’s TCP/IP properties (IP Address and Subnet Mask) so that they are located
in the same subnet. You can thenuse abrowser to configure the device.
Connecta PCto the Fonemosa unit
Step 4. Configuring a password for web based management
II. Configure the TCP/IP Properties of the PC connected to the Fonemosa unit.
-7-
4204LNK/ACTTIME SRVRFORWARDA.ANSWERCPU/ACTALARMPWRTO WANMDI-XTO LANMDI100MbpsMOSASOHO
Connect a PC to the Fonemosa (4204) unit
Connect a PC to the Fonemosa (4208/4216) unit
Click to highlight your
Network Card’s
TCP/IP options.
Clickthe “Properties”
-8-
Note. Ifthe Fonemosa unit’s IP address has been set to public or static IP mode; you must configure the IP Address and Subnet
Maskof the PC to be in the same subnet as the Fonemosa unit rather than using IP address “192.168.0.5”and Subnet Mask
“255.255.255.0”asthe above illustration demonstrates.
III. Entering the Web Based Management Interface
The Fonemosaunit’s
IP address
Fill in ”WEB”(all capitals) and the
password that you have configured
inthe basic configuration section
Pressthe “OK”button
Fill in the IP Address
and Subnet Mask.
They mustbe in the
samesubnet asthe
Fonemosa unit.
-9-
If you are using FAX machines with the Fonemosa unit, you must turn on the “Support T.38 Fax”function. For the web based
interface configuration,please setthe “Support T.38 FAX” to “Yes”.
V.Configuring a Channel for T.38 FAX Support
IV. Configurethe Area Code and Phone Number
Clickthe “BASIC” button to go
to the basic configuration page
Fill in the area code and
phone number
Clickthe “Apply”
button to apply
any changes.
-10 -
VI. Manually Editing the Phone Book
Set the Support
T.38 FAX to “Yes”
Click the “Apply”
button to apply
any changes
Click the “Select” button to confirm
Click the “CHANNEL”
button on the top to go to
the channel configuration
page.
Select the channel that
you want to configure
-11 -
If the recipient Fonemosa unit is using a public and static IP address, you can manually edit the IP address and phone number in
yourphone book and then directly call the recipientover IP, this does not require the IP learning process.
Note. If you need to configure any other parameters after the IP mode configuration is done, do not restart the Fonemosa unit as it
will use the newIP setting.When this happens, you may no longer be able to access the Fonemosa unitusing a web browser. You
will then need touse a phone or console to configure the IP back to its default or fixed IP address such as “192.168.0.2”.
VII. Configuring the Fonemosa unit’s IP Modes usingthe Web Based Interface
Clickthe PHONEBOOK button to
go to the phonebook configuration
page.
Fill in the country
code, area codeand
phonenumber
Click the “Apply”
button to apply
any changes
Fill in the IP
address
Fill in the signaling
UDP port. The
factorydefault is
2000
-12 -
Click the “IP SETTINGS” button
to go to the IP settings
configuration page.
Fill in the static IP
address, subnet mask
and default gateway
Select static IP mode
Click the “Apply”
button to apply
any changes
Static IP Mode
-13 -
Select DHCP mode
Click the “Apply”
button to apply
any changes
DHCP Mode
-14 -
VIII. Go tothe BASICPage to Restart the System
Fill in the (PPPoE)account
username and password,
re-enter the password to
confirm
Select PPPoE mode
Click the “Apply”
button to apply
any changes
PPPoE Mode
-15 -
For moredetailed information on the Fonemosa unit, please refer to the FONEMOSA 4204/4208/4216 User’s Guide found onthe
CDaccompanying the unit.After connecting the Fonemosa unit to your network, you can performthe following check:
nCheck if the Time Server’s LED on the front panel is ON. If it is not on this indicates a problem.Please referto the user’s
guideto determine the problem.
nUseFONEMOSA to dial VoIP service number.
Distributor’s VoIP Service Number (Following examples are for Taipei’s distributor)
Taipei area: please dial #Distributor’s Phone Number#
Taiwan other areas: please dial #02+Distributor’s Phone Number#
China area: please dial #008862+ Distributor’s Phone Number#
Other countries: please dial #International Access Code+ 8862+Distributor’s Phone Number#
IX. Quick Checking
X. IP Learning
Selectthe
WarmRestart
Click the “Apply”
button to restart
the system
Click the “BASIC” button to go to
the basic configuration page.
-16 -
Remote FONEMOSA
IP Network
Telecom Telecom
Local FONEMOSA
Unless the partyreceiving the call isusing a fixed IP address andit is manually added to the static phone book, you will have to
“learn”the IP address of the called party’s phone number before making calls to that particular number. The IP learning process can
be either Manual or Automatic when acquiring the IP address of the called party.
Automatic IP Learning. (The automatic answering function on the remote Fonemosa unit is disabled. This is
the default factory setting)
Local FONEMOSA Remote FONEMOSA
1. Assuming user dials a VoIP phone number,
for example “*002862164458275#”
2. Check the IP information in the dynamic phone book. (If the
number can be found, end the learning procedure and use
that IP to setup the call)
3. If the number can’tbe found in the dynamic phone book, the
Fonemosa unit will then use the phone line to dial
“002862164458275” through PSTN to reach the remote
Fonemosa unitandattempt to acquire the IP information. At
this point you will hear the ring back tone.
After a few seconds the phone will begin ringing. (The FXO LED
should be flashing.)
When a user answers the phone, he/she will hear the busy tone
and should hang up the phone
4. The learning procedures will start as soon as the remote
party has picked up the phone. You will then hear short
sounds that should continue for about 30 seconds
The phone is hung up, but the line and FXO LED is ON.
5. If the learning procedure is successful, the Fonemosa unit
will automatically disconnect the phone call made through
the PSTN. And should then begin dialing the remote
The phone should start ringing again.
-17 -
Fonemosaunit over IP. At this point your will hear the ring
back tone again
6. Wait for the remote party to answer the call. Pick up the phone to begin voice communication over IP.
Automatic IP Learning (The automatic answering function on the remote Fonemosa unit is enabled.)
Local FONEMOSA Remote FONEMOSA
1. Assuming user dials a VoIP phone number,
for example “*002862164458275#”
2. Check the IP information in the dynamic phone book. (If the
number can be found, end the learning procedure and use
that IP to setup the call)
3. If the number can’t be found in the dynamic phone book, the
Fonemosa unit will then use the phone line to dial
“002862164458275” through the PSTN to reach the remote
Fonemosa unit and attempt to acquire the IP information. At
this point you will hear the ring back tone
After a few seconds the Fonemosa unitwill be rung. (The FXO
LEDshould be flashing, but phone will not ring) The Fonemosa
unit will auto-answer.
4. The learning procedure will not start until the party receiving
the call answers the phone. In the duration of the learning
process you will hear short sounds that should continue for
about 30 seconds
The FXO LEDis ON, but the phone is disabled
5. If the learning procedure is successful, the Fonemosa unit
will automatically disconnect the phone call made through
the PSTN. And should then begin dialing the remote
Fonemosaunit over IP. At this point your will hear the ring
back tone again
The phone should start ringing.
6. Waiting for the remote party to answer the call. Pick up the phone to begin voice communication over IP.
Manual IP Learning (The automatic answering function on the remote Fonemosa unit could be either enabled
or disabled)
Local FONEMOSA Remote FONEMOSA
1. Assuming the user makes a traditional phone call through
the PSTN to reach a remote Fonemosa unit, for
example ”002862164458275” (You will then hear the ring
back tone).
After a few seconds the phone will begin ringing. (The FXO LED
should be flashing)
2. Waiting for the recipient to answer the phone, ask him/her to Pick up the phone and press the“
#
” key twice, thelearning
-18 -
press the “
#
” key twice. (Within one second) procedure will begin.
3. Waiting for the recipient pressthe “
#
” key twice, the
learning procedure should then begin. Later you will hear
short sounds that should continue for about 15 seconds
At this point the user will hear short sounds that should continue
for about 15 seconds
4. If the learning procedure was successful, you will hear three
short sounds in rapid succession.
Confirm that the learning process has completed successfully.
You should now be almost ready to commence voice
communication.
5. Hang up the phone to end the IP learning process
procedure.
Hang up the phone
The user can retry dialing aVoIP phone number, for example
“#002862164458275#”
The phone should ring. Pick up the phone to begin voice
communication over IP.
The phone number used belowis the same as atraditional phone number that you would use every day. For local calls, the number
is the same as the destination number. For long distance calls, placethe long distance access code and area code in front of the
destination number. For international numbers, you must add international access code + country code + area code + destination
number.
How to dial Description
Traditional Phone Calls through PSTN -Making phone calls as usual
Phone Number Making traditional phone calls through the PSTN
IP learning and On-net calls (between two FONEMOSA units)
‘*” + phone number + “#”
If it is the first time you are making IP calls with a particular
number,you haveto perform the IP learning process through
traditional phone calls.
On-net calls (between two FONEMOSA units) and Outbound Transit Calls
“#”+ phone number + “#”For on-net calls and outbound transit calls
“#” + fax number + ‘*”For on-net FAX and outbound transit FAX
Inbound Transit Calls –Making local calls from a traditional phone to a local Fonemosa unitfirst and then transferring itto
another Fonemosa unit
“#” + Inbound Transit Password + "“#”+ phone number + “#”Inbound transit calls
“#” + Inbound Transit Password + “#” + fax number + "‘*”Inbound transit FAX
P/N.61200000220A
DOC No.9172004001
XI .Placing IP calls

Popular VoIP manuals by other brands

Allworx Allworx 10x installation guide

Allworx

Allworx Allworx 10x installation guide

Vizio S2121w-D0 quick start guide

Vizio

Vizio S2121w-D0 quick start guide

ATCOM AX-2G4A quick start guide

ATCOM

ATCOM AX-2G4A quick start guide

Matrix SETU VG Series quick start

Matrix

Matrix SETU VG Series quick start

Grandstream Networks DUAL FXS PORT HT502 user manual

Grandstream Networks

Grandstream Networks DUAL FXS PORT HT502 user manual

Portech MV-370 user manual

Portech

Portech MV-370 user manual

iTALK VoIP-1 user manual

iTALK

iTALK VoIP-1 user manual

ZyXEL Communications Prestige 2602R Series user guide

ZyXEL Communications

ZyXEL Communications Prestige 2602R Series user guide

NetComm V110 quick start guide

NetComm

NetComm V110 quick start guide

Patton SmartNode 4830 DSL Series user manual

Patton

Patton SmartNode 4830 DSL Series user manual

Patton SmartNode 4830 Series user manual

Patton

Patton SmartNode 4830 Series user manual

D-Link DVG-2032S user manual

D-Link

D-Link DVG-2032S user manual

DSG Technology IP1200C Operation manual

DSG Technology

DSG Technology IP1200C Operation manual

Asotel ATA-01 user guide

Asotel

Asotel ATA-01 user guide

8x8 Inc MP-112 quick start guide

8x8 Inc

8x8 Inc MP-112 quick start guide

Crosley EL-4K-VIP-ACM Quick reference guide

Crosley

Crosley EL-4K-VIP-ACM Quick reference guide

manuals.online logo
manuals.online logoBrands
  • About & Mission
  • Contact us
  • Privacy Policy
  • Terms and Conditions

Copyright 2025 Manuals.Online. All Rights Reserved.