*Please arrange the line connection according to the actual hole position
of the purchased b .ox
Reserved
hole position
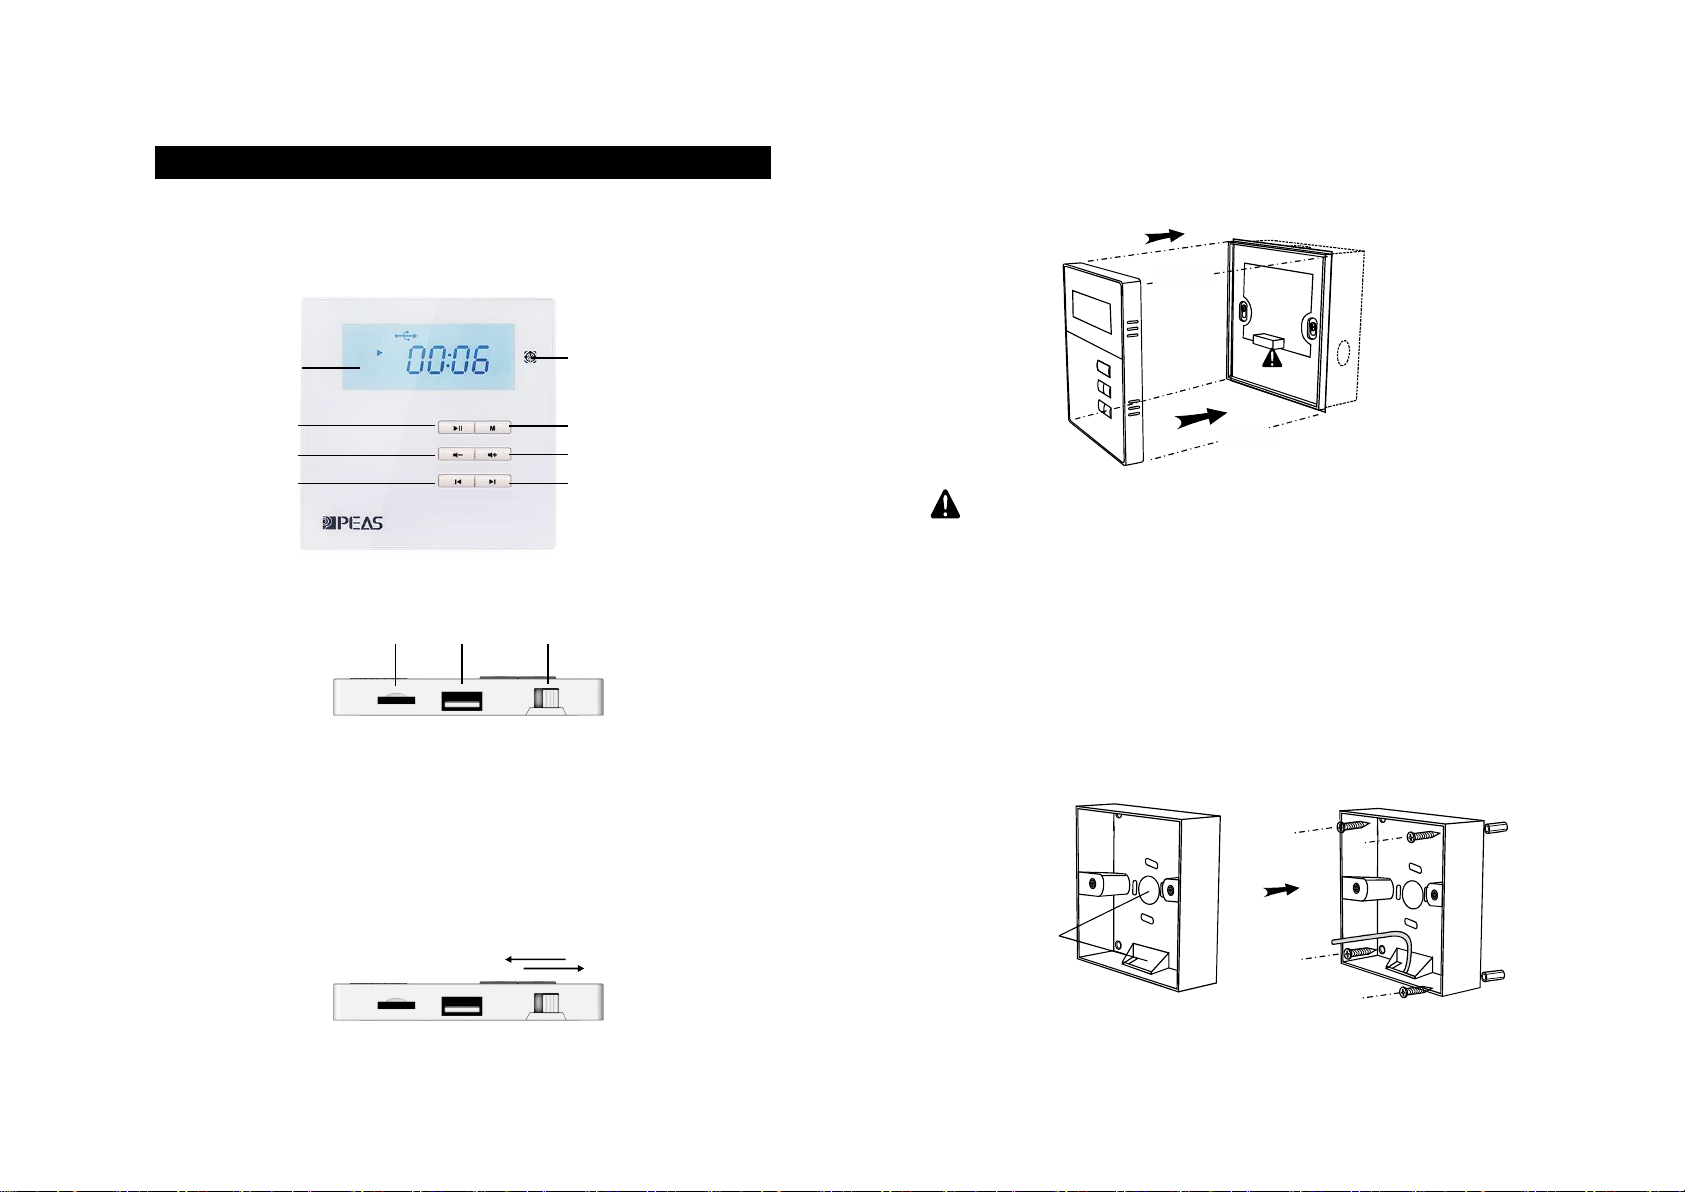
Installation
● Concealed installation
Functions of connection terminals
Function
Power input Null line
Symbol Name
Live wire
FM FM antenna
GND Signal ground
AUX IN Audio input right
Audio input left
AUX OUT Audio output right
Audio output left
Power amplifier
output 8Ω
Left speaker positive terminal
Left speaker negative terminal
Right speaker negative terminal
Right speaker positive terminal
N
L
ANT
R
L
R
L
OUTL+
OUTL-
OUTR+
OUTR-
Note you buy the box depth of not less than 40mm.:
Wall groove
Open a groove suitable for the b dimension on the wall
needing installation, and based on the positions of screw holes at
the four corners of the bottom surface of the b , drill holes on
the wall groove, and prepare to connect lines.
ox
ox
①
- 9 -
display “----” , when there is no music or unable to decode, and it will
play music automatically, and the screen will display the play time
progress when there is music and able to decode.
short press “ ” or “ ” to switch to previous or next
songs, and long press to fast forward or fast reverse; and short press
“ ” to play or pause.
short press “ ” or “ ” to increase or reduce
the current volume.
Press “ ” key to choose AUX mode.
short press “ ” to play or mute. When it is mute, the LCD
screen will flicker.
short press “ ” or “ ” to increase or reduce
thecurrent volume.
long press “ ” or “ ” to enter the sensitivity
adjustment, which can be switched between S1 and S2.
(S1: input 500mV, S2: input 1000mV)
Play control:
Volume adjustment:
4. AUX IN
M
Play control:
Volume adjustment:
Sensitivity adjustment:
5.AUX OUT
This device can be used as a audio source output to other amplifier
devices. when the AUX OUT interface is connected with other devices
and the FM\USB\SD\AUX IN\Bluetooth is selected for playback, the
audio signal can be output to these devices to play synchronously.
Press “ ” key to choose BT mode.
When there is no connection, the screen will display “BT” and flicker;
and when the device is connected successfully, “BT” will be always on.
The name of this product’s bluetooth displayed on other devices is
“DABA adding five address codes”.
short press “ ” or “ ” to increase or reduce
the current volume.
6. BLUETOOTH connection
M
Volume adjustment:
+
-
+
-
- 4 -
+
-