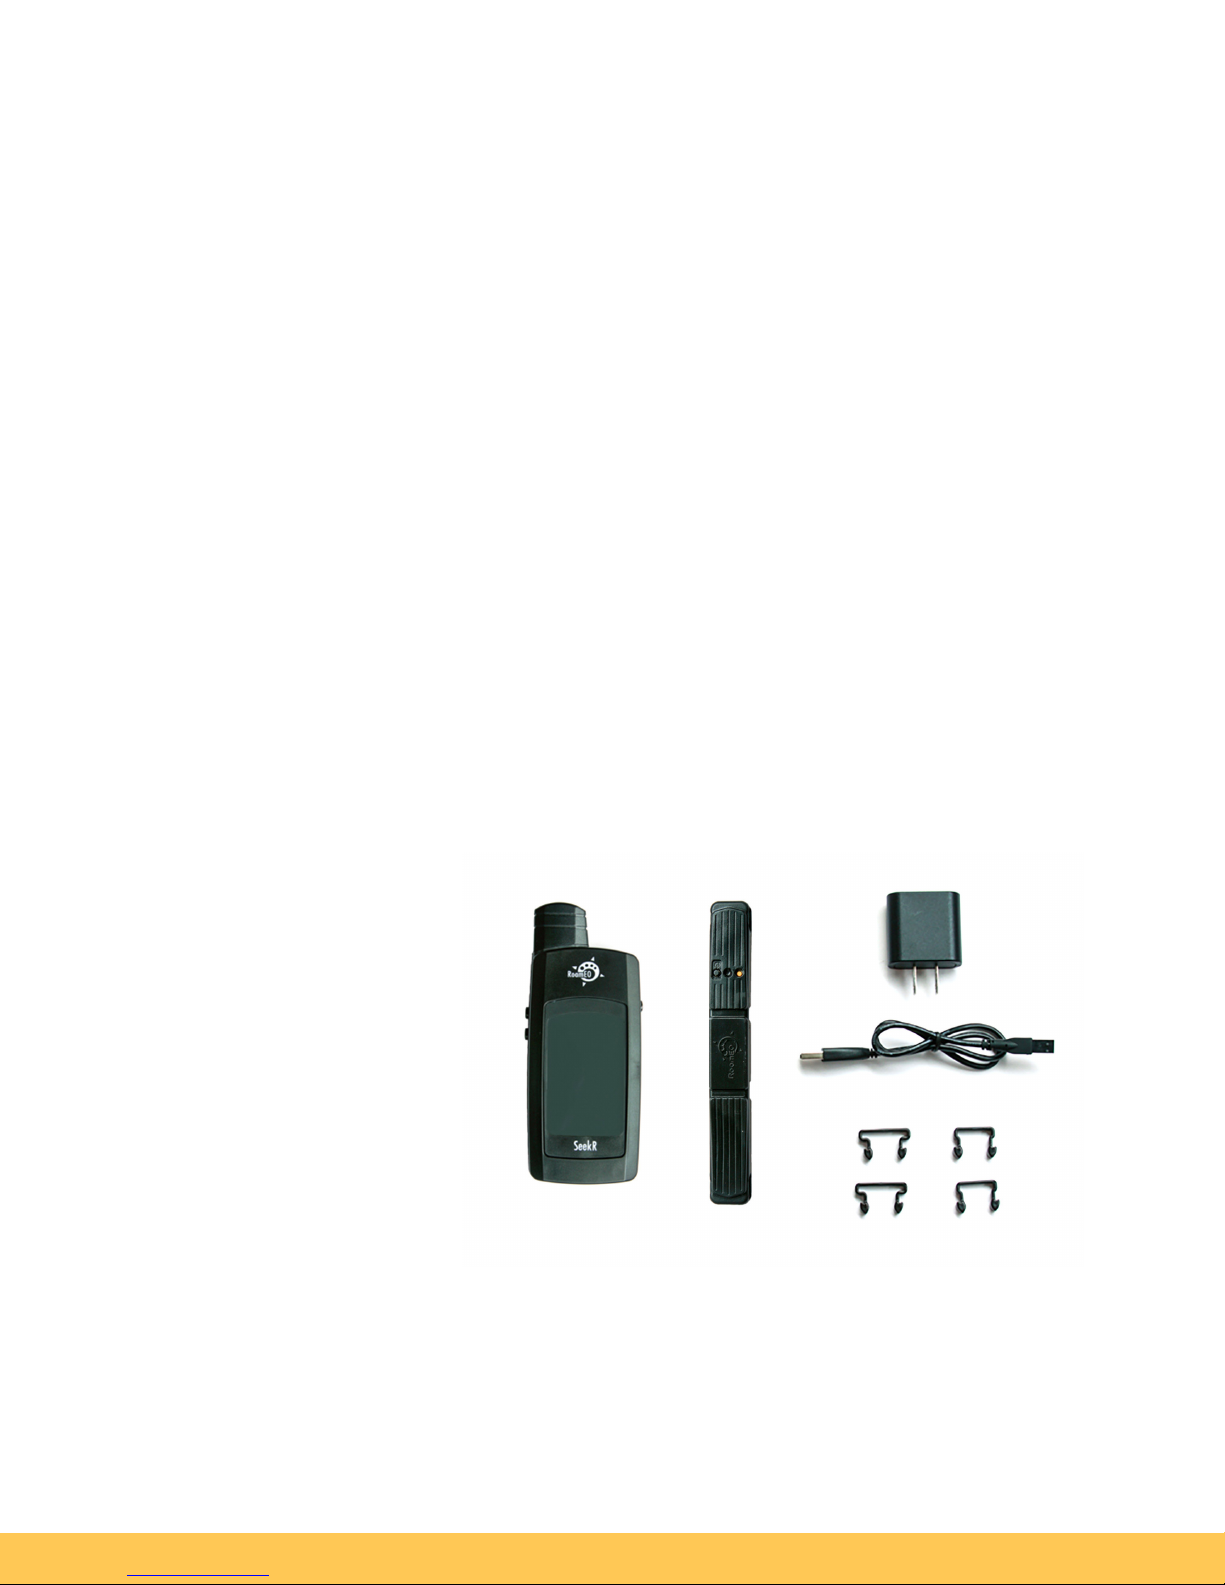
In the Box
Please make certain all parts are located before disposing of packing materials.
Handheld Receiver
GPS Collar Transmitter
USB Wall Charger
USB Charging Cable
1” Collar Clips
3 / 4” Collar Clips
Quickstart Guide
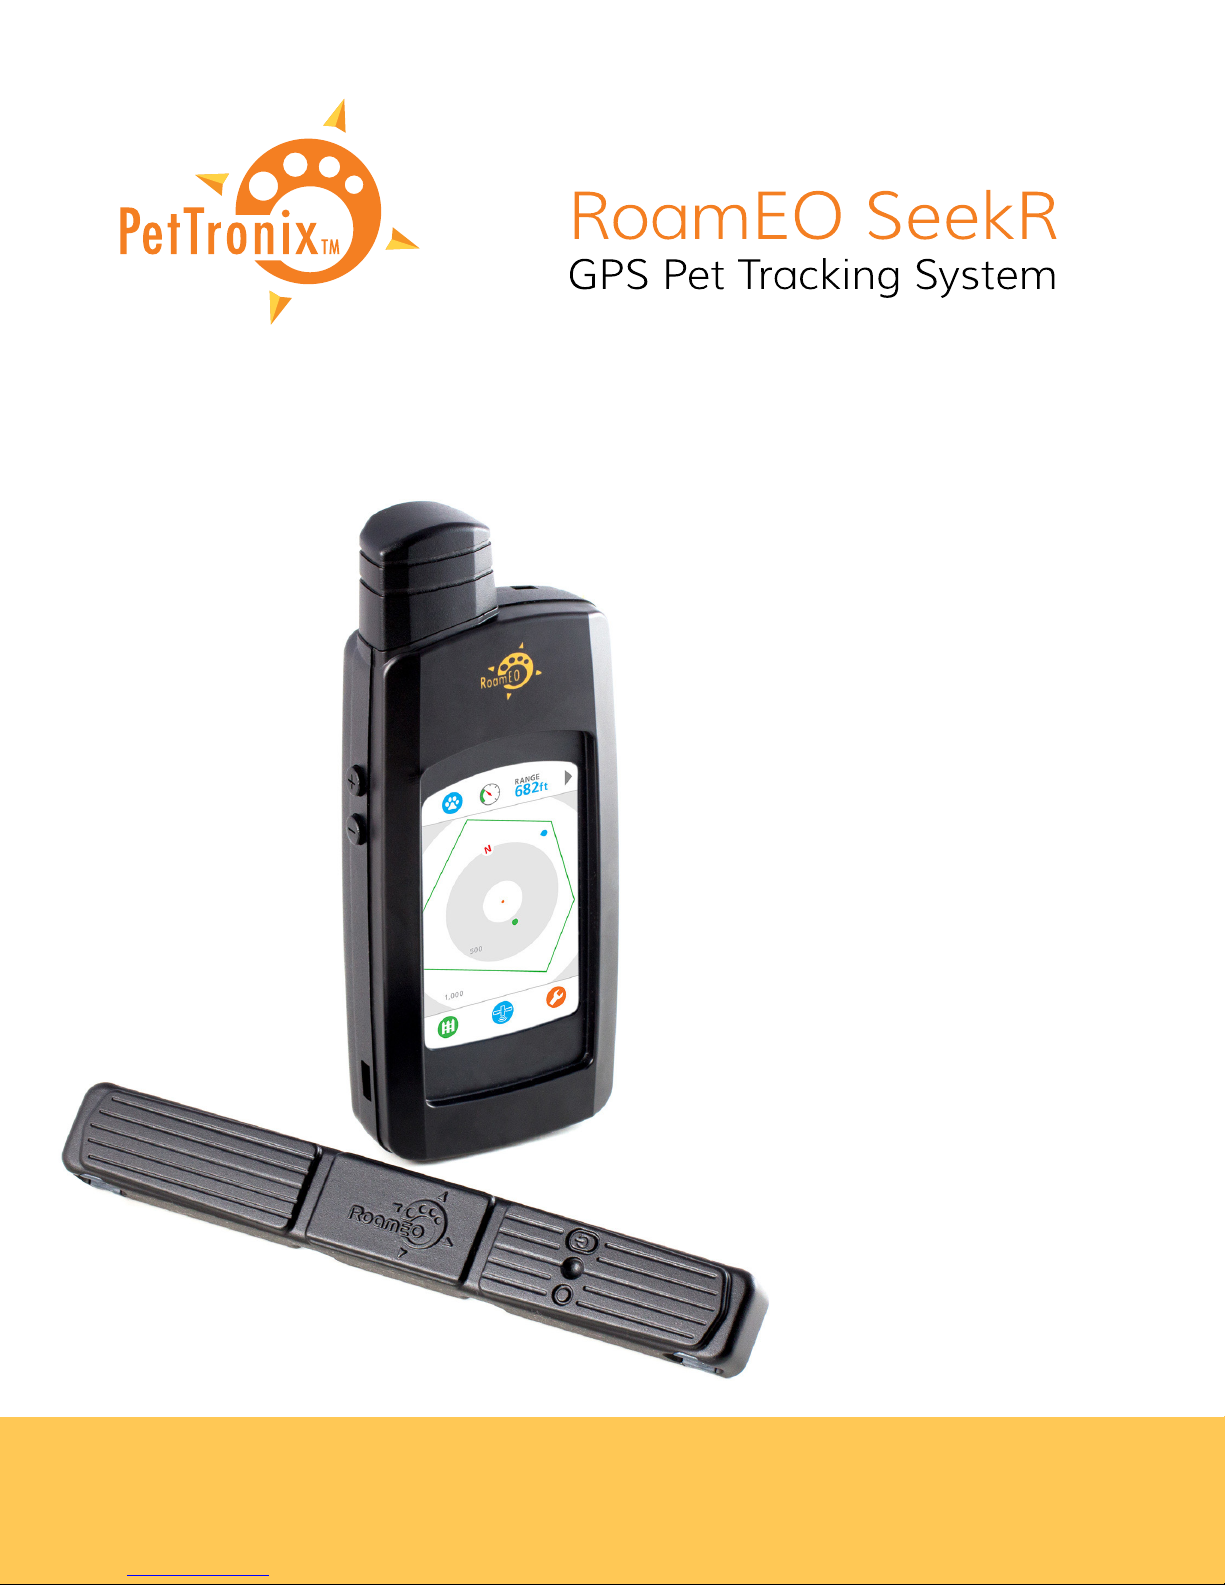
Get to Know Your System
Your RoamEO SeekR system consists of a Handheld Receiver and a GPS Collar
Transmitter that work together to track your dog’s activity in real time using GPS
technology.
The Handheld Receiver calculates your pet’s location based on data from the GPS
How the RoamEO SeekR Works
The RoamEO SeekR uses GPS technology to locate and track your dog’s movements.
The system acquires precise location data from the constellation of GPS satellites
circling the earth to pinpoint your pet’s exact location. The Collar Transmitter attached
to your dog’s existing collar sends its location data to the Handheld Receiver via a
proprietary radio circuit where a firmware algorithm triangulates the data and displays
your dog’s location in real time. The system automatically updates the GPS data and
the Handheld Receiver continually displays the new location information.
The RoamEO SeekR also includes many features designed for active dogs and their
owners. Refer to the Create GPS Fence section for instructions on building any one of
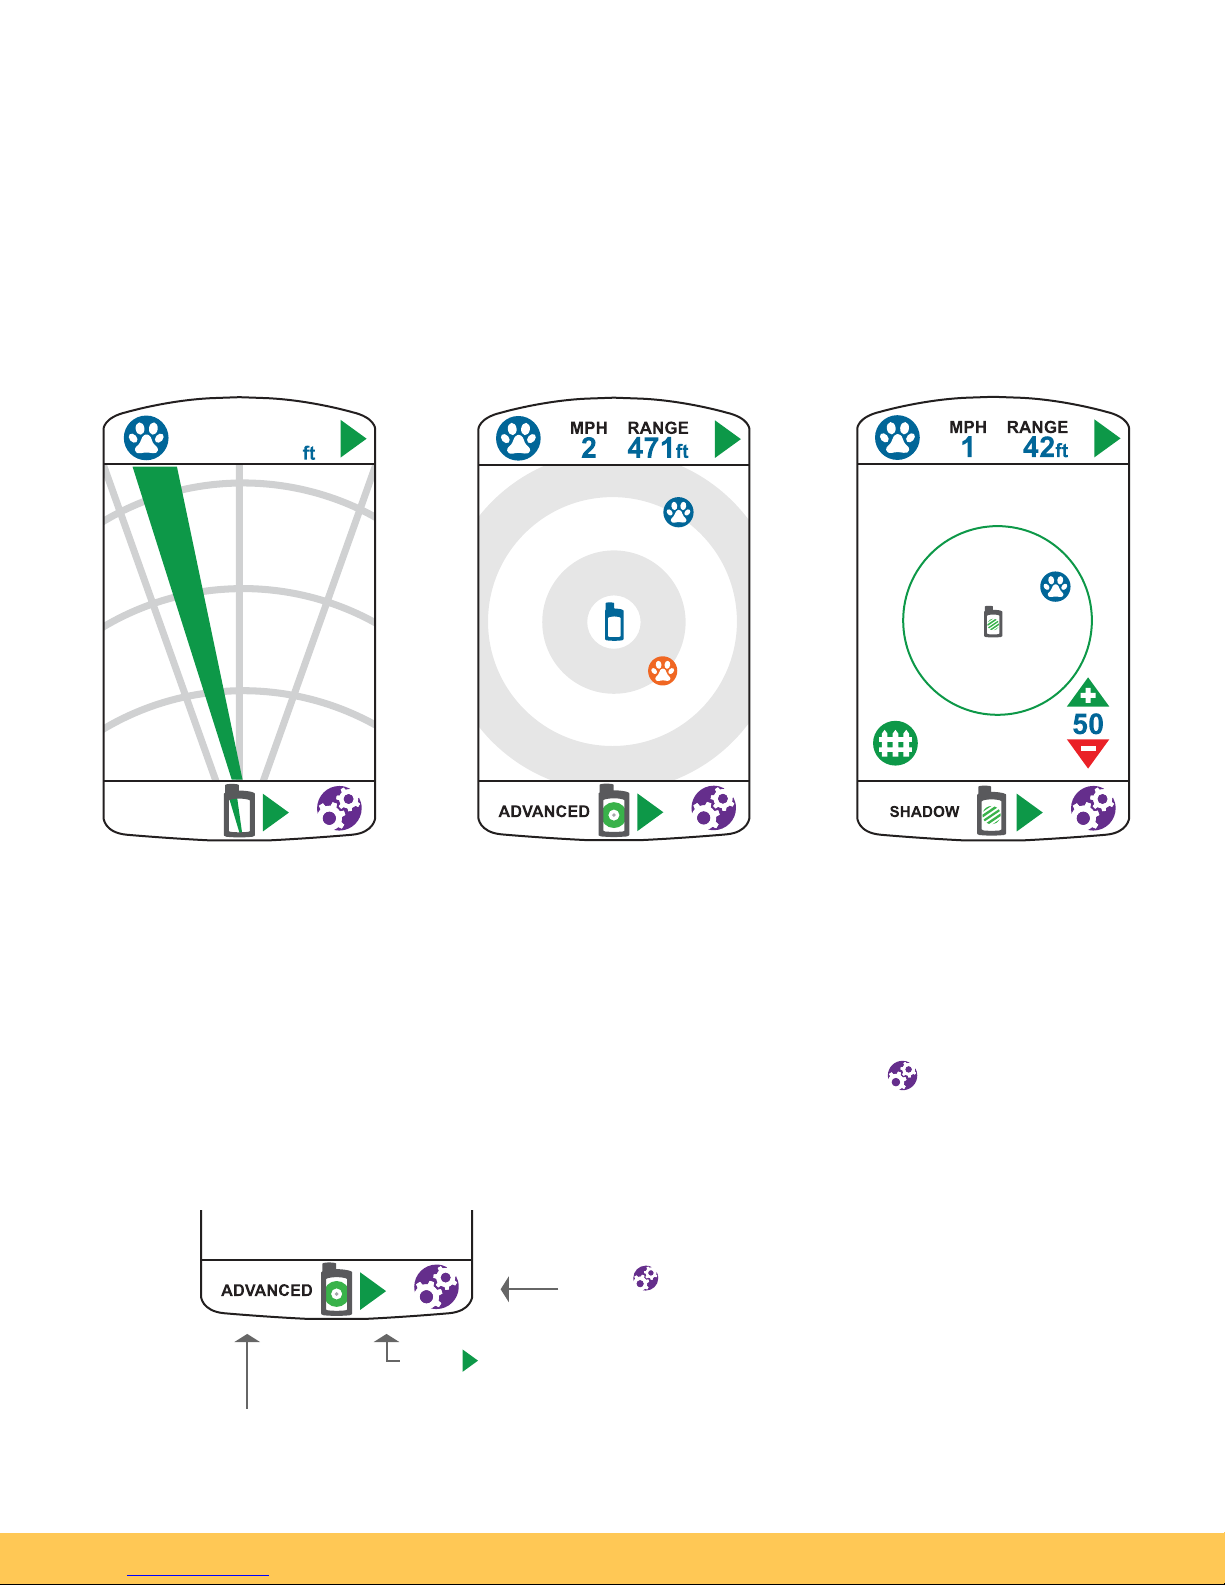
three dierent geo-perimeter options. The ShadowFence Tracking Screen creates a
circular GPS perimeter that follows your movements, ideal for walking or hiking with
your dog. The Home feature will commit a GPS waypoint to system memory, great for
guiding you back to a specific location such as a car or campsite. This is helpful in
environments where the terrain may be harsh or unfamiliar.
Collar Transmitter and then displays your dog’s movements on the color LCD. You can
select from any one of three tracking screens to view your pet’s location, making it
simple to track your dog in any environment.
The GPS Collar Transmitter attaches to your dog’s existing collar and continuously
transmits its location data to the Handheld Receiver. The Transmitter is waterproof and
is designed for use in rain, snow, mud or any other harsh conditions your dog will
encounter.
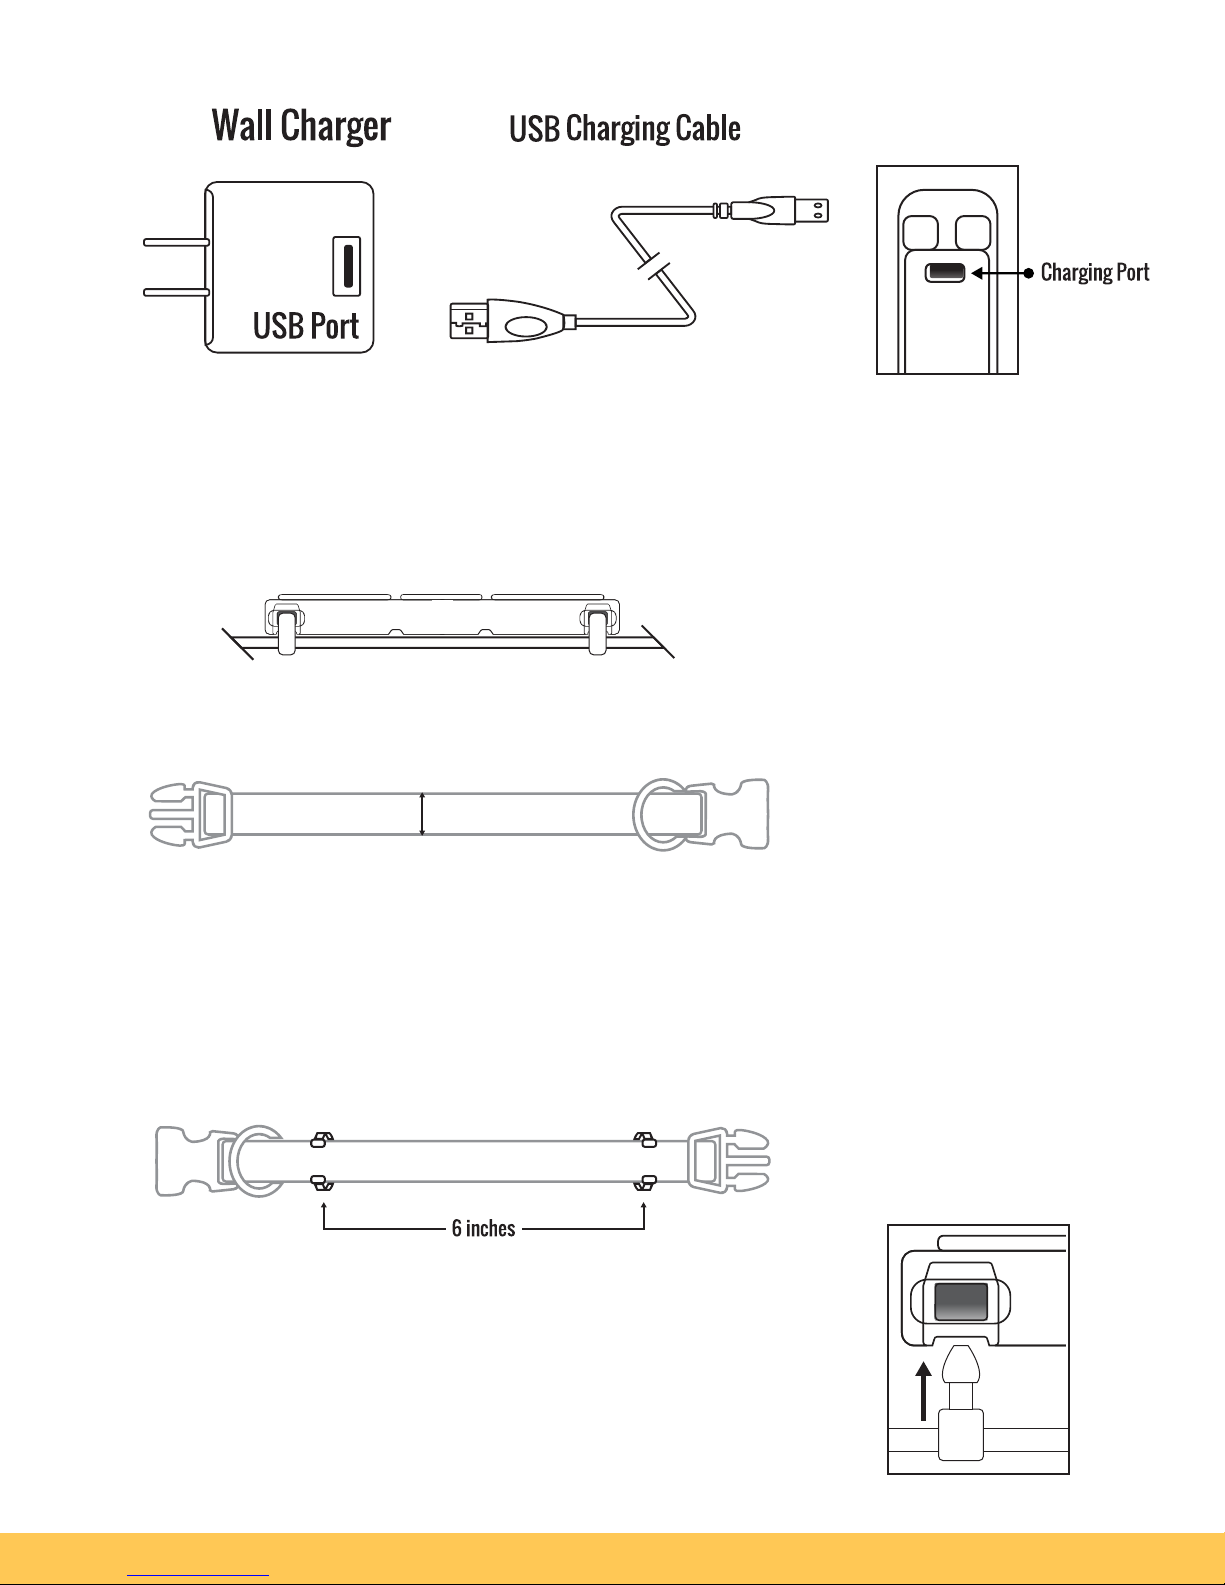
The USB Wall Charger and the charging cable are used for charging both the Handheld
Receiver and GPS Collar Transmitter.
Attaching the GPS Collar Transmitter
The Collar Transmitter is designed to attach to the top of your dog’s existing collar
using the Collar Clips provided with your system.
1. Measure the width of your dog’s collar.
Collar width: between 3 / 4” – 1” Use 1” collar clips
Collar width: 3 / 4” or smaller Use 3 / 4” collar clips
2. Using the appropriate size collar clips, attach two clips to your dog’s existing
collar, spacing the clips approximately six inches apart.
3. Place your dog’s collar on a flat surface with the
attached clips facing up. Attach the Collar Transmitter
to your dog’s collar by snapping the clips into the
receptacles molded in the Collar Transmitter.
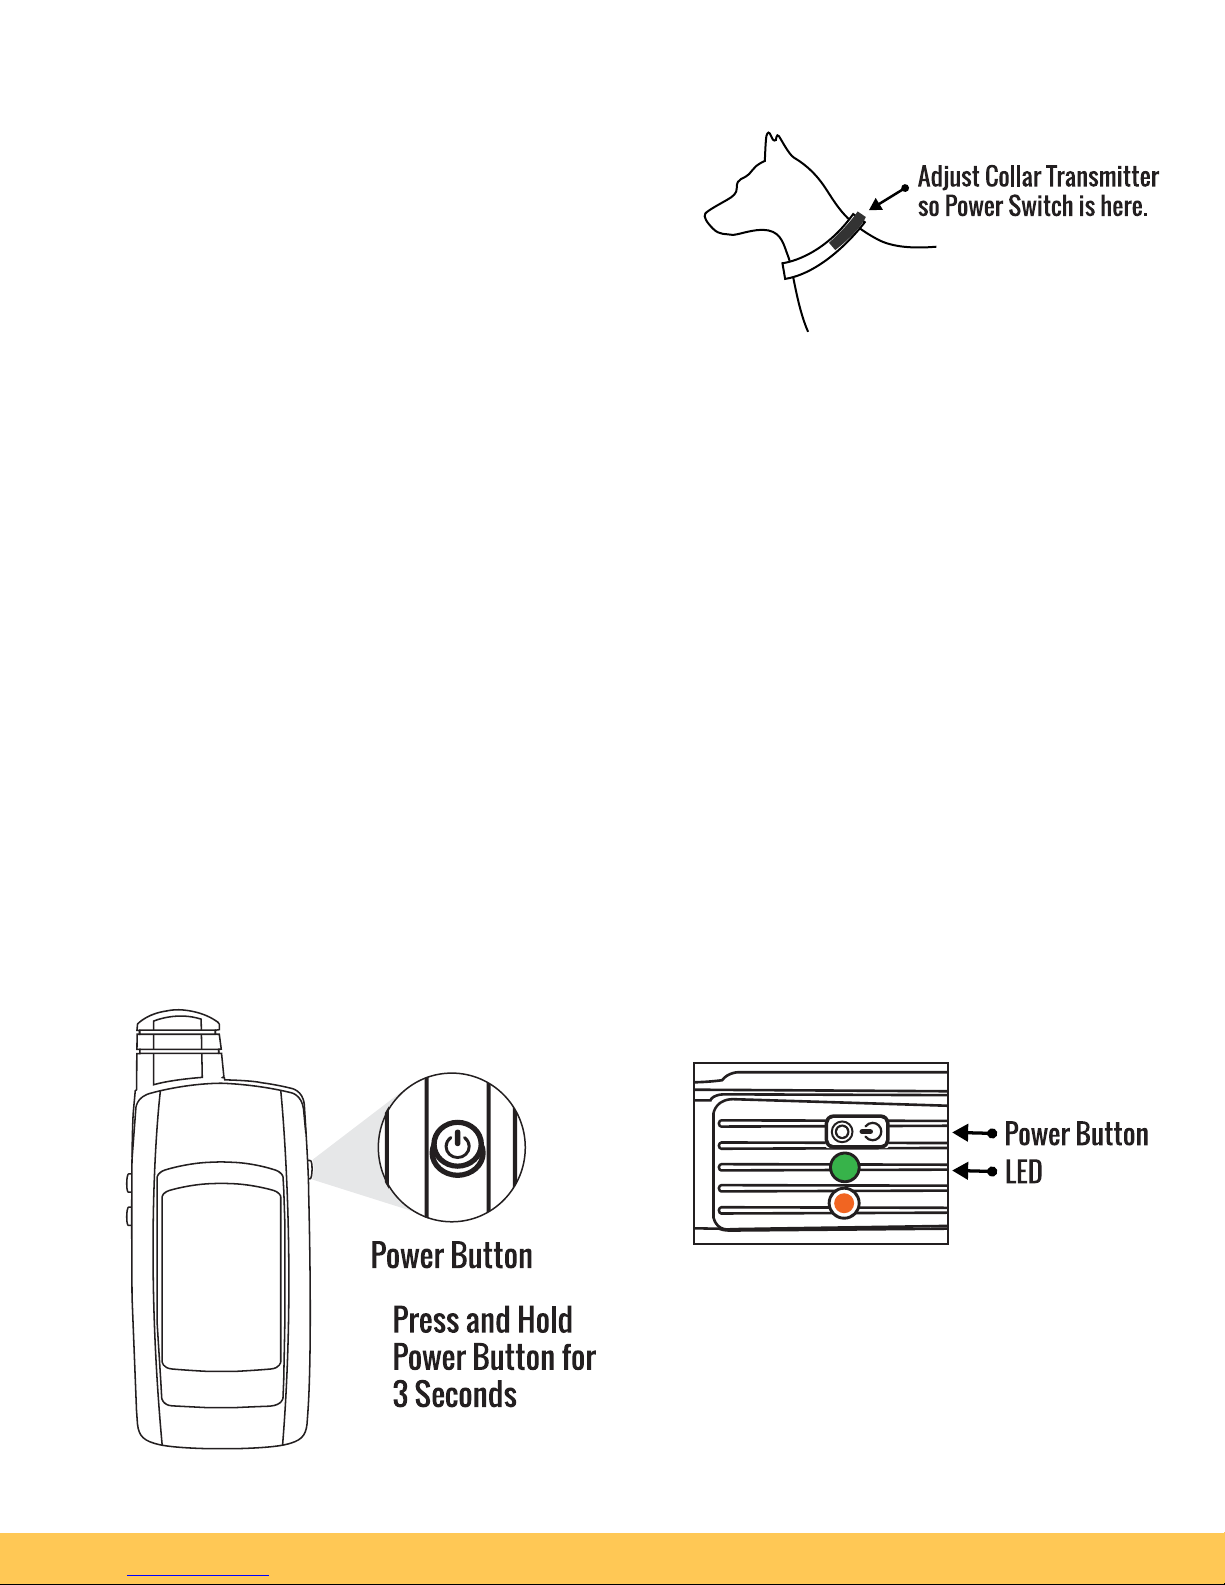
4. For optimal GPS performance, orientate
the Collar Transmitter so that the power
switch is as near as possible to the top
of your dog’s neck. This orientation
provides the widest view of the sky for
the GPS antenna embedded in the
Collar Transmitter.
Powering Your System
Handheld Receiver
To power on your Handheld Receiver, press and hold the power button until the LCD
screen appears.
GPS Collar Transmitter
Press and hold the power button until the LED flashes. The color of the LED will
indicate the remaining battery life for the Collar Transmitter.
Green: Battery charge is above 50%
Yellow: Battery charge is between 25 – 50%
Red: Battery charge is below 25%. Charging is recommended before placing Collar
Transmitter on your pet.
Understanding the Tracking Screens
The RoamEO SeekR has three tracking screens options available to help you monitor
your dog’s activity. Each tracking screen consists of a Status bar, the Tracking screen
and an Option bar.
PetTronix RoamEO SeekR Owners Manual 2