manuals.online logo
Brands
  1. Home
  2. •
  3. Brands
  4. •
  5. Philips
  6. •
  7. CRT TV
  8. •
  9. Philips M-Link 32PT81S1 User manual

Philips M-Link 32PT81S1 User manual

1
QUICK USE AND INSTALLATION GUIDE
TABLE OF CONTENTS
Getting Started
Warning/Precautions..................................1
Hooking Up Your TV ................................1
Basic TV and Remote Control Operation .................2
How to Use the Install Controls ...........................3–4
Using the Language Control......................................3
Setting the Tuner Mode .............................................3
Setting the TV to Auto Program Channels................3
Using the Channel Edit Control ................................4
Setting the Channel Name Control............................4
How to use the AutoChron™ control........................4
12 1
2
3
4
5
6
7
8
9
10
11
• For details on product registration, warranty,
and service, refer to the other literature included
with your TV information packet.
Please retain all these materials and keep them
handy for future reference.
WARNING: TO PREVENT FIRE OR SHOCK
HAZARD, DO NOT EXPOSE THIS UNIT TO
RAIN OR EXCESSIVE MOISTURE.
Model 32PT81S1
Color Television and Remote Control
NOTE: This Quick Use Guide may be used with
other models. Some of the features listed may or
may not apply to your TV.
3135 015 21371
ANT "A"
75Ω
L/Mono
Monitor out
VIDEO
S-VIDEO
PIP ANT "B"
75Ω
SURROUND SOUND
88
+ R – – L +
AV1 in
Y
Pb
Pr
AV2 in
AUDIO
R
M-Link
12
3
ANT"A"
75Ω
L/Mono
Monitorout
VIDEO
S-VIDEO
PIPANT "B"
75Ω
SURROUNDSOUND
88
+ R – – L +
AV1in
Y
Pb
Pr
AV2in
AUDIO
R
M-Link
IN
OUT
1
2
3 4
For homes with cable
TV converter descram-
bler boxes (with premi-
um/movie channels scram-
bled), follow the steps to
the right for an alternative
ANT A and PIP ANT B
feature hookup. Note that
the Cable TV signal will be
split before connection to
the converter box (an
optional two-way, 75-ohm
signal splitter will be
required).
CABLE BOX
CABLE CONVERTER BOXES
Connect your cable
TV signal to the single, 75-ohm
input plug on a two-way signal
splitter (optional).
Connect one end of the
RF coaxial cable to each of
the output plugs on the 75-ohm
signal splitter. The two lengths
of RF coaxial cable need F-
type connectors (screw-on or
push type) for both ends.
Round Cable
75Ω(Ohm) Cable TV Company
Cable TV Signal
Connect one of the signal
splitter outputs to the input
terminal on the Cable TV con-
verter box. Then route another
connection from the cable con-
verter output terminal to the
ANT A input on the rear of the
TV.
Your TV has two sepa-
rate ANT(enna)/cable
inputs on the rear of the
set. These two signal inputs
offer convenient hookup
options for both normal TV
program viewing and
Picture-In-Picture (PIP)
features.
The ANT(enna) A input is
intended for use and view-
ing on the TV’s main
screen. Your home’s pri-
mary antenna or cable TV
signal should be connected
to this input for normal TV
setup, use, and feature
operation.
The PIP ANT(enna) B
input is a second, or auxil-
iary, signal source
designed to supply your
TV’s Picture-In-Picture
(PIP) feature. For many
homes, the use of a single,
existing antenna or cable
TV source for both ANT A
and PIP ANT B will be the
preferred method of con-
nection. This type of con-
nection (optional signal
splitter required) will work
properly for the TV’s main
onscreen features, as well
as retain all the features
designed for PIP. For more
details, refer to the Picture-
In-Picture section in your
other owner’s manual.
ANTENNA OR
CABLE TV
ANT(ENNA) A & B INPUTS Remember, be
sure to set the TV for
the type signal to
which you've connect-
ed. (See the “Tuner
Mode A/B” section on
page 3.)
Your TV can set itself
to select only the chan-
nel numbers on your
cable system (see
“Auto Program" on
page 3). If you use a
cable converter box, set
the TV to the same
channel as the convert-
er's CH 3/4 switch (on
the back of the convert-
er).
Contact your dealer,
or call our Parts
Information Center at
1-800-851-8885 to
order the following
accessories:
• Two-way signal
splitter
• 300Ω(ohm) to
75Ω(ohm) adapter
• Combination
VHF/UHF antenna.
SMART
HELP
A typical ANT(enna)
A and PIP ANT B connection
(using a common signal source
and an optional signal splitter):
If your antenna or cable TV
signal has a round cable con-
nector (75 ohm) on the end,
then you're ready to connect it
to the 75-ohm signal splitter.
If your antenna has flat, twin-
lead wire (300 ohm), you first
need to attach the antenna wires
to the screws on a 300- to 75-
ohm adapter before connecting
to the 75-ohm signal splitter.
Connect your Antenna or
Cable TV signal to the single,
75-ohm input plug on the two-
way signal splitter (optional).
Then connect two lengths of RF
coaxial cable to the two output
plugs on the two-way signal
splitter (F-type connector on
both ends).
300Ω(Ohm) to
75Ω(Ohm) Adapter
Twin–lead
Wire
Back of TV
Round Cable
75Ω(Ohm)
- Outdoor or Indoor Antenna -
Receives normal broadcast channels
2–13 (VHF) and 14–69 (UHF).
OR
NOTE: Proper operation of your TV is not dependent
upon connection of the PIPANT B input. The main purpose
of the input is to provide an easily connected, dedicated picture
source for use of the PIP feature. The PIPANT B input can,
however, be used to connect and display other signal source
options such as a satellite dish system, an additional external
antenna, a VCR, or a video game, for example.
NOTE: Although the PIPANT B input can be used and
swapped as the source for the TV’s main picture, certain
setup features (such as AutoChron™) are based only on a sig-
nal being detected at the ANTA input. To ensure that all fea-
tures are operating properly, you may not want to rely solely on
the PIP ANT B input as your TV’s main screen signal source.
Connect the twin output
plugs on the signal splitter to
the ANT A and PIP ANT B
inputs on the rear of the TV.
Push the round connector end of
the RF coaxial cable onto the
ANT(enna) plug and screw it
down tightly (if using threaded
cables).
OPTIONAL TWO-WAY
SIGNAL SPLITTER
OR
Combination VHF/UHF Antenna
(single, 75-ohm input to twin,
75-ohm outputs – optional RF
coaxial connecting cables
also required)
ANT(enna) A
Input
PIP ANT(enna)
B Input
• The signal routed to
the TV’s PIPANT B
input will allow for the
selection and viewing of
cable channels at the TV
(except for the scrambled
premium/movie chan-
nels).
OPTIONAL TWO-WAY
SIGNAL SPLITTER
Cable TV Converter
Box Connection
Cable TV Company
Connect the remaining
signal splitter output from
the splitter to the PIP ANT B
input on the rear of the TV.
• The signal routed to the TV’s ANTA
input will allow for premium/movie
channels to be viewable on the TV.
• Channel selection will be at the converter.
• The ANT Ainput channel on the TV
should be set to the same output channel
as the converter box (usually CH 3 or 4).
Connect to ANT A Input Connect to PIP ANT B Input
2
SLEEP POWER
ON/OFF POSITION FREEZE
SWAP PIP CH
PICTURE
VOL CH
MUTE
MENU
M-LINK
SOUND
STATUS/EXIT
SOURCE CC CLOCK
4
A/CH
TV/VCR
PIP
SOURCE UP DN
HOME
ITR/REC HOME PERSONAL
VIDEO MOVIES
INCR. SURR.
PROGRAM LIST
SURF
OPEN/CLOSE TUNER A/B
POWER
1
REMOTE SENSORWINDOW
–
VOL
+
–
CH
+
MENU
2
3
TV AND REMOTE CONTROL OPERATION
TELEVISION
To load the supplied batteries into the remote:
1. Remove the battery compartment lid on the back of the remote.
2. Place the batteries (2-AA) in the
remote. Be sure the (+) and (–) ends
of the batteries line up correctly (the
inside of the case is marked).
3. Reattach the battery lid.
BATTERY INSTALLATION
REMOTE
SLEEP
TV/VCR ON/OFF POSITION FREEZE
SWAP SOURCE
UP
SOUND PICTURE
MENU
CH
MUTE
PIP CH
SOURCE CC CLOCK
ITR/REC HOME HOME PERSONAL
VIDEO MOVIES
INCR. SURR.
PROGRAM LIST
SURF
OPEN/CLOSE
POWER
DN
A/CH
PIP
M-LINK
VOL
STATUS/EXIT
TUNER A/B
OK
Power Button
Press to turn the TV ON and OFF.
PIP Buttons
Press to operate Picture-In-Picture features. See the PIP
section in the Instructions for Use manual for details.
Light Button
Press to back-light the buttons on the remote control.
Number Buttons
Press the number buttons to select TV channels. When
selecting single-digit channels, press the number of the
desired channel. The TV will pause for a few seconds and
then tune to the selected channel. (Note: You can press 0,
then the number also.) For channels 100 and above, first
press 1then the next two numbers of the desired channel.
Picture Button
Press to select an AutoPicture™ control. Choose from four
factory-set controls (MOVIES, SPORTS, WEAK SIGNAL,
and MULTI MEDIA) and a PERSONAL control that you
set according to your own prefernces through the onscreen
PICTURE menu. The four factory-set controls will tailor
the TV picture so as to enhance the particular type of pro-
gram you are watiching, or improve the picture of a pro-
gram that has a weak signal.
M-Link Button
Press to access the onscreen menu for the M-Link feature.
(See the M-Link Instructions for Use that came with your
TV for details and instructions.)
Channel (+) or (–) Buttons
Press to change the tuned channel.
CC Button
Press to select Closed Captioning options within the menu.
(See the Instructions for Use manual for details.)
Clock Button
Press the CLOCK button to access the onscreen Clock
menu.
Personal Button
After you’ve followed the easy steps for recording a macro
(a set of up to eight actions) within the M-Link feature, press
this button to have M-Link run the macro. (See the M-Link
Instructions for Use that came with your TV for details and
instructions.)
Home Movies Button
After you’ve followed the easy steps for setting up your
DVD to work with the M-Link feature, you can press this
button to play your DVD discs. (See the M-Link Instructions
for Use that came with your TV for details and instructions.)
Surf Button
Press to select previously viewed channels. You can place up
to 10 channels in memory. Then by pressing the SURF button
you can quickly view the select channels. (See the “Using the
Channel Surf Control” section in your Instructions for Use
manual to see how to select a series of channels using the Surf
button.)
Tuner A/B Button
Press to select the signal coming from the ANT IN Aor ANT
IN B connection.
Open/Close Button
Press to open or close the DVD drawer for easy loading
and unloading of DVD discs.
Sleep Button
Press to set the TV to automatically turn itself OFF after a
period of time. Choose 15, 30, 45, 60, 90, 120, 180, or 240
minute before the TV will automatically turn off.
TV/VCR (A/CH) Button
TV/VCR – Press while in the VCR mode (the VCR indicator
on the front of the VCR will light) to view the playback of a
tape. Press again to place in the TV position (the VCR indica-
tor light will go off) to view one program while recording
another program.
A/CH – Press to toggle between the currently viewed chan-
nel and the previously viewed channel.
Sound Button
Press to select an AutoSound™ control. Choose from three
factory-set controls (VOICE, MUSIC, and THEATRE) and a
PERSONAL control that you set according to your own pref-
erences through the onscreen Sound menu. The three factory-
set controls will tailor the TV sound so as to enhance the par-
ticular type of program you are watching.
Menu Button
Press for the onscreen menu to appear. Pressing the menu
button after menu selections are made will eliminate the
menu from the display.
Cursor Buttons (Left, Right, Up, Down)
Press these buttons to highlight, select, and adjust items on
the TV's onscreen menu.
Volume (+) or (–) Buttons
Press to adjust the TV sound level.
Mute Button
Press to turn the TV sound OFF. Press again to return the
sound to its previous level.
Status/Exit Button
Press to see the current channel number on the TV screen.
Also press to clear the TV screen after control adjustments.
Source Button
Press repeatedly to select the different signal sources con-
nected to the A/V inputs on the TV.
ITR/REC Button
After you’ve followed the easy steps for setting up your
VCR to work with the M-Link feature, you can press this
button to record TV programs with your VCR. (See the
M-Link Instructions for Use that came with your TV for
details and instructions.)
Home Video Button
After you’ve followed the easy steps for setting up your
VCR to work with the M-Link feature, you can press this
button to play videotapes on your VCR. (See the M-Link
Instructions for Use that came with your TV for details and
instructions.)
VCR §§, ■, ©, ©©, II Buttons
Press to rewind, stop, play, fastforward, or pause a
videotape.
Incr. Surr. Button
Press to set various factory Surround Sound listening modes.
Program List/OK Button
Press to display a list of channel numbers and their names
(see the “Tuner,” “Auto Program,” “Channel Edit,” and
“Name” sections on pages 3 and 4 for proper setup). Each
channel will appear as a selectable menu item. The current
channel will be highlighted by default. Only five channels
will be shown onscreen at one time; press the CURSOR UP
or CURSOR DOWN button to scroll the list and highlight a
channel. Press the CURSOR RIGHT button to tune to the
highlighted channel. Channels marked “Skipped” in the
“Channel Edit” control will not appear in the list. Each
channel that is being blocked by AutoLock™ will appear
with a padlock icon to indicate that the channel is not view-
able. PROGRAM LIST/OK also works as a
confirmation/select button for VCR use.
SMART HELP
Remember, you can press
any button on the front of
the TV to turn the TV ON.
The tuned channel number will
always briefly appear on the screen
when the TV is first turned ON
(and when the channel is changed).
You also can press the
STATUS/EXIT button (on the
remote control) to see what chan-
nel the TV is on.
Press the POWER
button to turn the TV ON. Press the VOL (+) button
to increase the sound level or
the VOL (–) button to lower
the sound level.
Pressing both VOL (+) and (–)
buttons at the same time will
display the onscreen menu.
After you are in the menu, use
these buttons to make adjust-
ments or selections.
Press the CH (➐) down or
(☞) up button to select TV chan-
nels. Use these buttons to make
adjustments or selections in the
onscreen menu.
NOTE: Press three number
buttons on the remote control
for channels 100 or above. For
example: Press 1then 2 then 5
for channel 125.
Point the remote control
toward the remote sensor win-
dow on the TV when operat-
ing the TV with the remote.
3
SLEEP POWER
TV/VCR ON/OFF POSITION FREEZE
PIP
UP DN
PIP CH
SOURCE
SWAP
123
456
789
0
PICTURE
SOUND
MENU
M-LINK
MUTE
VOL CH
SOURCE
STATUS/EXIT
CC CLOCK
PERSONAL
HOME
HOME
ITR/REC
VIDEO MOVIES
SURF
INCR. SURR.
PROGRAM LIST OPEN/CLOSE
TUNE
OK
PICTURE
SOUND
FEATURES
INSTALL
LANGUAGE
TUNER MODE A
TUNER MODE B
AUTO PROGRAM
CHANNEL EDIT LANGUAGE
TUNER MODE A
TUNER MODE B
AUTO PROGRAM
CHANNEL EDIT
INSTALL INSTALL
LANGUAGE
TUNER MODE A
TUNER MODE B
AUTO PROGRAM
CHANNEL EDIT
ENGLISH
FRANCAIS
ESPANOL
4
1
523
5
˜
6
HOW TO USE THE INSTALLATION FEATURES
For or Spanish- and
French-speaking TV
owners, an onscreen LAN-
GUAGE option is present.
The LANGUAGE control
enables you to set the TVÕs
onscreen menu to be shown
in either English, Spanish, or
French.
LANGUAGE
Press the MENU but-
ton on the remote control to
show the onscreen menu.
Press the CURSOR
DOWN button repeatedly
until INSTALL is highlighted.
Press the CURSOR
RIGHT button to highlight
the LANGUAGE control
options.
Press the CURSOR UP
or CURSOR DOWN button
to select ENGLISH,
ESPANOL (Spanish), or
FRANCAIS (French).
Press the CURSOR
RIGHT button to shift the
menu to the left and highlight
LANGUAGE.
SLEEP POWER
TV/VCR ON/OFF POSITION FREEZE
PIP
UP DN
PIP CH
SOURCE
SWAP
123
456
789
0
PICTURE
SOUND
MENU
M-LINK
MUTE
VOL CH
SOURCE
STATUS/EXIT
CC CLOCK
PERSONAL
HOME
HOME
ITR/REC
VIDEO MOVIES
SURF
INCR. SURR.
RO
GRAM LIST OPEN/CLOSE
PICTURE
SOUND
FEATURES
INSTALL
LANGUAGE
TUNER MODE A
TUNER MODE B
AUTO PROGRAM
CHANNEL EDIT LANGUAGE
TUNER MODE A
TUNER MODE B
AUTO PROGRAM
CHANNEL EDIT
INSTALL INSTALL
SEARCH
5
1
3
INSTALL
LANGUAGE
TUNER MODE A
TUNER MODE B
AUTO PROGRAM
CHANNEL EDIT
CABLE TUN-A
PLEASE WAIT
CHANNEL 12
LANGUAGE
TUNER MODE A
TUNER MODE B
AUTO PROGRAM
CHANNEL EDIT
24
6
Your TV can automatically
set itself for local area
(or cable TV) channels. This
makes it easy for you to
select only the TV stations in
your area by pressing the
CHANNEL (+) or (Ð) button.
AUTO PROGRAM
Press the MENU but-
ton on the remote control to
show the onscreen menu.
Press the CURSOR
DOWN button repeatedly until
INSTALL is highlighted.
Press the CURSOR
RIGHT button to shift the
menu to the left. LANGUAGE
will be highlighted.
SLEEP POWER
TV/VCR ON/OFF POSITION FREEZE
PIP
UP DN
PIP CH
SOURCE
SWAP
123
456
789
0
PICTURE
SOUND
MENU
M-LINK
MUTE
VOL CH
SOURCE
STATUS/EXIT
CC CLOCK
PERSONAL
HOME
HOME
ITR/REC
VIDEO MOVIES
SURF
INCR. SURR.
PR
OGRAM LIST OPEN/CLOSE
TUNER A/B
PICTURE
SOUND
FEATURES
INSTALL
LANGUAGE
TUNER MODE A
TUNER MODE B
AUTO PROGRAM
CHANNEL EDIT
LANGUAGE
TUNER MODE A
TUNER MODE B
AUTO PROGRAM
CHANNEL EDIT
INSTALL
INSTALL
LANGUAGE
TUNER MODE A
TUNER MODE B
AUTO PROGRAM
CHANNEL EDIT
1
3
INSTALL
LANGUAGE
TUNER MODE A
TUNER MODE B
AUTO PROGRAM
CHANNEL EDIT
AUTO
CABLE
ANTENNA
246
5
7
Your TV is equipped with
two tuners. This allows for
easy Picture-In-Picture usage
or a dual-signal source such
as cable and satellite. The
TUNER MODE A and
TUNER MODE B feature will
let you set each tuner for a
CABLE or an ANTENNA sig-
nal, or they can be set to
AUTO. The AUTO setting will
choose the type of signal
detected when the Auto
Program feature is activated.
(See “Auto Program” below.)
T
UNER
M
ODE
A/B
Press the MENU but-
ton on the remote control to
show the onscreen menu.
Press the CURSOR
DOWN button repeatedly until
INSTALL is highlighted.
Press the CURSOR
RIGHT button to highlight the
tuner options.
With the TUNER
MODE control set to AUTO,
Auto Program (see below)
will detect whether or not
cable input is present.
If, however, you want to set
the TUNER MODE to
CABLE or ANTENNA, press
the CURSOR UP or CUR-
SOR DOWN button until
either CABLE or ANTENNA
is highlighted.
Press the CURSOR
RIGHT button to shift the
menu to the left.
Press the CURSOR
DOWN button repeatedly
until the AUTO PROGRAM
control is highlighted.
Press the CURSOR
RIGHT button to start the
Auto Program scanning of
channels.
After youÕve run Auto
Program, check out the
results. Press the CHANNEL
(+) or (Ð) button and see which
channels you can select.
Remember, an antenna or cable
TV signal must first be con-
nected to your TV (see instruc-
tions for making connections
on page 1 of this guide).
If you want to delete any
unwanted channels from the
TVÕs memory, see the ÒCHAN-
NEL EDITÓ section on page 4.
SMART HELP
Remember, the LANGUAGE control
makes only the TVÕs onscreen MENU items
appear in English, Spanish, or French text. It does
not change the other onscreen text features, such as
Closed Captioning (CC), with TV shows.
Pressing the STATUS/EXIT button on your remote
control after making adjustments to the TV will
remove the menu from the screen. You also can
back out of the menu by repeatedly pushing the
MENU button on your remote control.
SMART HELP
Press the CURSOR
DOWN button until either
TUNER MODE A or TUNER
MODE B is highlighted.
When CABLE is
selected, channels 1–125
are available.
When ANTENNA is selected,
channels 2–69 are available.
SMART HELP
Press the
STATUS/EXIT button to
clear the menu from the
screen.
Press the
STATUS/EXIT button to
clear the menu from the
screen.
Press the
STATUS/EXIT button to
clear the menu from the
screen.
4
PICTURE
SOUND
FEATURES
INSTALL
LANGUAGE
TUNER MODE A
TUNER MODE B
AUTO PROGRAM
CHANNEL EDIT
LANGUAGE
TUNER MODE A
TUNER MODE B
AUTO PROGRAM
CHANNEL EDIT
INSTALL
INSTALL
LANGUAGE
TUNER A
TUNER MODE B
AUTO PROGRAM
CHANNEL EDIT
INSTALL
LANGUAGE
TUNER MODE A
TUNER MODE B
AUTO PROGRAM
CHANNEL EDIT
66 SKIPPED
67 SKIPPED
68 SKIPPED
69 SKIPPED
AV1
SLEEP POWER
TV/VCR ON/OFF POSITION FREEZE
PIP
UP DN
PIP CH
SOURCE
SWAP
123
456
789
0
PICTURE
SOUND
MENU
M-LINK
MUTE
VOL CH
SOURCE
STATUS/EXIT
CC CLOCK
PERSONAL
HOME
HOME
ITR/REC
VIDEO MOVIES
SURF
TUNER A/B
1
3
246
5
6
7
HOW TO USE THE INSTALLATION FEATURES
CHANNEL EDIT makes it
easy for you to add or
delete channels from the list
of channels stored in the TVÕs
memory.
CHANNEL EDIT
Press the MENU but-
ton on the remote control to
show the onscreen menu.
Press the CURSOR
DOWN button repeatedly
until INSTALL is highlighted.
Press the CURSOR
DOWN button repeatedly
until the CHANNEL EDIT
control is highlighted.
Press the CURSOR
RIGHT button to access the
CHANNEL EDIT menu.
Press the CURSOR
RIGHT button to shift the
menu to the left. LANGUAGE
will be highlighted.
PICTURE
SOUND
FEATURES
INSTALL
LANGUAGE
TUNER MODE A
TUNER MODE B
AUTO PROGRAM
CHANNEL EDIT
LANGUAGE
TUNER MODE A
TUNER MODE B
AUTO PROGRAM
CHANNEL EDIT
INSTALL INSTALL INSTALL
TUNER MODE B
AUTO PROGRAM
CHANNEL EDIT
AutoChron
NAME
SLEEP POWER
TV/VCR ON/OFF POSITION FREEZE
PIP
UP DN
PIP CH
SOURCE
SWAP
123
456
789
0
PICTURE
SOUND
MENU
M-LINK
MUTE
VOL CH
SOURCE
STATUS/EXIT
CC CLOCK
PERSONAL
HOME
HOME
ITR/REC
VIDEO MOVIES
SURF
SU
RR.
PE
N/CLOSE
TUNER A/B
3
246
5
7
1
8
TUNER MODE B
AUTO PROGRAM
CHANNEL EDIT
AutoChron
NAME
W- WX- WXY- WXYZ- WXYZ3
The channel NAME feature
allows you to list the
ÒcallÓ letters of your favorite
stations beside their channel
numbers when they appear
on the screen. The TV has in
memory a list of the 50 most
popular channel names (for
example, ABC, NBC, FOX,
etc.). You also can enter a
custom name (up to five
characters).
NAME
Press the MENU but-
ton on the remote control to
show the onscreen menu.
Press the CURSOR
DOWN button repeatedly
until INSTALL in highlighted.
Press the CURSOR
DOWN button repeatedly until
the NAME control is highlighted.
After you have selected a
name for the channel, press
the MENU button to save the
name in the TVÕs memory.
Press the CURSOR
RIGHT button to shift the
menu to the left. LANGUAGE
will be highlighted.
PICTURE
SOUND
FEATURES
INSTALL
BRIGHTNESS
COLOR
PICTURE
SHARPNESS
STORE
PICTURE
SOUND
FEATURES
INSTALL
LANGUAGE
TUNER MODE A
TUNER MODE B
AUTO PROGRAM
CHANNEL EDIT
LANGUAGE
TUNER MODE A
TUNER MODE B
AUTO PROGRAM
CHANNEL EDIT
INSTALL
TUNER MODE B
AUTO PORGRAM
CHANNEL EDIT
AutoChron
NAME
INSTALL TUNER MODE B
AUTO PORGRAM
CHANNEL EDIT
AutoChron
NAME
INSTALL
SET TIME
AUTO
MANUAL
TUNER MODE B
AUTO PORGRAM
CHANNEL EDIT
AutoChron
NAME
INSTALL
TIME ZONE?
CENTRAL
MOUNTAIN
PACIFIC
TUNER MODE B
AUTO PORGRAM
CHANNEL EDIT
AutoChron
NAME
INSTALL
DAYLIGHT
SAVING TIME?
YES
NO
TUNER MODE B
AUTO PORGRAM
CHANNEL EDIT
AutoChron
NAME
INSTALL
SEARCH FOR
TIME . . .
(Please wait)
12 PBS
TUNER MODE B
AUTO PORGRAM
CHANNEL EDIT
AutoChron
NAME
INSTALL
SEARCH FOR
TIME . . .
Time Found
PRESS TO END
TUNER MODE B
AUTO PORGRAM
CHANNEL EDIT
AutoChron
NAME
INSTALL
SEARCH FOR
TIME . . .
Time Found
11:00 AM
TUNER MODE B
AUTO PORGRAM
CHANNEL EDIT
AutoChron
NAME
INSTALL
SET TIME
AUTO
MANUAL
TUNER MODE B
AUTO PORGRAM
CHANNEL EDIT
AutoChron
NAME
INSTALL
ENTER TIME
11:00 AM
AutoChronTM can automat-
ically set the TVÕs
onscreen clock. Because the
time is received from a
broadcast signal, you must be
sure that a cable TV or
antenna signal is present
before you attempt to use the
AutoChronTM feature.
AutoChron™
Press the MENU but-
ton on the remote to show the
onscreen menu.
Press the CURSOR
DOWN button repeatedly
until INSTALL is highlighted.
Press the CURSOR DOWN
button until the AutoChron control
is highlighted.
Press the CURSOR
RIGHT button to shift the
menu to the left. LANGUAGE
will be highlighted.
Press the CURSOR UP
or CURSOR DOWN button to
scroll through the list of avail-
able channels. Or press the
number buttons on your remote
control to select a specific chan-
nel (for example, press 0and
then 2to select channel 2).
With the channel you
want to edit selected, press the
CURSOR RIGHT button to
mark the channel as SKIPPED.
The channel youÕve marked
SKIPPED will not appear when
you are changing from channel
to channel while watching TV.
NOTE: When you want to
add a channel that has been
marked SKIPPED, press the
CURSOR UP or CURSOR
DOWN button to highlight
the channel; then press the
CURSOR RIGHT button to
remove the word SKIPPED.
Press the CURSOR
RIGHT button to highlight the
NAME options area.
Press the CURSOR
RIGHT button again; then
press the CURSOR UP or
CURSOR DOWN button to
scroll through a list of options for
the first character (A through Z, 0
through 9). Press the CURSOR
RIGHT button and repeat for
the second, third, fourth, and fifth
characters.
Press the CURSOR
RIGHT button to start the
AutoChron™ feature. Then just
follow the onscreen instructions
to set the clock.
NOTE: When setting the
clock manually, press the
number buttons on the remote
control to enter the time.
Don’t forget to setAM or PM
with the CURSOR UP or
CURSOR DOWN button.
Follow these
onscreen
instructions
to set
AutoChron™
automatically.
Follow these
onscreen
instructions
to set
AutoChron™
manually.
The channels available for you to edit are the ones that the AUTO PROGRAM feature found through a search of your
TV antenna or cable TV signals. Channels not found during the search are marked SKIPPED.
SMART HELP
Press the
STATUS/EXIT button to
clear the menu from the
screen.
The five characters that the channel NAME feature allows you to
input can be letters, a dash character, or the numbers 0 through 9.
SMART HELP
Press the CURSOR
RIGHT button to select AUTO.
Within a few seconds, a menu
for choosing your time zone will
appear.
Press the CURSOR UP
or CURSOR DOWN button
to highlight your correct time
zone.
With your correct time
zone highlighted, press the
CURSOR RIGHT button.
Within a few seconds, you will
be given the option to choose
whether you want to select
Daylight Savings Time.
Press the CURSOR UP
or CUSOR DOWN button to
navigate through the YES and
NO selection list; then with the
item you want to select high-
lighted, press the CURSOR
RIGHT button. Follow the
onscreen instructions (shown
below) to set the AutoChronª
time either automatically or
manually.
Up to 5 characters

Other manuals for M-Link 32PT81S1

1

This manual suits for next models

1

Other Philips CRT TV manuals

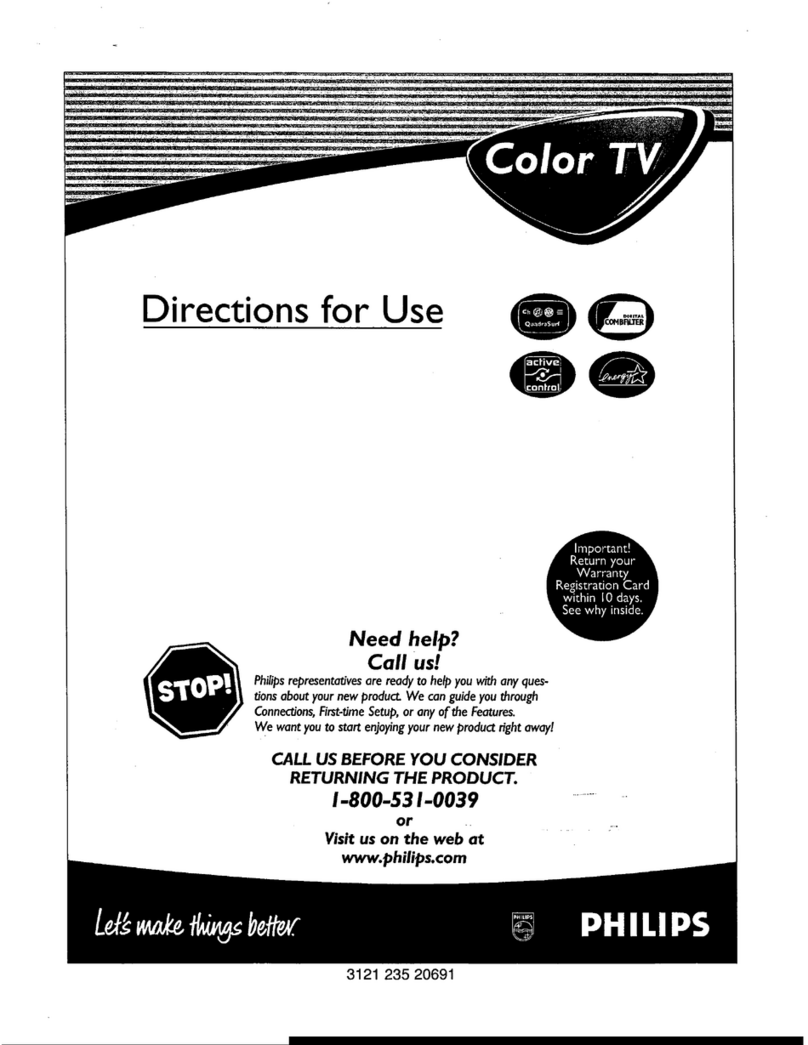
Philips 3121 235 20691 Manual

Philips

Philips 3121 235 20691 Manual

Philips 25SL5766/30S User manual

Philips

Philips 25SL5766/30S User manual

Philips HD2518C User manual

Philips

Philips HD2518C User manual

Philips TP3285C1 User manual

Philips

Philips TP3285C1 User manual

Philips 28PW6615 User manual

Philips

Philips 28PW6615 User manual

Philips TP3697B User manual

Philips

Philips TP3697B User manual

Philips 14PT135B User manual

Philips

Philips 14PT135B User manual

Philips 29PT9021/05 User manual

Philips

Philips 29PT9021/05 User manual

Philips 21PT4440/94 User manual

Philips

Philips 21PT4440/94 User manual

Philips PR1305C User manual

Philips

Philips PR1305C User manual

Philips PR1909B User manual

Philips

Philips PR1909B User manual

Philips 29PT5458 User manual

Philips

Philips 29PT5458 User manual

Philips TP3684C User manual

Philips

Philips TP3684C User manual

Philips PA9032C User manual

Philips

Philips PA9032C User manual

Philips HD1918C User manual

Philips

Philips HD1918C User manual

Philips 14PT1686S User manual

Philips

Philips 14PT1686S User manual

Philips 29PT4641 User manual

Philips

Philips 29PT4641 User manual

Philips 28PT4524/05R User manual

Philips

Philips 28PT4524/05R User manual

Philips Magnavox TP 3675C User manual

Philips

Philips Magnavox TP 3675C User manual

Philips 29PT9413 - annexe 1 User manual

Philips

Philips 29PT9413 - annexe 1 User manual

Philips Match III Line 28PT842B/12 User manual

Philips

Philips Match III Line 28PT842B/12 User manual

Philips 17PT1666 User manual

Philips

Philips 17PT1666 User manual

Philips TS2757C User manual

Philips

Philips TS2757C User manual

Philips 28PT7308/12 User manual

Philips

Philips 28PT7308/12 User manual

Popular CRT TV manuals by other brands

Sony KV-21LS30U instruction manual

Sony

Sony KV-21LS30U instruction manual

Toshiba CE30C10 owner's manual

Toshiba

Toshiba CE30C10 owner's manual

Panasonic CT-27G14D operating instructions

Panasonic

Panasonic CT-27G14D operating instructions

Magnavox MS3650C - 36" Smart Ctv Directions for use

Magnavox

Magnavox MS3650C - 36" Smart Ctv Directions for use

Sony KD-34XBR970 - 34" Hdtv 16x9 Format Specifications

Sony

Sony KD-34XBR970 - 34" Hdtv 16x9 Format Specifications

Panasonic CT-13R25D Operating operating instructions

Panasonic

Panasonic CT-13R25D Operating operating instructions

Palsonic 5155PF owner's manual

Palsonic

Palsonic 5155PF owner's manual

RCA E13344 user guide

RCA

RCA E13344 user guide

Toshiba 30DF56 - 30" CRT TV Specification sheet

Toshiba

Toshiba 30DF56 - 30" CRT TV Specification sheet

Sony KV-13FS100 - 13" Fd Trinitron Wega Tv operating instructions

Sony

Sony KV-13FS100 - 13" Fd Trinitron Wega Tv operating instructions

Panasonic CT-32SX30 user guide

Panasonic

Panasonic CT-32SX30 user guide

Sylvania TVK139V owner's manual

Sylvania

Sylvania TVK139V owner's manual

Sony FD Trinitron KV-32FQ70K instruction manual

Sony

Sony FD Trinitron KV-32FQ70K instruction manual

Samsung CW-29A2083 Owner's instructions

Samsung

Samsung CW-29A2083 Owner's instructions

Toshiba 26DF56 owner's manual

Toshiba

Toshiba 26DF56 owner's manual

Panasonic CT-27G33 operating manual

Panasonic

Panasonic CT-27G33 operating manual

Sylvania 6427CTF owner's manual

Sylvania

Sylvania 6427CTF owner's manual

Sylvania SRT2323 owner's manual

Sylvania

Sylvania SRT2323 owner's manual

manuals.online logo
manuals.online logoBrands
  • About & Mission
  • Contact us
  • Privacy Policy
  • Terms and Conditions

Copyright 2025 Manuals.Online. All Rights Reserved.