manuals.online logo
Brands
  1. Home
  2. •
  3. Brands
  4. •
  5. Philips
  6. •
  7. Projection TV
  8. •
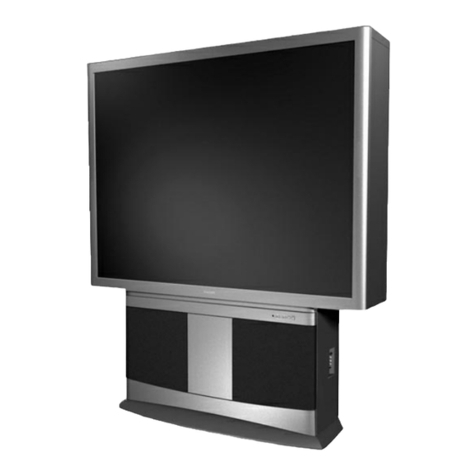
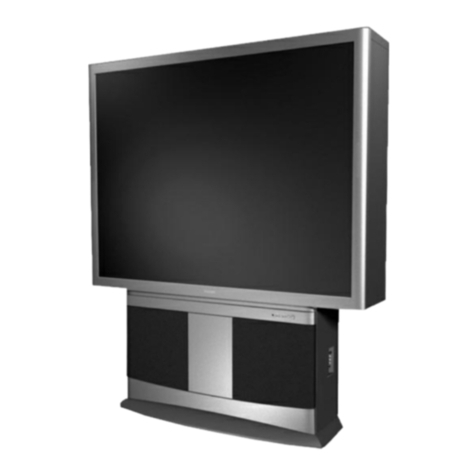
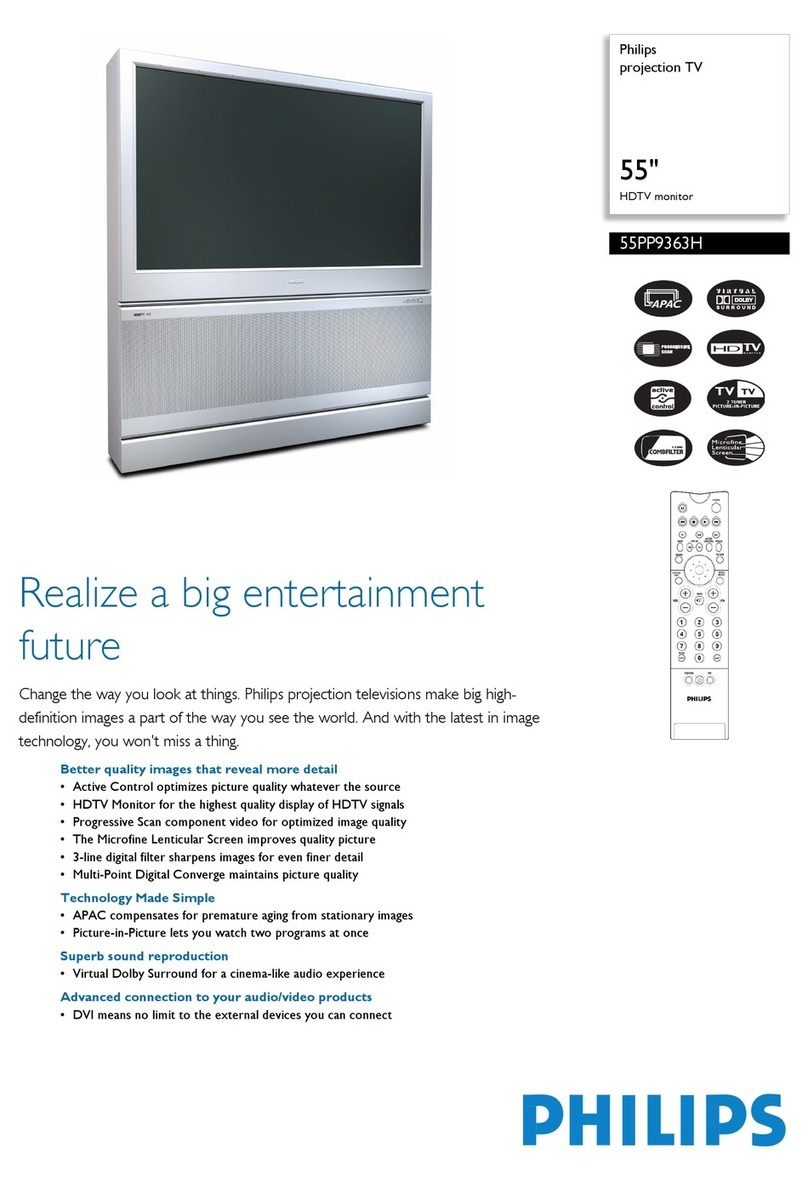
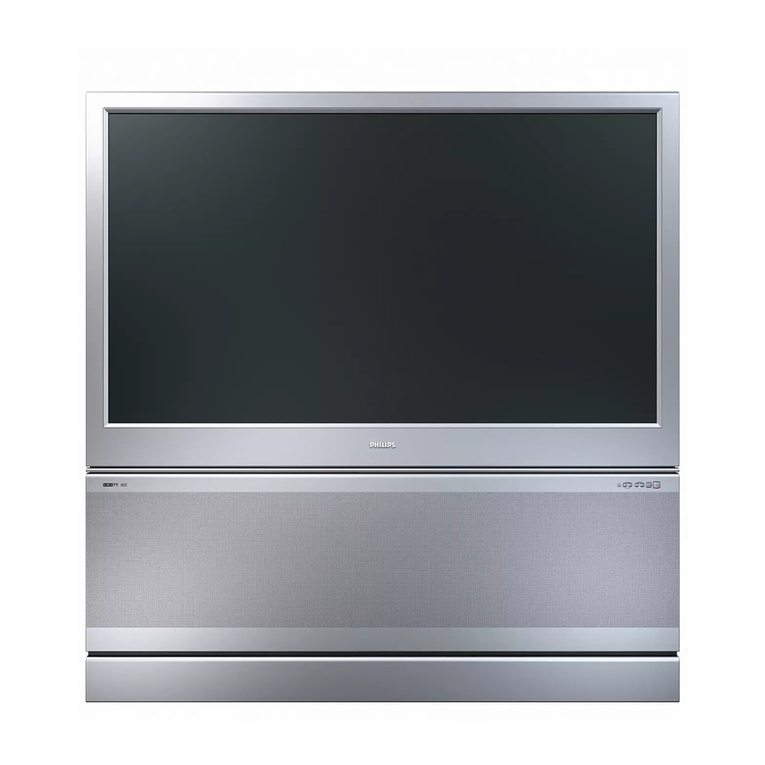
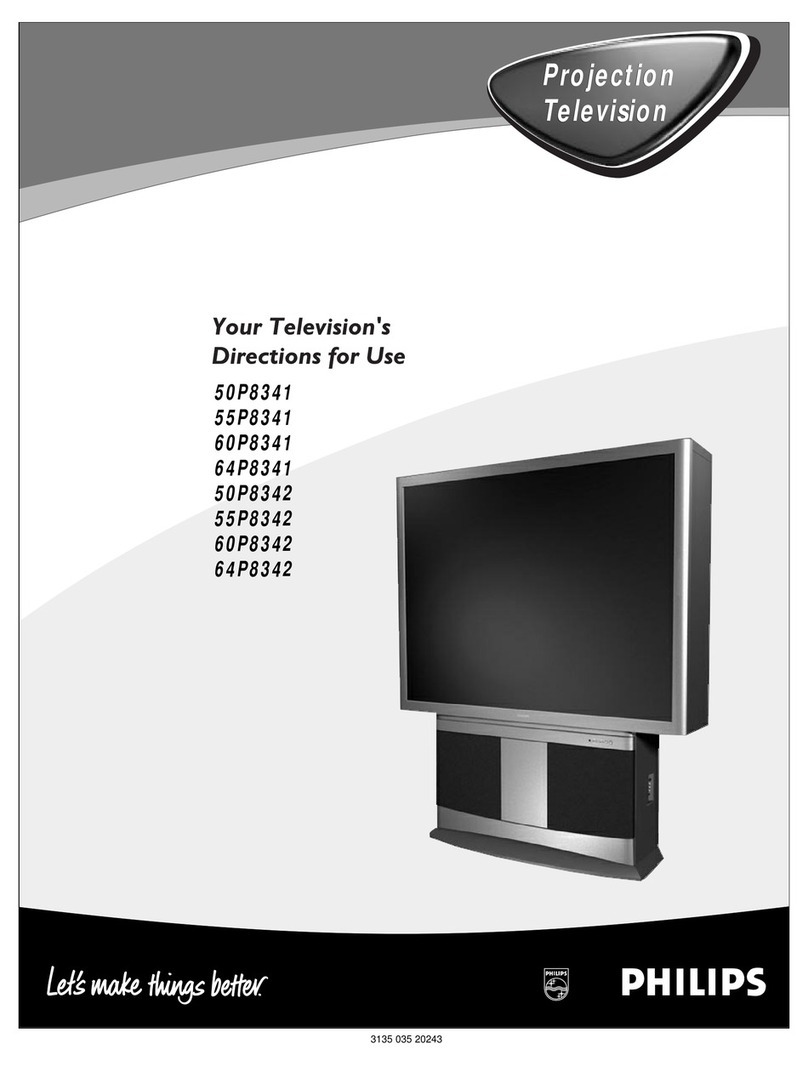
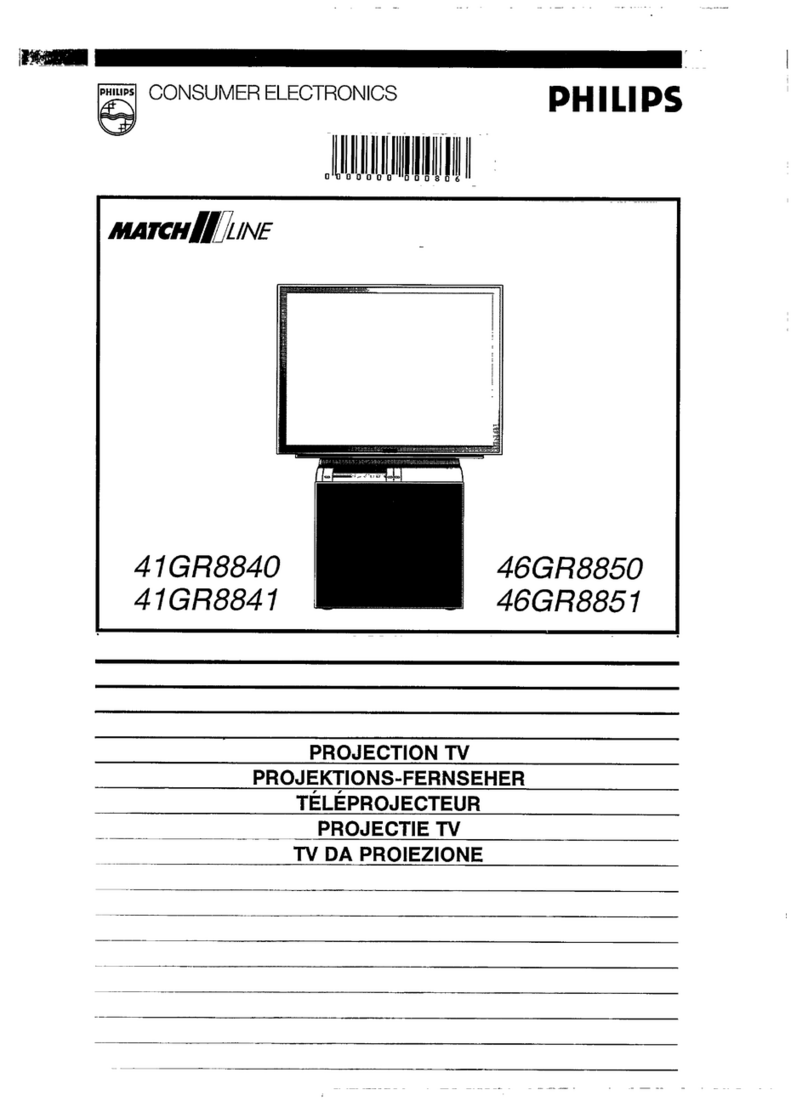
  9. Philips 60P916 User manual

Philips 60P916 User manual

Once your PHIL!PS purchase is registered, you're eligible to receive all the privileges of owning a
PH/L/PS product. So complete and return the Warranty Registration Card enclosed with your
purchase at once. And take advantage of these important benefits.
Congratulations on your purchase,
and welcome to the "family!" PHILIPS
Dear PHILIPS product owner:
Thank you for your confidence in PHILIPS. You've selected one of the best-built, best-backed
products
available today. And we'll do everything in our power to keep you happy with your purchase for many
years to come.
As a member of the PHILIPS "family," you're entitled to protection by one of the most comprehensive
warranties and outstanding service networks in the industry.
What's more, your purchase guarantees you'll receive all the information and special offers for which
you qualify, plus easy access to accessories from our convenient home shopping network.
And most importantly you can count on our uncompromising commitment to your total satisfaction.
All of this is our way of saying welcome-and thanks for investing in a PHILIPS product.
Sincerely,
Robert Minkhorst
President and Chief Executive Officer
P.S. Remember, to get the most from your PHILIPS
product, you must return your
Warranty Registration Card within 10 days. So
please mail it to us right now!
Know these
safetysymbo/s
CAUTION: TO REDUCE THE RISKOF ELECTRIC SHOCK, DO NOT
REMOVE COVER (OR BACK). NO USER,SERVICEABLE PARTS
INSIDE. REFER SERVICING TO QUALIFIED SERVICE PERSONNEL.
,_I_ This "bolt of lightning" indicates uninsulated material within your unit which may cause an
electrical shock. For the safety of everyone in your household, please do not remove product
covering.
_k The "exclamation point" calls attention to features for which you should read the enclosed
literature closely to prevent operating and maintenance problems.
WARNING: TO PREVENT FIRE OR SHOCK HAZARD, DO NOT EXPOSE THIS EQUIPMENT
TO RAIN OR MOISTURE.
CAUTION: To prevent electric shock, match wide blade of plug to wide slot, and fully insert.
ATTENTION: Pour _viter les chocs electriques, introduire la lame ta plus large de la fiche dans la
borne correspondante de la prise et pousser jusqu'au fond.
SAFETYINSTRUCTIONS-Readbefore operatingequipment
Thisproduct was designed and manufactured to meet strict quality and 11. Power-CordProtection-Power supply cords should be routed so
safety standards. There are, however, some installationand operation that they are not likelyto be walkedon or pinched by itemsplaced
precautionswhich you should beparticularly awareof. upon or against them, paying particular attention to cords and
plugs, convenience receptacles, and the point where they exit from
the appliance.
1. Read Instructions - All the safety and operating instructions should
beread before the appliance is operated.
2. Retain Instructions - The safety and operating instructions should
beretained for future reference.
3. Heed Warnings - All warnings on the appliance andin the operating
instructions should be adheredto.
4. Follow Instructions - All operating and use instructions should be
followed.
5. Water and Moisture - The appliance should not be used near water
- for example, near a bathtub, washbowl, kitchen sink, laundry tub,
in a wet basement or near a swimming pool, etc.
6. Carts and Stands - Theappliance should be used only with a cart or
standthat isrecommended by the manufacturer.
6A. An appliance and cart combination should be moved
with care. Quick stops, excessive force, and uneven
surfaces may cause the appliance and cart combination
to overturn.
6B. Tilt/Stability -All televisions must comply with recommended
international global safety standards for tilt and stability properties
of its cabinetdesign.
Do not compromise these design standards by applying exces-
sive pull force to the front, or top, of the cabinetwhich could
ultimately overturn the product.
Also, do not endangeryourself, or children, by placing elec-
tronic equipment/toys on the top of the cabinet. Such items
could unsuspectingly fall Fromthe top of the setand cause
product damage and/or personal injury.
7. Wall or Ceiling Mounting - The appliance should be mounted to a
wall or ceiling only as recommended by the manufacturer.
8. Ventilation - The applianceshould be situated so that its location or
position does not interfere with its proper ventilation. For example,
the appliance should not be situated on a bed, sofa, rug, or similar
surface that may block the ventilation openings; or, placed in a
built-in installation, such as a bookcaseor cabinet that may impede
the flow of airthrough the ventilation openings.
9. Heat - The appliance should be situated away from heat sources
such as radiators, heat registers, stoves, or other appliances
(including amplifiers) that produce heat.
10. Power Sources - The appliance should be connected to a power
supply only of the type described in the operating instructions or as
markedon the appliance.
12. Cleaning - The appliance should be cleaned only as recommended
bythe manufacturer.
13. Power Lines - An outdoor antenna should be located away from
power lines.
14. Outdoor Antenna Grounding - If an outside antenna is connectedto
the receiver, be sure the antenna system is grounded so as to
provide some protection against voltage surges and built up static
charges.
Section 810 of the National Electric Code, ANSI/NFPANo. 70-1984,
provides information with respect to proper grounding of the mats
and supporting structure grounding of the lead-in wife to an
antenna discharge unit, size of grounding connectors, location of
antenna-discharge unit, connection to grounding electrodes and
requirements for the grounding electrode. See Fig.below.
15. Non-use Periods - The power cord of the appliance should be
unplugged from the outlet when left unused for a long period of
time.
16. Object and Liquid Entry - Care should be taken so that objects do
not fall and liquids are not spilled into the enclosure through
openings.
17. Damage Requiring Service - The appliance should be serviced by
qualified service personnel when:
A. Thepower supply cord or theplug has beendamaged;or
B. Objects have fallen, or liquid has been spilled into the
appliance;or
C. Theappliance has beenexposedto rain; or
D. Theappliance does not appearto operate normally or exhibits
a marked change in performance; or
E. Theappliance has beendropped, or the enclosuredamaged.
18. Servicing - The user should not attempt to service the appliance
beyond that described in the operating instructions. AI/other
servicing should be referred to qualified service personnel.
Note to the CATVsystem installer: This reminder is provided to call the
CATVsystem installer's attention to Article 820-40 of the NEC that
provides guidelines for proper grounding and, in particular, specifies that
the cable ground shall be connected to the grounding system of the
building, ascloseto the point of cableentry aspractical.
Example of Antenna Grounding
as per NEC-National Electric Code
GROUNDCLAMP ANTENNALEADIN WIRE
ANTENNA DISCHARGE UNIT (NECSECTION810-20)
GROUNDING CONDUCTORS (NECSECTION 810-21)
GROUND CLAMPS
POWER SERVICE GROUNDING ELECTRODE SYSTEM (NECART250,PARTH)
ELECTRICSERVICE EQUIPMENT
Gettin_ Started
_ll Welcome/Product Registration ................... 2
Safety/Precautions ..................................................... 3
Table of Contents ....................................................... 4
Features, Model and Cabinet Infommtion ................. 5
On-Screen Features
PICTURE MENU
+Adjusting Color, Brighmess, Sharpness,
Tint, and Picture Controls ................................... 6
+Using the Clearview Control ............................... 7
+Adjusting the TV's Convergence Control ........... 8
+Using the Flesh Correction Control .................... 9
FEATURES MENU
+ Selecting a Picture Source ................................ 10
+Setting the TV for Closed Captioning ............... 11
+Setting the TV for Cable or Antenna Signals.... 12
+Adding Channels in Memory (Automatically) .13
+Adding Channels in Memory (Manually) ......... 14
+Setting the TV Clock ......................................... 15
+Alarm Timer ...................................................... 16
+Using the Sleep Timer Control ......................... 17
+ Adjusting the Channel Display Control ............ 18
+Using the Time/Channel Reminder Control ...... 18
+Using Parental Control/Content Advisory:
* Code Setup/Blocking Channels ............... 19-20
* Content Advisory - Movie Ratings ......... 21-22
* Parental Guidelines ....................................... 23
* Blocking Options/Review Settings ............... 24
+Using the Channel Label Control ...................... 25
+Using the Language Selection Control .............. 26
SOUND MENU
+Adjusting Bass, Treble, and Balance Sound
Controls ............................................................. 27
+ Setting the Bass Boost Control ........................ 27
+ Setting the TV f\3rStereo and SAP Pro_ams ..28
+Using the Incredible Stereo Control ................. 29
+Using the VoNme Display Control ................... 30
+Using the TV Speaker On/Off Control with
the Audio Output jacks ..................................... 31
+Surround Sound Speaker Connections and
Variable Audio Output Control ........................ 32
+Using the YV's Audio/Video Inputand
Output Jacks ............................................... 33-37
Remote Control _eration
Setting the Auto Picture Control ........... 38-39
Using the Auto Sound Control .................... 40
Using the Auto Surf Control .................................... 41
Setting the TV Remote to Work Optional Accessory
Devices:
Direct Entry/Code Number Method .............. 42-43
Search and Identity Method ................................ 44
Remote Control Direct Entry Code Lists ......45-46
Using the Remote's VCR buttons ............................ 47
_-]Pi-" r -In-Pi-.t r PIP
-- How to Use PIP (Connections) ............. 48-49
How to Use PIP with the TV Remote ...................... 50
Selecting the Picture Source for PIP ........................ 51
Adjusting Picture-in-Picture Color and Tint ............ 52
More PIP Connections (Cable Converter) ............... 53
General Information
TV Help Menu ........................................... 54
Tips if Something Isn't Working ............................. 55
Glossary of TV Terms ............................................. 56
Index ........................................................................ 57
Factory Service Locations .................................. 58-59
Warranty .................................................................. 60
Use the simple Set-Up Guide (supplied with
your TV information packet) for details on:
• Antenna Hook-ups
• First Time Set-Up
(Automatic Settings)
• Basic TV and Remote
Control Operation
• On-Screen Menu Use
Because of continuous product improvements, the
information mentioned in the documents accompanying
your product are subject to change without notice.
Copyright 'c: 2000 Philips Consumer Electronics Company. All rights reserved.
First Time Set Up -automatically sets the TV for
local channels, the correct picture signal (antenna or
cable), and assists in the setting of TV's Guide Plus+
feature.
Infrared Remote Control - operates your TV set and
a variety of wireless remote control VCRs, Cable TV
Converters, and other accessory equipment.
Standard TV broadcast (VHF/UHF) or Cable TV
(CATV) channel capability.
Closed Captioning -allows the viewer to read TV
program dialogue or voice conversations as on-screen
text.
Automatic Programming of channels - for quick and
easy selection of t:avorite stations available in your
area.
Picture-In-Picture (PIP) - can show a TV progTam
and the direct video output from an accessory (VCR,
etc.) onto the TV screen at the same time.
Parental Control for "Censoring" - this feature can
block out channels to keep children fi:om watching
undesirable programming. Parental Guideline and
Movie Rating settings can also be used as part of the
new Content Advisory Data system available with TV
programming.
Stereo-TV - with a built-in audio amplifier and a twin
speaker system, reception of TV programs in both
broadcast stereo sound or (SAP) bilingual broadcast
are available.
Twin Antenna (A/B) Inputs - for easy displaying of
two separate signal sources on the TV. An A/B button
on the remote control switches the TV's Main screen
between the two Antenna (A & B) Inputoptions.
Audio/Video Jacks - for direct connections with
VCRs (and other accessories) f_)rquality TV picture
and sound playback.Component Video Input
connectors are also available %r high fidelity color
and picture resolution when using digital video source
material, such as DVD.
Surround Sound - this TV set contains external;
audio speaker connections %r a more dynamic sound
effect.
Sleep-Timer - automatically turns the TV OFF at
preset time intervals.
Auto Button - %r the control of TV Sound and the
Picture levels. Use the Auto Button on the remote to
quickly adjust Auto Sound (to select various audio
modes matched to specific types of TV programming);
Auto Picture (for programmed video level adjustments
on a variety of program sources); and Auto Surf (for
quick one button channel selection of up to 10 of your
t:avorite channels).
Digital Ready -Projection Television capable of
connecting to both the current analog television
signals of today as well as interfacing with new
upcoming digital source playback products and
devices. This TV includes multiple signal connectors
(Component Video, S-Video, Composite Video)
which give you a variety of equipment playback
options for digital set top boxes, satellite receivers,
cable boxes, and other digital devices.
While there may exist some digital devices with
connections not available on this television, you
should be adequately prepared for the vast majority of
products coming onto the digital consumer
electronics' market. Note: You should ahvays use the
connection output on digital devices that gives the
highest level of picture quality possible. As listed
above the Component Video (or Y PB Pa) input
delivers the best color and picture reproduction;
followed by S-Video; and then Composite Video. In
addition to the above listed inputs, your television also
includes the standard 75ohm cable signal connector
for use with antennas or analog cable boxes.
As you unpack your TV please note that the
%llowing items have been included with your set:
• Owner's Manual
Safety Tip In%rmation
Factory Service Center Locations
• Warranty Registration Card
• Remote Control Transmitter
• Batteries %r Remote ControlUse
Please take a few minutes to complete your
registration card. The serial number for the TV is
on the back of the set.
Refer to the back of this manual for instructions
on the cleaning and care of the TV.
End-of-Life disposal
Your new projection television and its packaging
contain materials that can be recycled and reused.
Specialized companies can recycle your product
to increase the amount of reusable materials and
minimize the amounts which need to be properly
disposed.
Your product also uses batteries which should not
be thrown away when depleted, but should be
handed in and disposed of as small chemical
waste.
Please find out about the local regulations on how
to dispose of your old television, batteries, and
packaging materials whenever you replace
existing equipment.
oadjust your TV color and
icture controls, select aTV
channel and fidlow the steps shown
below.
Select BRIGHTNESS,
COLOR, TINT, or
SHARPNESS picture control.
With the PICTURE MEN_; on
screen, move the RED highlight
with the outer MENU ring @
buttons. Then press the center
MEN_; button to select the feature.
<_ Press the outer MENU ring
I buttons to adjust the selected
control.
_ Press the STATUS button to
clear the screen.
Remember. When the bar
scale is centered, control
settings are at normal mid-range
levels.
BRIGHTNESS Press (-) or (+) until
dark parts of the picture show good
detail.
PICT[ RE Press (-) or (+) until
whitest parts of the picture are as
bright as you prefer.
COLOR Press (-) or (+) to add or
eliminate color.
TINT Press (-) or (+) to obtain
natural skin tones. (Also see Fiesh
Con'ection on page 9 for more
information).
SHARPNESS Press (-) or (+) to
improx e detail in the picture.
%
MAIN MENU
Seleetandthenpless /Select and then press MENU
:; 11; ':'e; :_xP If_l:l_:lrl _ controls grouped under same
feaVme heading Fol
Example: Trot, Brighmess,
Picture, etc
l,ealview is ashalTness J'eature
hich smoothes out
background snow (or picmre noise)
without losing picmre image detail
or eHs!)ness.
t.-g-ggr_
@ Select CLEARVIEW control.
With the PICTURE MEN_; on
screen, move the RED highlight
with the outer MEN_I ring
buttons. Then press the center
MEN_I button to select the feature.
_ Press the outer MENU ring
buttons to move the RED highligl_.
Press the center MEN_I button to
select (_,_) the ENHANCED mode.
_ Press the STATUS button to
clear the screen. %
-- PICTURE MENU
10F2--
nVergence is the correct
ining up c(the red and blue
light paths on the TV screen.
NOTE: [!'no colorJi@ging (see
Smart Help) shows, then no
Convec_ence adjustments are
neeessal3'J'or your TH
<_ Select CONVERGENCE
control.
With PICTURE MElt; (2 of 2) on
screen, move the RED highlight
with the outer MEN_; ring
buttons. Then press the center
MEN_; button to select the feature.
@)If there is RED BLUE color
or
fringing on the White cross, press
the center MEN_I button to
continue.
i _ Press the MENU ring
buttons to move the red or blue
cross directly over the white cross
on the TV screen.
The red or blue cross is properly
adjusted when it is completely
merged with the white cross. (No
color appears around the edge of
the white cross).
Press the STATUS button to
clear the screen when convergence
adjustments are complete.
Remember. Convergence
Nhas been set at the t:actory t%r
best viewing, but if one or more of
the (red or blue) colors appear
around the edges of objects (color
t}inging) follow the steps given in
this section.
%
-- PICTURE MENU
® @ ®
1 'O'F'21 t '
!
-- PICTURE MENU
20F2--
,L
If there is RED or BLUE
fringe on the WHITE cross,
use this adjustment to
improve the picture.
Press "M"to Continue
- or -
Press ")'"to Return
NOTE: Adlustlnents for "Multi-Point" on-
H
A
Use thel _ keys to merge the
MULTI-POINT CONVERGENCE
screen color flinging can also be made as pal_
of the TV's Convergence control system.
Follow the TV's on-screen mem_ directions to
select individual screen areas that can be
reac!iusted and set for varying redBtue color
flinging conditions. These multi-point settings
can then be 'Saved" to memory for the
specific areas of the I"%,"screen (or Factory
Settings l'c_rconvergence can be recalled and
put back into place ibr use).
I÷÷ ÷
++++
Press "M" to Save
Press "_" to Undo
+++++
Jr- Jr-E+3 -4- Jr-
+++++
Press 11.-1to
recall Factoly Settings
+ethe Flesh Correction
ontrol to keep skin tone hues
(or facial tint) Ji_omvalTingJi'om
TV channel to TV channel.
Select FLESH
CORRECTION control.
With PICTURE MENU (2 of 2) on
screen, move the RED highlight
with the outer MENU ring
buttons. Then press the center
MEN_Ybutton to select the feature.
Press the MENU ring
buttons to move the RED
highlight. Press the center MENU
button to mm (_) the FLESH
CORRECTION control ON.
> Press the STATUS button to
clear the screen. %
PICTURE MENU
1'O/F21 I '
lr
-- PICTURE MENU
FLESH CORRECTION
] OFF
<
<
TthepictureJ'or the TVcan come
hrough either the ANTENNA
phlg or the A UDIO/VIDEO INput
jacks (on the rear oJ'the TV). The
Picture Source control simply tells
the TV which one oJ'these picture
sources it is to show on the TV
screen.
[ Select PICTURE SOURCE
[_SELECT control.
With the FEATURES MEN(; on
screen, move the RED highli_ht
with the outer MEN_/rin_ ((_))
buttons. Then press the cent_Jr_
ME_/button to select the feature.
Press the MENU ring @
buttons to move the RED
highlight. Press the center MEN_;
button to turn the desired
PICTURE SOURCE control ON
(_,").
ANT A or B- for a picture signal
coining from either the ANT(enna)
A or B Input plngs on the TV.
AUX 1 (or 2) VIDEO- for a
picture signal coming from the
AUX 1 (or 2) Video Input jacks on
the rear of the TV.
AUX 1 Y PB PR- t\_r picture
signals coming from the AUX 1
component (Y PB PR) luminance
and color input jacks on the rear of
the TV.
SIDE VIDEO- t\_ra picture signal
coming from the Video Inputjack
on the right side panel of the TV.
_ Press the STATUS button to
clear the screen.
%
-- MAIN MENU
--FEATURE MENU
ANT B
AUX 1 VIDEO
AUX 1 Y PB PR
AUX 2 VIDEO
SIDE VIDEO
Note: A "S-VIDEO 1 (ol 2)" Input
control will appear as a PICTURE
SOURCE SELECT(ion) in place of
the AUX I (or 2) VIDEO position
when the S-VIDEO plugs (on the rear
of the TV) are connected See page 35
1\_1operating details on S-VIDEO
Remember, the Auxiliary
®]Inputmodes (AUX 1 VIDEO,
AUX 1 Y PB PR, etc.) must have a
compatible video signal source
properly connected (to the INPUT
plug on the rear of the TV), or the
TV screen will be blank.
10
osed Captioning (CC) allows
,ou to read the voice content of
television programs on the TV
screen. Designed to help the hearing
impaired this jbature uses on-screen
"text boxes" to show dialogue and
conversations while the TVprogram
is"inprogress. r-g-ggr_
@ Select CLOSED
CAPTIONING control.
With the FEATURES MEN_; on
screen, move the RED high_ht
with the outer MEN[; ring (_)
buttons. Then press the cent'_
ME_; button to select the feature.
_ Press the MENU ring ha@ghlight"
buttons to move the RED
Press the center MEN_; button to
select (_) the desired Closed
Caption mode - For Example:
"ALWAYS ON" and "CAPTION
CAPTION 1, 2, 3, 4:
dialogue (and descriptions)
for the action on the captioned
TV program shows on-screen.
(See hnportant Note on this
page.)
TEXT 1, 2, 3, 4:
often used for channel guide,
schedules, or bulletin board
int\_rmation for CC programs.
_ After lnaking your Caption mode
selection, press the STATUS button
to clear the TV screen. The selected
Closed Caption mode will be active.
To cancel, set the Closed Captioned
feature to OFF when finished.
NOTE: Not all TV programs and product commercials are made f\>rbroadcast
with Closed Caption (CC) infonnatkm included. Neither are all Closed Caption
modes (CAPTION 1-4; or TEXT 1-4) necessarily being used by a broadcast station
during the transmission of a closed caption pro_am. Usually "CAPTION 1" is the
most used mode to view captioned material. Refer to your area!s TV program
listings for the stations and times of Closed Caption shows.
MAIN
Av POWER
GUIDE I_VO
®®®
®®®
®®®
®®®
POS_II_N PIP
NOTE: The ON DI RING
MITE ONLY control can be
used to set the TV to turn the
Closed Caption mode "ON"
whenevel the MUTE button
on the 1emote is plessed
--FEATURE MENU
10F5=
CAPTION I mode
Example Screen Display
Remember. Broadcast
._ stations will oRen use
spelling abbreviations, symbols,
dropouts and other grammatical
shortcuts in order to keep pace
with the on-screen action. These
type factors vary upon the source
of the captioned text material and
do not indicate a need *\_rservice
on the part of the TV.
Closed Caption in%rmation will usually appear
in black and white (although some broadcasters
or Iletworks may occasionally use color to
highlight or draw attention to certain areas)
T
FULL SCREEN TEXT
will block TV screen from viewing
m need to make sm_e the TV is'
et topic/< u!) either Cable TV
or Antenna signals. In other words',
the TV needs to know if you
connected a('able TVsignal or a
normal antenna to its"ANTENNA
ph_g.
NOTE: lj)'ou went through First
Time Setup fin your Quid< Use
Guide), this task has already been
completedJ'or you.
t.-g-ggr_
)Select CABLE CHANNEL
TUNING control.
With the FEATURES MEN_; on
screen, move the RED highlight
with the outer MEN_I ring ((Z))
buttons. Then press the cent%T
MEN_I button to select the feature.
Press the MENU ring
buttons to move the RED
highlight. Press the center MEN_I
button to select (_) the desired
mode - For Example: CABLE.
CABLE- If you DO have
Cable TV connected
to the TV. Channels
1-125 available.
NORMAL- If you have an
Antenna connected
to the TV. Channels
2-69 available.
_ Press the STATUS button to
clear the screen.
%
-- MAIN MENU
-- FEATURE MENU
Note: Both ANT(enna) A and ANT B inputs
on the 1ear of the TV can be set t\_r the correct
connected signal (either an Antenna or Cable
TV somce)
12
_burTV can automatically set itsel
rlocal area (or Cable TV)
channels'. This makes' it easv for you
to select only the TVsmtions in your
area when the CHANNEL A W
buttons are pressed.
NOTE: Ijyou went through First
Time Setup (in your Quick Use
Guide), this task has already been
completedJbr you.
Select CHANNEL MEMORY
(START AUTO-PROGRAMMING
control.
With the FEATURES MEN_; on
screen, move the RED Nghlight with
the outer MENU ring (C)) buttons.
Then press the center _[EN_; button
to select the feature.
_t Press the center MENU button to
urn AUTO-PROGRAMMING ON
The TV shows which channel
numbers arc "SAVED" (_) as they
are added into memory.
"Auto-programming CHANNEL
MEMORY is finished" shows when
the TV is through adding channels.
Press the STATUS or Menu
button to clear the screen.
Try it out. Press the
CHANNELAV buttons
and see which channels you can
select.
Remember, an Antenna or Cable
TV signal must first be connected
to your TV so that channels can be
saved.
ffyou want to delete any
unwanted channels from the TV's
memory, see "ADD/DELETE
CHANNELS" on the next page.
%
-- MAIN MENU
®®®
®®®
®®®
®®®
N$_IIO_ PIP
1,_ Channel Nulnbels are /
Saved in Melno W
-- FEATURE MENU
AUTO-PROGRAMMING CHANNEL
MEMORY FOR ANT A
1 2"/ 3,f 4"/
5_/6_/7¢" By"
9 _/ 10 11 12
13 14 15 16
17 18 19 20
21 22 23 24
Press "M" to
Stop Auto-Progl am
13
A uto-P rogra m ming (s"ee
previous'page) adds"all the
channels' it ean find (on your
Antenna or Cable TV s3'stem) into
the TVS"memory. Add/Delete
Channels makes it eaz_Jbr you to
add other channels', or dlvp
unwanted channels', J?om the list oJ"
channels' in the TVS"memo13'.
>Select CHANNEL MEMORY
(ADD/DELETE CHANNELS)
control.
With the FEATURES M[_; on
screen, move the RED highli_ht.._
with the outer MEN_; ring_(_
buttons. Then press the cent"eg
ME_I button to select the feature.
_ Press the CHANNEL AV m"
number buttons to select the
channel you want to add or delete.
-,_: _Press the outer MENU
ring button (on the Right) to
ADD the channel into the TV's
nlenlory.
Press the outer MEN_I ring button
(on the Left) to DELETE the
channel from memory.
Repeat steps 2 and 3 for each
channel you wish to add or delete.
Press the STATUS or MENU
Ibutton to clear the screen _hen
through.
Remember. You can also
-_add the Auxiliary modes
(AUX 1 VIDEO, AUX 1 Y PB PR,
etc.) .just like a channel. Then by
pressing the CHANNEL A'V'
buttons the AUX(iliary) mode can
quickly be selected to use the
desired set of Input .jacks (see
page 33).
Note: AUX(iliary) VIDEO modes
are located between the lowest
and highest channel numbers
within the ADD/DELETE
CHANNEL control screen.
%
-- MAIN MENU
55®®
® @ ®
--FEATURE MENU
1OF5_
CHANNEL MEMORY
TE1
SELECT CHANNEL
to DELETE CHANNEL
for ANT B
when FINISHED
NOTE: A separate ADD/DELETE CHANNEL memory
may also be created fbr the ANT(enna) B Input on the
1ear of the set (if an Antenna or Cable TV signal has been
comlected) Press the 'AV" button on the remote, while
in the ADD/DELETE CHANNEL mode. to switch
between the ANT A and ANT B channel memory lists
Then %llow steps 2 and 3 as shown to the left to add or
delete the desiled chamMs
our TV comes with an on-
creen clock. During normal
operation the clock ap!_ears on the
screen with every channel change
(and when the STATUS button is
pressed).
<_ Select SET CLOCK control.
With the FEATURES MEN_Y (2 of
5) on screen, move the RED
with the outer MEN_Y
highlight
ring buttons. Then press the center
MEN_Ybutton to select the feature.
<_a Press the remote's number
ibuttons to set the time clock.
_ Press the STATUS button to
t the clock in operation and clear
the screen.
Remember, be sure to
press "0" first and then the
hour number for single digit
entries.
The remote's MENU ring @
buttons can also be used to set the
hours, minutes and AM/PM
portions of the clock.
TV Clock settings may be lost
when the TV is unplugged (or AC
power to the set is interrupted).
%® @ @
0O4)
,_ 1 'dE '51 _ '
-- FEATURE MENU
20F 5--
-- SET CLOCK/ALARM TIMER --
15
tSt like an alarm clock you can
et the TV to turn itse!f on at the
same time everyday.
<_ Select SET ALARM TIMER
control.
With the FEATURES MEN_; (2 of
5) on screen, move the RED
with the outer MEN_;
highlight
ring buttons. Then press the centcT
w
MEN_; button to select the feature.
<_ Press the outer MENU ring
and center MENU buttons to
highlight and select "ON" (*,'_).
@Press the outer MENU ring
and center MENU buttons to
select "SET ALARM TIME".
<_ Press the remote's number
buttons to set the "TURN ON"
time for the TV. (Press the MEN_;
ring buttons for the AM or PM
settings.)
<_ Press the STATUS button to
set the "ALARM TIME" and clear
the screen.
=FEATURE MENU
20F5--
-- SET CLOCK/ALARM TIMER--
-- SET ALARM TIMER I
SET ALARM TIME
PLEASE ENTER THE
HOUR TO TURN ON
16
c/veyou ever,@llen asleep in
?ont qf the T_,on/y to have it
wal<eyou up at two in the morning
with a test pattern screeching in
yozm ears? Well,your TVcan save
you all that trouble l_v
automatically turning itse!['c?[f
t'gggi_
@_ Press the SLEEP button on the
remote control.
Note: you can also select the
SLEEP control with the TV's on-
screen FEATURES MENU (2 of 5).
Move the RED highlight with the
outer MENU ring @ buttons.
Then press the center MEN_Ybutton
to select the feature.
_ Press the SLEEP button
repeatedly to pick the amount of
time (15 minutes to 2 hours ahead)
before the TV will turn itself oft'.
The Menu ring buttons can also be
used to set the amount of time.
_ Press the STATUS MENU
or
button to clear the screen after you
have set the time t\)r the TV to turn
off.
many minutes are left before
the TV shuts itself oft; resetect the
SLEEP TIMER control screen.
To stop a SLEEP TIMER setting,
reset the timer back to OFF.
(Turning the TV off and on, or
pressing a button during the last
minute of a timer setting, will also
cancel a setting.)
A few seconds before the TV is to
shut off a message will come on the
screen telling you GOOD NIGHZ
66®®
.P P,PP.ooRc2,,
@®®
®®®
®®®
®@®
'v
-- FEATURE MENU
I 'O/F'5 _ '
20F5--
V
I/IS,h,i,e(hannelO,W<, ,
_"Vcontrol you can chcm_e the
size and location of/he on screen
channel and clock information.
Select CHANNEL DISPLAY
control.
With the FEATURES MEN_T (2
of 5) on screen, move the RED .:_,
highlight with the outer MEN_T_
ring buttons. Then press the center
MENU button to select tile
feature.
_ Press the MENU ring and
center MENU buttons to
highlight and select (,u,') the
LARGE or SMALL display
control.
a Press the STATUS button to
clear the screen.
@®®@
®@@
-- FEATURE MENU
-- FEATURE MENU
Try it out. N
Press the
CHANNEL AT
buttons and you
should see the
Display Size you
selected.
Remember. The
SMALL SIZE
display shows only
the channel number,
not the time (or
clock).
H,, cththeHai;'H?,rRen-,inder
ontrol the FY,automatically
shows you the cm'rent time and
channel every thirty minutes.
Select HALF HOUR
REMINDER control.
With the FEATURES MENU (2
of 5) on screen, move the RED _
highlight with the outer MEN_7_
ring buttons. Then press the center
MEN_Tbutton to select the
_ature.
_ Press the MENU ring and
center MENU buttons to
highlight and select (v,_) the
EVERY HALF HOUR item.
_ Press the STATUS button to
clear the screen.
@@@®
® @ ®
®®@
@@@
®@®
®@@
-- FEATURE MENU
-- FEATURE MENU
_ 'ElF5'===&
Renaenlber.
The Time and
Channel Reminders
will show on the
hour and the halt"
hour *\_rabout five
seconds.
18
rental Control allows'parents
block out, o1""censor", an3'
channels they think children should
not watch. A channel placed under
Parental Control cannot be viewed
until acorrect access code is"used to
unlock the channelJ'or viewing.
First let's set your Parental Code:
t.-fi-ggr
Select the PARENTAL
CONTROL
With the FEATURES MENU (3 of
5) on screen, move the RED
highlight with the outer MEN_/
ring buttons. Then press the center
MEN_/button to select the feature.
"CHANNEL BLOCKING" and
"SETUP CODE" show on screen.
_ Press the MENU ring and center
MENU buttons to highlight and
select the SETUP CODE item.
@Press 0, 7, 1, 1 on the remote.
"XXXX" shows on the ACCESS
CODE SETUP screen as you press
the number buttons.
"INCORRECT ACCESS CODE -
TRY AGAIN" will also show on the
screen.
_ 0,7, 1, on remote
Press 1 the
again.
"Next Enter Your New Access
ICode" shows on tile screen.
Enter a new digit
foul" number
code using the remote.
"Access Code Changed" shows on
the screen to let you know the new
code has been set.
Continue to the next page to find
out how to "BLOCK" channels f'om
viewing.
Parents - it isn't possible
N to unlock or defeat your
Censor Code without changing to
a new code number. So if your
Code number changes, and you
didn't change it yourseli; then you
will know that someone has
altered the code and the blanked
out channel has been viewed.
NOTE:Your TV left the factory with the Parental Code set to "0000". If you are using
your TV and the Parental Control for the first time, and don't want to SETUP a new
Access code number, you can use the "0000' number to block channels - see next page.
The "071 i" Parental ('ode (shown on this page) is given as a default or way to reset the
Code when the current Access number is not known.
--FEATURE MENU -- FEATURE MENU
I
r...................... J
--FEATURE MENU
3OE5--
-- PARENTAL CONTROL
n
n
r ...................... J
to EXIT to EXIT
r...................... J
m
_1 for CHANNEL BLOCKING
_) for CONTENT ADVISORY
to EXIT
• Press outer MEN[ ring button (on
the Right) to go on and start to
"block" channels
• Press outer MENI ring button (on
the Left) to go to "Content Advisory"
(or TV and Movie Ratings system of
channel blocking)
• Press the center MEN[ button to
ietmn to the Parental Conhol Menu
screen
•Press STAIr S to clear the screen
19
J'teryom_personal Parental
Code number has'been set (see
previous page), you are now ready
to select the channels"you want to
block out or censor.
< > SelectTthe BLOCK
CHANNELS control.
With the FEATURES MEN_; (3 of
5) on screen, 111ovethe RED
highlight _ith the outer MEN_;@
ring buttons. Then press the center
MEN13 button to select the feature.
_ Press the MENU ring and
center MENU buttons to highlight
and select the CHANNEL
BLOCKING item.
@Enter the correct Parental
Code number.
@Press Channel AV or Channel
Number buttons to select the
channel you x_ant to block.
Press the outer MENU ring
button (on the right) to "BLOCK
VIEWI%TG"on the selected
channel.
Press the outer MENU ring
button (on the le_i) to "ALLOW
VIEWING" on a blocked channel.
Repeat steps 3 and 4 t\_rany other
channels you wish to block out.
Remmnber, once set
_ Parental Control blocks out
the selected channel number on
both the ANT A and ANT B
channel rings. Also, to make TV
viewing easier all channels (for
both ANT A/B and Audio/Video
input jacks) will be unblocked,
once the correct Parental Code
number has been entered.
When the TV is turned OFF and
then back ON again, is when
Parental Control is back in place
for all blocked out channels.
--FEATURE MENU
-- FEATURE MENU
--FEATURE MENU
--PARENTAL CONTROL
®@@ CHANNEL BLOCKING MEMORY CHANNEL BLOCKING MEMORY
or Un-Block CHOOSE CHANNEL
channels First Enter {_} to ALLOW WEWING
to EXIT 1
!
f, ...................... ,,I
Note: You can also block OUt tile
use of the Audio, Video Input jacks
on the TV This stops the viewing of
CHANNEL 19 V(R progranls which call be shown
CHANNEL BLOCKING ACTIVE tblough the A&7 IN jacks J/tst select
I ×××× I AUX 1 VIDEO. AUX 2 VIDEO,
etc. (located between the lowest and
Pleaseenter Access Code highest channel Ilunlbers) o11tile
OR-
Select another Charlnr,I Channel Blocking screen and select
for viewing "blocked"
BLOCKED CHANNEL SCREEN MESSAGE
(Appears when an attempt to select a blocked
channel is made and Parental Control is ON)
2O

This manual suits for next models

2

Other Philips Projection TV manuals

Philips 55PP9363H User manual

Philips

Philips 55PP9363H User manual

Philips Matchline 41GR8840 User manual

Philips

Philips Matchline 41GR8840 User manual

Philips Magnavox 8P5444C199 User manual

Philips

Philips Magnavox 8P5444C199 User manual

Philips 55PP9352 Manual

Philips

Philips 55PP9352 Manual

Philips TP4841 User manual

Philips

Philips TP4841 User manual

Philips MX5471 User manual

Philips

Philips MX5471 User manual

Philips 55P834199 Manual

Philips

Philips 55P834199 Manual

Philips 43PP8421 Manual

Philips

Philips 43PP8421 Manual

Philips 64PP 9901 Operating manual

Philips

Philips 64PP 9901 Operating manual

Philips 43PP8545/69 User manual

Philips

Philips 43PP8545/69 User manual

Philips 51PP9363H User manual

Philips

Philips 51PP9363H User manual

Philips Magnavox 7P5430W User manual

Philips

Philips Magnavox 7P5430W User manual

Philips Magnavox 55P8288 Manual

Philips

Philips Magnavox 55P8288 Manual

Philips 52PFL7432/98 User manual

Philips

Philips 52PFL7432/98 User manual

Philips 64P834299 Manual

Philips

Philips 64P834299 Manual

Philips MX5471 User manual

Philips

Philips MX5471 User manual

Philips 50P 8341 User manual

Philips

Philips 50P 8341 User manual

Philips 43P 8341 User manual

Philips

Philips 43P 8341 User manual

Philips Magnavox 7P5441C User manual

Philips

Philips Magnavox 7P5441C User manual

Philips 51PP9363H User manual

Philips

Philips 51PP9363H User manual

Philips 51 IN DIGITAL WIDESCREEN HDTV MONITOR... Manual

Philips

Philips 51 IN DIGITAL WIDESCREEN HDTV MONITOR... Manual

Philips 60P 9161 User manual

Philips

Philips 60P 9161 User manual

Philips 41CE8741 User manual

Philips

Philips 41CE8741 User manual

Philips 60PP9363H/17B Instruction and safety manual

Philips

Philips 60PP9363H/17B Instruction and safety manual

Popular Projection TV manuals by other brands

RCA Pius+ Gold System user guide

RCA

RCA Pius+ Gold System user guide

Loewe Articos 55 HD specification

Loewe

Loewe Articos 55 HD specification

Toshiba 65H82 Specifications

Toshiba

Toshiba 65H82 Specifications

Sony KP-41S4G operating instructions

Sony

Sony KP-41S4G operating instructions

Samsung PLK405W - PLK - 405W instruction manual

Samsung

Samsung PLK405W - PLK - 405W instruction manual

JVC AV-48WP34/AHA Service manual

JVC

JVC AV-48WP34/AHA Service manual

Mitsubishi Electric WT-42311 Service manual

Mitsubishi Electric

Mitsubishi Electric WT-42311 Service manual

Hitachi 50VF820 - 50" Rear Projection TV operating guide

Hitachi

Hitachi 50VF820 - 50" Rear Projection TV operating guide

Mitsubishi Electric WS-A48 Service manual

Mitsubishi Electric

Mitsubishi Electric WS-A48 Service manual

Samsung PL-H403W instruction manual

Samsung

Samsung PL-H403W instruction manual

Mitsubishi WD-60C8 owner's guide

Mitsubishi

Mitsubishi WD-60C8 owner's guide

Sony GrandWega KDF-55E2000 Specifications

Sony

Sony GrandWega KDF-55E2000 Specifications

Hitachi 53UWX10B operating guide

Hitachi

Hitachi 53UWX10B operating guide

Toshiba TP61E90 owner's manual

Toshiba

Toshiba TP61E90 owner's manual

Sony Hi-Scan KP-65WS500 operating instructions

Sony

Sony Hi-Scan KP-65WS500 operating instructions

JVC HD70G886 - 70" CRT TV user guide

JVC

JVC HD70G886 - 70" CRT TV user guide

Sony KP-43T75A Service manual

Sony

Sony KP-43T75A Service manual

JVC AV-48P777/H Service manual

JVC

JVC AV-48P777/H Service manual

manuals.online logo
manuals.online logoBrands
  • About & Mission
  • Contact us
  • Privacy Policy
  • Terms and Conditions

Copyright 2025 Manuals.Online. All Rights Reserved.