PiesOn Oven User manual

PiesOn Oven
Brick Oven Quality Pizza ...
... Anywhere You go
TM
SAFETY ALERTS
ASSEMBLY INSTRUCTIONS
CARE AND USE MANUAL
READ OPERATING INSTRUCTIONS BEFORE USING.
SAVE THIS MANUAL FOR FUTURE REFRENCE.
For Questions and Information call us at:
Monday - Friday 8 a.m. - 4:30 p.m. EST)
PiesOn Oven Co.
Pepperell, MA 01463
www.piesonoven.com
1-781-248-0292
Failure to follow these instructions could result in fire or explosion
which could cause property damage, personal injury or death!
!WARNING
PiesOn Oven is a trademark of Dynamic Engineering Designs, LLC

Lit. # 01136 Rev-B 10/07 PiesOn Oven Safety/Installation/Use Instructions Page 2
Contents
About PiesOn Oven Co..............................1
Safety and Warnings..................................3
Instructions.................................................5
Setup.............................................................5
Operation.......................................................8
Oven pre-heating...........................................8
Preparing and cooking Pizza.........................8
Cleaning ...................................................... 11
Disassemble for transport............................ 11
Troubleshooting .......................................11
General maintenance and storage .........12
About PiesOn Oven Co.
Welcome and congratulations on your purchase of the
PiesOn Oven. You have joined a growing group of
campers, tailgaters, and adventurous chefs who want
to make the BEST brick-oven style pizza, anytime,
anywhere, outdoors!
The patent-pending PiesOn Oven is a fully self-
contained portable oven system, which has been
designed to make the best tasting brick oven pizza
anywhere, anytime.
Now can you make brick oven pizza pies on your
camping trip, on your tailgate party, and on your patio
or deck*.
The PiesOn Oven was designed to be with you
anywhere you go!
The PiesOn oven includes an integrated gas burner,
and only requires a standard 20 lb propane tank to
begin making fabulous crispy pizza. Its size will allow
the use of almost any sized pizza stone you own. The
PiesOn oven was designed for long life using high
quality materials.
At PiesOn Oven Company, we know great pizza when
we have it, and our family, friends, and tremendous
customers and testers have welcomed our latest
PiesOn Oven! Pizza ovens and accessories are all we
make. We take pride in our designs and our quality of
workmanship, but most importantly, in the outstanding
pizzas our ovens make! Thank you for your purchase
and happy cooking!
Features Include:
• Patent-pending design allows for fast heat up times
of less than 15 minutes to 500°F
• 50,000 BTU gas burner provides up to 600°F
baking performance, easily
• Internal size of 17"W x 17"D accommodates full
size pizza stones and baking pans
• Stainless steel wire rack for long lasting
performance
• High grade aluminum shell design --rust resistant
• Built-in temperature gauge for precise cooking
• Double walled and insulated design maintains heat
easily, even in cold temperatures!
• Oven legs are disconnected for transport or
storage.
• Propane hose and regulator assembly connects to
standard 20 lb. tanks used for gas grills.
• Includes an automatic gas shut-off control and over
temperature control
• Overall dimensions are 20"W x 20"D x 16"H
Limited Warranty
PiesOn Oven Co. hereby warrants to the ORIGINAL PURCHASER of
this PiesOn Oven that it will be free of defects in material and workman-
ship for one year from the date of purchase when assembled and oper-
ated in accordance with the printed instructions accompanying it. This
Limited Warranty shall be limited to the repair or replacement of parts
that prove defective under normal use and service and which on exami-
nation shall indicate, to PiesOn’s satisfaction, they are defective. Please
contact our Customer service representatives before returning any unit
or parts. If you are required to return defective parts, transportation
charges must be prepaid. This Limited Warranty does not cover any fail-
ures or operating difficulties due to accident, abuse, misuse, alteration,
misapplication, vandalism, improper installation or improper mainte-
nance or service, or failure to perform normal and routine maintenance,
including but not limited to damage caused by insects within the burner
tubes, as set out in this owner’s manual. Deterioration or damage due to
severe weather conditions such as hail, hurricanes, earthquakes or tor-
nadoes, discoloration due to exposure to chemicals either directly or in
the atmosphere, is not covered by this Limited Warranty.

Lit. # 01136 Rev-B 10/07 PiesOn Oven Safety/Installation/Use Instructions Page 3
Safety
SAFETY LABELS/DEFINITIONS
The following safety labels and notices are contained
in the product documentation and labels.
GENERAL SAFETY WARNINGS
DANGER: Failure to follow these instructions
could result in fire or explosion which could cause
property damage, personal injury or death. This
oven, like any gas oven, can be extremely
dangerous! It can burn you or start a fire. Misuse
of an outdoor oven can result in serious personal
injury or property damage. The warnings and
safety instructions in this manual must be
followed to provide reasonable safety and
efficiency in using this unit.
DANGER: Do not store or use gasoline or other
flammable vapors and liquids within 25 feet (7.62
meters) of the oven or any other oven.
WARNING: Restrict the use of this oven to adults
who read, understand, and can follow the warnings
and instructions in this manual and on the unit.
Strict compliance with these instructions, plus
common sense operation, are major accident
prevention measures. Remember: Think Safety
and Use Common Sense.
WARNING: DO NOT store a spare LP cylinder
within 10 feet (3 meters) of the oven.
WARNING: Sober adult operation ONLY! Read and
understand this manual before using the product.
The use of alcohol, prescription or non-
prescription drugs may impair your ability to
properly assemble or safely operate the oven.
WARNING: LP (propane) gas is colorless,
tasteless, heavier than air, and is both flammable
and explosive. Combustion of propane consumes
oxygen and produces carbon monoxide (a
poisonous gas). NEVER operate the oven inside a
building or confined area where ventilation may be
restricted. Make sure the LP Cylinder and the oven
is placed in an open area. Do not obstruct the flow
of combustion and ventilation air.
WARNING: Never leave oven unattended. Most
accidents occur as a result of leaving the oven
unattended. This is an ATTENDED oven. Do NOT
leave this oven unattended while heating.
WARNING: DO NOT locate this oven under ANY
overhead construction. Keep a minimum clearance
of 10 feet from the sides, front and back of the
oven to ANY construction. Keep the area clear and
free of any combustible material such as
household chemicals, paint, gasoline and other
flammable vapors and liquids. Use oven ovens
only in accordance with state and local ordinances
and codes. In the absence of local codes,
installation must conform with the National Fuel
Gas Code, ANSI Z223.1/NFPA 54, Storage and
Handling of Liquefied Petroleum Gases, ANSI/
NFPA 58 or CSA B149.1, Natural Gas and Propane
Installation Code; or CGA-B149.2 Installation
Code.
WARNING: Use ONLY on a level, stable non-
combustibles surface like brick, concrete or dirt.
Do NOT use this oven on any surface like asphalt,
vinyl, or plastic.
WARNING: This oven is for OUTDOOR use only.
Do NOT use in a building, garage or any other
enclosed area. Do NOT use under roof overhangs,
on porches, carports or at garage door openings.
This oven is NOT intended to be installed in or on
recreational vehicles and/or boats. This oven is
not intended for and should NEVER be used as a
heater.
WARNING: Keep the fuel supply hose away from
any heated surfaces.
WARNING: Clean and inspect the hose before
each use of the oven. If there is evidence of
abrasion, wear, cuts or leaks, the hose must be
replaced prior to the oven being put into operation.
WARNING: Keep children and pets away from the
oven at all times.
WARNING: DO NOT move the oven when in use.
Allow the oven to cool before moving or storing.
DO NOT LEAVE UNATTENDED WHILE oven IS IN
USE OR IS STILL HOT! (Above 100°F)
WARNING: Fire extinguishing materials shall be
readily accessible.
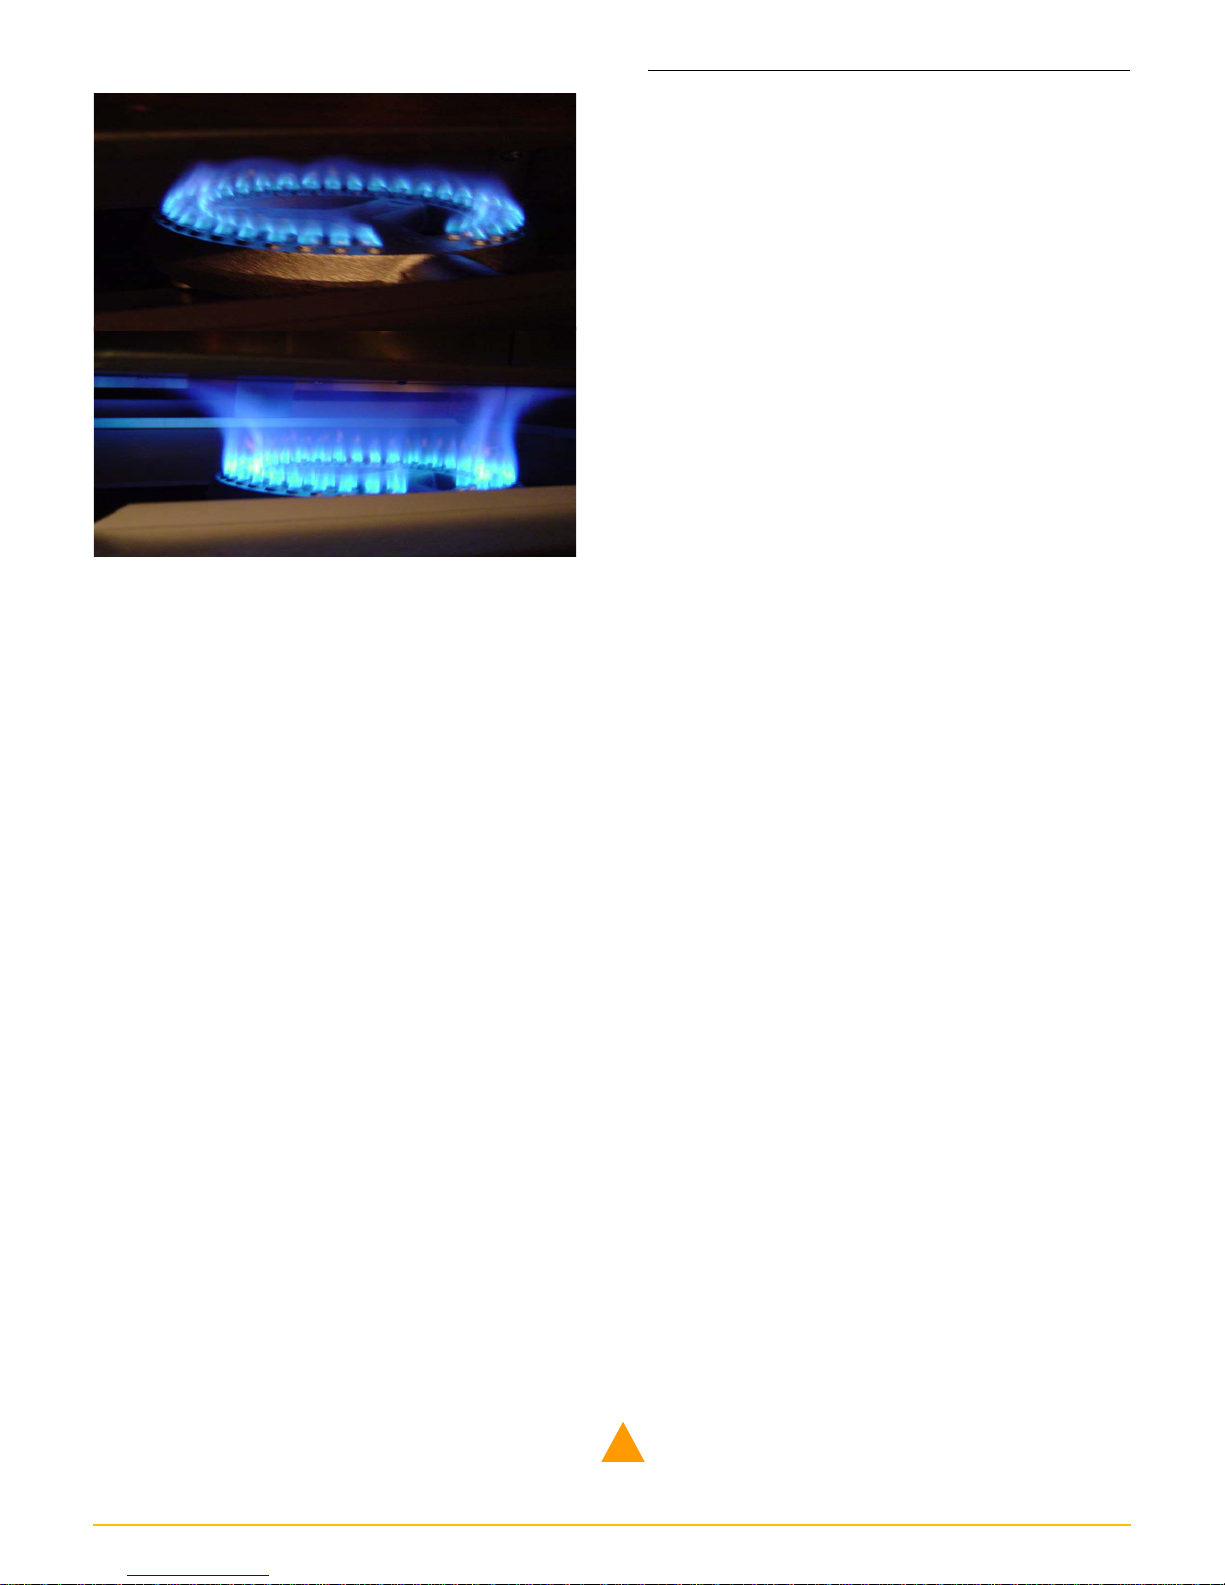
WARNING: In sunlight or other bright light, the
flame may be almost invisible. Use extreme
caution keeping hands, hair and clothing away
from the oven. Never put face or hands over
burner while lighting. Make sure to turn oven off
when not in use. Always wear cooking mitts when
handling the oven, cookware, cooking utensils and
accessories.
WARNING: Always check for gas leaks before
lighting, following the instructions in this manual.
WARNING: Follow lighting procedures as stated in
this manual. Use a fireplace match or gas oven
butane lighter.
WARNING: Always wear shoes while cooking.
Always wear mitts when handling the oven and
accessories.
WARNING: This oven is designed for use with
propane gas using ONLY. Never use with natural
gas.
WARNING: Carefully read and follow instructions
for assembly, checking for gas leaks, and lighting.
Failure to comply with these warnings and
instructions can result in property damage,
personal injury and death.
Label Meaning
DANGER Indicates an imminently hazardous
situation which, if not avoided, will
result in death or serious injury.
WARNING Indicates a potentially hazardous
situation which, if not avoided, could
result in death or serious injury.
CAUTION Indicates a potentially hazardous
situation which, if not avoided, may
result in minor or moderate injury.
!
!
!
!
!
!
!
!
!
!
!
!
!
!
!
!
!
!
!
!
!
!
!
!

Lit. # 01136 Rev-B 10/07 PiesOn Oven Safety/Installation/Use Instructions Page 4
LP Gas Cylinder Safety
PiesOn ovens are manufactured for use with 20 lb LP
gas cylinders. Always read, understand and follow the
cylinder manufacturer's instructions. LP tank valve
must have:
• Type 1 outlet compatible with regulator: Make sure
that the cylinder valve has the proper receptacle for
a handwheel hose connection.
• Safety relief valve
• UL listed Overfill Protection Device (OPD). This
OPD safety feature is identified by a unique
triangular hand wheel. Use only tanks equipped
with this type of valve. LP tank must be arranged
for vapor withdrawal and include collar to protect
LP tank valve.
WARNING: Use only D.O.T. certified (US
Department of Transportation) LP gas cylinders.
Always close LP cylinder valve after use. Always
use and store LP cylinder in an upright position.
Never store or transport LP cylinders in occupied
enclosures. Do not store a spare LP Cylinder
under or near this oven. Carefully read and follow
instructions on LP cylinder.
The LP-gas supply cylinder must be constructed
and marked in accordance with the specifications
for LP-gas cylinders of the U.S. Department of
Transportation (DOT) or the National Standards of
Canada, CAN/CSA-B339, Cylinders, Spheres and
Tubes for the Transportation of Dangerous Goods.
LP Tank Filling
• Use only licensed and experienced dealers.
• LP dealer must purge tanks before filling.
• Dealer should NEVER fill LP tank more than 80%
of LP tank volume. Volume of propane in tanks will
vary by temperature. A frosty regulator indicates
gas overfill. Immediately close LP tank valve and
call local LP gas dealer for assistance.
• Do not release liquid propane (LP) gas into the
atmosphere. This is a hazardous practice.
• To remove gas from LP tank, contact an LP dealer
or call a local fire department for assistance. Check
the telephone directory under "Gas companies" for
nearest certified LP dealers.
LP Tank Exchange
• Many retailers that sell ovens offer you the option of
replacing your empty LP tanks through an
exchange service. Use only those reputable
exchange companies that inspect, precision fill, test
and certify their cylinders. Exchange your tank only
for an OPD safety feature equipped tank as
described in the "LP Tank" section of this manual.
• Always keep new and exchanged LP tanks in
upright position during use, transit or storage.
• Leak test new and exchanged LP tanks BEFORE
connecting to oven.
LP Tank Removal, Transport and Storage
WARNING: A disconnected LP tank in storage or
being transported must have a safety cap
installed.
WARNING: Do not store an LP tank in enclosed
spaces such as a carport garage, porch, covered
patio or other building. Never leave an LP tank
inside a vehicle, which may become overheated by
the sun.
WARNING: Do not store LP tanks in an area where
children play.
WARNING: Cylinder must be stored outdoors. Out
of the reach of children and must NOT be stored in
a building, garage or any other enclosed area.
LP (Liquefied Petroleum Gas)
• LP gas is non-toxic, odorless and colorless when
produced. For Your Safety, LP gas has been given
an odor (similar to rotten cabbage) so that it can be
smelled.
• LP gas is highly flammable and may ignite
unexpectedly when mixed with air.
For Your Safety
If you smell gas:
1. Shut off gas to the oven.
2. Extinguish any open flame.
3. If odor continues, immediately call your gas
supplier or your fire department.
LP Tank Leak Test For your Safety
• Leak test must be repeated each time LP tank is
exchanged or refilled.
• Do not smoke during leak test.
• Do not use an open flame to check for gas leaks.
• oven must be leak checked outdoors in well-
ventilated area, away from ignition sources such as
gas fired or electrical ovens. During leak test, keep
oven away from open flames or sparks. Use a
clean paintbrush and 50/50 soap and water
solution. Use mild soap and water. Do not use
household cleaning agents. Damage to gas
components can result. Brush soapy solution onto
all weld seams and entire valve area.
• If “growing” bubbles appear, do not use or move the
LP tank. Contact an LP gas supplier or your fire
department.
!
!
!
!
!

Lit. # 01136 Rev-B 10/07 PiesOn Oven Safety/Installation/Use Instructions Page 5
Instructions
SETUP
The PiesOn Oven is designed for rapid and simple
setup in just five steps:
Step 1: Receive and Unpackage the System
Step 2: Assemble and Position Oven
Step 3: Attached LP Tank
Step 4: Leak Check LP Components
Step 5: Light the Oven
Step 1: Receive and Unpackage the
System
1. Remove components from the packaging. If
any damage has occurred, please contact
the delivery company immediately.
2. Your package should contain the following
items. If this is not correct, please contact us
immediately.
•οven assembly (1)
•οven burner assembly (1)
• oven legs (4)
• oven leg hardware ( 5 sets)
•¼-20 X 2” ribbed neck carriage bolt
•¼-20 flat washer, ¼-20 wing nut
• Flame baffle (1)
• Wire rack (1)
3. Place all components on a clean dry surface
for assembly
Step 2: Assemble and Position
Note: the burner assembly picture with legs below. The oven
legs have an orientation that must be followed. Follow
directions below.
1. Place the burner assembly upside down on a
level surface.
2. Insert the carriage bolt through the hole in the
oven leg as shown below. Note the proper
orientation: the oven leg curvature and bolt
insertion direction.
3. Place the oven leg and bolt through the
burner assembly as shown below, then place
the washer and wing nut onto the bolt.
4. Tighten firmly by hand, but do not overtighten
with a wrench
5. Repeat for the other three oven legs
6. When complete, stand the burner assembly
upright and place on a level surface as
shown below (Note: System shown with oven

Lit. # 01136 Rev-B 10/07 PiesOn Oven Safety/Installation/Use Instructions Page 6
removed.)
7. Place wire rack back inside the oven if it was
removed.
8. Place flame baffle back inside.
CAUTION!
Failure to use the flame baffle will allow direct
contact of the flame onto the pizza stone or baking
surface. This may cause permanent damage to
your stone or bake dish. Always double check that
the flame baffle is present. Always transport the
oven with the baffle inside of it so as not to forget
it.
WARNINGS:
Position oven on a level, non-combustible
surface.
The oven must be in open area with at least 10
feet of clearance in all directions to nearest
structure or combustible construction.
There must be no combustibles or roof
overhead. The oven shall NOT be located
under overhead unprotected combustible
construction.
There must be at least 2 feet (24") of space
between LP gas tank and oven.
Locate the LP gas tank “upwind” from the
oven. The LP gas tank and oven must be
located so that any wind is blowing the heat of
the oven away from the gas tank.
Step 3: Attached LP Tank
1. Place LP tank on a secure, level, and stable
surface.
2. Turn oven control knob to the OFF position.
3. Verify that the LP tank is fully off by turning
hand wheel clockwise to a full stop
WARNING: If you have never attached an LP tank
to a gas grill or similar device, please consult with
your LP gas provider for a physical demonsration
of the proper attachment procedures.
4. Remove the protective cap from LP tank
valve. Always use cap and strap supplied
with valve. Do not use a POL transport plug
(plastic part with external threads)! It will
defeat the safety feature of the valve.
5. Hold regulator, insert nipple into LP tank
valve. Hand tighten coupling nut, holding
regulator in a straight line with LP tank valve
so as not to cross thread the connection.
6. Turn the coupling nut clockwise to tighten to
a full solid stop. The regulator will seal on the
backcheck feature in LP tank valve, resulting
in some resistance. An additional one-half to
three quarters turn is required to complete
connection. Tighten by hand only – do not
use tools.
NOTE: If you cannot complete connection,
disconnect regulator and repeat steps 5 and
6. If you are still unable to complete the
connection, do not use this regulator!
WARNINGS:
Do not insert any foreign objects into the valve
outlet. You may damage the valve and cause a
leak. Leaking propane may result in explosion, fire,
severe personal injury, or death.
Never attempt to attach this oven to the self-
contained LP gas system of a camper or trailer or
motor home.
Do not use the oven until the LP tank and
components are leak checked.
If leak is detected at any time, STOP, move away
from the oven and call the Fire Department.
If you cannot stop a gas leak, immediately close
LP tank valve and call LP gas supplier or your fire
department.
Flame Baffle
Pizza Stone
!
!
!
!

Lit. # 01136 Rev-B 10/07 PiesOn Oven Safety/Installation/Use Instructions Page 7
Step 4: Leak Check LP Components
1. Turn all control knob(s) to OFF.
2. Be sure regulator is tightly connected to LP
tank.
3. Completely open LP tank valve by turning
hand wheel counter clockwise. If you hear a
rushing sound, turn gas off immediately.
There is a major leak at the connection.
Correct before proceeding.
4. Brush soapy solution onto all connections,
regulator, hose, and valve(s).
5. If “growing” bubbles appear, there is a leak.
Close LP tank valve immediately and
retighten connections. If leaks cannot be
stopped, do not try to repair. Call for
replacement parts.
6. Always close LP tank valve after performing
tank leak test by turning hand wheel
clockwise.
Step 5: Light the Oven
WARNING: DO NOT lean over the oven while
lighting.
WARNING: DO NOT light burner at air intake.
CAUTION: Check the flame baffle is installed
Failure to use the flame baffle will allow direct
contact of the flame onto the pizza stone or baking
surface. This may cause permanent damage to
your stone or bake dish. Always double check that
the flame baffle is present. Always transport the
oPlace the pizza stone on top of the oven rack.
1. Open the oven door
2. Turn the oven gas control valve to OFF
position. See picture below for the correct
position for OFF
NOTE: Be sure the gas control valve is in the off
position prior to opening the tank. If it is not, the
overflow safety feature will activate and keep the
flame low and will need to be reset.
3. Fully open the LP tank by turning the hand
wheel counter clockwise until it stops.
WARNING: DO NOT lean over the oven while
lighting.
4. Using a butane grill lighter start the grill
lighter flame and place it over the burner as
shown below.
WARNING! Use a long-handlwd grill lighter only.
Using standard matches or small lighters pose a
threat to burning.
5. Turn the oven gas valve to LOW as shown in
the picture below. The burner will light.
6. If ignition does not occur in 5 seconds, turn
the burner control(s) off, wait 5 minutes, and
repeat the lighting procedure.
Note: Your PiesOn Oven was run for a period
of time at the factory to ensure proper
function. However, curing of parts will occur
during the first few hours of use, which may
produce an odor.
7. Check burner flame. When you rotate the
knob to medium, the flame should grow
!
!
!
!

Lit. # 01136 Rev-B 10/07 PiesOn Oven Safety/Installation/Use Instructions Page 8
much higher like the picture below.
If the flame does not increase when you turn
it to medium, it means the overflow safety
feature has been activated. Follow these
simple steps to vent the gas line and reset
the safety device.
8. Shut the LP tank valve by turning clockwise
until it stops.
9. Turn the oven gas valve to LOW position for
10 seconds. You may hear gas coming from
the burner for a few seconds, but then it will
stop. This is called venting the gas line.
10. Turn the oven gas valve to the OFF position.
11. You may re-start the lighting process at step
#1.
OPERATION
Oven preheating:
When preparing to use the oven, sufficient pre-heat
time must be allowed for proper heat up of the oven
interior and pizza stone. The best way to enjoy the
benefits of the PiesOn Oven is to follow these simple
pre-heat steps. The patent pending oven design pre-
heats the oven quite rapidly so we recommend that
you complete your pizza preparation before lighting
the oven so as not to overheat the oven.
1. Prepare the pizza toppings, cheese, pizza
dough, or other food
2. Light the oven per the instructions and set it
to MEDIUM position.
Note: MEDIUM is usually the best overall
setting to preheat and cook your food. You
will find that starting on MEDIUM and
adjusting slightly from there will give you the
best results. Warning: the HIGH setting is
generally too high for most cooking
applications and is not necessary in most
cases. HIGH setting can cause the oven to
overheat faster than you want and can cause
food to burn much more easily. Extended
periods on HIGH setting may cause damage
to the oven.
3. If you want to preheat slower to allow for
more preparation time, set the control to the
LOW position, and turn to MEDIUM just
before you are ready to cook.
4. On MEDIUM position, it takes about 12-15
minutes to preheat the oven at an ambient
temperature of 22C. Colder temperatures or
strong winds may increase the preheat time.
5. Observe the temperature gauge on the oven
door. When the gauge reads around 325F,
the oven and stone are sufficiently pre-
heated.
Note: As you become familiar with oven, and how
you like your pizza cooked, you may find a higher
or lower setting more suitable to preheat your
oven. Always observe your oven thermometer in
order to better gauge how you like to operate your
oven.
6. Many times you will find that if the first pizza
took a little longer than expected or you
desire a crispier crust, the second one will
cook perfectly at the same heat setting.
7. Remember, when you adjust the gas control
position higher, it may take 2-3 minutes to
see the result.
8. If you find that you have overheated the
oven, simply set the gas control to LOW, and
open the door for several minutes.
WARNING! HOT SURFACES. Door, handles, frame,
components may be too hot to touch. Always use
oven mitts. The other option is to shut the gas off
and allow the oven to cool before resuming the
Low Flame
Medium Flame
!

Lit. # 01136 Rev-B 10/07 PiesOn Oven Safety/Installation/Use Instructions Page 9
preheat cycle. Operation Notes
The oven can be used to cook any pizza you can
dream about! Follow your personal recipe or visit our
website for a selection of great recipes.
Be sure to use a heavy duty pizza stone to get the best
results.
WARNING! High heat and open flame! Be sure to
keep the flame baffle in place at all times to
prevent damage to the burner unit, oven
components and overheating and fire!
Preparing and cooking pizza
Making your pizza can be fun for all. Simply prepare
you dough, add your favorite toppings and you are
ready to make the best tasting pizza…
The following tips were intended to help you learn
about pizza making as quick as possible.
Dough
1. Many small local pizzerias or popular chains
will sell their dough. This can save time of
making your own.
2. We like to use small or medium sized dough
instead of large for the following reasons:
• The small dough is easier to stretch and work
with
• We prefer to make 6 small pizzas instead of 3
large so we can always have hot pizza coming
out of the oven
• Small dough generally makes thinner, crispier
crust
3. When you buy the dough, make sure they
flour it and place in individual closed bags so
that the surface does not dry out.
4. You can refrigerate the dough for about a day
or two before it starts to lose its texture, but
we like to use it the same day.
5. It can be readily frozen if floured, individually
sealed, and then bulk bagged to keep the air
out.
6. Defrost on the counter, or put in microwave
on the lowest power setting to avoid cooking
it.
7. For best results, allow the dough to get close
to room temperature, as it will stretch easier
than dough just removed from the
refrigerator.
Sauce
A red sauce is the most popular but many people like
to make a white sauce with olive oil, or green with a
pesto. Many are available at the supermarket, but
most are easy to make at home.
!

Lit. # 01136 Rev-B 10/07 PiesOn Oven Safety/Installation/Use Instructions Page 10
Toppings
There are too many toppings options to list. You know
your favorites, and do not be afraid to experiment and
try new ones.
Prepare the Pizza
When all the ingredients are ready, its time to make the
pizza!! Follow these steps to ensure you make a great
pie.
1. Put some flour on the counter and place the
dough on it, flouring gently.
2. Place the dough on the counter and begin
working around in circles with your finger tips.
3. As it starts to enlarge, continue working on
the counter or pick up the dough and gently
toss it using the back of your hands.
Note: Pizza dough makes the best crust if you
minimize how much you “work” or stretch it.
Using a rolling pin will certainly make it round and
uniform, but will it be less light and airy when
cooked.
4. Place a generous amount of corn meal on to
a pizza peel and lay the dough on top of it.
The corn meal will help the dough slide off
the peel easily when placing into the oven.
5. Add your sauce and then toppings.
Cooking the Pizza
6. When the oven is preheated, open the oven
door and place the peel towards the back of
the pizza stone. Angle the peel up in the
back and gently “tug” or jerk the peel
backwards and the pizza will slide off.
7. Inspect the bottom of the pizza on occasion
to check for desired crust. A pair of 12" or
longer metal tongs work best to grab the
pizza and lift it for inspection.
8. For best results, turn the pizza 180 degrees
once during the co.ok cycle to ensure even
cooking
9. Cook for 6-10 minutes based on desired
results, pizza size, amount of toppings, etc
10. While the pizza is cooking, you should
prepare the next pizza such that it is ready to
go in the oven as the first pizza comes out.
Note: If a pizza is removed and the oven left idle
for more than a few minutes, the pizza stone will
begin to overheat. If it overheats too much, the
next pizza may begin to burn on the bottom. If you
need more time between pizza’s, turn the valve
setting to LOW, and then back to normal setting to
when the next pizza is ready.
11. When cooking is complete, simply turn off the
gas control valve and the LP tank valve.
Note: Since the stone is still hot, any residual corn
meal on the surface may start to burn lightly and
cause some smoke. This will stop within a few
minutes as cooling happens.
12. For faster cooling, open the door to allow
good air flow.
WARNING! HOT SURFACES. Door, handles, frame,
components may be too hot to touch. Always use
oven mitts.

Lit. # 01136 Rev-B 10/07 PiesOn Oven Safety/Installation/Use Instructions Page 11
CLEANING
When the oven has cooled to below 100F, you can
wipe the interior down. The stone should never really
need to be cleaned other than scraping any of the
burnt food or corn meal off.
NOTE: Never wash with soap as it will soak into
the stone. The exterior can be wiped with a mild,
dilute water & soap solution.
DISASSEMBLE FOR
TRANSPORTATION
The PiesOn oven was designed for use anywhere you
go. Follow these instructions to pack up your oven and
go.
1. Allow oven too cool.
2. Remove pizza stone and protect from
damage for transport.
3. Turn the flame baffle over so the legs are up
in the air as picture below.
4. Lift the oven off of the burner assembly.
5. Place the burner assembly on its back,
remove the wing nuts and washer, remove
the legs.
6. Fasten the bolt, washer and wing nut to the
oven leg so it will not get lost
7. Pack and go!
Troubleshooting
Tips
Problems with proper gas flow:
This oven and most propane tanks are equipped with a
safety device to shut off the flow of gas should the
hose be cut or severed. Sometimes this safety device
may be tripped when lighting the oven. To prevent this,
ALWAYS make sure the regulator valve is in the closed
position before opening the valve on the LP gas tank.

Lit. # 01136 Rev-B 10/07 PiesOn Oven Safety/Installation/Use Instructions Page 12
General
Maintenance &
Storage
• Store oven in a cool dry place. Do not store outside
exposed to weather. Storage of an oven indoors is
permissible only if the cylinder is disconnected. If
storing oven indoors, detach and leave LP cylinder
outdoors. LP cylinders must NOT be stored in a
building, garage or any other enclosed area.
• For long term storage, cover the cast iron burner
and the hose and regulator assembly in a plastic
bag.
• Do not tamper with or attempt repairs on the
burners, frames, valves, or LP cylinders. Allow only
qualified LP gas dealers to make repairs.
• Always close LP cylinder valve first after use.
Always use and store LP cylinder in an upright
position. Never store or transport LP cylinders in
occupied enclosures. If storing oven indoors,
detach and leave LP cylinder outdoors
Table of contents