Using the Remote Control
Switching remote control on
and off
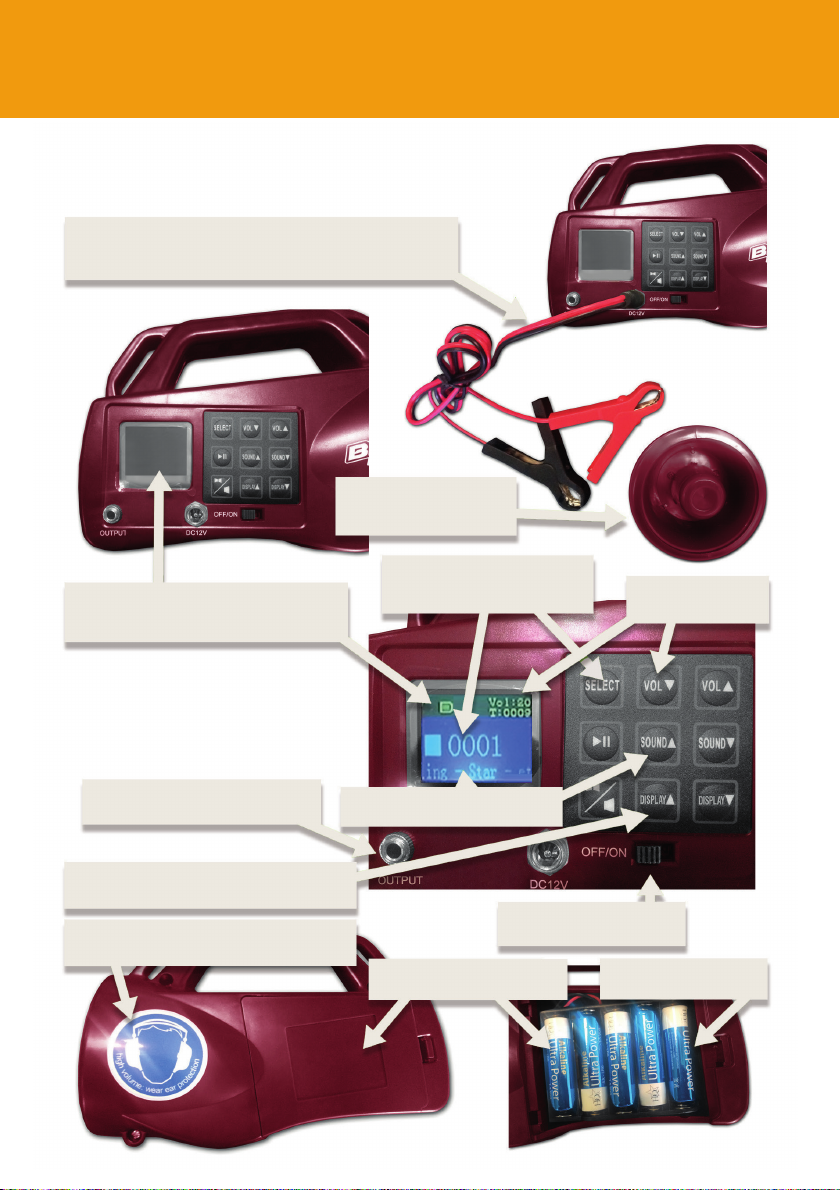
Open the battery cover on the
remote control and insert 3
AAA batteries, put the cover
back and slide the switch on
the right side downwards once
to switch on. Sliding this switch
downwards again, will turn off
the remote control.
The remote control will
automatically switch off after
approximately 1 minute if not
used.
Initialization of remote control
First start BirdYell and then start remote control.
The first time of use, the remote control should be more then 1 metre away from the BirdYell.
The remote control can then be used to change the sound, volume, play and pause.
When batteries are low of the remote control, the remote may not update correctly.
If this happens, after installing new batteries, push the speaker key for 3 seconds on the
remote, the songs will automatic update in the remote control.
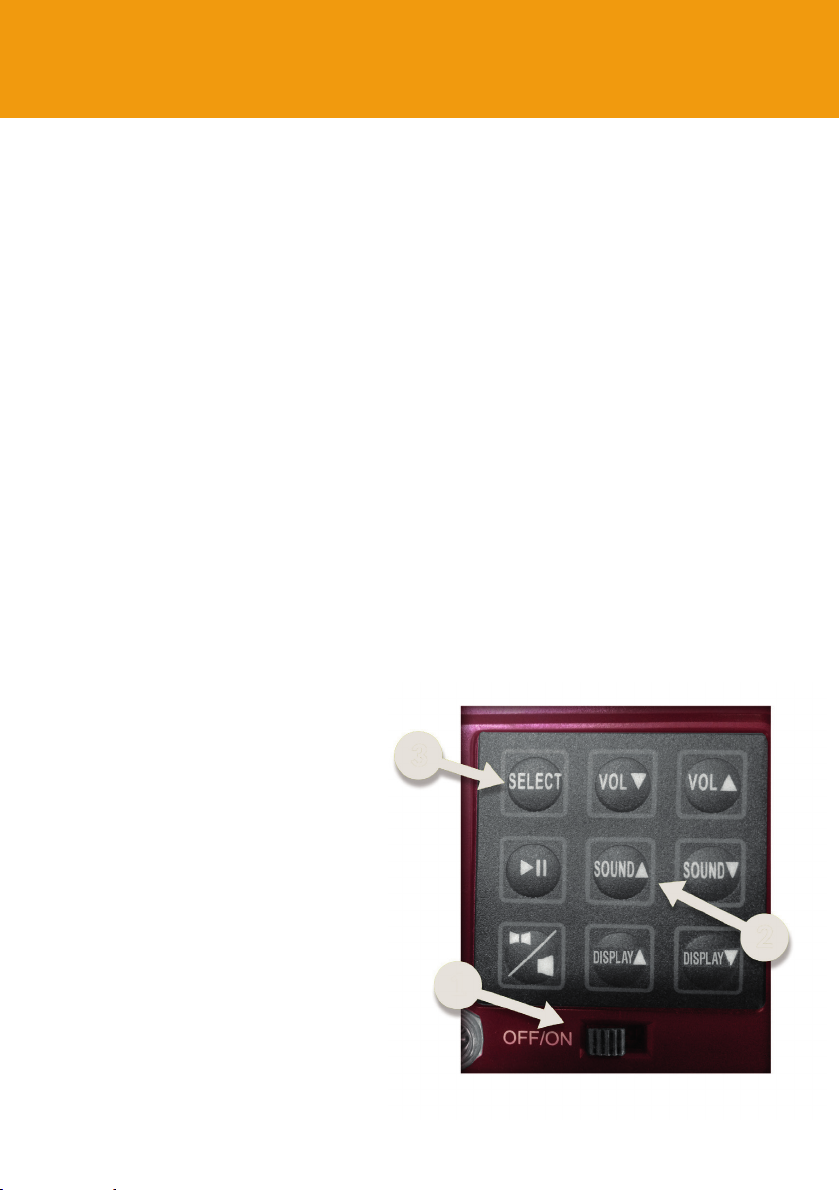
Function of the buttons
The function of the buttons on the remote are the same as the BirdYell.
1, 2, 3 and 4 buttons: Hotkeys means the most used 4 sounds can be set.
Operation method: first select the song, the press hotkey for 3 seconds when playing.
Eg: Choose song 3, when playing, press Hotkey 1, then press "select" to confirm.
Note: leaving the batteries out of the Remote for over 2 minutes will disconnect the Birdell. The
pairing process above will have to be repeated.
Pairing
With the remote switched on,
start the BirdYell unit: press and
hold SELECT on BirdYell
a message with be displayed
- Learning mode . . . release
then immediately press and hold
SELECT on the remote Control.
Once connected the display will
flicker 3 times and the Birdyell
will be connected
Using the Remote Control
Switching remote control on
and off
Open the battery cover on the
remote control and insert 3
AAA batteries, put the cover
back and slide the switch on
the right side downwards once
to switch on. Sliding this switch
downwards again, will turn off
the remote control.
The remote control will
automatically switch off after
approximately 1 minute if not
used.
Initialization of remote control
First start BirdYell and then start remote control.
The first time of use, the remote control should be more then 1 metre away from the BirdYell.
The remote control can then be used to change the sound, volume, play and pause.
When batteries are low of the remote control, the remote may not update correctly.
If this happens, after installing new batteries, push the speaker key for 3 seconds on the
remote, the songs will automatic update in the remote control.
Function of the buttons
The function of the buttons on the remote are the same as the BirdYell.
1, 2, 3 and 4 buttons: Hotkeys means the most used 4 sounds can be set.
Operation method: first select the song, the press hotkey for 3 seconds when playing.
Eg: Choose song 3, when playing, press Hotkey 1, then press "select" to confirm.
Note: leaving the batteries out of the Remote for over 2 minutes will disconnect the Birdell. The
pairing process above will have to be repeated.
Pairing
With the remote switched on,
start the BirdYell unit: press and
hold SELECT on BirdYell
a message with be displayed
- Learning mode . . . release
then immediately press and hold
SELECT on the remote Control.
Once connected the display will
flicker 3 times and the Birdyell
will be connected