7
•Before starting the machine, make sure that the cutting blade is not blocked and can rotate freely.
•Before cleaning and maintaining the device, disconnect it from the power supply and wait until the
cutting blades stop rotating.
•Work only in well-lit places.
•If a hard object hits the machine while mowing, switch off the mower and check whether any of the
components has been damaged.
•If the device vibrates abnormally, turn off the mower and check that no damage has occurred.
•Check the condition of the device regularly and replace worn parts.
•Never use the device during rain or in high humidity.
•Never mow wet grass.
•Use only extension cords intended for external use.
Other threats
Even when the power tool is operated according to the instructions, there is always a risk of danger. Depending on
the design and construction of the power tool, the following hazards may appear:
• Lung damage if a suitable dust mask is not used.
• Hearing damage if you do not wear appropriate ear protection.
• Negative impact on health due to vibration of the arms and hands, when the device is used for a long time or
in the wrong way and without maintenance.
ATTENTION! The device and packaging are not for fun! Keep out of the reach of children, danger of
swallowing or suffocation.
INSTALLATION AND MAINTENANCE
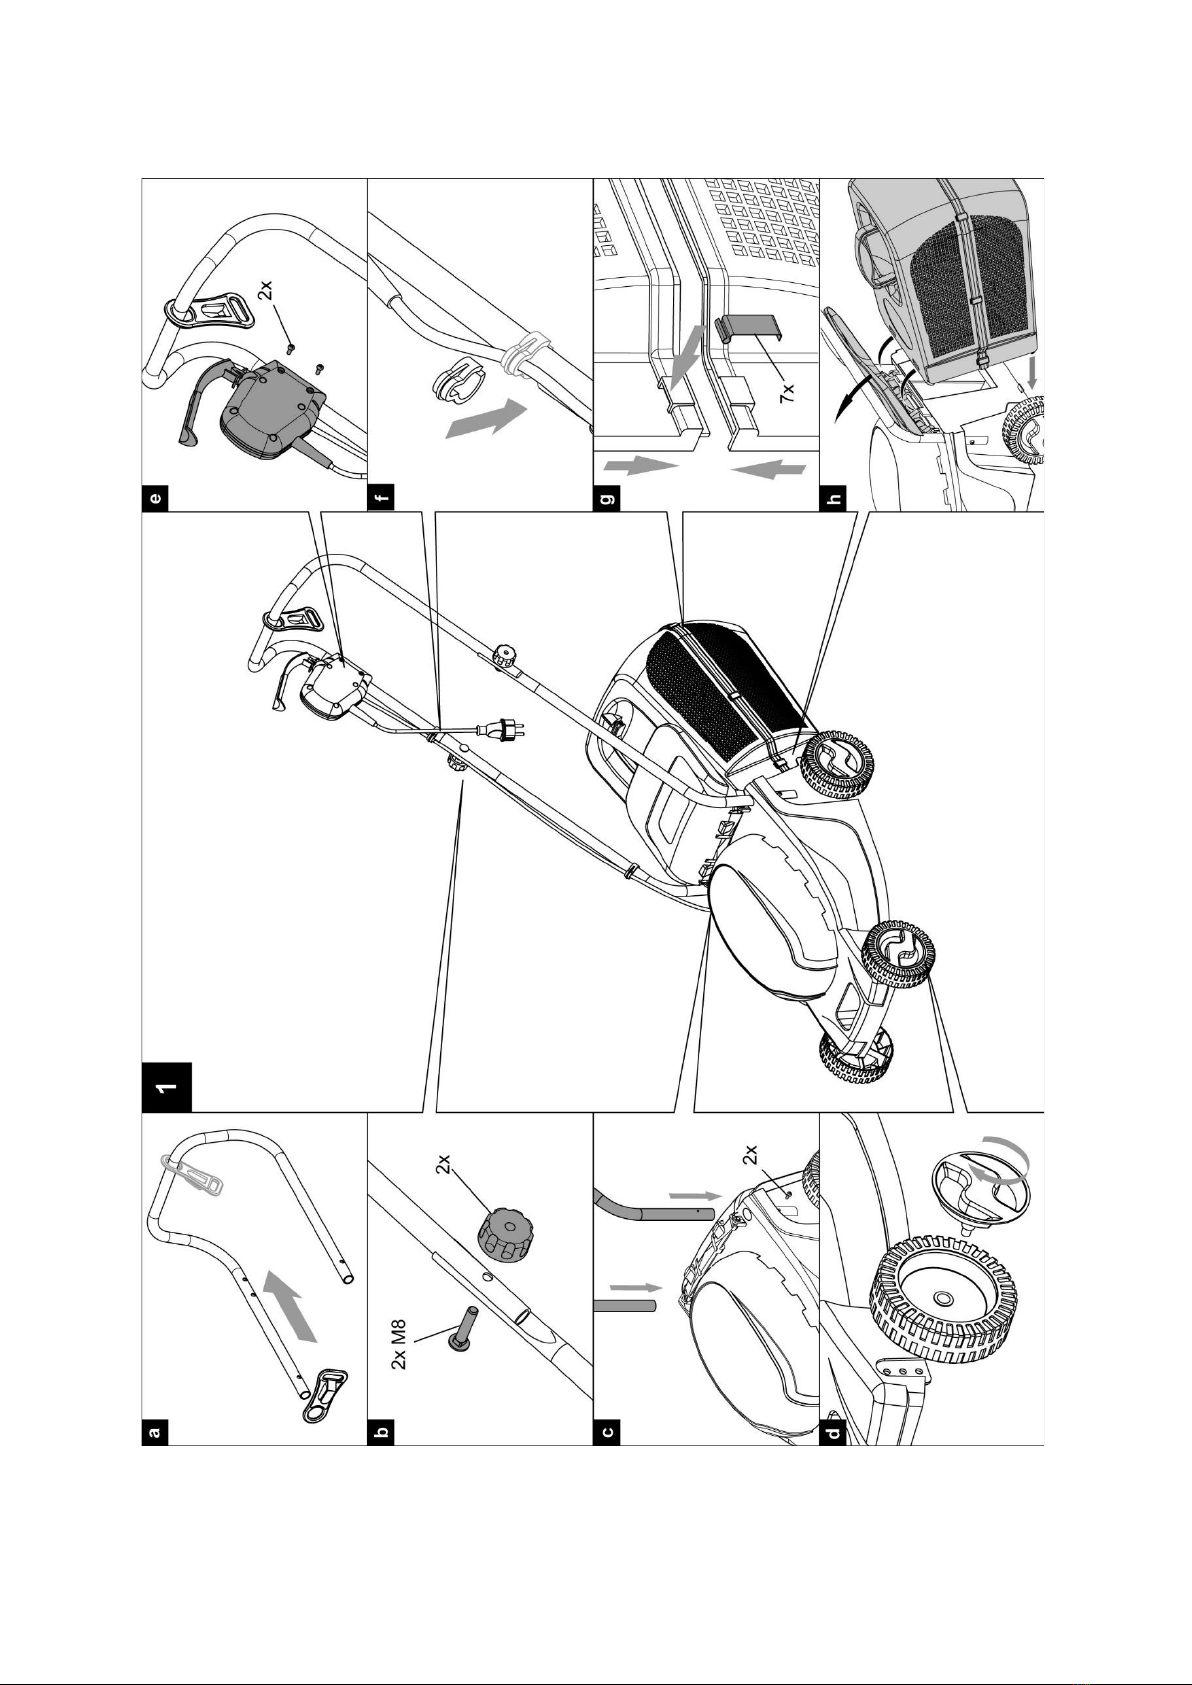
The method of mounting the device is presented in (Fig. 1).
and) Put the cable holder on the upper part of the mower's driving handle.and) Put the cable holder on the upper part of the mower's driving handle.
b) Use the screws and plastic nuts to connect the upper and lower parts of the running handle. b) Use the screws and plastic nuts to connect the upper and lower parts of the running handle.
c) Mount the running handle on the mower body and connect it to the body with the screws.c) Mount the running handle on the mower body and connect it to the body with the screws.
d) Install the wheel cap.d) Install the wheel cap.
e) Mount the power switch on the upper handle.e) Mount the power switch on the upper handle.
f) Clip the power cord with the snap clip to the handle tube.f) Clip the power cord with the snap clip to the handle tube.
g) Connect the two parts of the grass catcher using the mounting catches g) Connect the two parts of the grass catcher using the mounting catches
h) Lift the tailgate covering the grass outlet and attach the basket to the catches. h) Lift the tailgate covering the grass outlet and attach the basket to the catches.
Setting the cutting height (fig. 2).
•Attention! Disconnect the equipment from the power supply before changing the cutting height. Attention! Disconnect the equipment from the power supply before changing the cutting height.
•The cutting height is changed by changing the height of the mower's front and rear axles, hooking the wheel axle to the
corresponding cutout in the housing.