Prismasonic Fixed User manual

Assembly Instructions
Parts list:
Screen Fabric (may come as a different package)
Screen Framework (8 pieces)
Velvet Frame (4 pieces)
L-Bracket (4 pieces)
T-Bracket (4 pieces)
Corner Bracket (4 pieces)
Cap Screw with threaded washer, M8 x 50 (4 pieces)
Cap Screw, M6 x 40 (10 or 14 pieces; depending on the model)
Washer M6 (10 or 14 pieces; depending on the model)
Screw (clear), 5 x 35 (40 pieces)
Screw (oiled black), 5 x 30 (8 pieces)
Staple Gun
Tongs
Screwdriver
Tapemeasure
Staples, 8 mm
L-wrench, 5 mm
L-wrench, 6 mm
L-wrench, Torx
Assembly manual
Prismasonic Fixed Video Screen
Installation Instructions:
Carefully remove and unwrap all the contents of box. Referring to the list
below, make sure you have everything needed to proceed with the
assembly of the screen. If any parts are missing, contact Prismasonic
immediately.
16:9 Flat
Video Screen
Prismasonic Fixed Video Screen
Congratulations on your purchase of the Prismasonic Fixed Home Theatre Screen. The screen’s
combination of high-grade material and mechanical engineering make it a welcome addition
to Prismasonic’s line of professional-grade Home Theatre applications. The screen surface
provides high brightness, vivid colors, high contrast and a large viewing area. The unique 4-
point tightening system makes it possible to use the non-elastic, extremely high uniform
fabric as a screen material, and still achieve the 100%’waveless’ surface. The attractive frames
that are covered with the deepest black velvet trim to absorb any overspill light. The viewing
surface comes in contact with the beveled edges of the frames. The screen comes with
everything you need to install, adjust, and enjoy...
Thank you for your purchase, and happy viewing!
–The Team at Prismasonic

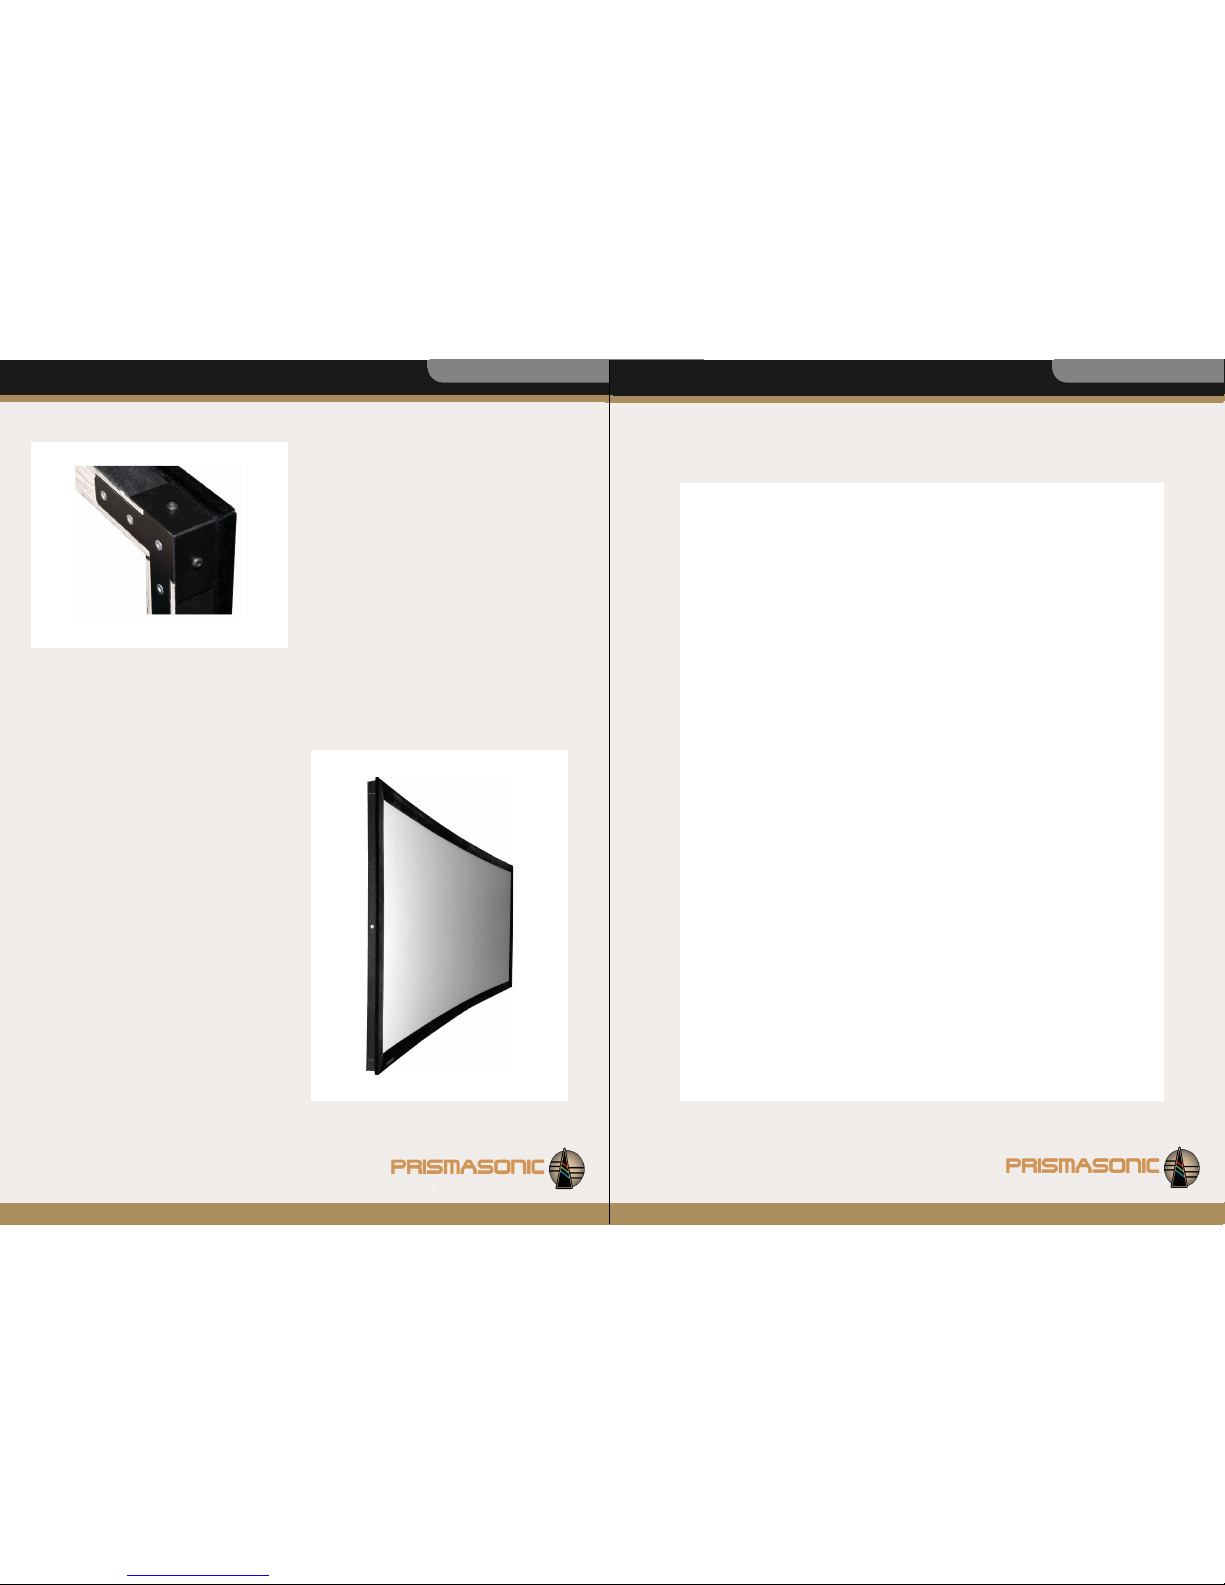
Assembly Instructions Prismasonic Fixed Video Screen
Figure 3
STEP 3
Measure the both diagonals of the framework using the Tapemeasure
(FIG 3) In case the measures differs from each other, either push the
opposite corners to each other, or pull them from each other to
achieve the framework geometry exactly correct. After the correct
geometry has been found, tighten all screws of the corner L-brackets
securely.
Assembly Instructions
Figure 1
STEP 1
Affix each of the Cap Screw with
thick washer, M8 x 50 (4 pieces)
into the thread sockets provided
on the four screen framework
parts. Make sure the heel of each
washer becomes in contact with a
thread socket. (FIG 1)
Prismasonic Fixed Video Screen
Figure 2
STEP 2
Build up the screen framework exactly as shown in the photo
illustration (FIG 2). Insert the framework parts with the cap screws
(Step1) through the circular 2-plane hole located at the spots of circles
in the photo illustration. Insert the L- and T brackets into their slots
provided on the framework parts, and prepare to tighten the screws 5
x 35 with the torx wrench. Make sure the grooves of the holes of the L-
and T brackets are facing upwards. Tighten securily first the T-brackets.
Tighten the L-brackets first only to the extent, that they STILL are
loosely held. At this point the corner assemblies must remain loose in
order to be able to get the framework geometry corrected (in the next
step)

1
2
34
6
5
7
8
9
11
10
12
13 14
16 15
aaaaa
a
a
a
b
b
b
b
bbbb
c
c
d
d
20 cm
8 inch
Figure 4
Assembly Instructions Prismasonic Fixed Video Screen Prismasonic Fixed Video Screen
Assembly Instructions
STEP 4
Attach the screen to the framework (to the opposite side of L- and T-brackets) by using the staple gun. (FIG4)
Make sure the rectangular slots of screen matches the slots of the framework with a certain accuracy. Start
shooting the staples to the spots illustrated in the figure 4, with the order of the provided numbering. Firmly
pull the fabric with tongs (FIG 5) to the direction of the arrow every time before the staple is shot. Finally
shoot the staples in steps of ~20 cm (~8 inch) around the screen with the order of the alphabets (FIG 4).
The fabric should now have only small wrinkles around the staples, but no waves at all on the viewing area.
Wrinkles will stay below the velvet frames, and thus will be invisible after full assembly. If there still exist some
waves on the viewing area, it is possible to remove the staples with the screwdriver head and the tongs, as
illustrated in the FIG 6, thus getting the problem area tightened. (There is no limitation on how many times
the staples can be removed and re-shoot.)
NOTE! In order to achieve the best result, please follow the
proposed stapling order
NOTE! If the screen slots do not match the framework slots with
a certain accuracy, the framework is not rectangular and you have
to return back to the STEP 3
Figure 5 Figure 6
STEP 5
The final tightening of the fabric is done with the four screws located into the slots of framework (two on
horizontal bottom leg, one on each vertical leg; FIG 2, FIG 7), pointing away from the edges. The screen will
be tightened by turning the screws counterclockwise with the L-wrench, 6 mm. First tighten the horizontal
direction after which the both vertical sides.
NOTE! The staples may loose if the fabric is overtightened by the screws
Figure 7
Figure 8
STEP 6
Stand up the framework and prepare attaching the
velvet frames. Insert a Cap Screw, M6 x 40 with a
washer to every slot provided by the framework, and
tighten them with the L-wrench, 5 mm (FIG 8) to
the screw threads of velvet frames, first only to an
amount that the frames still are loosely held. Match
the each corner of frames perfectly to each other, and
tighten all the screws securely. You may have to flip
the framework vertically in order to get all frames
properly installed.
Assembly Instructions Prismasonic Fixed Video Screen Prismasonic Fixed Video Screen
Assembly Instructions
Figure 9
STEP 7
Attach the each Corner Bracket to the framework
with the Screws, 5 x 30 (FIG 9). Tighten all screws
securely using L-wrench, Torx.
STEP 8
You are all done!
The screen can now be mounted to the wall simply
by affixing two screws (must stand the screen
weight) to the wall and lifting the screen to hang on
those screws from the upper horizontal framework
bar.
After wall mounting the fabric can still be fine
tightened by the four screws located into the slots of
framework (FIG 2, FIG 7)
Care and Maintenance
Matte White, High Contrast Gray Fabrics:
Clean surface with a solution of mild dishwashing
liquid diluted with warm water. Sponge the surface,
rinse with clear water and blot dry. Do not use
cleaning solvents or abrasives.
High Gain Silver Fabric:
Clean surface with a very soft brush or cloth and
carefully dust the surface. Do not use soap, water,
solvents or abrasives.
Acoustic Transparent Fabric:
Clean surface with a solution of mild dishwashing
liquid diluted with warm water. Sponge the surface,
rinse with clear water and blot dry. Allow screen to air
dry overnight in down position. Do not use cleaning
solvents or abrasives.
Make your notes here


