PROAIM ST-EQZR-00 User manual
1
Instruction Manual
2-Axis Equalizer (ST-EQZR-00)
For Flycam Flowline & Camera Gimbals

2
Subject Page
Foreword 3
Introducon 4
Safety Hints 5
Assembling 5-10
Warranty 11
At Proaim, our goal is to ensure 100% Customer Sasfacon in all that we do.
We back our sales with a 1 year warranty from the date of purchase and work hard
to resolve any problems in the unlikely event one should arise.
With our commitment to connuous improvement and your Feedback, building on
our reputaon of providing aordable, quality products is
PRIORITY #1.
Table of Contents

3
Dear Client,
On behalf of all the people that work so hard to provide you with the most
up-to-date, exible and cost-ecient producon gear, we would like to welcome
you into the Proaim family.
By purchasing your Proaim 2-Axis Equalizer for Flycam Flowline & Camera Gimbals,
you have just joined a host of designers, engineers, machinists, assembly, customer
service and oce sta that take great pride in all that they do. Our mantra of
connuous improvement has been the guiding principle of how we conduct our
business since day one.
Once you have the opportunity to experience your new 2-Axis Equalizer for Flycam
Flowline & Camera Gimbals, we hope you will agree that we cra quality products
at a compeve price. Products designed to meet and exceed the standards of
today’s real producon world.
Standards set by our valued clients and standards we strive to maintain.
With Best Wishes,
Proaim Team
Welcome To Proaim!

4
Proaim Equalizer 2-Axis An-Vibraon Mount is the perfect companion for
operators using a Flycam Flowline or Easyrig with motorized gimbal stabilizers
including the DJI Ronin® and Freey MōVI®. It is made to eliminate the moon
coming from the Flowline cord while walking or running. It stabilizes around two
axis, roll and lt; at the same me operator’s moon isn't transmied to the
camera gimbal and you can lt the gimbal eortlessly at the centre of gravity, along
its curved shape.
Please inspect the contents of your shipped package to ensure you have received
everything that is listed below.
Introducon
What’s In The Box
Rail System Rail System with
Loop
Handle Bar Grip with
28mm Adapter Rings
Top Handle Grip with 28mm
Adapter Rings
2 x Sliders
4 x 25mm Adapter
Rings
4 x Height Risers
5
Safety Hints
ATTENTION: PLEASE READ THIS BEFORE USING TO PREVENT SERIOUS DAMAGE TO
THE GEAR!
BE HIGHLY VIGILANT OF STOPPERS
Make sure that end-stoppers on both the sliders are appropriately ghtened to
avoid any slip-o.
DO NOT FORGET TO SECURE THE EQUIPMENT
The Hook must be carefully locked with Loop on Rail System, while seng-up with
Flycam Flowline or Easyrig.
NEVER LEAVE THE FASTENERS LOOSE
Always ghten the locking knobs properly for giving security to your setup.
FOLLOWING THESE GUIDELINES WILL PROVIDE BETTER SHOTS AND TROUBLE-FREE
OPERATION.
SHOULD YOU NEED ADDITIONAL INFORMATION, TECHNICAL ASSISTANCE IS
AVAILABLE ‘ONLINE’ BY CONTACTING YOUR SALES REPRESENTATIVE.
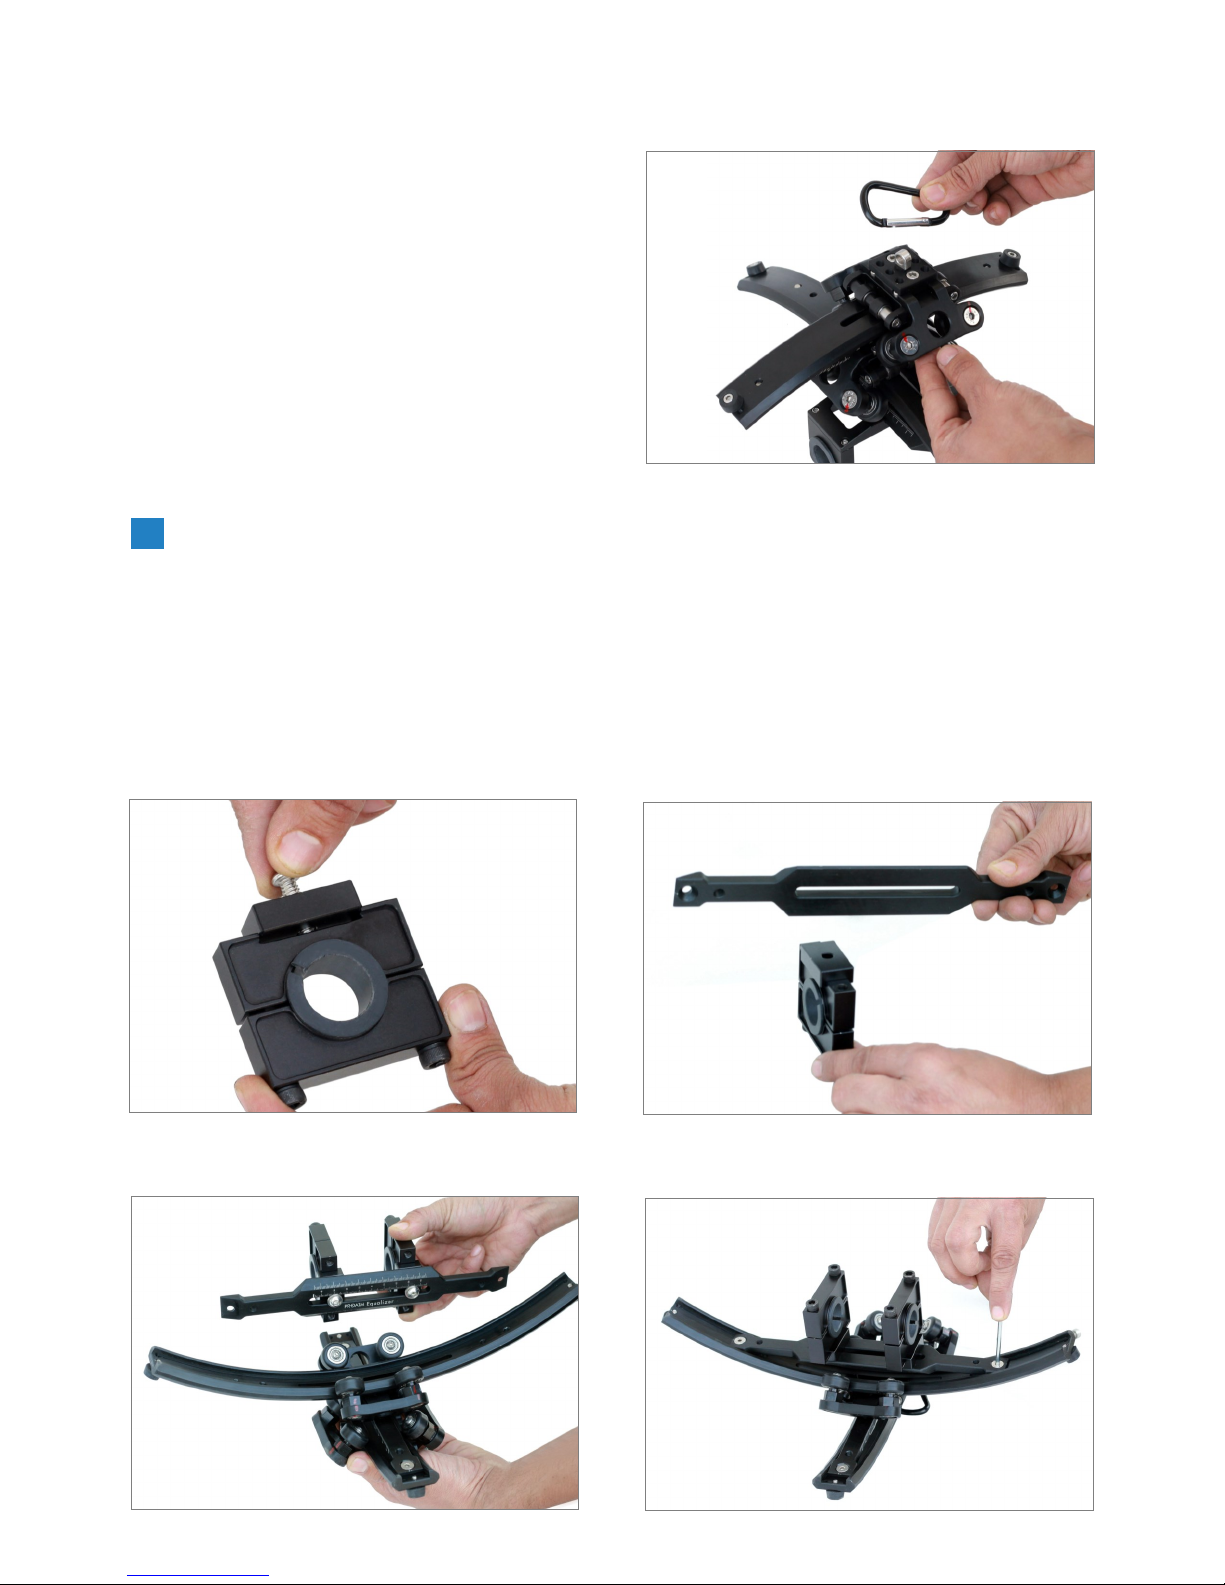
Assembly with Handle Bar Grip
The Handle Bar Grip works well with Freey MoVI M5/M10 & M15 Gimbals.
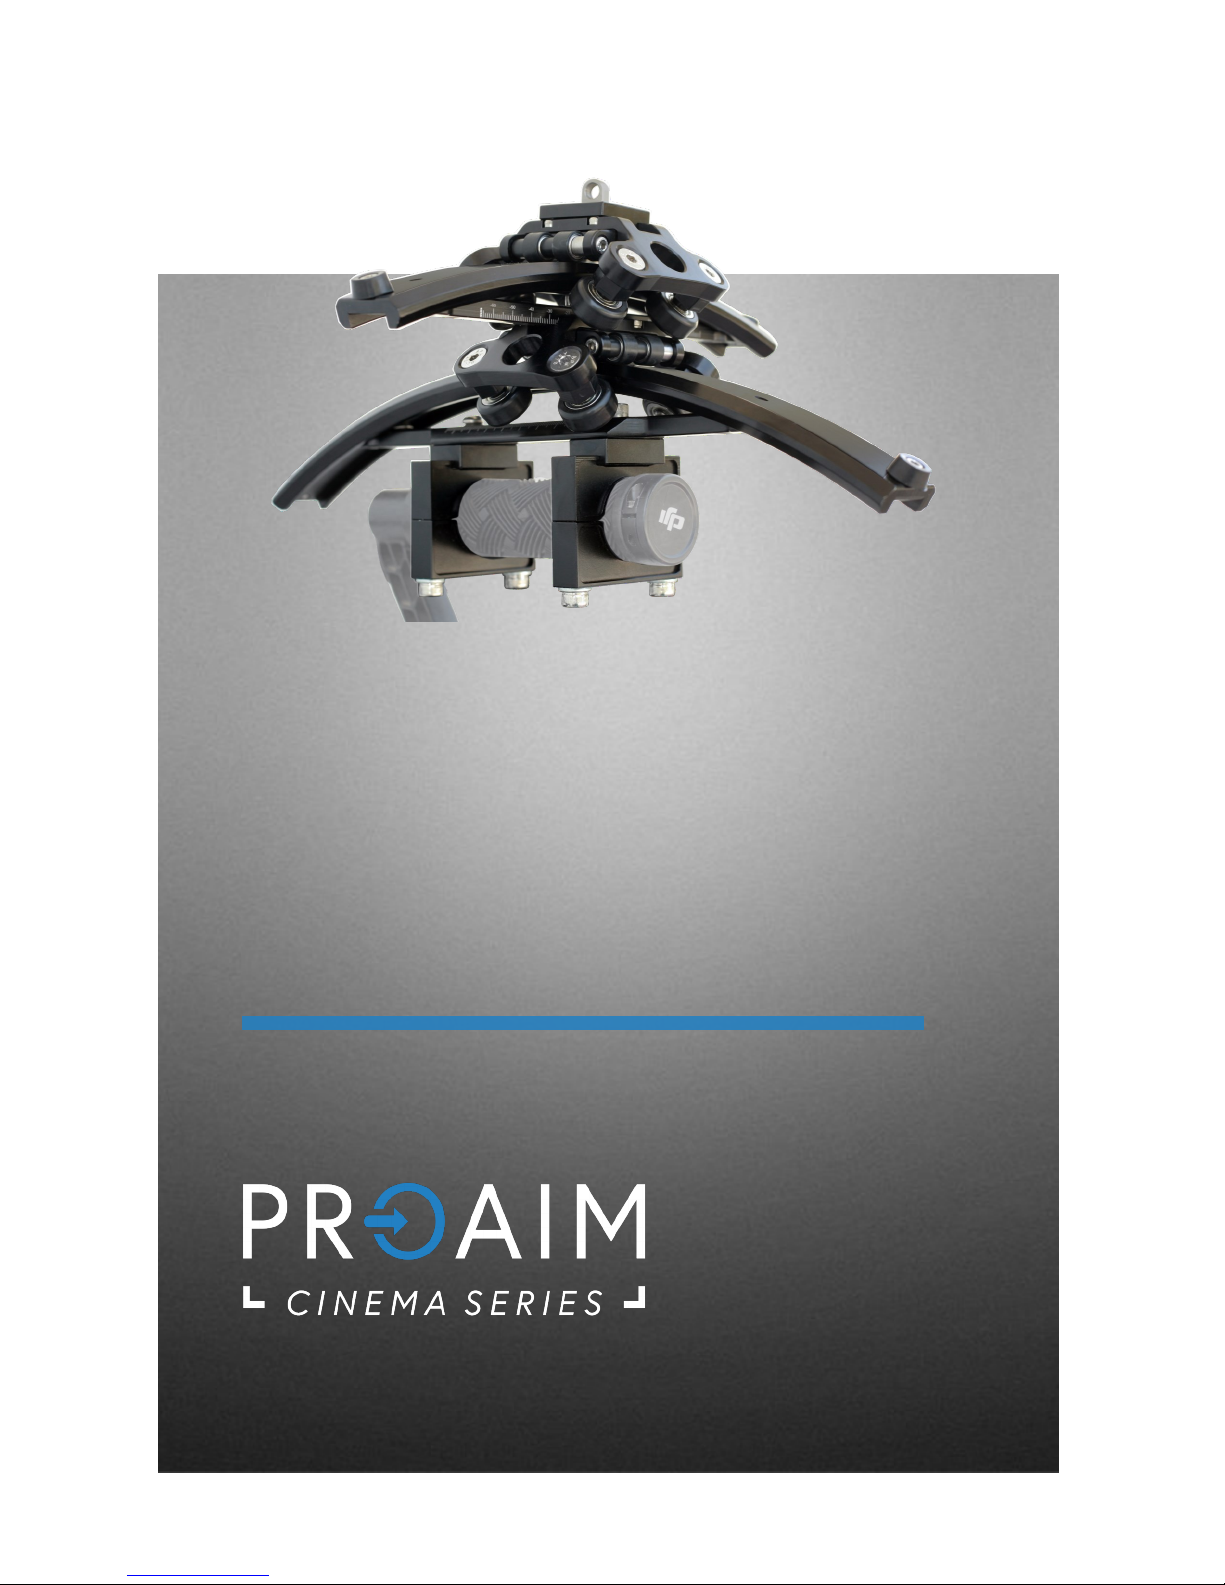
Firstly, take big Slider and loosen the screws from boom. Remove the part with index
markings.
6
Now again x this part on the big Slider. Aer xing, it will look as shown in image.
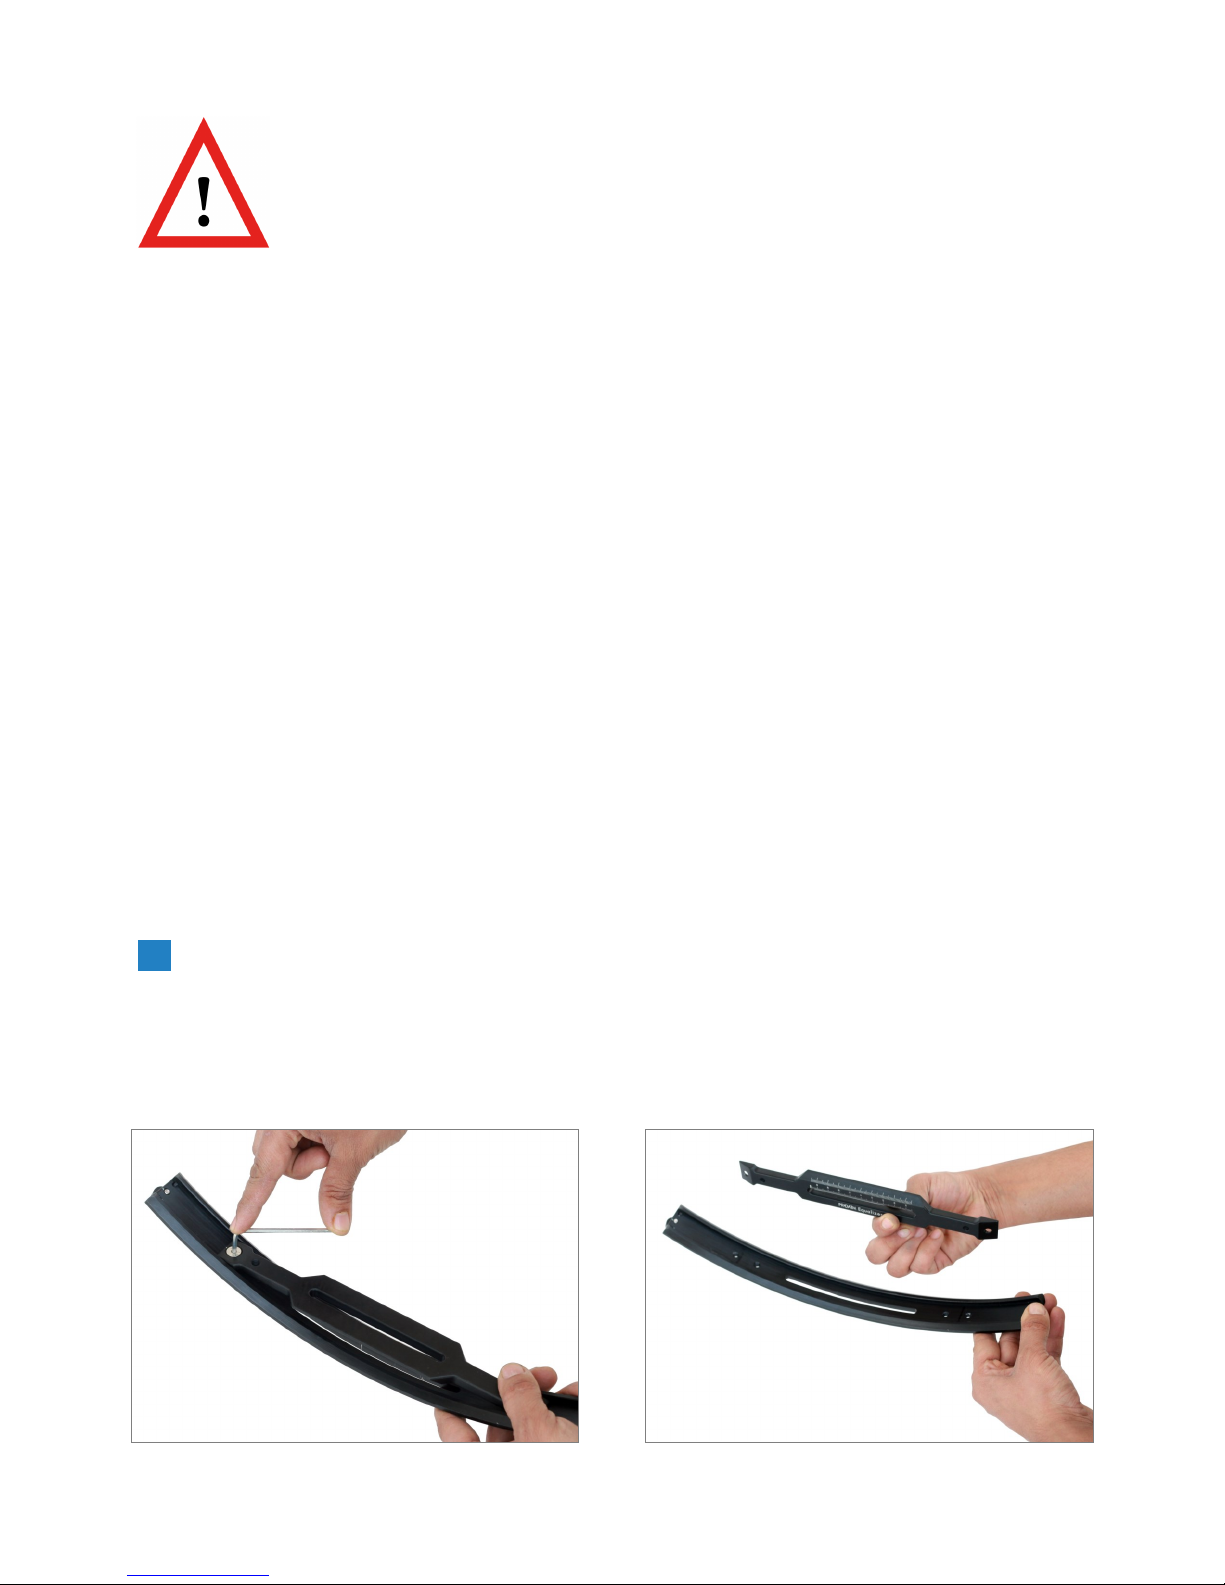
Mount this part on Handle Bar Grip and x it with provided screws.
Then take small Slider and Rail System.
Join both of these together via the
provided screws, as shown.
7
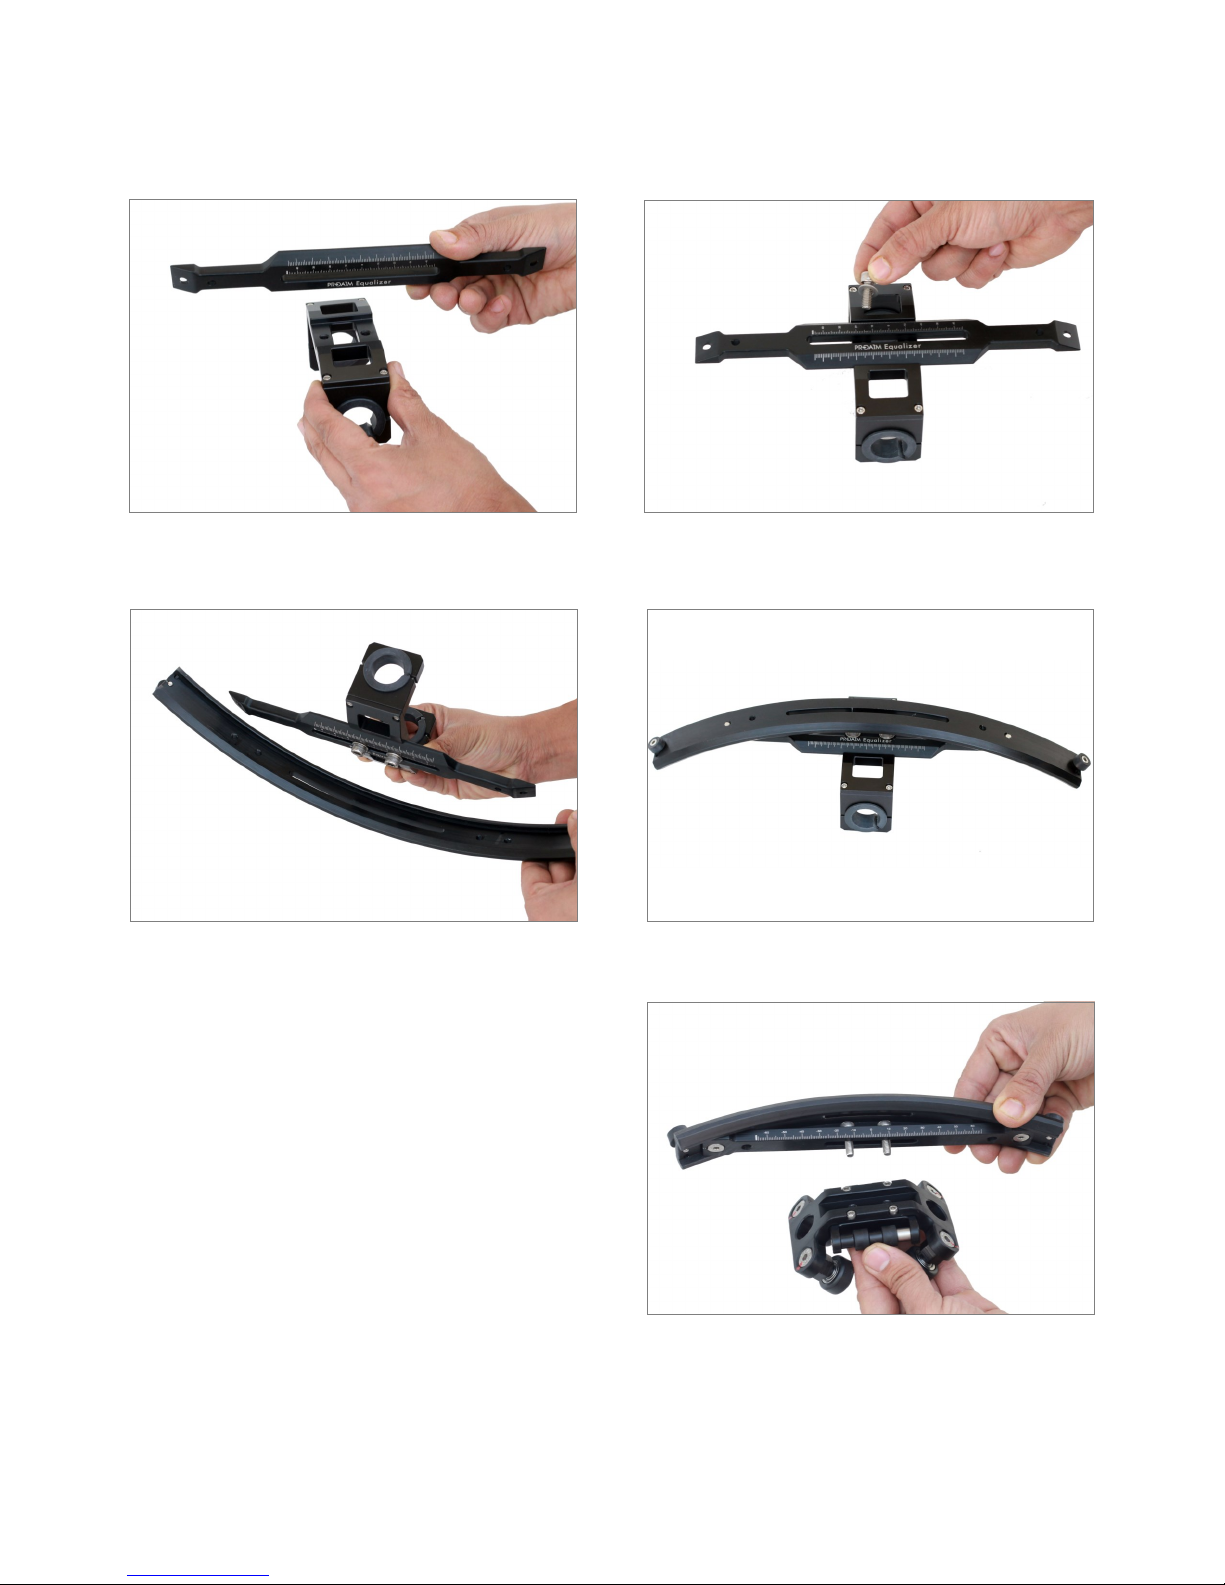
Tighten back the rubber end-stopper on
big Slider to secure the Rail System.
Loosen and remove one of the rubber end-stoppers from big Slider. Insert the above joined
small Slider setup onto big Slider.
Now loosen and remove one of the rubber end-stoppers from small Slider. Insert Rail System
with Loop onto the Slider and ghten back the stopper to secure it.
8
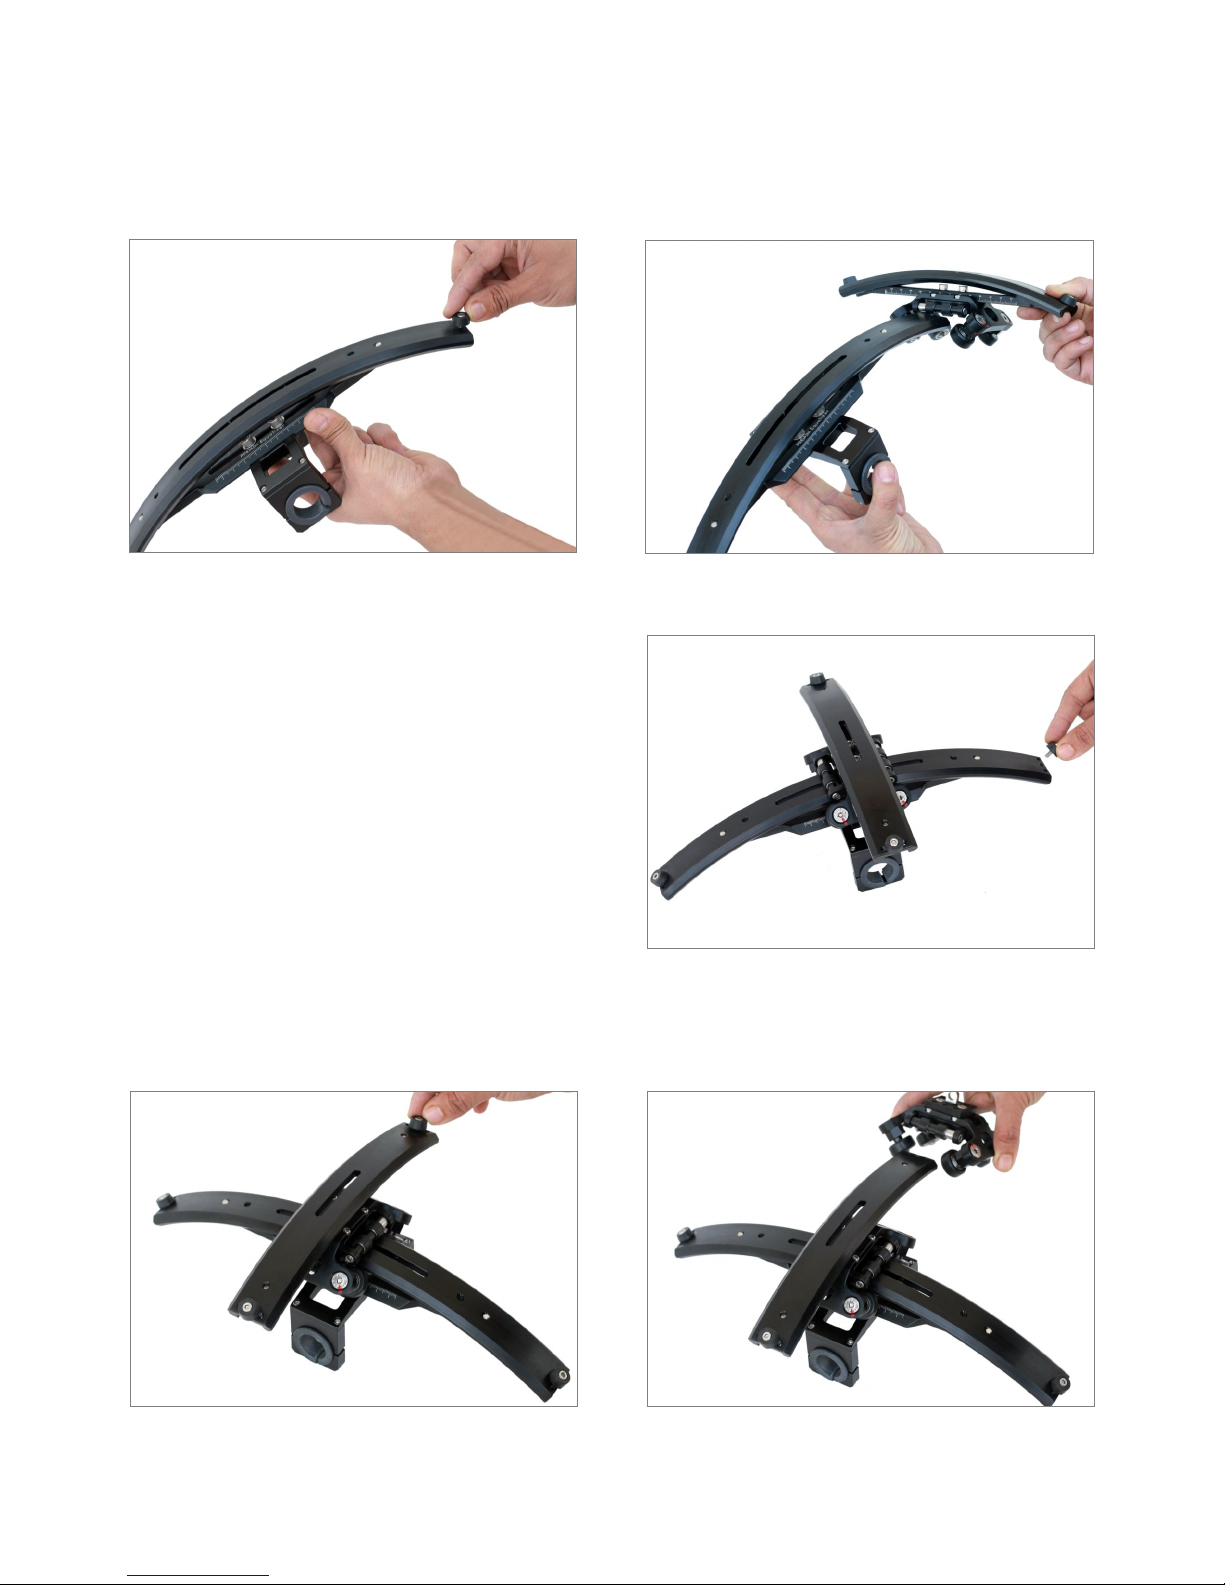
Now x this part on the boom of big Slider and ghten the screws accurately.
The Top Handle Grip works well with DJI Ronin/M/MX and DJI RONIN 2 (R2) Gimbals.
Connect the provided Hook properly
with Loop on Rail System.
Assembly with Top Handle Grip
NOTE: If you wish to change your Gimbal from Freey MoVI to DJI Ronin, then change Handle Grip
System by removing the boom part with index markings.
Take Top Handle Grip, loosen and remove the screw. Mount the part with index markings
onto the Grip and x it with screws.
9
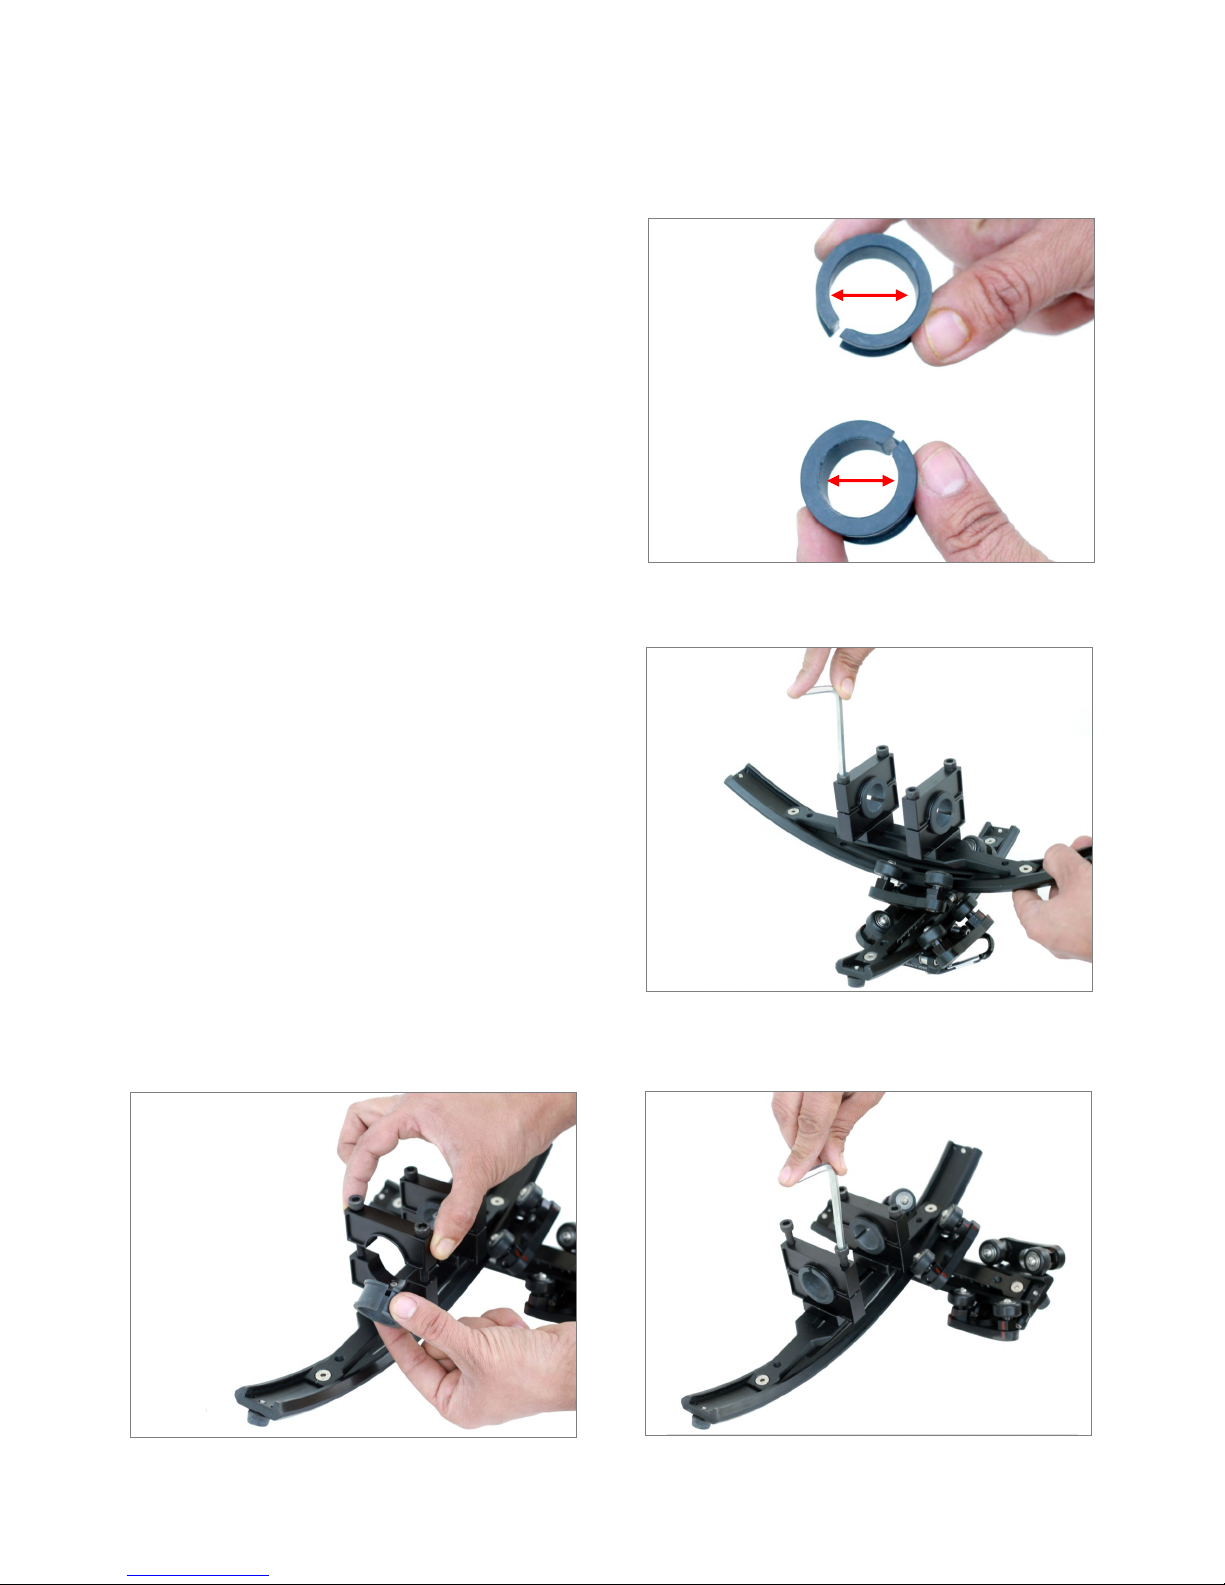
Loosen all the screws on boom of Top
Handle Grip, to change Adapter Ring.
Pull one secon up to take out the Ring. Insert the other size of Ring and ghten screws back.
To Change Adapter Rings
NOTE: There are 2 sizes of Adapter Rings
provided with this gear – 25mm & 28mm.
You can very easily change Adapter Rings
from Grips as per requirement. Therefore,
the grip can clamp on to 22mm, 25mm,
28mm or 30mm tubes.
NOTE: Similarly follow the menoned above steps to change Adapter Ring of Handle Bar Grip.
28mm
25mm

10
Take Handle Bar Grip, loosen all the 4 screws to remove Tube Clamps. Then aach Height
Risers with Clamps.
Now x these Clamps with Handle Bar Grip and ghten the screws back.Your Handle Bar Grip
has more height now and will look as shown in image.
To Increase Height of Handle Grips
NOTE: There are 4 Height Risers provided with this gear. You can very easily increase the height of
Grips as per requirement.
NOTE: Similarly follow the menoned above steps to increase height of Top Handle Grip.
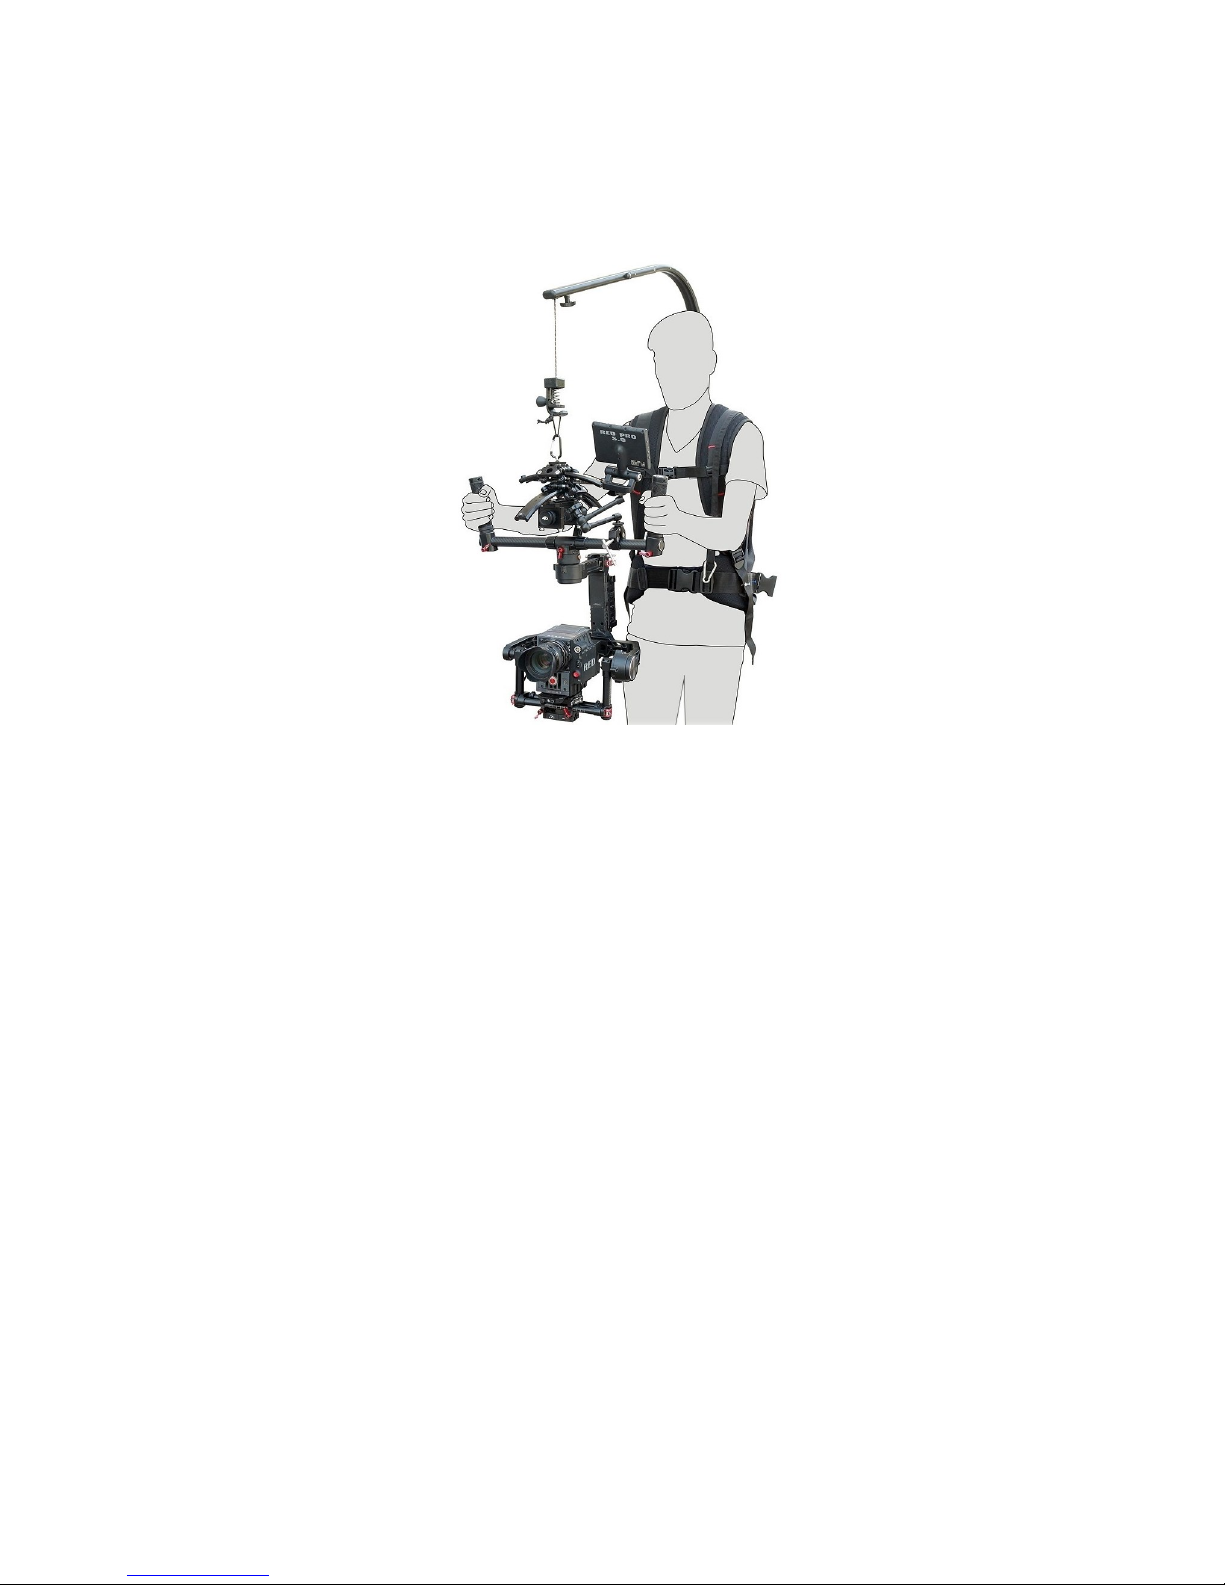
Finally, mount any camera and Gimbal
setup of your choice along with Flycam
Flowline.
11
YOUR 2-AXIS EQUALIZER
ALL DRESSED UP AND READY TO GO!
WARRANTY
We oer a one year warranty for our products from the date of purchase.
We will repair or replace your product, free of charge, in the event of a defect in materials or
crasmanship obtained during normal use or handling based on the user manual. Please note
that we will not cover any shipping costs for returning the product to us. If any VAT or import
dues are applied to the return, we will also charge these costs to the customer.
The warranty does not include, by the way of example, damage caused by products that we do
not supply or from mishandling in transit, accident, misuse, neglect, lack of care of the product ,
or service by anyone other than our company.
We are not liable for incidental or consequenal damages resulng from the use of the unit or
occurring due to any breach of this warranty.
Replacement parts of the product will be provided at nominal cost (covering the cost price of the
replacement parts only) to the customers aer the Warranty Period has expired. We will cover
the complete cost of sending replacement parts within the warranty period. Aer that, Nominal
cost of the product & Actual shipping cost will be charged.
Do not send the unit to us without rst geng a response and geng the approval to send back
the item.
In case of any kind of dissasfacon, we urge you to Contact us immediately and we shall do our
Best to help you out. For any other assistance you can reach us via email.
For any other assistance you can reach us via email.
This manual suits for next models
1
Table of contents


