Proficient Protege F5 Series User manual

FS12 / FS10 / FS8
Floor Standing Subwoofers
OWNER’S MANUAL
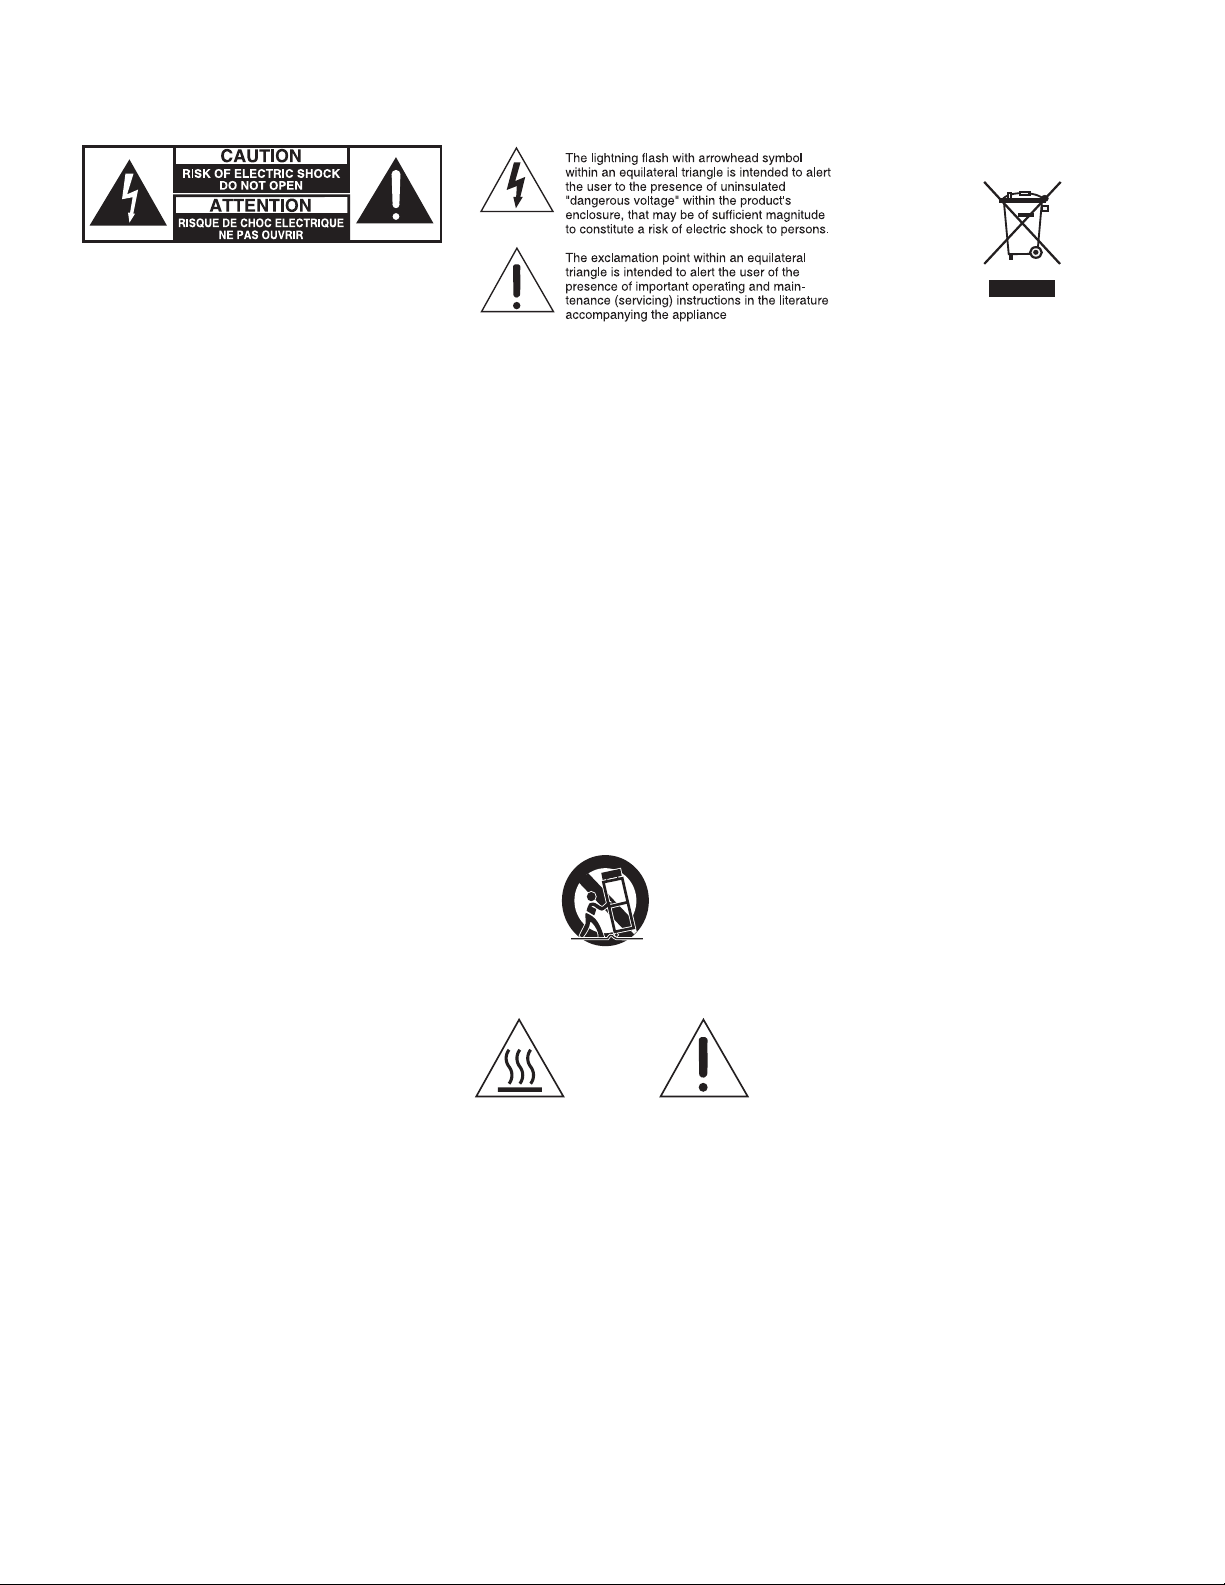
13. Unplug this apparatus during Iightning storms or
when unused for long periods of time.
14. Refer all servicing to qualified service personnel.
Servicing is required when the apparatus has been
damaged in any way such as power supply cord or
plug is damaged, liquid has been spilled or objects
have fallen into the apparatus, the apparatus has
been exposed to rain or moisture, does not operate
normally, or has been dropped.
15. Do not expose this apparatus to dripping or splash-
ing and ensure that no objects filled with liquids,
such as vases, are placed on the apparatus.
16. To completely disconnect this apparatus from
the AC Mains, disconnect the power supply
cord from the AC receptacle.
17. The power supply cord (sometimes referred to
as the “Mains Plug”) is used as the disconnect
device and shall remain accessible and operable
at all times.
18. Open flame sources, such as lighted candles,
should NOT be placed on the apparatus.
WARNING - To reduce the risk of fire or electric shock, do not
expose this apparatus to rain or moisture
1. Read these instructions.
2. Keep these instructions.
3. Heed all warnings.
4. Follow all instructions.
5. Do not use this apparatus near water.
6. Clean only with dry cloth.
7. Do not block any ventilation openings. Install in accordance with
the manufacturer’s instructions
8. Do not install near any heat sources such as radiators, heat registers,
stoves or other apparatus (including amplifiers) that produce heat.
9. Do not defeat the safety purpose of the polarized or grounding type
plug. A polarized plug has two blades with one wider than the other.
A grounding type plug has two blades and a third grounding prong.
The wide blade or the third prong are provided for your safety. If the
provided plug does not fit into your outlet, consult an electrician for
replacement of the obsolete outlet.
10. Protect the power cord from being walked on or pinched, particularly
at plugs, convenience receptacles, and the point where they exit from
the apparatus.
11. Only use attachments/accessories specified by the manufacturer.
12. Use only with the cart, stand, tripod bracket or table
specified by the manufacturer or sold with the apparatus.
When a cart is used, use caution when moving the cart/
apparatus combination to avoid injury from tip-over.
NOTE - This equipment has been tested and found to comply with the limits for a Class B digital device, pursuant to part 15 of
the FCC Rules. These limits are designed to provide reasonable protection against harmful interference in a residential installa-
tion. This equipment generates, uses, and can radiate, radio frequency energy and, if not installed and used in accordance with
the instructions, may cause harmful interference to radio communications. However, there is no guarantee that interference will
not occur in a particular installation. If this equipment does cause harmful interference to radio or television reception, which can
be determined by turning the equipment off and on, the user is encouraged to try to correct the interference by one or more of
the following measures:
• Reorient or relocate the receiving antenna.
• Increase the separation between the equipment and receiver.
• Connect the equipment into an outlet on a circuit different from that to which the receiver is connected.
• Consult the dealer or an experienced radio/TV technician for help.
Changes or modifications not expressly approved by the party responsible for compliance could void the user's authority to
operate the equipment.
CAUTION - Speaker components will get hot while playing music at moderate to high volume levels. Nothing should ever come
in contact with any of the components of the installed speaker. Non-flammable materials in proximity to these components and
the back of the speaker must have at a minimum 1" or 26mm clearance. Flammable materials like plastic vapor barriers must
have a minimum of 3" or 78mm clearance from these components and the back of the speaker.
IMPORTANT SAFETY INSTRUCTIONS
2
INTRODUCTION
Thank you for purchasing the Proficient Protege FS Series Subwoofer. We hope you enjoy it and the music
it makes as much as we have enjoyed creating it for you. The big features of the subwoofer are its high-
efficiency Class D digital amplifier, and its computer-optimized woofer and passive radiator design. These
powerful forces combine to produce as much bass as several 15-inch drivers mounted in a cabinet the size of
a small refrigerator! In addition, the Proficient Protege Sub’s extended frequency response means that your
new Protege subwoofer is the perfect match to virtually any loudspeaker. The result is extraordinarily high
operating efficiency – that is, more acoustic output for each watt of input.
UNPACKING
Your Proficient Protege FS Series Subwoofer should reach you in perfect condition. If you do notice any shipping
damage, please contact your Proficient Authorized Dealer immediately. Gently lift the unit out the box and
remove all the packing material. It is important to save all of the packing materials and the box in case your
subwoofer ever needs to be moved or shipped for repair. Keep your sales receipt as it is the only way to
establish the duration of your Limited Warranty and it may come in useful for insurance purposes. Please
take a moment to read the serial number located on the control panel and record it in this manual.
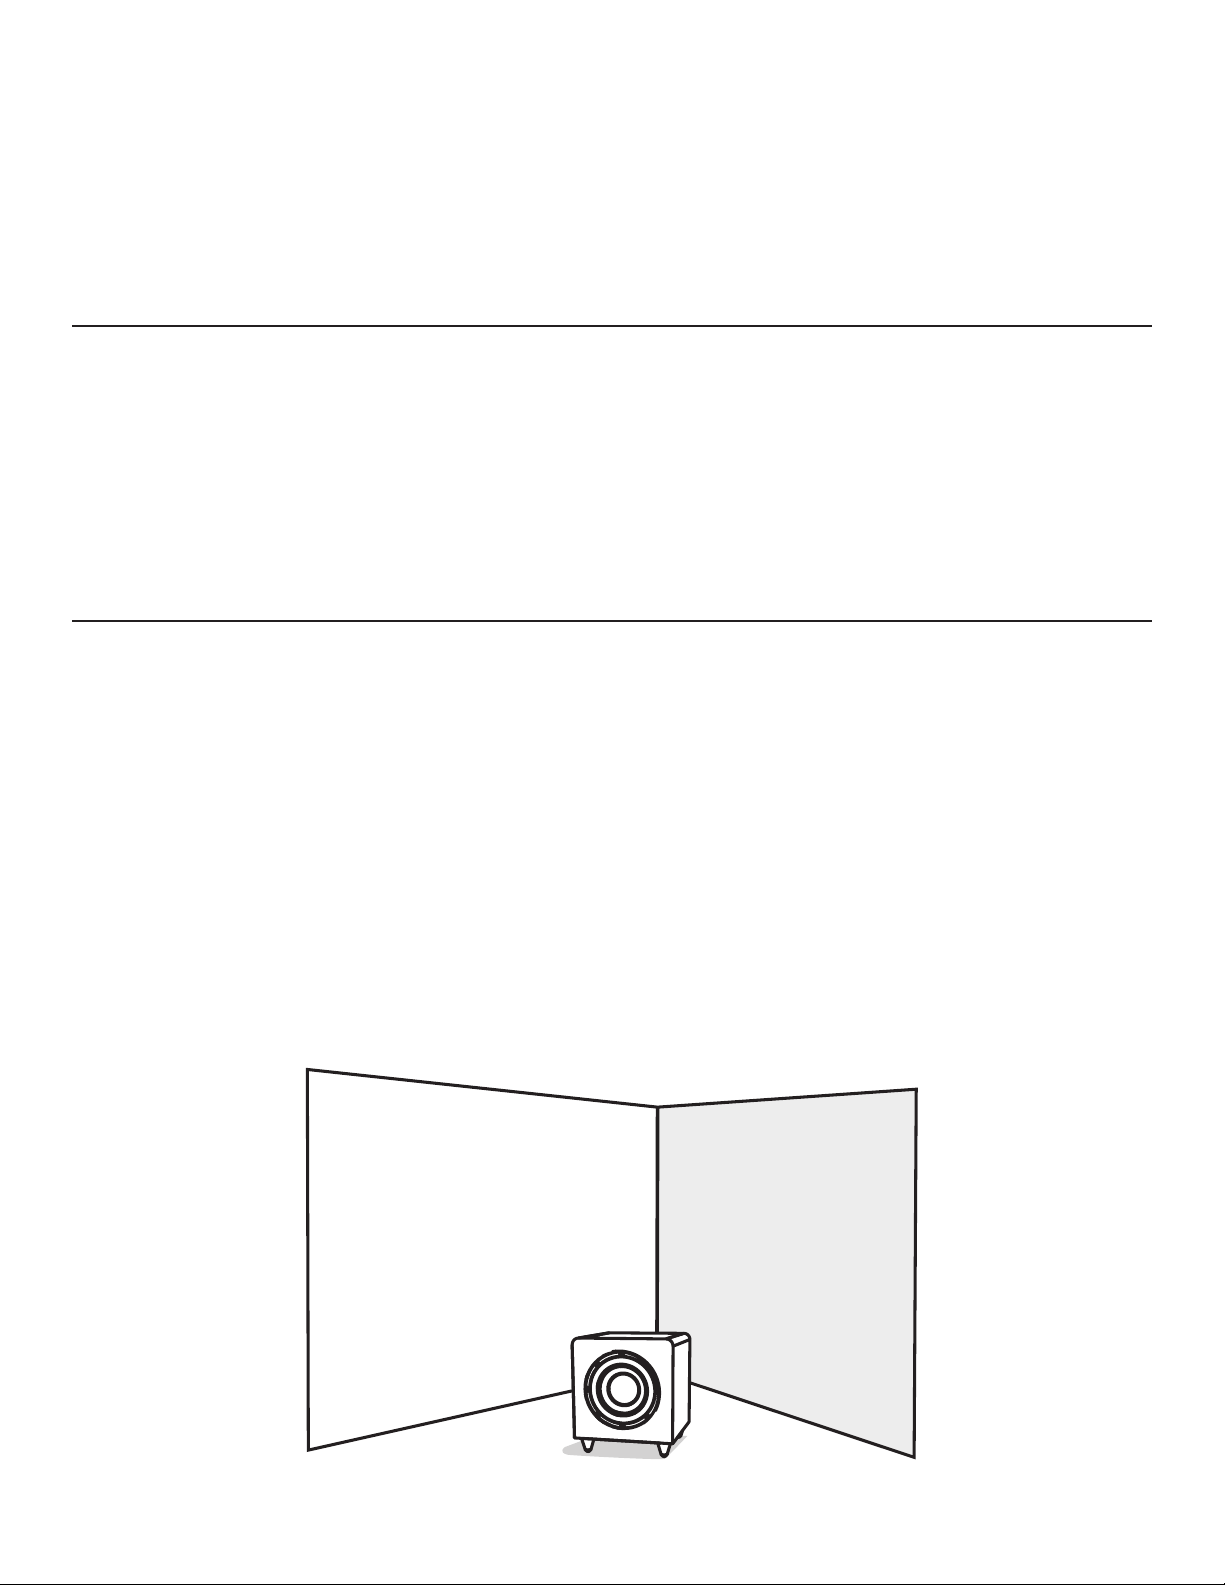
SUBWOOFER PLACEMENT (See Diagram 1)
Your Proficient Protege FS Series Subwoofer is designed to be placed in a corner for optimum performance.
Experiment with at least two corners and decide which sounds better. Although low frequencies are
non-directional, room reflections, standing waves, resonance and absorption strongly affect performance.
Moving the subwoofer from one corner to another can have a major effect on the bass response. Keep it
at least two or three feet away from any CRT screen, computer, VCR or magnetic tapes and discs. This will
reduce the chance of the magnetic fields upsetting the CRT screen or erasing your magnetic media. Also,
position the control panel so it is not touching anything and can receive good ventilation.
TWO SUBWOOFERS
With two subwoofers, the sound output will double. Place each subwoofer in a corner, and experiment with
the location and phase control to achieve the best bass response.
Diagram 1: Subwoofer Placement
3

CONTROL PANEL FEATURES (See Diagram 2)
1. AC INPUT CONNECTOR Connect the supplied line cord here. After all connections have been made
and confirmed, plug the power cord into an unswitched AC Outlet to power the sub. Contact Proficient
Audio Systems for a proper replacement should the AC Power Cord be damaged or misplaced.
2. POWER SWITCH Turns the subwoofer on or off. Always turn the power OFF when making connections
to the sub.
3. LINE LEVEL INPUTS These connect with RCA cables from the sub/LFE line-level output(s) of the receiv-
er or preamp. If there is only one output, use the left input jack.
4. HIGHPASS OUTPUTS These outputs a pass-through of the input signals with the bass frequencies
removed by a fixed high-pass crossover circuit. This output is not affected by the subwoofer's controls.
OUTPUT
TURN-ON
MODE
SIGNAL
SENSE
ALWAYS
ON
GREEN-ON
RED-STANDBY
INPUTR
L/
LFE
RL
150 HZ
CROSSOVER
FREQUENCY
PHASE
VOLUME
BYPASS
50 HZ
100 HZ
NORMAL
0˚ 180˚
90˚
MAXMIN
0 dB
12" Floor Standing Subwoofer
FS12
proficientaudio.com
Petaluma, CA USA
Made in China
ON
AC INPUT OFF
POWER
100–120 V~
50/60 Hz 2A
This device complies with Part 15 of the FCC Rules. Operation is
subject to the following two conditions: (1) this device may not
cause harmful interference, and (2) this device must accept any
interference received, including interference that may cause
undesired operation.
CAN ICES-3(B) / NMB-3(B)
9
1
8
7
6
5
4
3
2
Diagram 2: Subwoofer Control Panel Features
4

CONTROL PANEL FEATURES (Continued)
5. TURNON MODE
SIGNAL SENSE - The subwoofer will unmute when an audio input signal is present at the inputs.
After approximately fifteen minutes with no signal, the subwoofer will mute.
ALWAYS ON- The subwoofer is unmuted and ready to play when the power switch is on.
6. POWER STATUS INDICATOR This light is green when the subwoofer is on and unmuted, and red when
the subwoofer is muted in standby mode.
7. CROSSOVER FREQUENCY This control sets the crossover frequency between 50Hz and 150Hz. If it is
set to 100Hz for example, the subwoofer will reproduce the frequency range below 100Hz. Rotate the
control clockwise to increase this frequency range up to 150Hz.
Select BYPASS if your system has its own crossover frequency control.
If your processor does not have its own subwoofer crossover frequency control, rotate this control un-
til the bass sounds natural. If the If the mid-bass sounds natural but you want more low bass, turn the
crossover frequency down a little, then turn the volume up by about the same amount. The increases the
low-bass output while leaving the mid-bass output the same.
8. PHASE This control sets the relative phase of the subwoofer with respect to your other speakers. Use
this to help blend the subwoofer with the rest of your system. Adjust the control in small increments as
you listen for the most bass at your listening position. As a final trim, readjust the crossover frequency
and volume controls after the phase control has been set.
9. VOLUME This controls lets you match the output level of the subwoofer to the level of your other
speakers. When installing your system, turn this down first before turning on your subwoofer to prevent
any loud surprises.
ADJUSTMENTS
There are two main methods for adjusting the volume, crossover frequency and phase controls to match a
system:
1. Preferred Method: By listening and making the adjustments to suit your tastes.
2. Laboratory Method: By measuring the output with a microphone and adjusting for a flat frequency
response.
Excellent results can be obtained if you make the adjustments based on simply listening. This is our
preferred method as it allows the system to be voiced based on what sounds best to you, whereas the
laboratory-flat frequency response can often be clinical and less than exciting.
5

CONNECTION CONSIDERATIONS
Please consider the following when setting up your new system:
• Before making or changing any connections, always make sure that the subwoofer and your other com-
ponents are turned OFF. Turn down the volume control of both the subwoofer and your processor or
receiver.
• Route power cords away from the signal cables or speaker wires to prevent hum or interference.
• Choose reliable, high quality interconnect cables. They should be fully shielded and as short as possible
for the job. The longest cable in your system will likely be to the subwoofer, so choose a good quality
brand.
TYPICAL CONNECTIONS TO A HOME THEATER (See Diagram 3)
1. Turn the subwoofer and receiver power OFF before making connections.
2. Connect the receiver's Sub/LFE line-level output to the subwoofer's L/LFE input.
3. Set the subwoofer's crossover frequency control to BYPASS, volume control to 0dB, and phase control
to 0˚.
4. Use the receiver's subwoofer controls to adjust the frequency range and volume.
5. Alternatively, the subwoofer's crossover frequency, volume, and phase can be adjusted carefully to blend
the subwoofer into your system.
OUTPUT
INPUTR
L/
LFE
RL
ON
AC INPUT
100–120 V~
50/60 Hz 2A
OFF
POWER
SUB/LFE
OUTPUT
L/LFE
INPUT
ETHERNET
Diagram 3: Typical Connections
6

TROUBLESHOOTING
The Proficient Protege FS Series Subwoofers have been designed and built to provide years of trouble-free
performance. Most problems that occur can usually be solved by checking your setup, or by making sure
that the components connected to the amplifier are on and fully operational. The following information will
help you deal with common problems you may experience during normal use.
If a problem persists, please contact your authorized Proficient dealer or Proficient Customer Service at
800.472.5555.
SUBWOOFER CARE
To maintain the subwoofer cabinet’s finish, unplug the power cord and then use a soft cloth to clean the
surfaces. If your subwoofer needs servicing, please read the troubleshooting section below.
7
Not Enough Bass
• Check that your receiver’s outputs are connected to the subwoofer’s line-level inputs and not to the line-
level high-pass outputs. If they are connected to the outputs by mistake, the bass will be weak but the
subwoofer will still function.
• If your receiver has a single subwoofer/LFE output jack, make sure it is connected to the subwoofer’s Left
input. If the bass is still not heavy enough after checking all the remaining points, use a Y cable to connect
the receiver’s single subwoofer/LFE output to the subwoofer’s left and right inputs.
• Try moving the subwoofer to a different location. See Subwoofer Placement on Page 3. While not absolutely
essential, placing the subwoofer in a corner location will maximize the bass output and give the smoothest
possible response.
• Home Theater receivers usually have a way of adjusting the level of the subwoofer/LFE output, either using
a remote control or with a small volume knob on the back panel. Make sure that this is adjusted correctly.
• Check that your receiver’s sub output is turned on. Some systems only have a sub output signal when the
front speakers are set to “small.”
• If the receiver’s sub/LFE output has an adjustable crossover frequency, make sure that the subwoofer’s own
crossover point is set to Bypass or part of the bass range may be missing.
Not Enough Bass in a 7.1 or 5.1 Surround System
• 7.1 and 5.1 Home Theater receivers usually have a bass management system that allows the bass to be
redirected among your speakers. For example, the bass normally present in the front speakers can be
redirected to play in the subwoofer, or the subwoofer can play the bass from all the speakers, in addition
to its dedicated LFE (low frequency effects) channel. Make sure that all of the bass management options are
correctly set. The processor may have a way of turning the subwoofer output off entirely, so check that it is
always on.

8
Not Enough Bass in a 7.1 or 5.1 Surround System (Continued)
• Check that the receiver’s calibration procedure is correctly adjusted. Usually, the receiver will send a test
tone through all the speakers in your system, allowing you to adjust (trim) the volume of each channel until
they are all playing at the same level.
• If the bass is weak only when playing 7.1 or 5.1 surround sources, check that your receiver is correctly set to
decode the 7.1 or 5.1 surround modes, such as Dolby Digital or DTS.
• Some DVD discs have a menu which allows you to select which soundtrack to play. Check that the correct
7.1 or 5.1 surround audio soundtrack is selected, otherwise it may just play stereo into your receiver and
you won’t get the true LFE signal into the subwoofer.
Hum
Adding any component such as a subwoofer to an existing system will often give rise to a hum that wasn’t
there before. Your first thought may be that the subwoofer has a problem, but this is more than likely caused
by a “ground-loop” in your system.
Follow these steps to isolate the main cause of the ground-loop hum (there may even be more than one
cause):
• Try to have all of your equipment on the same electrical outlet or circuit, provided that the total current
draw does not exceed the current safety rating of the outlet or circuit.
• If your subwoofer is a fair distance away from your other equipment, you may use a 15 amp extension cord
as long as it has a ground connection. NOTE: Never remove the ground pin from any power cords. This is
very dangerous.
• Turn off all components in your system, including the subwoofer, amplifiers, preamp and the receiver,
before disconnecting or connecting cables.
• First remove every connection from the subwoofer to the rest of your system. Plug the subwoofer power
cord back in and check for the hum. If it is still there, try plugging it into a different outlet in case it is
picking up interference on the AC line.
• If you have followed the above guidelines for the power connections and a hum is still present, then there
is one very common problem to consider: a “ground-loop”introduced by connecting a cable or satellite
feed to a DVR, Cable Box or Satellite Receiver or TV, which is then connected to the preamp. This can be
addressed as follows:
• Disconnect all cables that come from outside the room such as cable TV, satellite TV, or roof top
antennas. Make sure that they are disconnected where they first enter the room, so they are making
no connection to your receiver, TV, or any other component. If the hum is caused by the cable TV
line, then you will need a “ground-loop isolator”. This is an inexpensive device fitted in line with the
coaxial cable feed.
• If the hum persists, disconnect all the source components one at a time from the back of the receiver
until you identify the problem.

9
Hum (Continued)
• Ground-loop isolators are also available for audio lines and video. Once you have identified which
components are causing a problem, you can connect the isolators between the component and the
receiver.
No Auto Turn off
• The subwoofer should turn itself off after approximately fifteen minutes with no audio signal present. If not,
check if there is no background hum. The subwoofer may sense hum as a small signal and stay on. See the
above hints to eliminate the hum.
No Auto Turn On
• Check that the subwoofer power switch is on.
• Check that a signal is being received from your receiver.
• Check the input connections.
• Check the mode switch or menu on surround systems to be certain that a bass signal is being sent to
the subwoofer. Please refer to Diagram 3 on Page 6.
Sub Turns On, No Output
• The sub’s volume control may be turned down.

NOTES
10

11
FS12 FS10 FS8
Woofers: Two 12" Polypropylene-Coated Two 10" Polypropylene-Coated Two 8" Polypropylene-Coated
Fiber Composite Woofers Fiber Composite Woofers Fiber Composite Woofers
Woofer Configuration: One Front-Firing Active One Front-Firing Active One Front-Firing Active
One Down-Firing Passive One Down-Firing Passive One Down-Firing Passive
Amplifier Type: Class D Amp Class D Amp Class D Amp
Power Rating Continuous: 300 Watts RMS 250 Watts RMS 200 Watts RMS
Power Rating Peak: 600 Watts Peak 500 Watts Peak 400 Watts Peak
Frequency Response: 28Hz - 150Hz 30Hz - 150Hz 32Hz - 150Hz
Subwoofer Output: 106dB SPL 103dB SPL 100dB SPL
Inputs: Left & Right Line Level; LFE Left & Right Line Level; LFE Left & Right Line Level; LFE
Outputs: Line Level High-Pass Line Level High-Pass Line Level High-Pass
Phase: 0˚-180˚ 0˚-180˚ 0˚-180˚
Crossover: 50Hz - 150Hz; Bypass 50Hz - 150Hz; Bypass 50Hz - 150Hz; Bypass
Additional Features: Auto On, Anti-Clipping Circuitry, Auto On, Anti-Clipping Circuitry, Auto On, Anti-Clipping Circuitry,
Detachable Power Cord Detachable Power Cord Detachable Power Cord
Cabinet: Black Wood Grain Vinyl Finish Black Wood Grain Vinyl Finish Black Wood Grain Vinyl Finish
with Dampened Rubber Feet with Dampened Rubber Feet with Dampened Rubber Feet
AC Mains: 100-120V~, 50/60Hz, 2A 100-120V~, 50/60Hz, 2A 100-120V~, 50/60Hz, 2A
Dimensions: H 16⁄" x W 14½" x D 15½" H 15⁄" x W 13¼" x D 14" H 13⁄" x W 11¾" x D 12½"
Weight: 35 lbs 27 lbs 20 lbs
PROFICIENT PROTEGE FS SERIES SUBWOOFER SPECIFICATIONS
Features and specications are subject to change without notice.

5919 Sea Otter Place, Suite 100 • Carlsbad, CA 92010
800.472.5555 • Fax 707.283.5901 • proficientaudio.com
©2019 Nortek Security & Control, LLC. All Rights Reserved.
Proficient® is a registered trademark of Nortek Security & Control, LLC.
For technical inquires, please call 800.472.5555 or e-mail us at techsupport@proficientaudio.com.
Proficient Audio Systems (“Proficient”) warrants to the original retail purchaser
only (“you”) that this product will be free from defects in materials and work-
manship for a period of three years (the “Warranty Period”), subject to the
limitations and exclusions set out in this Limited Warranty. This warranty is not
transferable to subsequent owners of the product. If you discover a defect in
material or workmanship within the Warranty Period, you can obtain warranty
service by contacting Proficient during the Warranty Period at 800.472.5555 or
purchased the product. Once an RMA has been issued, defective products
must be shipped, prepaid and insured, together with proof of purchase.
Warranty service requests made without proof of date of purchase will be
denied. Freight collect shipments will be refused. It is preferable to ship this
product in the original shipping container to lessen the chance of transit
damage. In any case, the risk of loss or damage in transit is to be borne by the
purchaser.
If, upon examination by Proficient or its authorized dealer, it is determined that
the unit is in fact defective, Proficient will, at its option:
• Repair or replace the product at no additional charge; or
• If the model is no longer available and can not be repaired effectively, replace
the unit with a current model of equal or greater value. In some cases where
a new model is substituted, a modification to the mounting surface may be
required. If mounting surface modification is required, Proficient assumes no
responsibility or liability for such modification.
Proficient will bear the cost of returning the repaired or replaced product to
you, freight prepaid. All replaced parts and product become the property of
Proficient Audio Systems. The foregoing is your sole and exclusive remedy for
breach of warranty. If the product is not found to be defective, Proficient will
contact you to arrange for return of the product to you, at your expense.
EXCLUSIONS:
• This Warranty does not include service or parts to repair damage caused by
accident, disaster, misuse, abuse, negligence, inadequate packing or shipping
procedures, commercial use, voltage inputs in excess of the rated maximum
of the unit, or service, repair or modification of the product by unauthorized
dealers. This Warranty also excludes normal cosmetic deterioration caused by
environmental conditions.
• This Warranty will be void if:
• the Serial Number on the product has been removed, tampered with or defaced.
• the product was not purchased from an authorized dealer.
THE FOREGOING WARRANTIES ARE EXCLUSIVE AND IN LIEU OF ALL OTHER
EXPRESSED AND IMPLIED WARRANTIES. PROFICIENT EXPRESSLY DISCLAIMS
ALL SUCH OTHER WARRANTIES, INCLUDING BUT NOT LIMITED TO IMPLIED
WARRANTIES OF MERCHANTABILITY, FITNESS FOR A PARTICULAR PURPOSE
AND NON-INFRINGEMENT. In no event will Proficient be liable for any incidental
or consequential damages arising out of the use or inability to use the product,
even if Proficient has been advised of the possibility of such damages, or for any
claim by any other party. Notwithstanding the above, if you qualify as a“con-
sumer” under the Magnuson-Moss Warranty Act, then you may be entitled to any
implied warranties allowed by law for the Warranty Period. Further, some states
do not allow limitations on how long an implied Limited Warranty lasts or allow
the exclusion or limitation of consequential damages, so such limitations may not
apply to you.
ATTENTION TO OUR VALUED CONSUMERS:
To ensure that consumers obtain quality pre-sale and after-sale support and
service, Proficient products are sold exclusively through authorized dealers. This
warranty is VOID if the products have been purchased from any unauthorized
internet reseller. To determine if your Proficient reseller is authorized, please
call Proficient at 800.472.5555 or go to proficientaudio.com.
LIMITED THREE-YEAR WARRANTY
P/N: 10001759 (Rev A3)
This manual suits for next models
3
Table of contents
Other Proficient Protege Subwoofer manuals


